

"Essential MP4 Software Elevate Your Mac Productions"
Essential MP4 Software: Elevate Your Mac Productions
What is the Best MP4 Cutter for YouTubers On Mac?

Liza Brown
Oct 26, 2023• Proven solutions
Editing videos is a big part of YouTubers’ job including cutting MP4, customizing intros and outros, grading video colors, adding a multitude of effects, and many more. All YouTube celebrities use a diverse set of video editing features such as filters, transitions, custom titles and captions, and overlays.
These post-processing effects ensure that their videos don’t only look aesthetically pleasing but are more engaging and interactive to keep their viewers hooked from the beginning right till the end. This is exactly why cutting MP4 videos and editing have become monumentally significant for newcomers.
Having said that, most of the beginners and hobbyists either can’t afford or want to pay for professional video editing software for cutting MP4 such as Adobe Premiere or Final Cut Pro. In this time, FilmoraX will be a better choice to cut MP4 for Youtube
Before we further delve into the details of advanced video cutter functions, let’s first develop an understanding of the basics.
Section1. Basic Video Cutter Functions
Section2. Advanced Video Cutter Functions
Section 1. Basic Video Cutter Functions
These are the features of cutting MP4 videos that are used by almost all of the YouTuber to give their videos a more engaging look and contextualize them based on the content. For instance, almost all of the YouTubers use customized captions and titles to share information that is highly valuable for the viewers and enables them to develop a connection with the YouTuber.
Almost all of the YouTubers have customized intros and outros in their videos but some of the notable names include MKBHD, PewDiePie, and Smosh. In the process of cutting MP4 videos, they add these effects to create a brand for themselves.
One of the most basic functions of cutting MP4 or other videos intended for YouTube audiences is to add your intro and outro.
- Intro - It is a customized beginning where YouTubers usually add their channel name or its logo along with the title of the video. This helps them to develop a personal brand and add context to what their audience is about to see.
- Outro - It is the customized ending of the video where most content creators choose to add a call to action (CTA) encouraging them to engage with the channel or the video in some manner. For example, they may add an outro that asks the users to subscribe to the YouTube channel.

These are customized stickers, captions, and titles that enable YouTubers to add contextual information at any point in the video to add more value to their content during the process of cutting MP4 videos. For example, if a YouTuber is running a smartphone review channel, they can add rich stickers that contain specifications of the smartphone for those who are interested in particulars.
Including such information, while cutting MP4 also adds to the credibility of the content creator as they are perceived as more professional and dedicated to their job.

Steps to Perform Basic Video Cutter Effects on Filmora X
Here’s how you can add intros and outros to your YouTube videos using Wondershare Filmora X for cutting MP4 videos.
- Add intro background and select your favorite audio or sound effect
- Add your logo and/or text to the intro video
- Now add cool effects to improve the appearance of your intro
- Export your intro video and add it to shared media
You can also use Filmora templates for cutting MP4 videos to create your intro video for your YouTube content.
In Filmora, you will find a wide variety of templates for titles, openers, end credits, plain texts, callouts, and more for cutting MP4 and other video formats. You can use the premade template to add the desired text effect and then edit them according to your preferences. If you want to use these settings again, save the customized text effects as presets. It will save you a lot of time.
Section 2. Advanced Video Cutter Functions 


These are the cutting MP4 effects that aren’t used by beginners but hobbyists and professional video content creators may use them to add production value and interactive dimension to their content.
- Green Screen - This effect allows YouTubers to add any type of live or static background while cutting MP4 videos adding production value to their video.
- Motion Tracking - This is a cinematic method that enables YouTubers to include digital visuals in live-action video. It ensures that everything including scale, position, relative motion, and orientation is accurate.
- Color Matching - If you are shooting your video with different cameras, every camera records the footage in its own color profile. Color matching is used to introduce color consistency throughout the video. Filmora X is perfectly capable of handling color matching while you are cutting MP4 and other videos.
Some of the channels and YouTubers that rely on advanced video cutting MP4 effects include Vlad and Niki, MKBHD, Dude Perfect, Canal KondZilla, Like Nastya Vlog, and Kids Diana Show.
Performing Advanced Cutting MP4 Video Effects on Filmora X
Step 1 - Set up and position the green screen and add adequate lighting.
Step 2 - Make sure that you don’t wear anything that’s green and start shooting.
Step 3 - Download green screen backgrounds from the website of your choice.
Step 4 - Import your green screen footage into Filmora X and adjust the settings according to your preferences.
Step 5 - Position the background-clip so it looks natural and then export the video in your required format (MP4).
Step 1 - Go to Behaviors in Control Panel and select the top clip. Then click on the “plus” button right next to Behaviors.
Step 2 - Here, select the motion track from the list and open the folder to select the footage you want to track.
Step 3 - This will automatically start motion analysis of the video clip and you’ll be notified with grey tracker points once the analysis is complete.
Step 4 - You can draw around the region that you want to follow the motion and it will be automatically applied to the object.
Step 5 - Preview the clip and adjust any settings if the result isn’t according to your liking.
Step 1 - Drag the video clip to your timeline and move the play head to the frame you want to color match.
Step 2 - Select the remaining video clips and apply color matching through the right-click or the toolbar. Select the frame as a reference and click on ‘Match’.
Step 3 - Now, using the slider, adjust the extent to which you want the color setting of other clips that need to be matched. See the result in the ‘comparison view’.
Final Word
Cutting MP4 or other videos for YouTube content creation is a major part of the process. You need to have reliable and versatile video editing software that can get the job done without any hassle. And while there are professional packages available, they cost way too much for the YouTubers who are just starting out or are just hobbyists. That’s where Filmora X can be an exceptional alternative offering a wide variety of features at a fraction of the cost.
You can try Filmora X for free for cutting MP4 videos before you pay for the fully-featured software.
You May Also Like:How do Beginners Make a Cool Video for YouTube on Mac>>>
Liza Brown
Liza Brown is a writer and a lover of all things video.
Follow @Liza Brown
Liza Brown
Oct 26, 2023• Proven solutions
Editing videos is a big part of YouTubers’ job including cutting MP4, customizing intros and outros, grading video colors, adding a multitude of effects, and many more. All YouTube celebrities use a diverse set of video editing features such as filters, transitions, custom titles and captions, and overlays.
These post-processing effects ensure that their videos don’t only look aesthetically pleasing but are more engaging and interactive to keep their viewers hooked from the beginning right till the end. This is exactly why cutting MP4 videos and editing have become monumentally significant for newcomers.
Having said that, most of the beginners and hobbyists either can’t afford or want to pay for professional video editing software for cutting MP4 such as Adobe Premiere or Final Cut Pro. In this time, FilmoraX will be a better choice to cut MP4 for Youtube
Before we further delve into the details of advanced video cutter functions, let’s first develop an understanding of the basics.
Section1. Basic Video Cutter Functions
Section2. Advanced Video Cutter Functions
Section 1. Basic Video Cutter Functions
These are the features of cutting MP4 videos that are used by almost all of the YouTuber to give their videos a more engaging look and contextualize them based on the content. For instance, almost all of the YouTubers use customized captions and titles to share information that is highly valuable for the viewers and enables them to develop a connection with the YouTuber.
Almost all of the YouTubers have customized intros and outros in their videos but some of the notable names include MKBHD, PewDiePie, and Smosh. In the process of cutting MP4 videos, they add these effects to create a brand for themselves.
One of the most basic functions of cutting MP4 or other videos intended for YouTube audiences is to add your intro and outro.
- Intro - It is a customized beginning where YouTubers usually add their channel name or its logo along with the title of the video. This helps them to develop a personal brand and add context to what their audience is about to see.
- Outro - It is the customized ending of the video where most content creators choose to add a call to action (CTA) encouraging them to engage with the channel or the video in some manner. For example, they may add an outro that asks the users to subscribe to the YouTube channel.
These are customized stickers, captions, and titles that enable YouTubers to add contextual information at any point in the video to add more value to their content during the process of cutting MP4 videos. For example, if a YouTuber is running a smartphone review channel, they can add rich stickers that contain specifications of the smartphone for those who are interested in particulars.
Including such information, while cutting MP4 also adds to the credibility of the content creator as they are perceived as more professional and dedicated to their job.
Steps to Perform Basic Video Cutter Effects on Filmora X
Here’s how you can add intros and outros to your YouTube videos using Wondershare Filmora X for cutting MP4 videos.
- Add intro background and select your favorite audio or sound effect
- Add your logo and/or text to the intro video
- Now add cool effects to improve the appearance of your intro
- Export your intro video and add it to shared media
You can also use Filmora templates for cutting MP4 videos to create your intro video for your YouTube content.
In Filmora, you will find a wide variety of templates for titles, openers, end credits, plain texts, callouts, and more for cutting MP4 and other video formats. You can use the premade template to add the desired text effect and then edit them according to your preferences. If you want to use these settings again, save the customized text effects as presets. It will save you a lot of time.
Section 2. Advanced Video Cutter Functions
These are the cutting MP4 effects that aren’t used by beginners but hobbyists and professional video content creators may use them to add production value and interactive dimension to their content.
- Green Screen - This effect allows YouTubers to add any type of live or static background while cutting MP4 videos adding production value to their video.
- Motion Tracking - This is a cinematic method that enables YouTubers to include digital visuals in live-action video. It ensures that everything including scale, position, relative motion, and orientation is accurate.
- Color Matching - If you are shooting your video with different cameras, every camera records the footage in its own color profile. Color matching is used to introduce color consistency throughout the video. Filmora X is perfectly capable of handling color matching while you are cutting MP4 and other videos.
Some of the channels and YouTubers that rely on advanced video cutting MP4 effects include Vlad and Niki, MKBHD, Dude Perfect, Canal KondZilla, Like Nastya Vlog, and Kids Diana Show.
Performing Advanced Cutting MP4 Video Effects on Filmora X
Step 1 - Set up and position the green screen and add adequate lighting.
Step 2 - Make sure that you don’t wear anything that’s green and start shooting.
Step 3 - Download green screen backgrounds from the website of your choice.
Step 4 - Import your green screen footage into Filmora X and adjust the settings according to your preferences.
Step 5 - Position the background-clip so it looks natural and then export the video in your required format (MP4).
Step 1 - Go to Behaviors in Control Panel and select the top clip. Then click on the “plus” button right next to Behaviors.
Step 2 - Here, select the motion track from the list and open the folder to select the footage you want to track.
Step 3 - This will automatically start motion analysis of the video clip and you’ll be notified with grey tracker points once the analysis is complete.
Step 4 - You can draw around the region that you want to follow the motion and it will be automatically applied to the object.
Step 5 - Preview the clip and adjust any settings if the result isn’t according to your liking.
Step 1 - Drag the video clip to your timeline and move the play head to the frame you want to color match.
Step 2 - Select the remaining video clips and apply color matching through the right-click or the toolbar. Select the frame as a reference and click on ‘Match’.
Step 3 - Now, using the slider, adjust the extent to which you want the color setting of other clips that need to be matched. See the result in the ‘comparison view’.
Final Word
Cutting MP4 or other videos for YouTube content creation is a major part of the process. You need to have reliable and versatile video editing software that can get the job done without any hassle. And while there are professional packages available, they cost way too much for the YouTubers who are just starting out or are just hobbyists. That’s where Filmora X can be an exceptional alternative offering a wide variety of features at a fraction of the cost.
You can try Filmora X for free for cutting MP4 videos before you pay for the fully-featured software.
You May Also Like:How do Beginners Make a Cool Video for YouTube on Mac>>>
Liza Brown
Liza Brown is a writer and a lover of all things video.
Follow @Liza Brown
Decoding the Undisclosed World of YouTube Videos
You may have noticed that some videos in your YouTube playlist are unavailable. This is because the platform allows content creators to categorize their videos into public, private, or unlisted based on their preferences.
To help you uncover the content that you otherwise wouldn’t have access to, we’ve compiled a detailed guide to show you how to find YouTube hidden videos. We’ve also explained why so many unlisted videos are now labeled as private.
So, let’s get started with our guide without any further delay!
4 Types of Videos on YouTube
Firstly, let’s learn about the background of the types of YouTube videos. YouTube videos fall into the following four broad categories:
Public Videos: YouTube contains videos on many themes and topics. It makes it impossible to watch all uploaded content under a specific category.
So, whenever you search for a video or theme, a list of content is displayed in the search result: “Public Videos.” It means that they are visible to everyone around the globe (depending on the terms and conditions). Moreover, you can share, like, unlike, download, or add these videos to your playlists for later watching.
Private Videos: Private videos on YouTube can only be seen by people invited by the person who uploaded the video. This means that only those with access to the video’s shareable link can watch it.
Private videos are not visible to the public or to people who are not logged into YouTube. Hence, it is a great way to share sensitive or personal information with a select group.
Unlisted Video Unlisted videos on YouTube are not publicly visible on the site. They can only be seen by people who have the URL. This category works as a bridge between private and public videos. It is accessible only through sharable links without appealing in any YouTube public playlist or search result.
You might upload an unlisted video to YouTube if you do not want everyone to see it. However, you still want to share it with specific people, like your friends or family. You might also use an unlisted video to test out a new idea before making it public on the video-sharing platform.
Age-Restricted Videos: Age-restricted videos on YouTube are not suitable for all audiences. It may contain content that includes violence, profanity, sexual content, and other inappropriate material. YouTube requires that users be at least 18 years old to view these types of videos.
If you search on YouTube and come across an age-restricted video, you will be asked to confirm your age before viewing its content.

How To Find Unlisted YouTube Videos
Now that we’ve learned about the four types of YouTube content, let’s discuss how you can find unlisted YouTube videos:
How To Find Other People’s Unlisted YouTube Videos?
Since unavailable videos in YouTube playlists are hidden from general public viewers, you cannot find them on YouTube or Google search results.
However, the following workaround can help you watch these YouTube videos without facing much trouble:
Step 1: First, open a browser on your PC and visit the Unlisted Videos website. This platform contains over 600,000 unlisted YouTube videos from 2016 and earlier. You can also submit your unlisted video on the site.

Step 2: Use the search bar at the top of your screen to search for other people’s YouTube playlists. You can also click the “All Video” or “Random Videos” option to find the hidden content of a user.
How To See Unlisted Videos on My YouTube Channel?
To see your unlisted videos on your YouTube channel, do the following steps in sequence:
Step 1: In the first step, install the YouTube Studio app on your mobile device or visit its website using a browser on your computer. Next, launch the app and sign in to your channel’s account using your email and password.
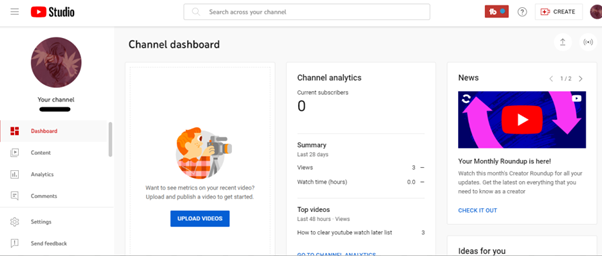
Step 2: In the next step, tap/ click the “Content” tab and tap/click the “Funnel” icon at the top of the video list to access the visibility options.
Step 3:
- Now, choose the “Visibility” option.
- Select “Unlisted” to change the visibility.
- Click the “Save” option to apply changes.
- See the hidden videos on your channel.

Since YouTube has marked the videos uploaded before 2017 as private as of July 2021, you can find your old unlisted videos under the “Private” list. To access it, choose “Private” as the visibility option.
How To Find Unlisted YouTube Videos with Google
Sometimes, unlisted YouTube videos appear on Google when someone shares the link to them on a public forum or website.
To confirm this, open a browser on your computer or a mobile device, head to the Google website, and search for your query. With some luck, you can find these unlisted YouTube videos in the search results.
You May Want to Know: Why Are So Many Unlisted Videos Now Private?
All unlisted videos uploaded to YouTube before January 2017 were switched to private. Therefore, if you have any older unlisted videos added to your Playlist or embedded on your website, you won’t be able to access them now.
However, the channel’s owner can restore access to the video by switching it back to unlisted or public. If now, the video will be labeled as “Private” indefinitely or until its settings are changed.
Conclusion
In this detailed guide, we’ve explored the four types of videos on YouTube and how to find YouTube hidden videos in three different ways. We’ve also explained why so many videos are now listed as “Private” and inaccessible.
Hopefully, you’ve found this article helpful and can now access the unlisted videos on YouTube without hassle.
You may have noticed that some videos in your YouTube playlist are unavailable. This is because the platform allows content creators to categorize their videos into public, private, or unlisted based on their preferences.
To help you uncover the content that you otherwise wouldn’t have access to, we’ve compiled a detailed guide to show you how to find YouTube hidden videos. We’ve also explained why so many unlisted videos are now labeled as private.
So, let’s get started with our guide without any further delay!
4 Types of Videos on YouTube
Firstly, let’s learn about the background of the types of YouTube videos. YouTube videos fall into the following four broad categories:
Public Videos: YouTube contains videos on many themes and topics. It makes it impossible to watch all uploaded content under a specific category.
So, whenever you search for a video or theme, a list of content is displayed in the search result: “Public Videos.” It means that they are visible to everyone around the globe (depending on the terms and conditions). Moreover, you can share, like, unlike, download, or add these videos to your playlists for later watching.
Private Videos: Private videos on YouTube can only be seen by people invited by the person who uploaded the video. This means that only those with access to the video’s shareable link can watch it.
Private videos are not visible to the public or to people who are not logged into YouTube. Hence, it is a great way to share sensitive or personal information with a select group.
Unlisted Video Unlisted videos on YouTube are not publicly visible on the site. They can only be seen by people who have the URL. This category works as a bridge between private and public videos. It is accessible only through sharable links without appealing in any YouTube public playlist or search result.
You might upload an unlisted video to YouTube if you do not want everyone to see it. However, you still want to share it with specific people, like your friends or family. You might also use an unlisted video to test out a new idea before making it public on the video-sharing platform.
Age-Restricted Videos: Age-restricted videos on YouTube are not suitable for all audiences. It may contain content that includes violence, profanity, sexual content, and other inappropriate material. YouTube requires that users be at least 18 years old to view these types of videos.
If you search on YouTube and come across an age-restricted video, you will be asked to confirm your age before viewing its content.
How To Find Unlisted YouTube Videos
Now that we’ve learned about the four types of YouTube content, let’s discuss how you can find unlisted YouTube videos:
How To Find Other People’s Unlisted YouTube Videos?
Since unavailable videos in YouTube playlists are hidden from general public viewers, you cannot find them on YouTube or Google search results.
However, the following workaround can help you watch these YouTube videos without facing much trouble:
Step 1: First, open a browser on your PC and visit the Unlisted Videos website. This platform contains over 600,000 unlisted YouTube videos from 2016 and earlier. You can also submit your unlisted video on the site.
Step 2: Use the search bar at the top of your screen to search for other people’s YouTube playlists. You can also click the “All Video” or “Random Videos” option to find the hidden content of a user.
How To See Unlisted Videos on My YouTube Channel?
To see your unlisted videos on your YouTube channel, do the following steps in sequence:
Step 1: In the first step, install the YouTube Studio app on your mobile device or visit its website using a browser on your computer. Next, launch the app and sign in to your channel’s account using your email and password.
Step 2: In the next step, tap/ click the “Content” tab and tap/click the “Funnel” icon at the top of the video list to access the visibility options.
Step 3:
- Now, choose the “Visibility” option.
- Select “Unlisted” to change the visibility.
- Click the “Save” option to apply changes.
- See the hidden videos on your channel.
Since YouTube has marked the videos uploaded before 2017 as private as of July 2021, you can find your old unlisted videos under the “Private” list. To access it, choose “Private” as the visibility option.
How To Find Unlisted YouTube Videos with Google
Sometimes, unlisted YouTube videos appear on Google when someone shares the link to them on a public forum or website.
To confirm this, open a browser on your computer or a mobile device, head to the Google website, and search for your query. With some luck, you can find these unlisted YouTube videos in the search results.
You May Want to Know: Why Are So Many Unlisted Videos Now Private?
All unlisted videos uploaded to YouTube before January 2017 were switched to private. Therefore, if you have any older unlisted videos added to your Playlist or embedded on your website, you won’t be able to access them now.
However, the channel’s owner can restore access to the video by switching it back to unlisted or public. If now, the video will be labeled as “Private” indefinitely or until its settings are changed.
Conclusion
In this detailed guide, we’ve explored the four types of videos on YouTube and how to find YouTube hidden videos in three different ways. We’ve also explained why so many videos are now listed as “Private” and inaccessible.
Hopefully, you’ve found this article helpful and can now access the unlisted videos on YouTube without hassle.
Also read:
- In 2024, DIY Photography Support Systems
- In 2024, Deep Dive Into the Rise of Online Performing Artists
- 2024 Approved Essential ASMR Apps Android & iOS Edition
- Jest Junction YouTube's Top 20 for a Lighthearted Pause
- 2024 Approved 10 Reasons Why Your YouTube Videos Has 0 Views & Solution
- Enhancing Video Impact Interpreting YouTube Metrics Wisely
- YouTube Editing Competitors Ranked Top 5 Non-YouTube Sites List
- [Updated] Binge on Beats Top 20 YouTube Music Crews
- [New] Capture YouTube's Subtitles on No-Cost Platforms
- Essential Tips for FREE YouTube Video Transcriptions
- Amplify Views Effortlessly Discovering the Best 20 YouTube Techniques for 2024
- [Updated] Beat Your Content Up a Notch Music Addition in YouTube Videos
- Enhance Your Presence Best Free Tools for Intriguing Openings for 2024
- 2024 Approved Captivating Content The Basics of Removing Background From Videos
- Demystifying YouTube Shorts Content Strategy Guide
- Discover the Prime Lineup of Affordable Cutting Tools
- Choosing the Best Camera for Filming Mirrorless or DSLR for 2024
- In 2024, Chart Success Using YouTube Statistics to Grow Engagement
- [New] Enhanced Engagement with Effective YouTube Video Outros Strategies
- In 2024, Discovering Ideal Hashtags for Your YouTube Videos
- [New] 10 Strategies for Educators Starting Their Own YouTube Series
- [Updated] Building a Strong Network How to Form Effective YouTube Partner Relationships
- [Updated] Essential PC Editing Skills for Compelling YouTube Videos
- [Updated] Create Memorable Videos with the Right Thumbnail Font
- Quick Ways to Randomize YouTube Playlist On PC/Phones/TVs
- [Updated] Elevate Your YouTube Content Editing in Adobe Premiere
- [Updated] A Visual Journey Uncovering the Best Icons & Logos Online
- Rise in the Rankings Essential SEO for Video Creators
- Cutting-Edge Royalty-Free Music Platforms for Content Makers
- Essential Guide to Top 12 Free and Paid Gaming Introduction Creators
- 2024 Approved Elevate Your Videography Premiere to YouTube Upload
- Media Mosaic Maker
- [New] Drive More Watch Time, Not Churn Discover the Top 6 Techniques on YouTube
- [Updated] Building Successful YouTube Collaborations Step by Step
- Navigating the Financial Frontier of YouTube Creators
- App Wont Open on Your Vivo Y100 5G? Here Are All Fixes | Dr.fone
- In 2024, A Step-by-Step Guide on Using ADB and Fastboot to Remove FRP Lock on your Itel
- [New] 2024 Approved The Verdict on Using ITop for Screen Capture?
- Color Lut Is an Easy and Powerful Tool to Make Your Video Stands Out From the Crowd. Check This Article to Learn the Details About Color Lut
- How to Galaxy F04 Get Deleted Pictures Back with Ease and Safety?
- 2024 Approved Mac to Snapchat Creating Compact, Shareable Content
- In 2024, How to Track WhatsApp Messages on Vivo S17 Without Them Knowing? | Dr.fone
- Updated In 2024, Top Cartoonizer Apps Transform Your Photos on Mobile Devices
- New In 2024, Break Free From Sony Vegas Top Windows Video Editing Software Alternatives
- [Updated] In 2024, Top Strategies to Ensure Success with Desktop TikTok Content
- Online Video Makers to Use for 2024
- Title: "Essential MP4 Software Elevate Your Mac Productions"
- Author: Kevin
- Created at : 2024-06-26 14:16:56
- Updated at : 2024-06-27 14:16:56
- Link: https://youtube-videos.techidaily.com/essential-mp4-software-elevate-your-mac-productions/
- License: This work is licensed under CC BY-NC-SA 4.0.
