
:max_bytes(150000):strip_icc()/tesla-phone-concept-2236595eafcc4248a93b0b3b73bda251.png)
"Enriching Slides Video Incorporation From YouTube"
Enriching Slides: Video Incorporation From YouTube
Create High-Quality Video - Wondershare Filmora
An easy and powerful YouTube video editor
Numerous video and audio effects to choose from
Detailed tutorials provided by the official channel
Google Slide presentation is a powerful tool for creators to keep their audience engaged. This online platform lets you create and demonstrate your ideas. It will capture your viewers’ attention from the very beginning. It also doesn’t matter whatever learning style you engage. Adding YouTube videos to Google Slide will appeal to all levels of individuals.
More so, it is the best way to provide a break for both the audience and the creator. You can break Google Slide presentations with videos to offer some break. Viewers and the presenter get a breather in the process. The presenter can take a short break from speaking while the video plays. Let’s now dive into how to embed a YouTube video in Google Slides.

In this article
01 Why should we add a video to Google Slides?
02 How to add a YouTube video to Google Slide
03 How to choose the right video for your Slides?
Why should we add a video to Google Slides?
There is a great impact of adding video to Google Slides.
For attention
Videos will automatically awaken you, especially if your thoughts have started to sway during a presentation. A video has a direct way of showing creativity. The audience automatically connects the dots between the video and the presentation lines alike.
To stimulate discussion
A picture is worth a thousand words. There is a way that an added video will help the audience connect to the day’s topic. It will bring up several ideas and stir up discussion with the presenter.
Easy following
With videos embedded in Google Slide, viewers will find it easy to understand and digest. Videos automatically eliminate boredom and make any topic interesting.
How to add a YouTube video to Google Slide
Use these two methods to add a YouTube video to Google Slides. Via the Search and Direct link.
Method 1. Embed YouTube video to Google Slide by search and selection
Google has owned YouTube since the year 2006. You can, therefore, integrate Google’s products with YouTube easily.
Step 1. First, go to the slide where you want to embed your video.
Step 2. Then choose the “Insert” option from the menu bar and hit the “Video” option.

Step 3. It would be best if you now viewed the “YouTube” search bar to type in the video you want to embed. You can use keywords to search for the video in question and view instant search results.
Step 4. Then select the video you want to embed, and you’ll see it appear on the “Slide.”

Step 5. Format your video. Remember that the entire video will be embedded. You don’t necessarily need the whole video. It is time to select just a brief but relevant clip from the video to use. Then position your video to the right point using the axes from the exact starting point to the finished part you want the video to appear in.
Method 2. Embed YouTube video to Google Slide by direct link
You can engage this method if you want to include the entire video.
Step 1. Get the URL of the specific YouTube video that you want to use.

Step 2. Then go to your browser’s “Address bar” to copy the YouTube link.
Step 3. Next, open the “Presentation” slide to put your video to.
Step 4. Choose the “Insert” tab from the menu bar.
Step 5. Then hit on the “Video” option from the drop-down menu that appears.
Step 6. A new window will open automatically. Choose the “By URL” tab.
Step 7. Then paste the YouTube video URL in the “Paste YouTube URL Here” bar section.

Step 8. Wait for the video file to load and press the “Select” option. The video will immediately appear in the presentation slide. Just drag and drop the video in your preferred position.
Note: You can do a few edits inside the application. Set the timer when your video should start and when to stop. You can also adjust the video player size.
How to choose the right video for your Slides?
Not all videos will make an impact on your Google Slide. You need to use the best shot that adds value to your presentation. These guidelines will help you to settle on the best video.
Be Professional – choose the best video for your presentation. Remember that the video is part of the presentation and carries more weight. Settling for quality video will bring out the professionalism in you.
Relevant – how do you know that what you are showing your audience corresponds to the presentation piece? Ensure that the video you add has something to do with the Google Slide presentation topic. The two should naturally flow to make it easy to understand the whole concept.
Precise – your presentation is not about the video. The ideal length should not exceed 60 seconds. The longer the video, the greater the chance for your audience to lose track along the way.
Know every footage you are working with – this will help you pick the best shots for your presentation. So, learn every aspect of the video before settling down to use it.
Add new content – even though one content may suit several presentations, don’t rely on the same piece each time. Your audience will want to feel something fresh each time you are presenting. So, compose different videos for different scenarios to make that big impact.
Create an eye-catching video for your Slides with Filmora
The video quality matters when it comes to creating your Slides. The best video creator – Filmora – works in simple steps to give you an eye-catching video. It will create videos for all scenarios like marketing, tutorial, gaming, etc.
Key features of Filmora
- It offers you advanced video effects like filters, motion elements, etc
- You can multiply your fun with multiple screens with the Split Screen feature
- Easily change backgrounds using the Green Screen feature
- The speed control lets you fast forward or slow down a special moment
- Import your video clips to social media platforms
- You can also adjust the audio of your tracks using the Audio Mixer feature
Follow this guide to create a video for your slide with Filmora
Step 1. Launch Filmora
First, begin by downloading and installing Filmora on your computer device. Once installed, launch it and allow it to run. You can either create a new project or open an existing project to work on.
Step 2. Create a new project
Here, click on the “New Project” tab on the app’s welcome screen. The editor should load immediately. Then proceed to register the product. Just hit on the “Register” tab.
Step 3. Import video
Check the upper left corner of your screen to see the “Import” tab. Click on it and choose the “Import Media Files” option. Next, navigate to the location of your computer’s local list to select the clip or video you want to edit. Then, hit the “Import” button to add the video to the timeline for editing.
Step 4. Edit video
Drag and drop the raw footage to Filmora’s timeline to begin editing. Here, you can trim, add other video clips, merge, and add effects as you wish. Likewise, you can add opening titles, subtitles, and end credits to your video. More so, this tool offers different templates to use. Just drag and drop the templates you wish to use to a specific location on the timeline.
Step 5. Preview your file
Last but not least, you can preview your files. Click on the “Play” tab to start previewing your video clips. The main essence of this part is to allow you to make the necessary changes to your clips if there is a need.
Step 6. Export and Share
With Filmora, you can export your file to various social media platforms. But first, go to the “Output window” and select the video file format to use. This software supports several output formats to apply to any platform and device. Just click on the “Format” tab and choose the file format to use. Then also change the resolution and other parameters like frame rate and channel of your video in the “Settings” section. Finally, share your video to your YouTube channel and get ready to add the video to the Google Slide presentation.
For Win 7 or later (64-bit)
For macOS 10.12 or later
Conclusion
● You now know how to put a YouTube video in Google Slides the simple way. You can search for your YouTube videos or directly use the URL link. Whatever the case, remember that it’s the quality of your video that carries more weight. Thanks to the availability of third-party apps that you can use to create and improve the quality of your videos.
● Filmora is at your service to create high-resolution videos that you can export in any format to your YouTube channel. The tool is intuitive, and it won’t matter whether you haven’t tried it before. It is a perfect choice for both professionals and first-time users.
Google Slide presentation is a powerful tool for creators to keep their audience engaged. This online platform lets you create and demonstrate your ideas. It will capture your viewers’ attention from the very beginning. It also doesn’t matter whatever learning style you engage. Adding YouTube videos to Google Slide will appeal to all levels of individuals.
More so, it is the best way to provide a break for both the audience and the creator. You can break Google Slide presentations with videos to offer some break. Viewers and the presenter get a breather in the process. The presenter can take a short break from speaking while the video plays. Let’s now dive into how to embed a YouTube video in Google Slides.
In this article
01 Why should we add a video to Google Slides?
02 How to add a YouTube video to Google Slide
03 How to choose the right video for your Slides?
Why should we add a video to Google Slides?
There is a great impact of adding video to Google Slides.
For attention
Videos will automatically awaken you, especially if your thoughts have started to sway during a presentation. A video has a direct way of showing creativity. The audience automatically connects the dots between the video and the presentation lines alike.
To stimulate discussion
A picture is worth a thousand words. There is a way that an added video will help the audience connect to the day’s topic. It will bring up several ideas and stir up discussion with the presenter.
Easy following
With videos embedded in Google Slide, viewers will find it easy to understand and digest. Videos automatically eliminate boredom and make any topic interesting.
How to add a YouTube video to Google Slide
Use these two methods to add a YouTube video to Google Slides. Via the Search and Direct link.
Method 1. Embed YouTube video to Google Slide by search and selection
Google has owned YouTube since the year 2006. You can, therefore, integrate Google’s products with YouTube easily.
Step 1. First, go to the slide where you want to embed your video.
Step 2. Then choose the “Insert” option from the menu bar and hit the “Video” option.
Step 3. It would be best if you now viewed the “YouTube” search bar to type in the video you want to embed. You can use keywords to search for the video in question and view instant search results.
Step 4. Then select the video you want to embed, and you’ll see it appear on the “Slide.”
Step 5. Format your video. Remember that the entire video will be embedded. You don’t necessarily need the whole video. It is time to select just a brief but relevant clip from the video to use. Then position your video to the right point using the axes from the exact starting point to the finished part you want the video to appear in.
Method 2. Embed YouTube video to Google Slide by direct link
You can engage this method if you want to include the entire video.
Step 1. Get the URL of the specific YouTube video that you want to use.
Step 2. Then go to your browser’s “Address bar” to copy the YouTube link.
Step 3. Next, open the “Presentation” slide to put your video to.
Step 4. Choose the “Insert” tab from the menu bar.
Step 5. Then hit on the “Video” option from the drop-down menu that appears.
Step 6. A new window will open automatically. Choose the “By URL” tab.
Step 7. Then paste the YouTube video URL in the “Paste YouTube URL Here” bar section.
Step 8. Wait for the video file to load and press the “Select” option. The video will immediately appear in the presentation slide. Just drag and drop the video in your preferred position.
Note: You can do a few edits inside the application. Set the timer when your video should start and when to stop. You can also adjust the video player size.
How to choose the right video for your Slides?
Not all videos will make an impact on your Google Slide. You need to use the best shot that adds value to your presentation. These guidelines will help you to settle on the best video.
Be Professional – choose the best video for your presentation. Remember that the video is part of the presentation and carries more weight. Settling for quality video will bring out the professionalism in you.
Relevant – how do you know that what you are showing your audience corresponds to the presentation piece? Ensure that the video you add has something to do with the Google Slide presentation topic. The two should naturally flow to make it easy to understand the whole concept.
Precise – your presentation is not about the video. The ideal length should not exceed 60 seconds. The longer the video, the greater the chance for your audience to lose track along the way.
Know every footage you are working with – this will help you pick the best shots for your presentation. So, learn every aspect of the video before settling down to use it.
Add new content – even though one content may suit several presentations, don’t rely on the same piece each time. Your audience will want to feel something fresh each time you are presenting. So, compose different videos for different scenarios to make that big impact.
Create an eye-catching video for your Slides with Filmora
The video quality matters when it comes to creating your Slides. The best video creator – Filmora – works in simple steps to give you an eye-catching video. It will create videos for all scenarios like marketing, tutorial, gaming, etc.
Key features of Filmora
- It offers you advanced video effects like filters, motion elements, etc
- You can multiply your fun with multiple screens with the Split Screen feature
- Easily change backgrounds using the Green Screen feature
- The speed control lets you fast forward or slow down a special moment
- Import your video clips to social media platforms
- You can also adjust the audio of your tracks using the Audio Mixer feature
Follow this guide to create a video for your slide with Filmora
Step 1. Launch Filmora
First, begin by downloading and installing Filmora on your computer device. Once installed, launch it and allow it to run. You can either create a new project or open an existing project to work on.
Step 2. Create a new project
Here, click on the “New Project” tab on the app’s welcome screen. The editor should load immediately. Then proceed to register the product. Just hit on the “Register” tab.
Step 3. Import video
Check the upper left corner of your screen to see the “Import” tab. Click on it and choose the “Import Media Files” option. Next, navigate to the location of your computer’s local list to select the clip or video you want to edit. Then, hit the “Import” button to add the video to the timeline for editing.
Step 4. Edit video
Drag and drop the raw footage to Filmora’s timeline to begin editing. Here, you can trim, add other video clips, merge, and add effects as you wish. Likewise, you can add opening titles, subtitles, and end credits to your video. More so, this tool offers different templates to use. Just drag and drop the templates you wish to use to a specific location on the timeline.
Step 5. Preview your file
Last but not least, you can preview your files. Click on the “Play” tab to start previewing your video clips. The main essence of this part is to allow you to make the necessary changes to your clips if there is a need.
Step 6. Export and Share
With Filmora, you can export your file to various social media platforms. But first, go to the “Output window” and select the video file format to use. This software supports several output formats to apply to any platform and device. Just click on the “Format” tab and choose the file format to use. Then also change the resolution and other parameters like frame rate and channel of your video in the “Settings” section. Finally, share your video to your YouTube channel and get ready to add the video to the Google Slide presentation.
For Win 7 or later (64-bit)
For macOS 10.12 or later
Conclusion
● You now know how to put a YouTube video in Google Slides the simple way. You can search for your YouTube videos or directly use the URL link. Whatever the case, remember that it’s the quality of your video that carries more weight. Thanks to the availability of third-party apps that you can use to create and improve the quality of your videos.
● Filmora is at your service to create high-resolution videos that you can export in any format to your YouTube channel. The tool is intuitive, and it won’t matter whether you haven’t tried it before. It is a perfect choice for both professionals and first-time users.
Architecting Authoritative Adjuncts
Nowadays, having a strong online presence is more important than ever. One of the best ways to do that is to create engaging content for your YouTube channel, and you can achieve this by adding a solid intro and outro to your videos.
To keep viewers engaged, the outros on your videos must be strong and captivating to make a positive impression and leave viewers wanting more.
In this article, we’ll discuss how to create news outro templates for your videos or get an editable or non-editable template online.
Part 1. Before Starting, Learn What Is a Good YouTube Outro?
Before we investigate where to find an appropriate News Style Outro for your video in Part 2, let’s figure out what elements a good outro should include firstly.
A good outro will typically include a call to action, such as subscribing to a channel, checking out a website, or following on social media. You can also use engaging music or make your outros visually appealing with graphics, animations, or both to keep your viewers hooked.
Furthermore, it should include a brief summary of the video, and what viewers can expect for the things to come. You can find outros templates online or make your own outstanding YouTube outros in just a few clicks.
Part 2. Recommendation: Where Can You Find News Style Outro?
Now that you’ve understood what a good YouTube outro is, you might wonder where you can find News Style outros for your videos/presentations to add a bit of flair.
Multiple platforms offer editable or non-editable news styles outros to content creators. Below we’ve recommended top websites/platforms where you can get your required templates without any issues. Some even offer non-copyright content to their users.
Editable News Outro Template Websites
An editable news outro template can provide a quick and easy way to create or customize an outro that is both professional and engaging. Here are four websites we have chosen for you to find editable news outro templates.
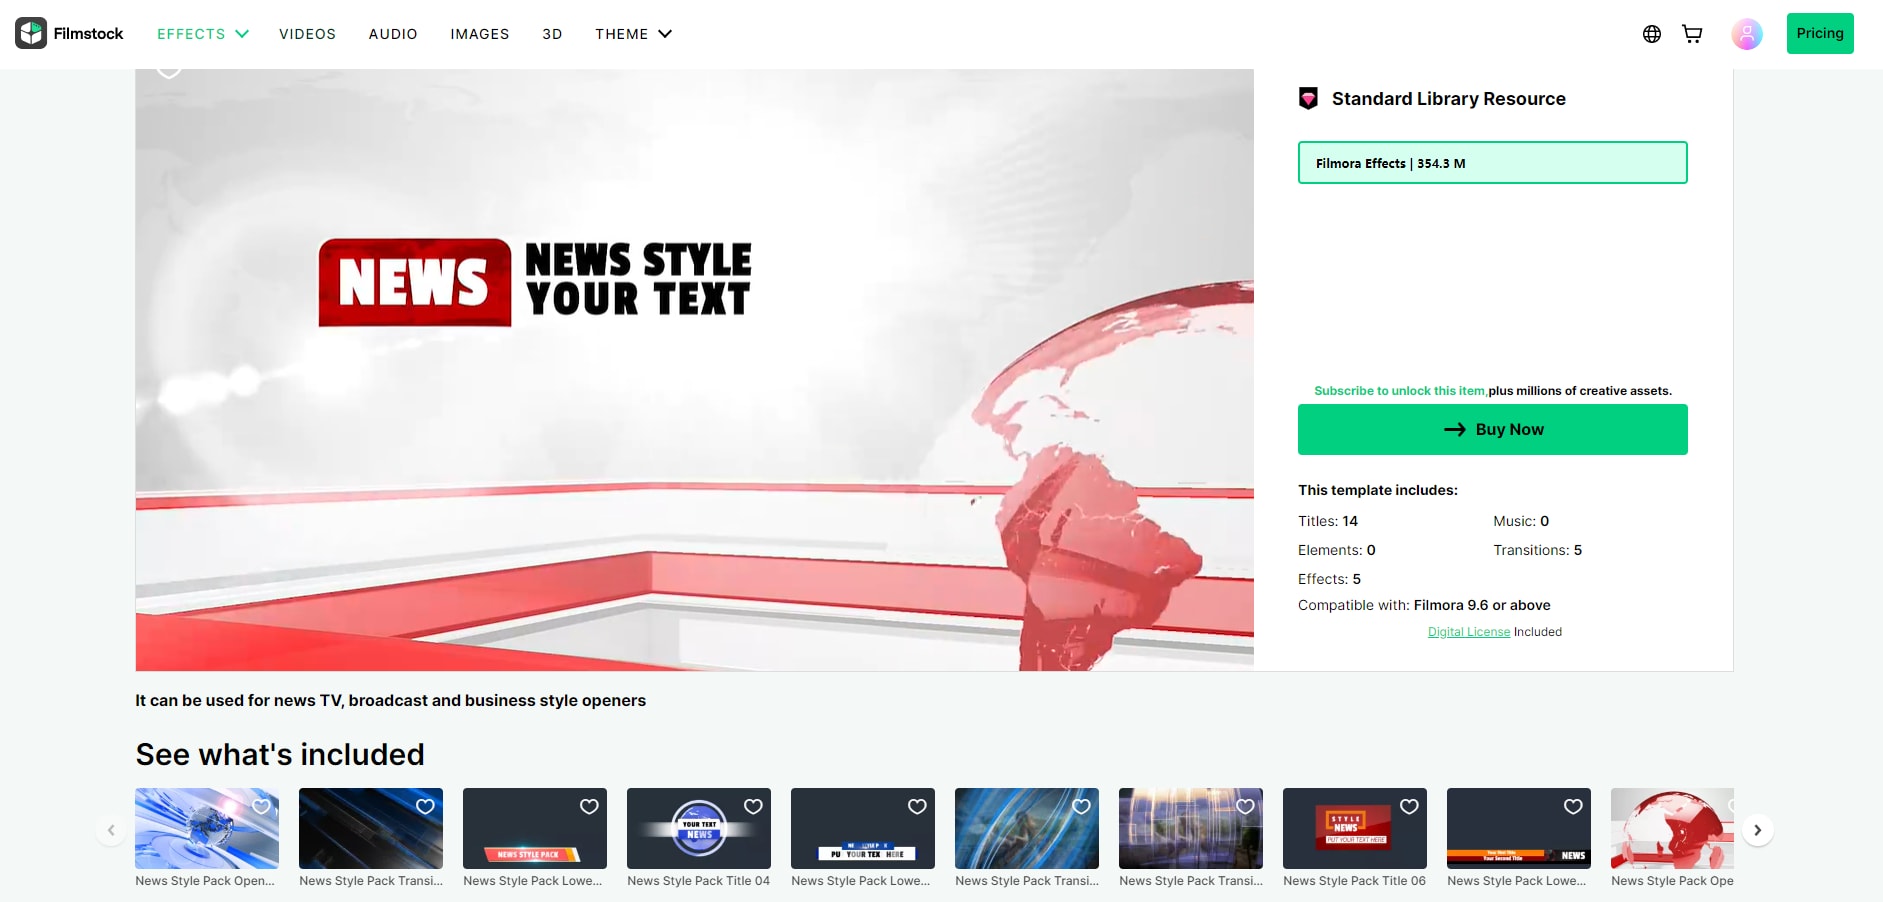
Filmstock
Filmstock is a platform offering free and paid editable templates for content creators. With dozens of editable templates to choose from on Filmstock , you can find the perfect news style outro for your videos in just a few clicks. First, however, you need to install Filmora on your PC to use the platform.
Filmora is a popular video editor with a built-in filmstock library offering hundreds of non-copyright editable templates for every occasion. With the software, you can find and add your news style outros to your videos with just a few clicks. The only disadvantage is that it isn’t completely free. The paid version offers two options: A standard plan that costs $9.99 per month and a Premium plan that will cost you $49.99 per month.
You can also find detailed video tutorials to facilitate your video creation through Filmora and Filmstock’s official YouTube Channels, as well as video sources set presentation on the two channels. Here is an example of News Set video on Filmora’s YouTube Channel. Go to watch it and check are there any ideal news outro!
Video of News Set in Filmora Effects Store
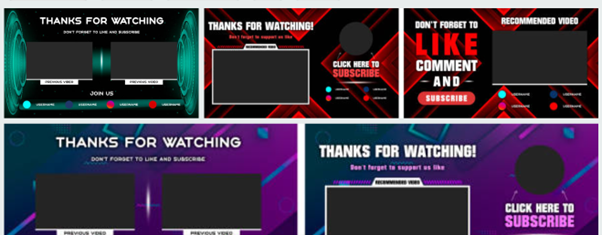
Canva
Canva is a user-friendly graphic design free and paid tool that is quickly becoming a popular choice for businesses of all sizes. Canva offers a range of templates for creating professional-looking designs.
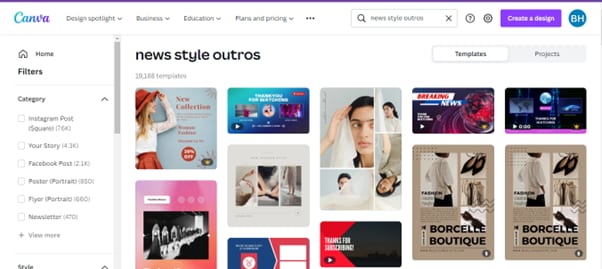
With a wide range of templates to choose from, you can easily find one that fits your needs and style. Best of all, you can create your outro template in minutes without hiring a designer or spending hours learning complex design software.
The software is easy-to-use and does not require any editor to customize and use the templates. The paid version is divided into 2 tiers: Canva Pro ($54.99 per year) and Canva for team ($84. 90/year). One disadvantage of the Canva free version is that it is limited resolution options when exporting your file.
Flexclip
Flexclip is a free, powerful, and easy-to-use online video maker that helps you create beautiful and engaging content for your business. With Flexclip, you can easily create editable news style outros for your videos from scratch or choose a template and edit it according to your requirements.

You can add text, music, elements, overlays, and branding to your templates to make them more stunning and captivating.
The platform offers 3 paid plans starting at $8.99/month. The con here is that the free version is only limited to the export quality of 480p, single royalty-free stock use, and 12 projects limit.
Placeit
Placeit is an online editor giving you the ability to create and customize your video content in no time. The editor also includes a stock image library, giving you access to several customizable templates.
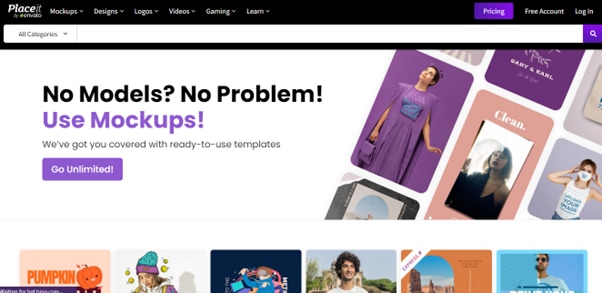
Placeit is easy to use and offers a variety of templates for different purposes, including outros for news stories, video blogs, and even gaming videos. The platform offers an unlimited subscription plan starting from $7.47 /month.
However, the design rendering process of the editor is slow, there is no AI tool, and you even cannot import fonts that are not available on the platform.
Non-Editable News Outro Template Websites
Some platforms offer non-editable high-resolution news outros that you can integrate into your videos using software programs like Filmora (guidance in Part 3), After Effects, etc.
Storyblock
Searching for high-quality templates for your next project?Storyblock is a website that comes with royalty-free, non-customizable news style outros.
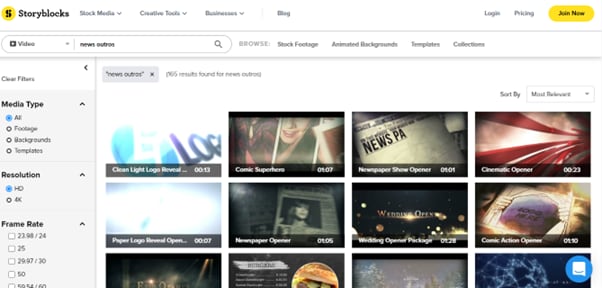
You can use these templates to create high-quality news intros and outros for your podcast or videos. The platform offers two pricing plans for individual content creators, starting at $15 per month. While businesses can customize their plans as per their requirements.
Limitations of the Storyblock are that the footage quality is very poor in the free version, and the paid versions might be tricky to avail sometimes.
Videvo
Videvo is a great resource for anyone looking for royalty-free video templates. They have over 300,000 free and premium videos, which you can download in clips or full with 4K resolution. However, their stock library is not much vast. The platform comes with a two-tier subscription plan starting from $14.99/month or $144/year.
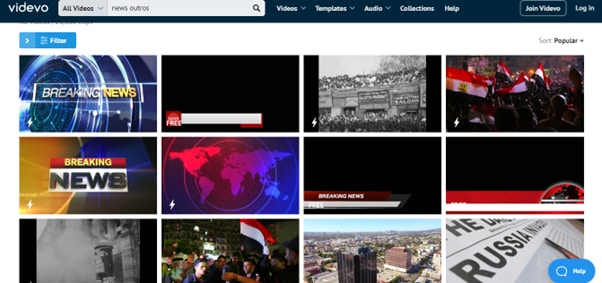
You can find templates for both commercial and non-commercial use, so whatever your needs are, Videvo is likely to have a template that will work for you, i.e., news style. Some features of the platform include high-resolution download options, numerous music, sound effects, images and videos library, and a video compression option.
Videezy
Videezy is a royalty-free video site that offers free and premium video templates. The website has a variety of options to choose from, including news style outros, all of which are geared towards creating engaging content.
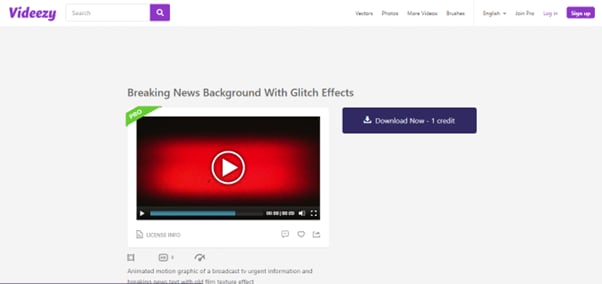
The templates are all ready-made and royalty-free. You can download them for use in your own projects and attach them to your video using any video editing app/software.
The pricing of the platform starts at $19/file, which might be expensive for some users. Moreover, in the free version, too many ads are displayed.
Shutterstock
Shutterstock has various affordable, royalty-free outro templates that you can use for your video/podcast. With a wide selection of styles and price points, this platform has the perfect content for your needs.
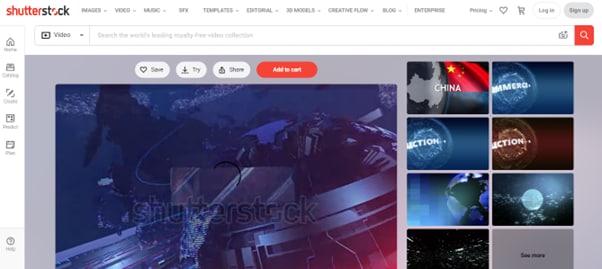
On Shutterstock, the free trial only offers 10 images, and you will be charged $0.22-$14.50/image once the trial limit is over. On the other hand, the Extended license will cost you $67.96-$99.50. The downside is that you have to purchase the content pack separately.
iStock
iStock is a premium website offering royalty-free stock photos, illustrations, and videos divided into numerous categories for easy access. The platform also offers a variety of non-editable news outro templates that you can add to your videos or podcasts.
The free trial on the platform is limited to 10 images, and after that, you will be charged $0.22-$9.90/image, while the Extended license will cost you $144-$216. The support system on the platform is slow and doesn’t respond on time.
Part 3. A Bonus Tip: How To Edit Your News Outro For Your YouTube Video?
After knowing the websites providing News Style Outro, we hope you can find an ideal outro successfully. However, how to use the material you have found, integrate it into your YouTube video, and improve the quality of it?
Like mentioned before, we highly recommend Filmora to fulfill all your editing needs and even provide royalty-free templates to use. Below are the steps to edit your news outros and make your content more appealing. Let’s start it without any hassle:
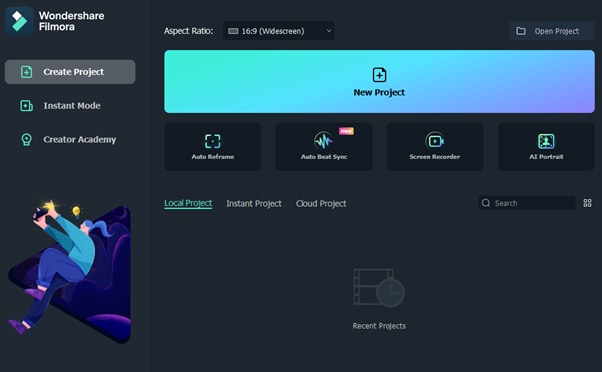
Step1 Download Filmora software from the official website and install it on your PC. Launch the software and click “New Project.”
Step2 Drag and drop your media file or import it using the “Click Here to Import Media File” option. Now, drag your file and drop it in the Timeline.
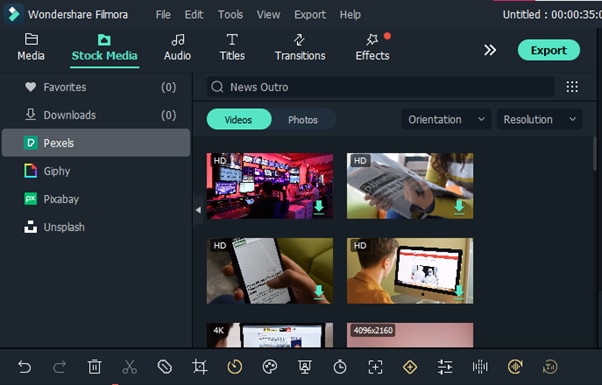
Step3 Adjust your clip in the Timeline and click the “Stock Media” option. Search for “News Outros,” select the one you like, and add it to the Timeline.
Step4 Next, adjust the template on your video, and once you are satisfied, click the “Export” option. Finally, do the necessary settings and click “Export” again or share your video directly to YouTube.
Free Download For Win 7 or later(64-bit)
Free Download For macOS 10.14 or later
Conclusion
In this article, we’ve provided a detailed guide on how to create news outro templates with simple and easy-to-follow instructions. We also discussed various platforms/editors where you can find customizable and non-customizable templates.
Hopefully, you find this guide informative and can now create strong news style outros for your videos.
Canva
Canva is a user-friendly graphic design free and paid tool that is quickly becoming a popular choice for businesses of all sizes. Canva offers a range of templates for creating professional-looking designs.
With a wide range of templates to choose from, you can easily find one that fits your needs and style. Best of all, you can create your outro template in minutes without hiring a designer or spending hours learning complex design software.
The software is easy-to-use and does not require any editor to customize and use the templates. The paid version is divided into 2 tiers: Canva Pro ($54.99 per year) and Canva for team ($84. 90/year). One disadvantage of the Canva free version is that it is limited resolution options when exporting your file.
Flexclip
Flexclip is a free, powerful, and easy-to-use online video maker that helps you create beautiful and engaging content for your business. With Flexclip, you can easily create editable news style outros for your videos from scratch or choose a template and edit it according to your requirements.
You can add text, music, elements, overlays, and branding to your templates to make them more stunning and captivating.
The platform offers 3 paid plans starting at $8.99/month. The con here is that the free version is only limited to the export quality of 480p, single royalty-free stock use, and 12 projects limit.
Placeit
Placeit is an online editor giving you the ability to create and customize your video content in no time. The editor also includes a stock image library, giving you access to several customizable templates.
Placeit is easy to use and offers a variety of templates for different purposes, including outros for news stories, video blogs, and even gaming videos. The platform offers an unlimited subscription plan starting from $7.47 /month.
However, the design rendering process of the editor is slow, there is no AI tool, and you even cannot import fonts that are not available on the platform.
Non-Editable News Outro Template Websites
Some platforms offer non-editable high-resolution news outros that you can integrate into your videos using software programs like Filmora (guidance in Part 3), After Effects, etc.
Storyblock
Searching for high-quality templates for your next project?Storyblock is a website that comes with royalty-free, non-customizable news style outros.
You can use these templates to create high-quality news intros and outros for your podcast or videos. The platform offers two pricing plans for individual content creators, starting at $15 per month. While businesses can customize their plans as per their requirements.
Limitations of the Storyblock are that the footage quality is very poor in the free version, and the paid versions might be tricky to avail sometimes.
Videvo
Videvo is a great resource for anyone looking for royalty-free video templates. They have over 300,000 free and premium videos, which you can download in clips or full with 4K resolution. However, their stock library is not much vast. The platform comes with a two-tier subscription plan starting from $14.99/month or $144/year.
You can find templates for both commercial and non-commercial use, so whatever your needs are, Videvo is likely to have a template that will work for you, i.e., news style. Some features of the platform include high-resolution download options, numerous music, sound effects, images and videos library, and a video compression option.
Videezy
Videezy is a royalty-free video site that offers free and premium video templates. The website has a variety of options to choose from, including news style outros, all of which are geared towards creating engaging content.
The templates are all ready-made and royalty-free. You can download them for use in your own projects and attach them to your video using any video editing app/software.
The pricing of the platform starts at $19/file, which might be expensive for some users. Moreover, in the free version, too many ads are displayed.
Shutterstock
Shutterstock has various affordable, royalty-free outro templates that you can use for your video/podcast. With a wide selection of styles and price points, this platform has the perfect content for your needs.
On Shutterstock, the free trial only offers 10 images, and you will be charged $0.22-$14.50/image once the trial limit is over. On the other hand, the Extended license will cost you $67.96-$99.50. The downside is that you have to purchase the content pack separately.
iStock
iStock is a premium website offering royalty-free stock photos, illustrations, and videos divided into numerous categories for easy access. The platform also offers a variety of non-editable news outro templates that you can add to your videos or podcasts.
The free trial on the platform is limited to 10 images, and after that, you will be charged $0.22-$9.90/image, while the Extended license will cost you $144-$216. The support system on the platform is slow and doesn’t respond on time.
Part 3. A Bonus Tip: How To Edit Your News Outro For Your YouTube Video?
After knowing the websites providing News Style Outro, we hope you can find an ideal outro successfully. However, how to use the material you have found, integrate it into your YouTube video, and improve the quality of it?
Like mentioned before, we highly recommend Filmora to fulfill all your editing needs and even provide royalty-free templates to use. Below are the steps to edit your news outros and make your content more appealing. Let’s start it without any hassle:
Step1 Download Filmora software from the official website and install it on your PC. Launch the software and click “New Project.”
Step2 Drag and drop your media file or import it using the “Click Here to Import Media File” option. Now, drag your file and drop it in the Timeline.
Step3 Adjust your clip in the Timeline and click the “Stock Media” option. Search for “News Outros,” select the one you like, and add it to the Timeline.
Step4 Next, adjust the template on your video, and once you are satisfied, click the “Export” option. Finally, do the necessary settings and click “Export” again or share your video directly to YouTube.
Free Download For Win 7 or later(64-bit)
Free Download For macOS 10.14 or later
Conclusion
In this article, we’ve provided a detailed guide on how to create news outro templates with simple and easy-to-follow instructions. We also discussed various platforms/editors where you can find customizable and non-customizable templates.
Hopefully, you find this guide informative and can now create strong news style outros for your videos.
Also read:
- From Screenplays to Screens YouTube's Filmmaker Training
- In 2024, Best 12 YouTube Gaming Intro Makers - Free and Paid
- [New] Elevating Video Previews A Compreayer Approach for YouTube
- In 2024, Building a Fanbase with YouTube Streams
- Emoji Tips for YT Comments A Quick Guide
- [New] Decoding Unlisted Videos A Deep Dive Into YouTube Secrecy
- Learn How to Build YouTube Backlinks for Your Channel
- In 2024, 10 YouTube Tips for Teachers
- In 2024, Boosting YouTube Interaction with Emojis
- [Updated] Elevating Your Music Crafting Stunning Lyric Videos Using Lyric Video Maker
- How to Create and Build A YouTube Channel Today
- Elevate Your Video Game Top Tips for Perfect Live Thumbnails for 2024
- [Updated] Engaging YouTube Summaries with Tailored Templates
- In 2024, Discovering and Dominating Unique Segments in YouTube
- In 2024, Elevate Entertainment A Thousand Gaming Channels
- Innovative YouTube Channel Titles The Key to Successful Blogging & Filmmaking (No More than 156 Characters)
- Stars of Tomorrow Perfecting Reaction Videos for Audiences Through Dual Perspectives
- Your Perfect Movie Day 2024’S Top FREE Films on YouTube
- [New] 30 Leading Free Platforms for Exceptional YouTube Intros
- [New] Dissecting the Financial Strategy of T-Series in Video Platforms
- 2024 Approved Edit with Ease The Top 10 YouTube Video Trimmers Guide
- Avoiding Pitfalls Understanding YouTube Standards
- [New] Crafting Your Perfect YouTube Playlists A Step-by-Step Guide
- [Updated] Charting New Territory in YouTube Advertising Artistry
- A Complete Guide to YouTube's Live Image Lore for 2024
- 2024 Approved Charting New Territory YouTube's Revised Policies
- [New] Decoding Vtubers The Path From Concept to Career?
- Unlock YouTube's Potential Key Strategies From Creator Studio Manual
- Cutting-Edge Studio Lights for Online Filmmakers for 2024
- [Updated] Charisma in Characters Two Ways to Enliven Text
- Navigating Your Path as a First-Time YouTuber Sidestep These 8 Common Mistakes
- Break Through the Crowd Key YouTube SEO Strategies to Rank High for 2024
- From Barely There to Top Rated The Youtube Growth Arc
- In 2024, Elite 10 Volume Augmenters for All OS
- [Updated] Essential Strategies for Successful Mukbang Production
- [New] Unlocking Instagram Memories with These Apps for 2024
- Updated 2024 Approved Gaming Intro Creation Made Easy Top Tools for Windows and Mac
- New Ranking the Top Video Editors for Adding Music and Soundtracks
- In 2024, Top 4 Ways to Trace Vivo T2 Pro 5G Location | Dr.fone
- New 2024 Approved Top 6 Android & iOS Apps for Enhancing Call Conversation Volume
- Convert TikTok to MP4 without Watermark Best TikTok Downloaders
- New In 2024, Essential Economical Mac Audiophiles Multitrack Mixer App
- Best Online Echo Chambers
- In 2024, How to Change/Fake Your Nubia Red Magic 8S Pro+ Location on Viber | Dr.fone
- [Updated] Enhancing Facebook Viewership with OBS Broadcasts
- In 2024, Hacks to do pokemon go trainer battles For Lava Blaze 2 5G | Dr.fone
- How to Change Your Honor X50i Location on life360 Without Anyone Knowing? | Dr.fone
- The Best Android Unlock Software For Huawei Nova Y71 Device Top 5 Picks to Remove Android Locks
- In 2024, Ultimate Collection Free TikTok Edits for Mac Users
- In 2024, Remove Device Supervision From your iPhone XS Max
- [Updated] To Use ITop Recorder A Compelling Case, In 2024
- Updated The Leading Lineup Best No-Charges Music Transformation Apps for iPhone/Android Enthusiasts
- How To Revive Your Bricked Samsung Galaxy F04 in Minutes | Dr.fone
- Title: "Enriching Slides Video Incorporation From YouTube"
- Author: Kevin
- Created at : 2024-05-25 15:10:26
- Updated at : 2024-05-26 15:10:26
- Link: https://youtube-videos.techidaily.com/enriching-slides-video-incorporation-from-youtube/
- License: This work is licensed under CC BY-NC-SA 4.0.
