
:max_bytes(150000):strip_icc()/easeus-data-recovery-wizard-free-b92bc63ec5594068a7adc5581e7b1512.png)
"Enhancing Video Tracking Adding Timestamps in YouTube for 2024"
Enhancing Video Tracking: Adding Timestamps in YouTube
How to Add Timestamps on YouTube Video Link?

Richard Bennett
Mar 27, 2024• Proven solutions
It is a well-known fact that internet users have a short interest span, about just eight seconds. This attention span applies to all internet platforms including YouTube. YouTube is the second largest and most visited search engine after Google. It provides users with information through engaging and eye-catchy videos. However, certain videos are longer where only a particular section of the video holds the important information. Viewers tend to skip the long videos and if you do not want this to happen to you, you can link to that specific part on your video adding value for your channel viewers with a link known as the YouTube Timestamp link.
When you have a Timestamp link on your video, you can help your viewers directly reach the specific time in the video. This helps avoid the viewers from losing interest or to search for the key part in your video themselves.
Here in this article, we will explain Timestamp links, how to add Timestamp to YouTube video links, and what are the benefits of Timestamp.
- Part 1: YouTube Timestamp Links Introduction
- Part 2: Adding a Timestamp to YouTube Video Link on Desktop
- Part 3: How to Share Specific Parts of YouTube Video
- part 4: Getting YouTube Timestamp Link on Mobile
- Part 5: FAQ About YouTube Timestamps
Part 1: What is YouTube Timestamp Links
In this fast-paced world where viewers have limited time at hand, YouTube Timestamp links are extremely helpful. These links are anchor text or video hyperlinks found either in the description beneath the video or at the video link end.

The Timestamps links allow you to put a link to a key moment in your YouTube video allowing the viewers and subscribers to view the video at the precise time specified. Your YouTube video maybe half an hour long or maybe your users do not have the time now or forget to later watch your video, but when you add Timestamp to the YouTube link, you provide them ways to get to the content quickly enhancing the user experience.
In addition to this, you can even provide a reference in minutes and hours where necessary. The YouTube Timestamp link acts as a guide that directs viewers to the part of the video, which is most relevant to them without having to watch the entire video.
Part 2: How to Add a Timestamp to YouTube Video Link on Desktop?
In the following section, I will show you how to add timestamp to YouTube video link in several ways.
Use YouTube’s Share Feature
Using YouTube’s share feature is the simplest way to add Timestamp to YouTube videos. Here are easy steps to follow to do this.
- Open the YouTube video on your desktop that you want to share.
- Play the video or navigate the timeline and stop at the key moment you wish to apply the timestamp to.
- Now click on the Share button, a pop-up will appear. Under the URL, you will see a small box indicating Start at. The Timestamp is generated automatically, but you can adjust it.

- Copy the updated URL with Timestamp to share the video or click on the social sharing icons to do so.
- When your viewers click on this URL, the video will begin at the specified Timestamp.
Use the Browser URL to add Timestamp manually
You can add Timestamp manually as well. Follow the step-by-step guide below to add a Timestamp manually.
- Open your YouTube video in a browser on your desktop and then find the URL in the browser’s address bar.
- Enter the specific time you want the viewers to watch the video from at the end of the video URL.
You can add time manually in two ways depending on the URL.
?t=As or
&t=As
“youtu.be/” Format
If your YouTube video link is a youtu.be format, then just add ?t=As at the end of the video link. The A denotes the seconds at which you want the viewer to watch your video. The time can also be specified in minutes and seconds and when you want to do that just add ?t=AmBs. For instance, ?t=2m40s.
“youtube.com/” Format
When your YouTube video link has a youtube.com format, the adjustment starts with an ampersand. &t=As or &t=AmBs is what you can use. If you are looking to add the Timestamp at 2m40s, just add “&t=2m40s at the end of the video URL.
Whenever anybody uses the URL with Timestamp, the video will start from the specified time.
However, when adding a Timestamp manually, always leave include whole numbers. For example, if the time starts at 4m, use 4 and not 04.
Copy video URL at current time
You can use YouTube’s built-in feature to share the key parts of your YouTube video. Follow the steps here.
- Visit YouTube and open the video you want to add Timestamp link to.
- Play the video or navigate the timeline to reach the specific part you like to use in Timestamp.
- Now either press Ctrl + click or right-click anywhere on the video. A pop-up opens where you can see various texts, click on the Copy video URL at current time and share the link.

- Anyone who clicks on this link will be instantly transported to the exact segment of your YouTube video.
Part 3: How to Share Specific Parts of Videos with Vibby and Get YouTube Link with Timestamp
The above-mentioned methods to add and send YouTube link with timestamp are quick and easy, but they have a few limitations. If you need more control and share highlighted parts of YouTube video without cutting the video, you need to use a third-party tool known as Vibby.
Vibby allows you to not only share specific parts of videos from YouTube but other platforms as well like Vimeo and Twitch. With the tool, you can clip multiple sections of the video and share them with others.
- To get started, signup either with mail, Google, Twitter, Facebook, or Twitch account.
- Once signed in, go to Create vib at the top left corner and then paste the URL of the YouTube video you would like to share and then click on the Start button.

- Your video will load in the Vibby editor, now click on Highlight the parts to share.
- Here you will see the Start highlight button, jump 5-sec option, option to switch between HD and SD video quality, and volume control button. Navigate to the part you want to share and click on Start highlight.

- When you reach the end of the part, click on Finish highlight. Repeat the process to highlight multiple parts of the video. All the highlighted parts will appear in a list on the right side of the screen.
- Add a description to each part and format it, you have the option to preview before hitting the Save vib button.
- Name the vib and assign a category and then publish it to Vibby or make it a private vib.
- You get a dedicated link to your vib with the ability to embed it on your website or blog.
In this way, you can share the highlights of the YouTube video or Vimeo video easily.
Part 4: How to Get YouTube Timestamp Link on iPhone and Android?
Linking to specific YouTube Timestamp Link is straightforward on both iPhone and Android.
- Go to YouTube and select the video you want to share.
- Move through the progress bar of the video to reach the key part and click on the Share button.
- A pop-up menu appears, highlight the URL and click on the Copy button.
- Paste the URL and manually add the Timestamp using the steps mentioned in add a Timestamp manually.
Part 5: Is Timestamp Beneficial for your Video?
Timestamping your YouTube videos may decrease the watch time, but it enhances the user experience, and they want to see more of your videos. Apart from this, adding Timestamps to your videos make your videos discoverable through Google search. YouTube and Google will reward you for the videos in form of a high search engine ranking.
Bonus: How to Add YouTube Timestamp Link in YouTube Video Description
Adding a YouTube Timestamp link in your video description is easy. Here are the steps to do so.
- Go to your YouTube channel and select the video you want to add Timestamp to and then navigate to the description below it.
- Edit the description by clicking on the Edit Video button.
- You are redirected to the Video Details page. Here write 0:00 at the first part of the timecode, and then continue with the time of the key part of the video you want to add the Timestamp to in 2:40 format. You can add more Timestamp as well and then click on the Save button.

- Reload the video page and you will see auto-generated Timestamp Links at the specific time you provided in the description.
Note: You need to add at least three timestamps which are 10 seconds or longer in order to add timestamps successfully.
Conclusion
As much as possible YouTubers want to make videos short and to the point. However, if a video needs to be longer, you can still help users navigate through to find what is important to them by adding Timestamp to YouTube link or Timestamp the YouTube descriptions. This can help your viewers jump straight to the interesting part in the video, rather than viewing the entire video saving their time and boost user experience.
Richard Bennett
Richard Bennett is a writer and a lover of all things video.
Follow @Richard Bennett
Richard Bennett
Mar 27, 2024• Proven solutions
It is a well-known fact that internet users have a short interest span, about just eight seconds. This attention span applies to all internet platforms including YouTube. YouTube is the second largest and most visited search engine after Google. It provides users with information through engaging and eye-catchy videos. However, certain videos are longer where only a particular section of the video holds the important information. Viewers tend to skip the long videos and if you do not want this to happen to you, you can link to that specific part on your video adding value for your channel viewers with a link known as the YouTube Timestamp link.
When you have a Timestamp link on your video, you can help your viewers directly reach the specific time in the video. This helps avoid the viewers from losing interest or to search for the key part in your video themselves.
Here in this article, we will explain Timestamp links, how to add Timestamp to YouTube video links, and what are the benefits of Timestamp.
- Part 1: YouTube Timestamp Links Introduction
- Part 2: Adding a Timestamp to YouTube Video Link on Desktop
- Part 3: How to Share Specific Parts of YouTube Video
- part 4: Getting YouTube Timestamp Link on Mobile
- Part 5: FAQ About YouTube Timestamps
Part 1: What is YouTube Timestamp Links
In this fast-paced world where viewers have limited time at hand, YouTube Timestamp links are extremely helpful. These links are anchor text or video hyperlinks found either in the description beneath the video or at the video link end.
The Timestamps links allow you to put a link to a key moment in your YouTube video allowing the viewers and subscribers to view the video at the precise time specified. Your YouTube video maybe half an hour long or maybe your users do not have the time now or forget to later watch your video, but when you add Timestamp to the YouTube link, you provide them ways to get to the content quickly enhancing the user experience.
In addition to this, you can even provide a reference in minutes and hours where necessary. The YouTube Timestamp link acts as a guide that directs viewers to the part of the video, which is most relevant to them without having to watch the entire video.
Part 2: How to Add a Timestamp to YouTube Video Link on Desktop?
In the following section, I will show you how to add timestamp to YouTube video link in several ways.
Use YouTube’s Share Feature
Using YouTube’s share feature is the simplest way to add Timestamp to YouTube videos. Here are easy steps to follow to do this.
- Open the YouTube video on your desktop that you want to share.
- Play the video or navigate the timeline and stop at the key moment you wish to apply the timestamp to.
- Now click on the Share button, a pop-up will appear. Under the URL, you will see a small box indicating Start at. The Timestamp is generated automatically, but you can adjust it.
- Copy the updated URL with Timestamp to share the video or click on the social sharing icons to do so.
- When your viewers click on this URL, the video will begin at the specified Timestamp.
Use the Browser URL to add Timestamp manually
You can add Timestamp manually as well. Follow the step-by-step guide below to add a Timestamp manually.
- Open your YouTube video in a browser on your desktop and then find the URL in the browser’s address bar.
- Enter the specific time you want the viewers to watch the video from at the end of the video URL.
You can add time manually in two ways depending on the URL.
?t=As or
&t=As
“youtu.be/” Format
If your YouTube video link is a youtu.be format, then just add ?t=As at the end of the video link. The A denotes the seconds at which you want the viewer to watch your video. The time can also be specified in minutes and seconds and when you want to do that just add ?t=AmBs. For instance, ?t=2m40s.
“youtube.com/” Format
When your YouTube video link has a youtube.com format, the adjustment starts with an ampersand. &t=As or &t=AmBs is what you can use. If you are looking to add the Timestamp at 2m40s, just add “&t=2m40s at the end of the video URL.
Whenever anybody uses the URL with Timestamp, the video will start from the specified time.
However, when adding a Timestamp manually, always leave include whole numbers. For example, if the time starts at 4m, use 4 and not 04.
Copy video URL at current time
You can use YouTube’s built-in feature to share the key parts of your YouTube video. Follow the steps here.
- Visit YouTube and open the video you want to add Timestamp link to.
- Play the video or navigate the timeline to reach the specific part you like to use in Timestamp.
- Now either press Ctrl + click or right-click anywhere on the video. A pop-up opens where you can see various texts, click on the Copy video URL at current time and share the link.
- Anyone who clicks on this link will be instantly transported to the exact segment of your YouTube video.
Part 3: How to Share Specific Parts of Videos with Vibby and Get YouTube Link with Timestamp
The above-mentioned methods to add and send YouTube link with timestamp are quick and easy, but they have a few limitations. If you need more control and share highlighted parts of YouTube video without cutting the video, you need to use a third-party tool known as Vibby.
Vibby allows you to not only share specific parts of videos from YouTube but other platforms as well like Vimeo and Twitch. With the tool, you can clip multiple sections of the video and share them with others.
- To get started, signup either with mail, Google, Twitter, Facebook, or Twitch account.
- Once signed in, go to Create vib at the top left corner and then paste the URL of the YouTube video you would like to share and then click on the Start button.
- Your video will load in the Vibby editor, now click on Highlight the parts to share.
- Here you will see the Start highlight button, jump 5-sec option, option to switch between HD and SD video quality, and volume control button. Navigate to the part you want to share and click on Start highlight.
- When you reach the end of the part, click on Finish highlight. Repeat the process to highlight multiple parts of the video. All the highlighted parts will appear in a list on the right side of the screen.
- Add a description to each part and format it, you have the option to preview before hitting the Save vib button.
- Name the vib and assign a category and then publish it to Vibby or make it a private vib.
- You get a dedicated link to your vib with the ability to embed it on your website or blog.
In this way, you can share the highlights of the YouTube video or Vimeo video easily.
Part 4: How to Get YouTube Timestamp Link on iPhone and Android?
Linking to specific YouTube Timestamp Link is straightforward on both iPhone and Android.
- Go to YouTube and select the video you want to share.
- Move through the progress bar of the video to reach the key part and click on the Share button.
- A pop-up menu appears, highlight the URL and click on the Copy button.
- Paste the URL and manually add the Timestamp using the steps mentioned in add a Timestamp manually.
Part 5: Is Timestamp Beneficial for your Video?
Timestamping your YouTube videos may decrease the watch time, but it enhances the user experience, and they want to see more of your videos. Apart from this, adding Timestamps to your videos make your videos discoverable through Google search. YouTube and Google will reward you for the videos in form of a high search engine ranking.
Bonus: How to Add YouTube Timestamp Link in YouTube Video Description
Adding a YouTube Timestamp link in your video description is easy. Here are the steps to do so.
- Go to your YouTube channel and select the video you want to add Timestamp to and then navigate to the description below it.
- Edit the description by clicking on the Edit Video button.
- You are redirected to the Video Details page. Here write 0:00 at the first part of the timecode, and then continue with the time of the key part of the video you want to add the Timestamp to in 2:40 format. You can add more Timestamp as well and then click on the Save button.
- Reload the video page and you will see auto-generated Timestamp Links at the specific time you provided in the description.
Note: You need to add at least three timestamps which are 10 seconds or longer in order to add timestamps successfully.
Conclusion
As much as possible YouTubers want to make videos short and to the point. However, if a video needs to be longer, you can still help users navigate through to find what is important to them by adding Timestamp to YouTube link or Timestamp the YouTube descriptions. This can help your viewers jump straight to the interesting part in the video, rather than viewing the entire video saving their time and boost user experience.
Richard Bennett
Richard Bennett is a writer and a lover of all things video.
Follow @Richard Bennett
Elevating Your YT Content with the Top Thumbnail Hacks
Best 8 YouTube Thumbnail Grabbers You Should Know
Richard Bennett
Oct 26, 2023• Proven solutions
A YouTube thumbnail must be made very engaging and attractive to tell the potential viewers what the video is about and make them watch it. Since YouTube is a visual media platform, viewers set their eyes on the thumbnails first before they read the title of the video. If you’ve made a collage of YouTube thumbnails or designed YouTube channel art containing various freeze-frame images from different YouTube videos, you are no stranger to needing a fast way to collect YouTube thumbnail images. Online, there are several tools dedicated to solving this exact problem. These are the top five YouTube Thumbnail grabbers:
These thumbnails can be then be used in videos, blogs, articles, web pages, etc. Let’s have a look at 8 best thumbnail grabbers in the market:
- YouTube Thumbnail Grabber
- BoingBoing
- Thumbnailsave.com
- Get YouTube Thumbnail
- Fbutube.com
- YT Thumbnail Downloader
- Youtubethumbnailimage.com
- Youthumbnail.com
#1: YouTube Thumbnail Grabber
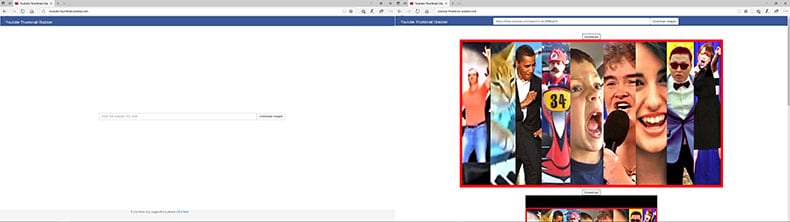
https://youtube-thumbnail-grabber.com
YouTube Thumbnail Grabber is at the top of our list. The website is very simple and clean with no ads. All you need to do is enter the YouTube video URL and click on the “Download Images” button. The site will then present you with your downloadable images in different sizes. It’s free and fast!
#2: BoingBoing
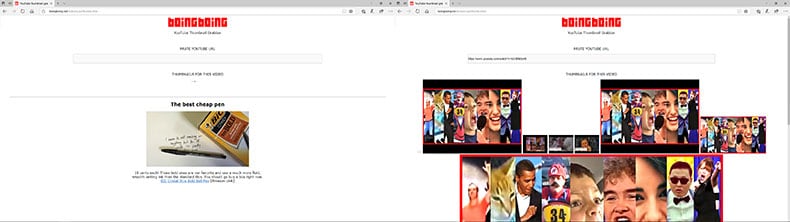
https://boingboing.net/features/getthumbs.html
BoingBoing is faster than YouTube Thumbnail grabber because it skips the “Download Images” step. As soon as you enter in your YouTube video URL, BoingBoing will automatically present you with your downloadable images. Although it is one step faster than YouTube Thumbnail Grabber, you will have to deal with having to view one small ad at the bottom of the page. In case you also want to download freeze frames that occur midway through the video, BoingBoing also gives you the option to download those images as well.
#3: Thumbnailsave.com
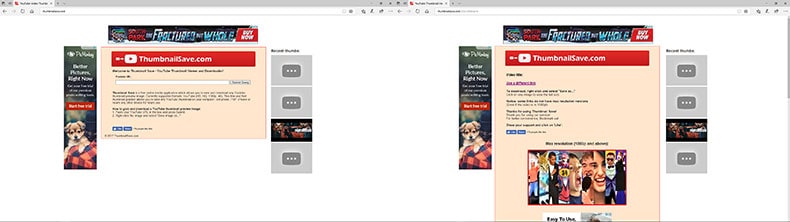
Another free, straightforward website for grabbing your YouTube thumbnails is Thumbnailsave.com. Again, all you need to do is enter the YouTube video URL and click the “Submit” button. Unlike our first two options, this site has a lot more ads. You’ll see a banner ad at the top as well as an ad to the side of the page. One interesting thing about this website is that it displays a column of thumbnails recently grabbed by users all over the world (displayed on the right side of the page). You might find this entertaining. If you are captivated by one of the thumbnail images, you can download it onto your computer and then do a reverse image search on Google to find the video.
#4: Get YouTube Thumbnail
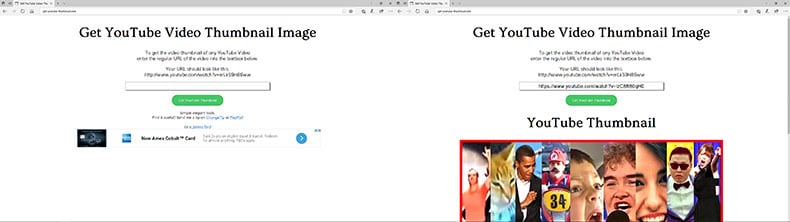
http://www.get-youtube-thumbnail.com
Get YouTube Thumbnail is another free, straightforward tool for grabbing YouTube thumbnail images. All you need to do is paste the URL of the YouTube video and click on the “Get YouTube Thumbnail” button to retrieve your thumbnail. Yes, that’s right. One thumbnail image. What’s different about this website is that it provides you with a unique image URL. This might be useful for anyone not wanting to deal with files. While this website is free to use, it does have ads.
#5: Fbutube.com
Fbtube.com is a tool that is used to download YouTube thumbnails by bloggers, YouTubers, graphic designers, etc. This tool helps to grab all the thumbnails available for a YouTube video. All you need to do is copy and paste the link of the YouTube video you like in the search bar and tap on the Generate tab.
A number of thumbnail images will be displayed of different sizes and resolutions (720p, 360p, 180p, and 90p) will be displayed for you to choose from. You can download the thumbnail you like by hitting the Download tab. This tool also offers an option to create a custom YouTube thumbnail for sharing on Facebook.
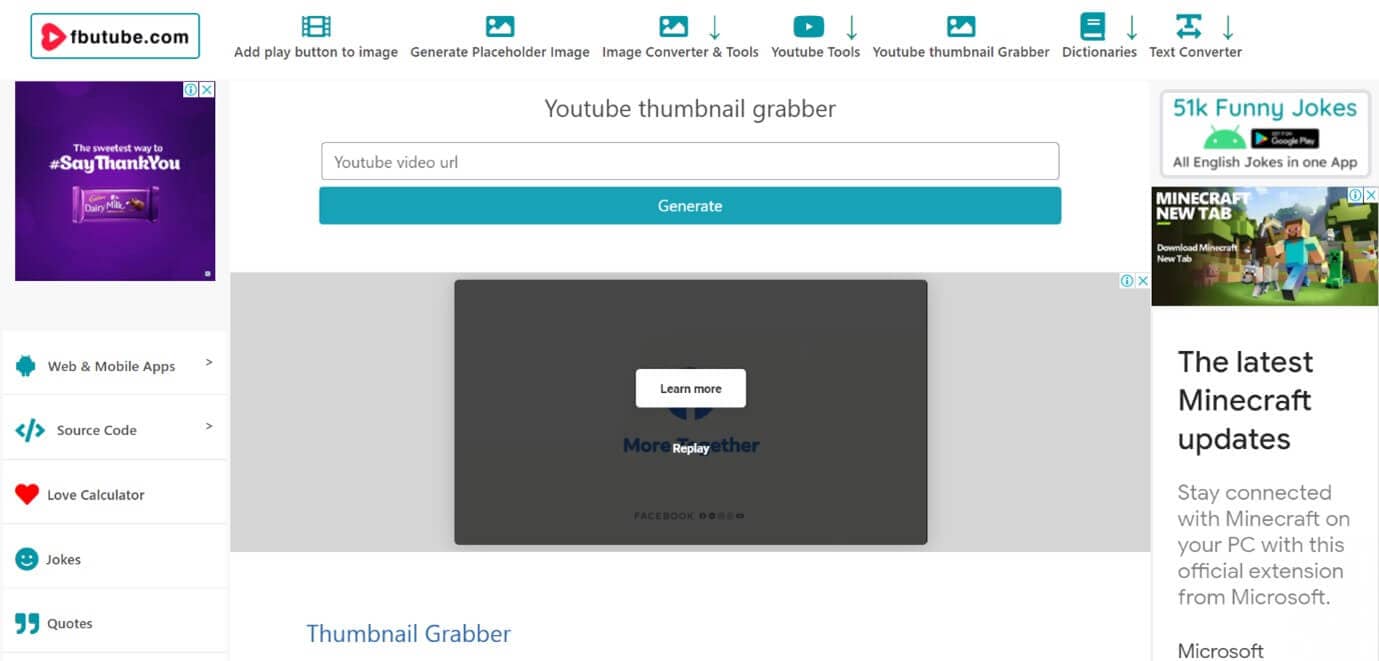
https://fbutube.com/youtube-thumbnail-grabber
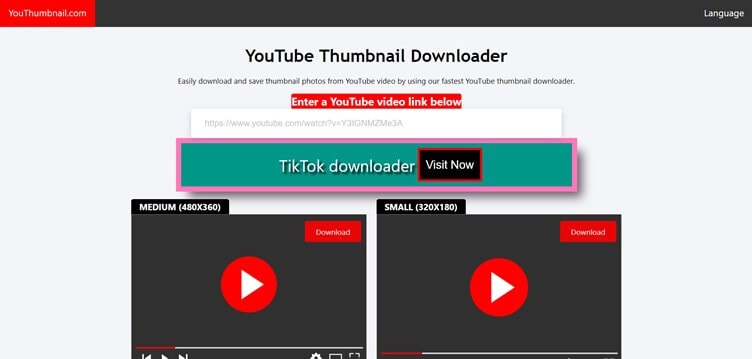
#6: YT Thumbnail Downloader
YT Thumbnail Downloader is a free online tool that you can use to download the thumbnail of any YouTube video you wish. This tool is very easy to use, contains no ads, and offers thumbnails in 1080p, 720p, 480p, and 360p format.
To download the thumbnail simply paste the link of the YouTube video you like and hit the Download button. A list of thumbnails of different qualities will be displayed. Choose your desired quality and hit Download again. Another plus point of YTThumbnail Downloader is that it allows extracting thumbnails of live streaming videos.
https://yt-thumbnail-downloader.com/
#7: Youtubethumbnailimage.com
Youtubethumbnailimage.com is another free site that allows you to download YouTube thumbnails. This site allows to download thumbnails in 4 different dimensions, HD 1920x1080, SD 640x480, HQ 480x360, and MQ 320x180.
To download the thumbnail you just have to copy and paste the URL of your desired YouTube video in the search bar and hit Search. Once the results are displayed, choose a dimension and hit Download.
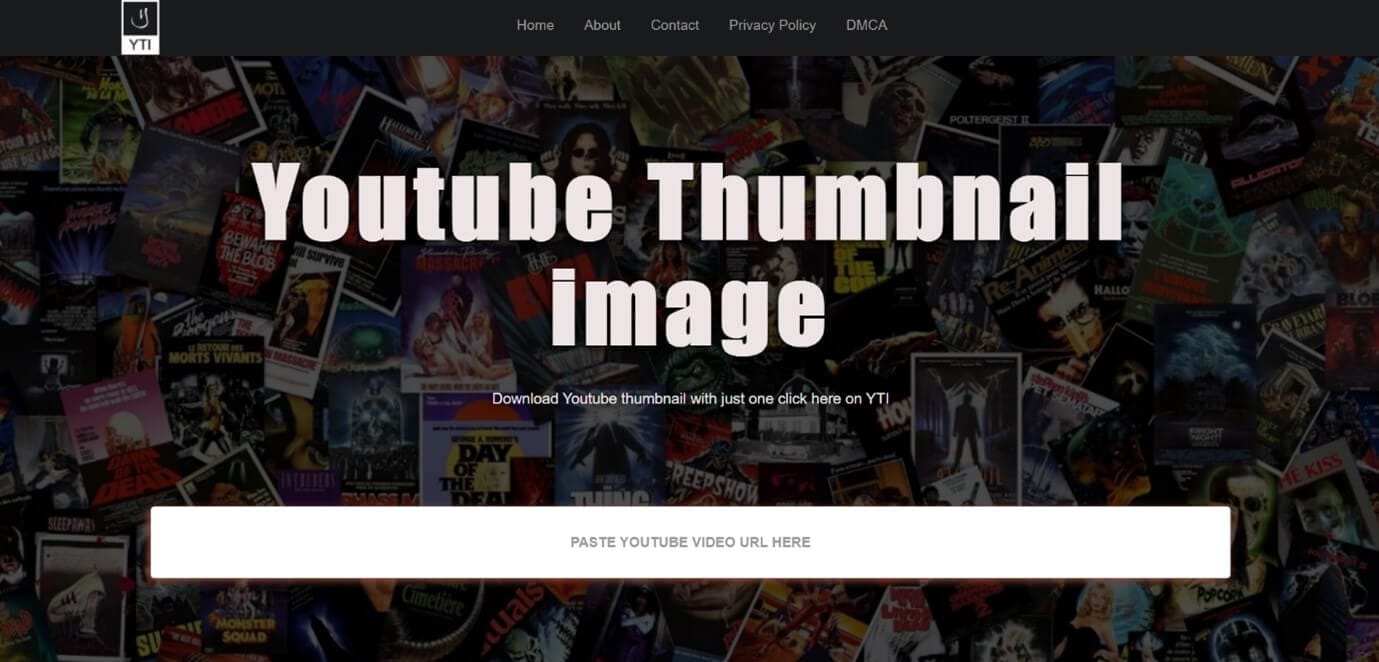
https://youtubethumbnailimage.com/
#8: Youthumbnail.com
Youthumbnail.com is the final tool we will be talking about that can help you save the YouTube thumbnail of a YouTube video. This free tool contains some annoying ads but can download YouTube thumbnail fast and easily in 3 different qualities.
To download the YouTube thumbnail, paste the link of the YouTube video you like in the search box and press Enter. Select the image of your choice from the three images displayed and the thumbnail will be downloaded for your later use.
So that’s our list of top online tools to grab your YouTube thumbnails with our favorite one being YouTube Thumbnail Grabber.
Want to know more about what makes a great YouTube thumbnail? Read all about it in our Ultimate Guide to YouTube Thumbnails.
Custom Videos with Versatile Video Editor
Filmora is a stunning video editing software that is suggested both by beginners and professionals alike for creating and editing all sorts of videos, from Gifs and one-minute videos to high-quality movies and YouTube videos. It packs in a wide variety of features like 4K editing, noise removal, color tuning, audio mixer, scene detection, video stabilization, advanced text editor, GIF support, audio equalizer, etc. that can be used to create an outstanding YouTube video of your own.
Some other features offered by Filmora that can be used to make your YouTube video more attractive are 800+ video effects, motion tracking, green screen editing, screen recording, 3D Lut, and the option to export videos to YouTube directly


Conclusion
The thumbnail is one of the most important metadata of a YouTube video and hence all the YouTubers try to design it in the best way possible. As a result, most of the thumbnails are very attractive, creative and speak a lot about the content. Hence many people including bloggers, YouTubers, content creators, etc. want to download and save these thumbnails for their videos, blogs, articles wallpapers, and much more.
The YouTube thumbnail grabbers we have listed above are free and can be used by anyone to download their desired YouTube video thumbnail in good quality. Along with that anyone who wishes to create an attractive YouTube video that stands out can use Wondershare Filmora and its extensive video editing features. Hope our suggestions help you in the future. Thank you.
Richard Bennett
Richard Bennett is a writer and a lover of all things video.
Follow @Richard Bennett
Richard Bennett
Oct 26, 2023• Proven solutions
A YouTube thumbnail must be made very engaging and attractive to tell the potential viewers what the video is about and make them watch it. Since YouTube is a visual media platform, viewers set their eyes on the thumbnails first before they read the title of the video. If you’ve made a collage of YouTube thumbnails or designed YouTube channel art containing various freeze-frame images from different YouTube videos, you are no stranger to needing a fast way to collect YouTube thumbnail images. Online, there are several tools dedicated to solving this exact problem. These are the top five YouTube Thumbnail grabbers:
These thumbnails can be then be used in videos, blogs, articles, web pages, etc. Let’s have a look at 8 best thumbnail grabbers in the market:
- YouTube Thumbnail Grabber
- BoingBoing
- Thumbnailsave.com
- Get YouTube Thumbnail
- Fbutube.com
- YT Thumbnail Downloader
- Youtubethumbnailimage.com
- Youthumbnail.com
#1: YouTube Thumbnail Grabber
https://youtube-thumbnail-grabber.com
YouTube Thumbnail Grabber is at the top of our list. The website is very simple and clean with no ads. All you need to do is enter the YouTube video URL and click on the “Download Images” button. The site will then present you with your downloadable images in different sizes. It’s free and fast!
#2: BoingBoing
https://boingboing.net/features/getthumbs.html
BoingBoing is faster than YouTube Thumbnail grabber because it skips the “Download Images” step. As soon as you enter in your YouTube video URL, BoingBoing will automatically present you with your downloadable images. Although it is one step faster than YouTube Thumbnail Grabber, you will have to deal with having to view one small ad at the bottom of the page. In case you also want to download freeze frames that occur midway through the video, BoingBoing also gives you the option to download those images as well.
#3: Thumbnailsave.com
Another free, straightforward website for grabbing your YouTube thumbnails is Thumbnailsave.com. Again, all you need to do is enter the YouTube video URL and click the “Submit” button. Unlike our first two options, this site has a lot more ads. You’ll see a banner ad at the top as well as an ad to the side of the page. One interesting thing about this website is that it displays a column of thumbnails recently grabbed by users all over the world (displayed on the right side of the page). You might find this entertaining. If you are captivated by one of the thumbnail images, you can download it onto your computer and then do a reverse image search on Google to find the video.
#4: Get YouTube Thumbnail
http://www.get-youtube-thumbnail.com
Get YouTube Thumbnail is another free, straightforward tool for grabbing YouTube thumbnail images. All you need to do is paste the URL of the YouTube video and click on the “Get YouTube Thumbnail” button to retrieve your thumbnail. Yes, that’s right. One thumbnail image. What’s different about this website is that it provides you with a unique image URL. This might be useful for anyone not wanting to deal with files. While this website is free to use, it does have ads.
#5: Fbutube.com
Fbtube.com is a tool that is used to download YouTube thumbnails by bloggers, YouTubers, graphic designers, etc. This tool helps to grab all the thumbnails available for a YouTube video. All you need to do is copy and paste the link of the YouTube video you like in the search bar and tap on the Generate tab.
A number of thumbnail images will be displayed of different sizes and resolutions (720p, 360p, 180p, and 90p) will be displayed for you to choose from. You can download the thumbnail you like by hitting the Download tab. This tool also offers an option to create a custom YouTube thumbnail for sharing on Facebook.
https://fbutube.com/youtube-thumbnail-grabber
#6: YT Thumbnail Downloader
YT Thumbnail Downloader is a free online tool that you can use to download the thumbnail of any YouTube video you wish. This tool is very easy to use, contains no ads, and offers thumbnails in 1080p, 720p, 480p, and 360p format.
To download the thumbnail simply paste the link of the YouTube video you like and hit the Download button. A list of thumbnails of different qualities will be displayed. Choose your desired quality and hit Download again. Another plus point of YTThumbnail Downloader is that it allows extracting thumbnails of live streaming videos.
https://yt-thumbnail-downloader.com/
#7: Youtubethumbnailimage.com
Youtubethumbnailimage.com is another free site that allows you to download YouTube thumbnails. This site allows to download thumbnails in 4 different dimensions, HD 1920x1080, SD 640x480, HQ 480x360, and MQ 320x180.
To download the thumbnail you just have to copy and paste the URL of your desired YouTube video in the search bar and hit Search. Once the results are displayed, choose a dimension and hit Download.
https://youtubethumbnailimage.com/
#8: Youthumbnail.com
Youthumbnail.com is the final tool we will be talking about that can help you save the YouTube thumbnail of a YouTube video. This free tool contains some annoying ads but can download YouTube thumbnail fast and easily in 3 different qualities.
To download the YouTube thumbnail, paste the link of the YouTube video you like in the search box and press Enter. Select the image of your choice from the three images displayed and the thumbnail will be downloaded for your later use.
So that’s our list of top online tools to grab your YouTube thumbnails with our favorite one being YouTube Thumbnail Grabber.
Want to know more about what makes a great YouTube thumbnail? Read all about it in our Ultimate Guide to YouTube Thumbnails.
Custom Videos with Versatile Video Editor
Filmora is a stunning video editing software that is suggested both by beginners and professionals alike for creating and editing all sorts of videos, from Gifs and one-minute videos to high-quality movies and YouTube videos. It packs in a wide variety of features like 4K editing, noise removal, color tuning, audio mixer, scene detection, video stabilization, advanced text editor, GIF support, audio equalizer, etc. that can be used to create an outstanding YouTube video of your own.
Some other features offered by Filmora that can be used to make your YouTube video more attractive are 800+ video effects, motion tracking, green screen editing, screen recording, 3D Lut, and the option to export videos to YouTube directly
Conclusion
The thumbnail is one of the most important metadata of a YouTube video and hence all the YouTubers try to design it in the best way possible. As a result, most of the thumbnails are very attractive, creative and speak a lot about the content. Hence many people including bloggers, YouTubers, content creators, etc. want to download and save these thumbnails for their videos, blogs, articles wallpapers, and much more.
The YouTube thumbnail grabbers we have listed above are free and can be used by anyone to download their desired YouTube video thumbnail in good quality. Along with that anyone who wishes to create an attractive YouTube video that stands out can use Wondershare Filmora and its extensive video editing features. Hope our suggestions help you in the future. Thank you.
Richard Bennett
Richard Bennett is a writer and a lover of all things video.
Follow @Richard Bennett
Also read:
- Elevate Your Game 14 Must-See Vids for YouTube Gaming Success for 2024
- 2024 Approved Deconstructing the Revenue Stream of TSeries in YouTube Economy
- Create a YouTube Music Playlist on Web and Mobile - A Detailed Guidance
- Mastering YouTube Video Extraction A Step-by-Step Guide
- Flash Vids Unpacked What's Inside?
- 2024 Approved Discover the Ideal Release Windows on YouTube
- [Updated] Breakout 8 Channel Visionaries Amplifying Impact
- [New] Ensuring Effective Monetization Strategies for YT Channels
- Unleashing Potential Combining YouTube & TikTok Efforts
- [New] Discover Ultimate ASMR Microphones for Clear Sounds
- Captivating Content at Your Fingertips Download YouTube for iOS
- 2024 Approved Digital Warriors YouTube’s #Top Ten Women
- [New] Achieving YouTube Apex with Smart Management Tools
- Techniques Extracting YouTube Audio
- Crafting Link-Driven Success A Backlink Blueprint for Channels
- In 2024, Efficient Processes for Uploading Videos From iOS Gadgets
- 2024 Approved Epicurean Elites Top Food Vloggers You Can't Miss
- Tailored Titling Techniques for Impactful YouTube Channels
- Crafting Stellar Video Beginnings with Free Tools
- [Updated] Climbing the YouTube Search Rankings Key SEO Strategies Unveiled
- In 2024, Audio Outliers Best Sound Distortion Apps for Your Device
- [Updated] A Stepwise Approach to Designing Powerful Edu-Vids on Social Media
- Flashing Feathersticks Short Film Characters' Music
- YouTube's Economic Model Month-to-Month Income?
- The Complete YouTube Video Editor Reference Manual
- [New] Deep Dive Into Rank Tracker Solutions for Peak Success on YouTube
- Video Excellence Started with Quality Cameras and Lenses
- Evasion Techniques for YouTube Bans for 2024
- Subscription Surge Entry Into Monetization Realm
- Discovering 6 Interactive Workout Ideas for Social Media Success
- [New] Elevate Content Discovery The TubeBuddy Way
- 2024 Approved Easy Guide Unearthing Your YouTube Compliments & Critiques
- Ultimate Guide to Calculate Your YouTube Views and Money.
- Insightful Comparisons Top Android Applications for YouTube Download
- In 2024, How To Fix OEM Unlock Missing on Honor Magic 6?
- Updated 2024 Approved The Ultimate Guide Best Android Video Editor Apps for Chromebook
- An Exhaustive List of Lip Sync Apps for Vibrant Video Creation for 2024
- In 2024, 7 Best Transition Sound Effects (Free Download) That You Dont Know
- [New] 2024 Approved Quick Tips for Posting Videos on Instagram
- 6 Proven Ways to Unlock Google Pixel 8 Pro Phone When You Forget the Password
- [Updated] In 2024, Pro Tips Grab Your Chromebook's Screen with These 4 Hacks
- [Updated] Learn to Flip Videos A Guide for Instagram Users
- In 2024, A Detailed Guide on Faking Your Location in Mozilla Firefox On Vivo S17 | Dr.fone
- [Updated] 2024 Approved Proactive Measures to Save and Secure Your Classroom Talks on MacOS
- [New] In 2024, Effective Audio Capture for Your Zoom Sessions
- [Updated] In 2024, Affordable Digital Screen Recorders Reviewed & Rated
- Top 11 Free Apps to Check IMEI on Lenovo Phones
- Transforming Chats with Animated Gifs – A Complete Walkthrough for Snapchat
- How to Cast OnePlus Open to Computer for iPhone and Android? | Dr.fone
- [Updated] 2024 Approved Accelerating Your Ascension to Instagram A-List Status Our Fast Track Guide of 15 Must-Try Strategies
- [Updated] Boxed Bliss Reinventing the Art of First Contacts
- Apple ID is Greyed Out From iPhone XS How to Bypass?
- In 2024, Unlock Apple iPhone SE With Forgotten Passcode Different Methods You Can Try
- [New] Immersion in the Most Realistic Water Games
- Free Commercial Image Sources A Step-by-Step Guide
- Virtual Ventures 10 Near-Misses to GTA V for 2024
- In 2024, How To Use Allshare Cast To Turn On Screen Mirroring On Nokia 130 Music | Dr.fone
- New In 2024, Embark on a Journey with These Top 9 State-of-the-Art AI-Enabled Voice Assistants for a Better Day
- New 2024 Approved More than You Could Dream or Imagine, Final Cut Pro X Is a Powerful Software. One Such Hidden Feature From FCPX Is Jump Cuts, and We Shall Know More About Final Cut Pro Jump Cuts in This Article
- Ultimate Guide on Vivo Y100i Power 5G FRP Bypass
- Updated 2024 Approved Mastering the Aesthetics of Audio Design Examining Features, Benefits, Drawbacks, and Comparisons with Alternatives
- [Updated] In 2024, Inverting Video Order on Snapchat
- The Ultimate Technique for Capturing Hulu Playbacks for 2024
- Convert Your FB Video Into Singable Songs (MP3)
- Updated Premiere Pro Text Effects Beginner Guide
- Title: "Enhancing Video Tracking Adding Timestamps in YouTube for 2024"
- Author: Kevin
- Created at : 2024-05-25 15:09:51
- Updated at : 2024-05-26 15:09:51
- Link: https://youtube-videos.techidaily.com/enhancing-video-tracking-adding-timestamps-in-youtube-for-2024/
- License: This work is licensed under CC BY-NC-SA 4.0.
