
Engage Viewers with an Effortless YouTube Animated Subscribe Button Using Filmora
Engage Viewers with an Effortless YouTube Animated Subscribe Button Using Filmora
How to Make Your YouTube Animated Subscribe Button Easily With Filmora

Richard Bennett
Mar 27, 2024• Proven solutions
The main goal of every content creator is to increase its audience to expand its reach and views. To do so, it’s essential to provide something unique and different to the viewer. Without providing them the content they are looking for, it is impossible to grow your channel and reach. Once your content is ready and you are getting many views, it is essential to make these potential viewers your permanent viewers. The animated subscribe button will help you achieve this goal. While your viewers are watching your videos, you must remind them about subscribing to your channel for receiving such incredible content in the future. Subscribe animation plays a vital role in converting your viewers into subscribers.
There are so many platforms on the internet from where you can get Youtube subscribe button animation free, and you can also purchase these subscribe png gifs. But creating your own animated subscribe button can make you stand out from the crowd and make your videos unique and exclusive. Because it enables you to design it the way you want according to your brand, so, let’s create your own subscribe animation using Wondershare Filmora .
Step-By-Step guide
Step 1: To get started,open Filmora X. On your upper left corner, click on the “Sample Colors,” select the Green color and drag it to Video Track into the timeline. We are using a Green background to easily remove it using the green screen feature in Filmora to use it in our future projects after exporting it, without creating it again. Adjust the duration of this track according to your requirement. In my case, I am trying to make an animated subscribe button of 5 seconds.
Step 2: Lock this track by clicking on the lock icon to work on subscribe animation without disturbing the background easily.
Step 3: Now it’s time to design the subscribe png gif. Go to the Sample colors again and drag the red color into the time above the green background.
Step 4: Double click on the red color in the timeline and adjust its size. Make it look like a subscribe button that is a rectangle and place it at the bottom center of the background. You can put it anywhere you want it to appear in your future videos.
Step 5: Now, let’s add Subscribe text into the button. Go to the Title and select any style that you like. “Basic 6” will work perfectly fine for this purpose. Drag and drop it into the timeline above all tracks.
Step 6: Double click on the Title on the timeline and edit it with “Subscribe” and place it under the red rectangle and click OK.
Step 7: We have put a cursor that can click on the animated subscribe button. You can use Google Search to find a transparent cursor. Make sure to save it in png format. Download it and import it into Filmora.
Step 8: Drag and drop the cursor into the timeline and place it above all the other three tracks to make it prominent. Adjust the size of the cursor place it on the Subscribe button where you want it to appear.
Step 9: Now, it’s time to animate the design using keyframes. First of all, let’s animate the red rectangle. Double click on the red color on the timeline. Go to the ‘Animation’ tab and then click ‘Customize.’ Move to the 1 second in the timeline and click ‘Add.’
Step 10: Now go back to the beginning in the timeline and adjust the scale to 0%. It will make the rectangle pop up when you play the clip.
Step 11: Text needs to be animated as well to match it with the rectangle. Double click on the text in the timeline and click ‘ADVANCED.’
Step 12: In this Advance text editor, go to the ‘Animation’ tab and select any animation that you like. On the timeline under the preview screen, adjusts the dark areas according to the time you set on the rectangle, which was 1 second. We want the text to appear on the screen in 1 second, like the rectangle. Also, adjust the ending time when you want the text to disappear again. We have set it on 4 seconds. Which means it will start to fade after 4 seconds.
Step 13: Now, to animate the mouse cursor, we will use the same process we used for a rectangle that is key framing. Double click on the cursor track on the timeline and move the time on your timeline to a point when you want the cursor to appear. Now add a key frame by clicking ‘Add’.
Step 14: Now jump back to a point in your timeline, when the cursor will start appearing from outside the screen. Move the cursor outside the screen from where you want it to start moving toward the subscribe animation.
Step 15: To animate the click of the cursor, move ahead a little bit into your timeline and scale down the cursor to around 70%. Move it a little further and scale it up to 100%.
Step 16: You can add the sound of mouse click to make it more realistic. You can find this sound anywhere on the internet. Download it and import it into Filmora. Now place it into the timeline where it can match the movement of the cursor.
Step 17: Now it’s time to make this subscribe animation button disappear. Move forward into the time to the end, at around 4 seconds. Double click on the red button in the timeline and add a key frame at its actual scale.
Step 18: After that, move further in the timeline to the end and make its scale 0. It will make it disappear.
Step 19: Do the same with the cursor. Double click on the cursor in the time and add a key frame at its actual position.
Step 20: Move ahead when you want it to disappear. Move the cursor out of the screen and click ‘OK’.
Step 21: Your Subscribe png gif is ready to be exported and used in your videos. Click on export and choose from various formats and options to choose from while exporting it.
You may also like: How to Get People to Subscribe Channel
Conclusion:Your own Animated Subscribe Button is ready to be used in your future videos and projects. This is a ready-to-use subscribe button that can be easily used using the green screen effect in Filmora. Just import the clip, remove the green screen, and you are good to go. You can also customize this Subscribe Animation using your channel and more. Keep experimenting with new things using Filmora.


Richard Bennett
Richard Bennett is a writer and a lover of all things video.
Follow @Richard Bennett
Richard Bennett
Mar 27, 2024• Proven solutions
The main goal of every content creator is to increase its audience to expand its reach and views. To do so, it’s essential to provide something unique and different to the viewer. Without providing them the content they are looking for, it is impossible to grow your channel and reach. Once your content is ready and you are getting many views, it is essential to make these potential viewers your permanent viewers. The animated subscribe button will help you achieve this goal. While your viewers are watching your videos, you must remind them about subscribing to your channel for receiving such incredible content in the future. Subscribe animation plays a vital role in converting your viewers into subscribers.
There are so many platforms on the internet from where you can get Youtube subscribe button animation free, and you can also purchase these subscribe png gifs. But creating your own animated subscribe button can make you stand out from the crowd and make your videos unique and exclusive. Because it enables you to design it the way you want according to your brand, so, let’s create your own subscribe animation using Wondershare Filmora .
Step-By-Step guide
Step 1: To get started,open Filmora X. On your upper left corner, click on the “Sample Colors,” select the Green color and drag it to Video Track into the timeline. We are using a Green background to easily remove it using the green screen feature in Filmora to use it in our future projects after exporting it, without creating it again. Adjust the duration of this track according to your requirement. In my case, I am trying to make an animated subscribe button of 5 seconds.
Step 2: Lock this track by clicking on the lock icon to work on subscribe animation without disturbing the background easily.
Step 3: Now it’s time to design the subscribe png gif. Go to the Sample colors again and drag the red color into the time above the green background.
Step 4: Double click on the red color in the timeline and adjust its size. Make it look like a subscribe button that is a rectangle and place it at the bottom center of the background. You can put it anywhere you want it to appear in your future videos.
Step 5: Now, let’s add Subscribe text into the button. Go to the Title and select any style that you like. “Basic 6” will work perfectly fine for this purpose. Drag and drop it into the timeline above all tracks.
Step 6: Double click on the Title on the timeline and edit it with “Subscribe” and place it under the red rectangle and click OK.
Step 7: We have put a cursor that can click on the animated subscribe button. You can use Google Search to find a transparent cursor. Make sure to save it in png format. Download it and import it into Filmora.
Step 8: Drag and drop the cursor into the timeline and place it above all the other three tracks to make it prominent. Adjust the size of the cursor place it on the Subscribe button where you want it to appear.
Step 9: Now, it’s time to animate the design using keyframes. First of all, let’s animate the red rectangle. Double click on the red color on the timeline. Go to the ‘Animation’ tab and then click ‘Customize.’ Move to the 1 second in the timeline and click ‘Add.’
Step 10: Now go back to the beginning in the timeline and adjust the scale to 0%. It will make the rectangle pop up when you play the clip.
Step 11: Text needs to be animated as well to match it with the rectangle. Double click on the text in the timeline and click ‘ADVANCED.’
Step 12: In this Advance text editor, go to the ‘Animation’ tab and select any animation that you like. On the timeline under the preview screen, adjusts the dark areas according to the time you set on the rectangle, which was 1 second. We want the text to appear on the screen in 1 second, like the rectangle. Also, adjust the ending time when you want the text to disappear again. We have set it on 4 seconds. Which means it will start to fade after 4 seconds.
Step 13: Now, to animate the mouse cursor, we will use the same process we used for a rectangle that is key framing. Double click on the cursor track on the timeline and move the time on your timeline to a point when you want the cursor to appear. Now add a key frame by clicking ‘Add’.
Step 14: Now jump back to a point in your timeline, when the cursor will start appearing from outside the screen. Move the cursor outside the screen from where you want it to start moving toward the subscribe animation.
Step 15: To animate the click of the cursor, move ahead a little bit into your timeline and scale down the cursor to around 70%. Move it a little further and scale it up to 100%.
Step 16: You can add the sound of mouse click to make it more realistic. You can find this sound anywhere on the internet. Download it and import it into Filmora. Now place it into the timeline where it can match the movement of the cursor.
Step 17: Now it’s time to make this subscribe animation button disappear. Move forward into the time to the end, at around 4 seconds. Double click on the red button in the timeline and add a key frame at its actual scale.
Step 18: After that, move further in the timeline to the end and make its scale 0. It will make it disappear.
Step 19: Do the same with the cursor. Double click on the cursor in the time and add a key frame at its actual position.
Step 20: Move ahead when you want it to disappear. Move the cursor out of the screen and click ‘OK’.
Step 21: Your Subscribe png gif is ready to be exported and used in your videos. Click on export and choose from various formats and options to choose from while exporting it.
You may also like: How to Get People to Subscribe Channel
Conclusion:Your own Animated Subscribe Button is ready to be used in your future videos and projects. This is a ready-to-use subscribe button that can be easily used using the green screen effect in Filmora. Just import the clip, remove the green screen, and you are good to go. You can also customize this Subscribe Animation using your channel and more. Keep experimenting with new things using Filmora.
Richard Bennett
Richard Bennett is a writer and a lover of all things video.
Follow @Richard Bennett
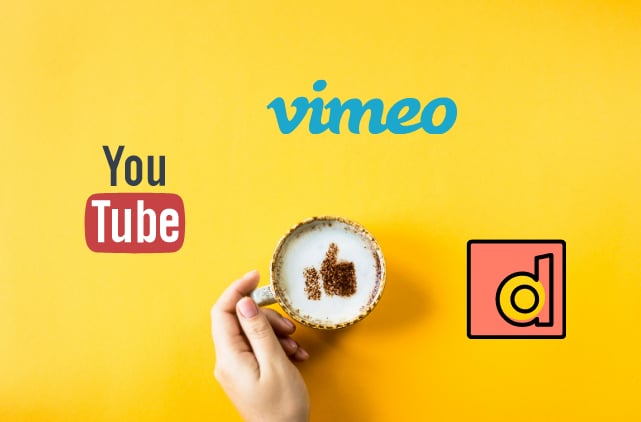
Video-Sharing Titans: Ranking Vimeo, YouTube & Dailymotion
Vimeo vs YouTube vs Dailymotion: Which Video Platform is Right for You?

Ollie Mattison
Mar 27, 2024• Proven solutions
If you are an upcoming entrepreneur who is looking forward to an effective video marketing strategy then you have to come to a decision regarding the portal you want to use for your marketing. As you should know by now YouTube , Dailymotion and Vimeo are the 3 major players in the field of video marketing. In this article, we are going to give you a comparative analysis of all these video sharing platforms so that you can select the one most suited to your needs.
- Part 1: Detailed Comparison of Vimeo, YouTube, and DailyMotion
- Part 2: Tips for Editing Videos on YouTube, DailyMotion, and Vimeo
Compare Vimeo, YouTube, and DailyMotion in 4 Aspects
1. Content
Before deciding which video platform to choose, you need to find out about the content in which each of them specializes.
Youtube: If your content is more related to entertainment then YouTube is the platform to go for.
Vimeo: Vimeo is a closed community specializing in videos by artists from various genres and is considered to be a more creative platform than YouTube.
Dailymotion: Dailymotion has a fair share of both but it resembles the YouTube trend.
2. Audience Size and Membership

Youtube: YouTube’s audience is large, with over 1 billion users that watch hundreds of millions of hours of content – each day! Vimeo has a much smaller for their audience, its 170 million viewers, about 42 million are in the United States.
Vimeo: Vimeo comes with 4 membership options – the Basic which is available for free and the paid Plus, ($59.95/ year) Pro ($199.00 a year), and Business membership ($599.00 a year). The storage level and support for each membership option vary. The free membership is limited to just 500 MB/week. YouTube and Dailymotion on the other hand are totally free, and Youtube gives unlimited hosting. However YouTube Red is a $9.99 subscription service that will allow you to watch ad-free videos and download them for watching offline.
Read this Vimeo introduction >>>
Dailymotion: DailyMotion is the world’s second-largest video-sharing website behind YouTube, statistics claimed by both companies show that YouTube has a significant advantage over DailyMotion in terms of unique site visits, totaling one billion visits per month compared with DailyMotion’s 112 million visits per month.
Know more about Dailymotion >>>
3. Limitation of Videos

Youtube: One of the best parts about this platform is that it doesn’t come with any upload limit.
Dailymotion: Regular users can upload 60 minutes videos of 2 GB limit and the quality of upload is limited to 1280 720p.
Vimeo: With a Basic plan, you can upload 500MB/week, with a Plus plan you can upload 5GB/week and with Pro plan you will be able to upload unlimited videos with a per-file limit of 25 GB.
4. User Experience
To begin with, both Vimeo and YouTube had a very similar kind of user interface. This has gradually evolved over the years and these days the user interface of Vimeo is more attractive than YouTube. Vimeo would give the user fewer adverts, offer easy navigation and of course, allow them to watch the videos on a large video player. Though these days YouTube is also offering a ‘theatre mode’ for the full-screen view along with a skip adoption, yet the quality of its user experience is still isn’t at par with Vimeo. YouTube is still trying its best to satisfy its one billion/month users but still, Vimeo is the winner when it comes to unparalleled user experience.
Tips for Editing Videos on YouTube, DailyMotion, and Vimeo
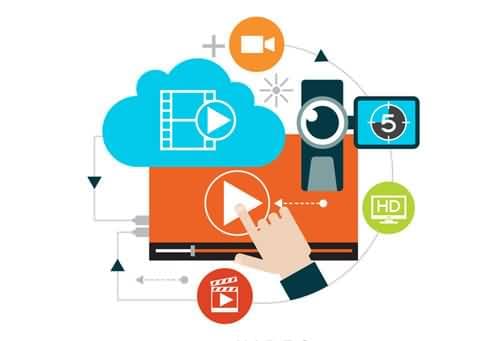
Before uploading your video on any one of these above-mentioned platforms the first thing you have to do is get your videos edited. The Wondershare Filmora is a comprehensive video editor that is ideal for use by beginners. With this software, you will be able to nicely edit a video even if you have no prior knowledge about video editing. This easy to use video editing software is loaded with lots of useful features which can be effectively used by the casual and novice editors. This software is packed with all you need to create good quality videos for your audience on YouTube, Vimeo, or DailyMotion. All you need to do is import the video clips and choose a piece of pre-programmed music and theme for your video. The software would then analyze your video clips and automatically create a video for you.
Ollie Mattison
Ollie Mattison is a writer and a lover of all things video.
Follow @Ollie Mattison
Ollie Mattison
Mar 27, 2024• Proven solutions
If you are an upcoming entrepreneur who is looking forward to an effective video marketing strategy then you have to come to a decision regarding the portal you want to use for your marketing. As you should know by now YouTube , Dailymotion and Vimeo are the 3 major players in the field of video marketing. In this article, we are going to give you a comparative analysis of all these video sharing platforms so that you can select the one most suited to your needs.
- Part 1: Detailed Comparison of Vimeo, YouTube, and DailyMotion
- Part 2: Tips for Editing Videos on YouTube, DailyMotion, and Vimeo
Compare Vimeo, YouTube, and DailyMotion in 4 Aspects
1. Content
Before deciding which video platform to choose, you need to find out about the content in which each of them specializes.
Youtube: If your content is more related to entertainment then YouTube is the platform to go for.
Vimeo: Vimeo is a closed community specializing in videos by artists from various genres and is considered to be a more creative platform than YouTube.
Dailymotion: Dailymotion has a fair share of both but it resembles the YouTube trend.
2. Audience Size and Membership
Youtube: YouTube’s audience is large, with over 1 billion users that watch hundreds of millions of hours of content – each day! Vimeo has a much smaller for their audience, its 170 million viewers, about 42 million are in the United States.
Vimeo: Vimeo comes with 4 membership options – the Basic which is available for free and the paid Plus, ($59.95/ year) Pro ($199.00 a year), and Business membership ($599.00 a year). The storage level and support for each membership option vary. The free membership is limited to just 500 MB/week. YouTube and Dailymotion on the other hand are totally free, and Youtube gives unlimited hosting. However YouTube Red is a $9.99 subscription service that will allow you to watch ad-free videos and download them for watching offline.
Read this Vimeo introduction >>>
Dailymotion: DailyMotion is the world’s second-largest video-sharing website behind YouTube, statistics claimed by both companies show that YouTube has a significant advantage over DailyMotion in terms of unique site visits, totaling one billion visits per month compared with DailyMotion’s 112 million visits per month.
Know more about Dailymotion >>>
3. Limitation of Videos
Youtube: One of the best parts about this platform is that it doesn’t come with any upload limit.
Dailymotion: Regular users can upload 60 minutes videos of 2 GB limit and the quality of upload is limited to 1280 720p.
Vimeo: With a Basic plan, you can upload 500MB/week, with a Plus plan you can upload 5GB/week and with Pro plan you will be able to upload unlimited videos with a per-file limit of 25 GB.
4. User Experience
To begin with, both Vimeo and YouTube had a very similar kind of user interface. This has gradually evolved over the years and these days the user interface of Vimeo is more attractive than YouTube. Vimeo would give the user fewer adverts, offer easy navigation and of course, allow them to watch the videos on a large video player. Though these days YouTube is also offering a ‘theatre mode’ for the full-screen view along with a skip adoption, yet the quality of its user experience is still isn’t at par with Vimeo. YouTube is still trying its best to satisfy its one billion/month users but still, Vimeo is the winner when it comes to unparalleled user experience.
Tips for Editing Videos on YouTube, DailyMotion, and Vimeo
Before uploading your video on any one of these above-mentioned platforms the first thing you have to do is get your videos edited. The Wondershare Filmora is a comprehensive video editor that is ideal for use by beginners. With this software, you will be able to nicely edit a video even if you have no prior knowledge about video editing. This easy to use video editing software is loaded with lots of useful features which can be effectively used by the casual and novice editors. This software is packed with all you need to create good quality videos for your audience on YouTube, Vimeo, or DailyMotion. All you need to do is import the video clips and choose a piece of pre-programmed music and theme for your video. The software would then analyze your video clips and automatically create a video for you.
Ollie Mattison
Ollie Mattison is a writer and a lover of all things video.
Follow @Ollie Mattison
Also read:
- [New] Capture Excellence Prime Phone-Compatible Tripods
- [New] In 2024, Dive Into the World of Expertise with YouTube's Top 10 Makeup Vloggers
- [Updated] 2024 Approved Tackling Frame Loss Best Practices for OBS Users
- [Updated] Boosting Your Content Reach with Eye-Catching YouTube Video Thumbnails
- [Updated] In 2024, Sneak Peeks Into Slow-Motion Mastery on Instagram
- 2024 Approved Deciphering How to Spot Your Video Enthusiasts
- 2024 Approved Educators' Guide to Thriving YouTube Channels – 10 Must-Know Secrets
- Avoiding Online Deception in Blogging - A Strategic Overview of Secure Promotional Tactics Using Massmail for 2009 Success
- Bringing Your Vision Alive Transferring Vids From Premiere for 2024
- Find Your Custom Box Top 10 Online Stores Offering Tailored Packaging for 2024
- How to Unlock Infinix Hot 40 Pro Phone Password Without Factory Reset?
- In 2024, Endless Entertainment Loop YouTube Content on TV
- In 2024, Ultimate Voice Changer for Valorant Gamers – Free to Use
- Monetary Spectrum A Glimpse Into Mr. Beast’s World
- Rhythm Rendezvous Optimal DJ Video Selections
- Understanding YouTube's Monetization Schedule
- Unlock Higher Engagement The Power of Precise Timestamping
- Title: Engage Viewers with an Effortless YouTube Animated Subscribe Button Using Filmora
- Author: Kevin
- Created at : 2025-01-18 16:46:09
- Updated at : 2025-01-22 17:23:40
- Link: https://youtube-videos.techidaily.com/engage-viewers-with-an-effortless-youtube-animated-subscribe-button-using-filmora/
- License: This work is licensed under CC BY-NC-SA 4.0.