Elevating YouTube Productions with Effective Video Lighting
Elevating YouTube Productions with Effective Video Lighting
How To Light Your YouTube Video

Richard Bennett
Oct 26, 2023• Proven solutions
When it comes to sensitivity to light, no consumer-level camera sensor comes close in performance to the human eye. Many newbies to videography, though, don’t think about this when they use their camera indoors and discover that their recorded footage appears too dark.
If you want to use your camera indoors as many YouTubers do, you’ll need to have extra light. But the solution is not as simple as surrounding yourself with lamps that are all randomly placed.
Below, I’ll go into detail on how you can set up your lighting equipment to make your YouTube videos look good.
| Table of Contents Using Light You Already Have Window LightingHome Lighting Home Studio Lighting Light Control3-Point Lighting4-Point Lighting |
|---|
Part 1: Using Light You Already Have
Most beginner YouTubers light their videos with what they already have. That’s what I did to start as well. In the past, my video recording space consisted of natural sunlight coming from my window and ceiling light for times when the sunlight wasn’t strong enough.
1. Window Lighting
The best thing about window lighting is that it’s free. The worst thing about it is that it’s uncontrollable. The amount of light you get in your video can vary with all the changes in the weather.
Window lighting for me was especially difficult to work with because I live in a very rainy and cloudy city, Vancouver, Canada, where we pretty much just get three months of good sun.

Above are two freeze frames from one of Daniel’s past window-lit vlogs. Although these two frames are both from the same vlog, you can see that the image on the right looks brighter due to clearer skies at that moment. These varying amounts of light is what you will have to deal with if you choose to light your YouTube video with window lighting.
2. Home Lighting
Home lighting is another source of light that many new YouTubers use. In the past, when my window light wasn’t strong enough to light my video recording space, I would turn on the ceiling light.

Notice how the color of Daniel’s skin looks much more orange here (above) than the color of the skin in the two side-by-side window lighting examples? The side of the face also appears to look bluer. This all happened because he mixed up different color temperatures shining out of the two lights (cooler window light and warmer ceiling light).
Most home lighting is warmer in its color temperature. If you want to use your home lights without everything being orange-tinted, you’ll need to switch out your light bulbs for daytime LED light bulbs.
Ceiling lights are also typically situated in the center of a room in order to light an entire room evenly. This is not likely to be the best location for your filming video. Since the ceiling light was directly above the face in the above example, you can see harder shadows beneath his cheeks.
Part 2: Home Studio Lighting
If you rather not deal with all the window and home lighting challenges, you can set up studio lighting in your home.
1. Light Control
The first thing you’ll want to do to set up studio lighting in your home is to pick a room to film in and eliminate as much external lighting as you can. Use blinds, curtains, towels, or any thick fabric to block sunlight from shining into your room.
2. 3-Point Lighting
The most common setup for studio lighting is 3-point lighting. For this kind of lighting you’ll need three lights: a key light, a fill light, and a back light (also called a hair light).

Out of the three lights, the key light should be the brightest. When it is positioned to the left of you (as shown in the diagram above) your right side will have shadows.
To minimize the shadows on your right side, use a weaker light as a fill light. You don’t want your fill light to completely eliminate all your shadows or else your shot will look flat.
Lastly, a backlight positioned behind you can give an appealing highlight to the ends of your head and even help to separate your hair from blending into your background if both happen to be dark.
3. 4-Point Lighting
As a YouTuber, you may not only want yourself to be seen optimally with proper lighting, but you may also want your background to be seen optimally, especially if you’ve taken the time to decorate it for your audience.
What you’ll need to ensure that your background is sufficiently lit is 4-point lighting setup. The 4-point lighting setup is the same as a 3-point lighting setup, but with an additional light shining at your background.
For more information on lighting equipment, check out my Top 17 Video Lighting Equipment For YouTubers .
Touch Up YouTube Videos with Filmora
Filmora is one of the best video editing software for YouTube beginners to start the YouTube channel. So, if you find the lighting isn’t perfect after recording, you can use the Auto Color Enhancement feature in Filmora to adjust the color with one-click. Or, you can change the white balance, Light, color, and HSL manually. Filmora also features some presets and LUTs templates , which allows you to apply pre-programmed effects to video for color correction faster.


Richard Bennett
Richard Bennett is a writer and a lover of all things video.
Follow @Richard Bennett
Richard Bennett
Oct 26, 2023• Proven solutions
When it comes to sensitivity to light, no consumer-level camera sensor comes close in performance to the human eye. Many newbies to videography, though, don’t think about this when they use their camera indoors and discover that their recorded footage appears too dark.
If you want to use your camera indoors as many YouTubers do, you’ll need to have extra light. But the solution is not as simple as surrounding yourself with lamps that are all randomly placed.
Below, I’ll go into detail on how you can set up your lighting equipment to make your YouTube videos look good.
| Table of Contents Using Light You Already Have Window LightingHome Lighting Home Studio Lighting Light Control3-Point Lighting4-Point Lighting |
|---|
Part 1: Using Light You Already Have
Most beginner YouTubers light their videos with what they already have. That’s what I did to start as well. In the past, my video recording space consisted of natural sunlight coming from my window and ceiling light for times when the sunlight wasn’t strong enough.
1. Window Lighting
The best thing about window lighting is that it’s free. The worst thing about it is that it’s uncontrollable. The amount of light you get in your video can vary with all the changes in the weather.
Window lighting for me was especially difficult to work with because I live in a very rainy and cloudy city, Vancouver, Canada, where we pretty much just get three months of good sun.
Above are two freeze frames from one of Daniel’s past window-lit vlogs. Although these two frames are both from the same vlog, you can see that the image on the right looks brighter due to clearer skies at that moment. These varying amounts of light is what you will have to deal with if you choose to light your YouTube video with window lighting.
2. Home Lighting
Home lighting is another source of light that many new YouTubers use. In the past, when my window light wasn’t strong enough to light my video recording space, I would turn on the ceiling light.
Notice how the color of Daniel’s skin looks much more orange here (above) than the color of the skin in the two side-by-side window lighting examples? The side of the face also appears to look bluer. This all happened because he mixed up different color temperatures shining out of the two lights (cooler window light and warmer ceiling light).
Most home lighting is warmer in its color temperature. If you want to use your home lights without everything being orange-tinted, you’ll need to switch out your light bulbs for daytime LED light bulbs.
Ceiling lights are also typically situated in the center of a room in order to light an entire room evenly. This is not likely to be the best location for your filming video. Since the ceiling light was directly above the face in the above example, you can see harder shadows beneath his cheeks.
Part 2: Home Studio Lighting
If you rather not deal with all the window and home lighting challenges, you can set up studio lighting in your home.
1. Light Control
The first thing you’ll want to do to set up studio lighting in your home is to pick a room to film in and eliminate as much external lighting as you can. Use blinds, curtains, towels, or any thick fabric to block sunlight from shining into your room.
2. 3-Point Lighting
The most common setup for studio lighting is 3-point lighting. For this kind of lighting you’ll need three lights: a key light, a fill light, and a back light (also called a hair light).
Out of the three lights, the key light should be the brightest. When it is positioned to the left of you (as shown in the diagram above) your right side will have shadows.
To minimize the shadows on your right side, use a weaker light as a fill light. You don’t want your fill light to completely eliminate all your shadows or else your shot will look flat.
Lastly, a backlight positioned behind you can give an appealing highlight to the ends of your head and even help to separate your hair from blending into your background if both happen to be dark.
3. 4-Point Lighting
As a YouTuber, you may not only want yourself to be seen optimally with proper lighting, but you may also want your background to be seen optimally, especially if you’ve taken the time to decorate it for your audience.
What you’ll need to ensure that your background is sufficiently lit is 4-point lighting setup. The 4-point lighting setup is the same as a 3-point lighting setup, but with an additional light shining at your background.
For more information on lighting equipment, check out my Top 17 Video Lighting Equipment For YouTubers .
Touch Up YouTube Videos with Filmora
Filmora is one of the best video editing software for YouTube beginners to start the YouTube channel. So, if you find the lighting isn’t perfect after recording, you can use the Auto Color Enhancement feature in Filmora to adjust the color with one-click. Or, you can change the white balance, Light, color, and HSL manually. Filmora also features some presets and LUTs templates , which allows you to apply pre-programmed effects to video for color correction faster.
Richard Bennett
Richard Bennett is a writer and a lover of all things video.
Follow @Richard Bennett
Open Source Video Template Ideas for YouTube
Free YouTube Channel Art Templates - Find Them Here
Richard Bennett
Oct 26, 2023• Proven solutions
Looking for free YouTube channel art templates? Good channel art can be the difference between a visitor to your channel thinking of you as a YouTuber instead of just someone who posted a few videos. Branding your channel with a banner doesn’t only make your channel look nicer, it makes you look like you’re serious about YouTube.
Here are 7 places where you can find templates for YouTube channel art.
1. 50 Free Banner Art Templates from Filmora
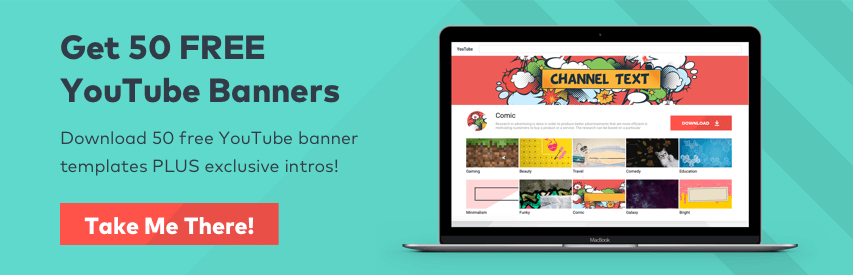
You can download 50 free YouTube channel art templates right here on filmora.io. We have 10 categories of banners: gaming, beauty, travel, comedy, education, minimalist, funky, comics, galaxy, and bright. There’s something for everyone.
You will have the option of downloading either PSD files you can edit in Photoshop, or PNG files you can customize in a free online program like Canva.com. Click here (link) to learn more and download your free channel art templates.
2. Canva
Phil from Video School Online’s Canva tutorial.
Canva is a free online program you can use to create all kinds of graphics easily (learn how to use Canva here ), and they even have templates you can use to make YouTube channel art. Using a template on Canva is as easy as clicking on the one you want and then dragging and dropping in your own images (if you don’t want to use theirs) and changing what the text says.
Although Canva is free to use, and includes many free options for graphics and stock photos, it does also have some premium images and clip art which cost $1 each to use. Making a free banner is as easy as making sure none of the paid elements are in your design (they’re watermarked, so you’ll know).
3. Wondershare PixStudio
Wondershare PixStudio is an all-in-one and powerful online graphic design maker for everyone. It has various types of templates for YouTube Thumbnails, Logos, Posters, etc. You can create a beautiful design by simply dragging and dropping the elements and photos. The online platform is free to use all templates, just One-Click to download your creations and share to your Facebook, Instagram Story, and YouTube Thumbnails, etc. immediately.
PixStudio has special features to remove the image background. With a single click, you can quickly remove the image background, and use your image with more flexibility. Just payment of $7.99 per month to use the features.
4. Fotor
In the above video, YouTuber BBelleGames walks you through all of the features you can use to build your channel art in Fotor.
Fotor is another free online drag-n-drop program with YouTube channel art templates. You can create your banner with Fotor in 4 steps. First open the Design feature and choose a template. Second, either choose a design or build one from scratch. Third, overlay images and any text you want over your background. Finally, save your banner and choose a format to export it in.
The free version of Fotor will work well enough for most YouTubers, but you can also upgrade to their paid Pro program to unlock more content and features.
5. Visme
Visme offers 50 YouTube channel art templates which you can customize the text of for free. You just create a free account, choose the template that best suits your channel, insert your own text and edit that text’s font and color.
6. YourTube
YourTube has a ton of really nice looking channel art templates you can download for free. The downloads include both PSD (Photoshop) files and the background images without text. This is great because you’ll have an editable file you can build on in Photoshop, if you have it, and an image file you can use in combination with a free service like Canva if you don’t.
7. Banner Snack
Banner Snack is for all kinds of social media graphics from YouTube channel art to Twitter headers. It’s a high quality service that’s been used by a lot of major brands, like Lego and Xerox. The only downside of Banner Snack is that their free service is limited and has a watermark. You need to be paying at least $7 per month in order to get rid of the watermark.
Let us know if you know anywhere else to get free YouTube channel art templates!
Richard Bennett
Richard Bennett is a writer and a lover of all things video.
Follow @Richard Bennett
Richard Bennett
Oct 26, 2023• Proven solutions
Looking for free YouTube channel art templates? Good channel art can be the difference between a visitor to your channel thinking of you as a YouTuber instead of just someone who posted a few videos. Branding your channel with a banner doesn’t only make your channel look nicer, it makes you look like you’re serious about YouTube.
Here are 7 places where you can find templates for YouTube channel art.
1. 50 Free Banner Art Templates from Filmora
You can download 50 free YouTube channel art templates right here on filmora.io. We have 10 categories of banners: gaming, beauty, travel, comedy, education, minimalist, funky, comics, galaxy, and bright. There’s something for everyone.
You will have the option of downloading either PSD files you can edit in Photoshop, or PNG files you can customize in a free online program like Canva.com. Click here (link) to learn more and download your free channel art templates.
2. Canva
Phil from Video School Online’s Canva tutorial.
Canva is a free online program you can use to create all kinds of graphics easily (learn how to use Canva here ), and they even have templates you can use to make YouTube channel art. Using a template on Canva is as easy as clicking on the one you want and then dragging and dropping in your own images (if you don’t want to use theirs) and changing what the text says.
Although Canva is free to use, and includes many free options for graphics and stock photos, it does also have some premium images and clip art which cost $1 each to use. Making a free banner is as easy as making sure none of the paid elements are in your design (they’re watermarked, so you’ll know).
3. Wondershare PixStudio
Wondershare PixStudio is an all-in-one and powerful online graphic design maker for everyone. It has various types of templates for YouTube Thumbnails, Logos, Posters, etc. You can create a beautiful design by simply dragging and dropping the elements and photos. The online platform is free to use all templates, just One-Click to download your creations and share to your Facebook, Instagram Story, and YouTube Thumbnails, etc. immediately.
PixStudio has special features to remove the image background. With a single click, you can quickly remove the image background, and use your image with more flexibility. Just payment of $7.99 per month to use the features.
4. Fotor
In the above video, YouTuber BBelleGames walks you through all of the features you can use to build your channel art in Fotor.
Fotor is another free online drag-n-drop program with YouTube channel art templates. You can create your banner with Fotor in 4 steps. First open the Design feature and choose a template. Second, either choose a design or build one from scratch. Third, overlay images and any text you want over your background. Finally, save your banner and choose a format to export it in.
The free version of Fotor will work well enough for most YouTubers, but you can also upgrade to their paid Pro program to unlock more content and features.
5. Visme
Visme offers 50 YouTube channel art templates which you can customize the text of for free. You just create a free account, choose the template that best suits your channel, insert your own text and edit that text’s font and color.
6. YourTube
YourTube has a ton of really nice looking channel art templates you can download for free. The downloads include both PSD (Photoshop) files and the background images without text. This is great because you’ll have an editable file you can build on in Photoshop, if you have it, and an image file you can use in combination with a free service like Canva if you don’t.
7. Banner Snack
Banner Snack is for all kinds of social media graphics from YouTube channel art to Twitter headers. It’s a high quality service that’s been used by a lot of major brands, like Lego and Xerox. The only downside of Banner Snack is that their free service is limited and has a watermark. You need to be paying at least $7 per month in order to get rid of the watermark.
Let us know if you know anywhere else to get free YouTube channel art templates!
Richard Bennett
Richard Bennett is a writer and a lover of all things video.
Follow @Richard Bennett
Also read:
- [New] In 2024, Cross-Device Synchronization Aligning Zoom with Calendar Events
- [New] In 2024, Novice's Compendium Understanding Pixel Perfection
- [Updated] Free and Paid Drawing Tools for Windows Enthusiasts for 2024
- [Updated] Unveiling Six Techniques to Screen Record Your Streamed Movies on MacOS for 2024
- 2024 Approved The Ultimate Guide to Transforming Views Into Revenue
- Epicurean Envoys The Best Food Vloggers to Watch
- Evasion Techniques for YouTube Bans
- Explore Free YouTube Pic Themes
- Foremost Frame Openers Identifying the Most Effective 16 YouTube Intros
- How to Add Music to iMovie From YouTube?
- How to Downgrade iPhone 15 to the Previous iOS Version? | Dr.fone
- In 2024, 8 Best Wedding Videos on YouTube and Vimeo
- In 2024, Building Audience Connection with Empowerment Vlogs
- In 2024, Chortle Chronicles Recording 7 Amusing Video Adventures
- In 2024, Top-Notch Solutions for Disabled Apple ID On Apple iPhone 13 mini Making It Possible
- Italy Uncovered: Essential Phrases for a Rich Experience
- Resetting and Reinstalling Windows on Your Dell Device: Tips & Techniques
- Title: Elevating YouTube Productions with Effective Video Lighting
- Author: Kevin
- Created at : 2025-01-28 17:51:28
- Updated at : 2025-01-29 20:28:52
- Link: https://youtube-videos.techidaily.com/elevating-youtube-productions-with-effective-video-lighting/
- License: This work is licensed under CC BY-NC-SA 4.0.