
:max_bytes(150000):strip_icc()/PolkAudioRC80i-594adc4a3df78cae81a59280.jpg)
"Elevate YouTube Content Advanced Editing Using WM Maker for 2024"
Elevate YouTube Content: Advanced Editing Using WM Maker
How to Edit YouTube videos in Windows Movie Maker

Richard Bennett
Mar 27, 2024• Proven solutions
We all know YouTube is an important platform for sharing and watching videos. Are you a YouTuber looking for how to edit YouTube video with the best YouTube movie maker? You have come the right place if you wonder how to edit a video for YouTube on Windows. While, if you have free Windows Movie Maker already installed on your computer, you can edit YouTube videos in Windows Movie Maker and then upload to YouTube directly. In this article, I will show you all the information you need to know about how to edit a video for YouTube in Windows Movie Maker with step by step.
You may also like : The Ultimate Guide to YouTube Video Editing Tools
In case that you do not have free Windows Movie Maker in your computer, you may need to download it from other website since Microsoft has removed the downloading link after January 2017. Please pay attention when downloading the Movie Maker application from website and never download it from untrusted website.
A better way to edit YouTube Videos - Wondershare Filmora supports many formats including MP4, MOV, MKV, and FLV, which means that you will not need to convert the files before and after editing. Like Windows Movie Maker, Wondershare Filmora is easy to use but comes with many more features that allow for professional-grade videos. One of these features is the animated text. There are also built-in presets that you can use to quickly edit your videos. There is also the option to directly upload a video to YouTube from Filmora, so no time is wasted waiting for a video to process.
 Download Mac Version ](https://tools.techidaily.com/wondershare/filmora/download/ )
It is hard to list all the information of how to use Filmora to edit YouTube videos here, but we have composed an article about how to edit videos, you can check How to Edit Video in Filmora: Beginners’ Guide .
Windows Movie Maker YouTube: How to Edit YouTube Videos?
Before editing the video in Windows Movie Maker , you have to make sure that the video format is supported by free Windows Movie Maker. As you may know that Window Movie Maker only accept the following file formats at importing: .WMV/.ASF, .MPG (MPEG-1), .AVI (DV-AVI), .WMA, .WAV, and .MP3. Importing formats such as MP4/3GP, FLV and MOV, are also supported you are running Windows 7 or later and you have installed the necessary codec as well.
If your videos are not supported at importing in Windows Movie Maker, you may need to converter it first or choose a video editor like Filmora video editor which supports the almost all popular formats.
Step 1: Import Video Files Into Windows Movie Maker

To import video or photo into Windows Movie Maker, you can click on the button Add Videos or Photos located at the top of the program. A file window will open, and you can select the videos from any area of your computer. Once you have the files selected, click OK to import the files to the storyboard in the right hand panel.
You can also choose to record a webcam on your windows 10 or windows 7 computer and use it as the material.

Step 2: Trim/Cut/Split/Combine videos in Windows Movie Maker
Preview the video clips in the preview box. You can always use the Previous Frame or Next Frame to preview video frame by frame. When editing a video for YouTube, you may need to trim to remove unwanted parts from the video , combine several clips into a new one or split the video into several smaller parts .
To remove any parts of the video that you do not want in the final version of the video, locate the start frame that you want to remove in the storyboard, and then click the Split button to get the starting point of the split segment, and then locate the end frame that you want to remove and click Split again. Right-click the split video clip you want to remove and select Remove from the context menu. This can be done as many times as you want.

Step 3: Apply Transitions and Visual Effects to YouTube Video
Once you have all the clips that you want in your video, you can then add transitions to the video. At the top of Windows Movie Maker, there is a button that says Animations. This will open a menu that has different options. You need to select the clip, and add the transition that you want. The program does the rest of the work. You can see how it looks by clicking play.

Applying visual effects, overlays and filters work in the same way, but you click on Visual Effects, which is located at the top of the window. You can apply effects to any clip as along as the clip is selected first.
Step 4: Edit/Mute Audio in Video or Add New Audio Sound
If you are planning on adding music to your video, you should think about muting the audio in video or decrease the audio volume in Video. Double click the video clip to enter the Edit panel, and then then click on Video Volume button. You can then mute the audio by drag the volume slider to the left end. Of course, you can adjust the video audio volume per your need. This will affect the all the sounds on that video clip. If you want to mute all the clips, you need to select all the clips, or you will end up with one clip with no sound, and the rest of the clips having sound.

Once the sound has been adjusted on the clips, you can add new audio sound to the video. You can record narrations for your YouTube video in Windows Movie Maker by clicking Record narration button in Home tab and add music to video by clicking Add music button and select the music to import it. You can add music from your computer or find new music sound from AudioMicro, Vimeo or Free Music Archive online.

After importing the new audio file for your YouTube video, you can now adjust the music volume. In the Music Tools tab, there is an Option tab, you can control the volume and other options about the music.

Step 5: Add Title and Text to Video for YouTube
Windows Movie Maker allows you to add different types of text freely. You will see 3 buttons that allow different types of text to video: stationary title, captions and rolling credits. Click on Title, you can add text before the video begins; select Caption, you will write text to the video frames; and click Credits will add end credits to the end of the video.

After selecting the type of text you want, you can enter your text and edit the text effects. You can change the text duration and apply text visual effects, and change the text outline size and more.

Check the detailed information of How to Add Text in Windows Movie Maker .
Step 6: Save and Publish
Once all the edits are done, you can save the video by clicking on File then clicking on Publish Movie. You will need to select where you want to save the file and the file type. Since we are editing videos for YouTube, choose YouTube to upload the edited video to YouTube. You can also save the video in computer with different formats, resolution or burn to DVD. Windows Movie Maker also allows you to save the Video for Email or for mobile devices.

Conclusion
That’s it. That’s how you can edit your YouTube video with Windows Movie Maker. It is a great YouTube video editor to make video with various features. However, you may consider other YouTube movie maker as it won’t updated. Why not try Filmora. It is one of the best movie editor for YouTube. Download it now to have a try!
Download Mac Version ](https://tools.techidaily.com/wondershare/filmora/download/ )
Richard Bennett
Richard Bennett is a writer and a lover of all things video.
Follow @Richard Bennett
Richard Bennett
Mar 27, 2024• Proven solutions
We all know YouTube is an important platform for sharing and watching videos. Are you a YouTuber looking for how to edit YouTube video with the best YouTube movie maker? You have come the right place if you wonder how to edit a video for YouTube on Windows. While, if you have free Windows Movie Maker already installed on your computer, you can edit YouTube videos in Windows Movie Maker and then upload to YouTube directly. In this article, I will show you all the information you need to know about how to edit a video for YouTube in Windows Movie Maker with step by step.
You may also like : The Ultimate Guide to YouTube Video Editing Tools
In case that you do not have free Windows Movie Maker in your computer, you may need to download it from other website since Microsoft has removed the downloading link after January 2017. Please pay attention when downloading the Movie Maker application from website and never download it from untrusted website.
A better way to edit YouTube Videos - Wondershare Filmora supports many formats including MP4, MOV, MKV, and FLV, which means that you will not need to convert the files before and after editing. Like Windows Movie Maker, Wondershare Filmora is easy to use but comes with many more features that allow for professional-grade videos. One of these features is the animated text. There are also built-in presets that you can use to quickly edit your videos. There is also the option to directly upload a video to YouTube from Filmora, so no time is wasted waiting for a video to process.
Download Mac Version ](https://tools.techidaily.com/wondershare/filmora/download/ )
It is hard to list all the information of how to use Filmora to edit YouTube videos here, but we have composed an article about how to edit videos, you can check How to Edit Video in Filmora: Beginners’ Guide .
Windows Movie Maker YouTube: How to Edit YouTube Videos?
Before editing the video in Windows Movie Maker , you have to make sure that the video format is supported by free Windows Movie Maker. As you may know that Window Movie Maker only accept the following file formats at importing: .WMV/.ASF, .MPG (MPEG-1), .AVI (DV-AVI), .WMA, .WAV, and .MP3. Importing formats such as MP4/3GP, FLV and MOV, are also supported you are running Windows 7 or later and you have installed the necessary codec as well.
If your videos are not supported at importing in Windows Movie Maker, you may need to converter it first or choose a video editor like Filmora video editor which supports the almost all popular formats.
Step 1: Import Video Files Into Windows Movie Maker
To import video or photo into Windows Movie Maker, you can click on the button Add Videos or Photos located at the top of the program. A file window will open, and you can select the videos from any area of your computer. Once you have the files selected, click OK to import the files to the storyboard in the right hand panel.
You can also choose to record a webcam on your windows 10 or windows 7 computer and use it as the material.
Step 2: Trim/Cut/Split/Combine videos in Windows Movie Maker
Preview the video clips in the preview box. You can always use the Previous Frame or Next Frame to preview video frame by frame. When editing a video for YouTube, you may need to trim to remove unwanted parts from the video , combine several clips into a new one or split the video into several smaller parts .
To remove any parts of the video that you do not want in the final version of the video, locate the start frame that you want to remove in the storyboard, and then click the Split button to get the starting point of the split segment, and then locate the end frame that you want to remove and click Split again. Right-click the split video clip you want to remove and select Remove from the context menu. This can be done as many times as you want.
Step 3: Apply Transitions and Visual Effects to YouTube Video
Once you have all the clips that you want in your video, you can then add transitions to the video. At the top of Windows Movie Maker, there is a button that says Animations. This will open a menu that has different options. You need to select the clip, and add the transition that you want. The program does the rest of the work. You can see how it looks by clicking play.
Applying visual effects, overlays and filters work in the same way, but you click on Visual Effects, which is located at the top of the window. You can apply effects to any clip as along as the clip is selected first.
Step 4: Edit/Mute Audio in Video or Add New Audio Sound
If you are planning on adding music to your video, you should think about muting the audio in video or decrease the audio volume in Video. Double click the video clip to enter the Edit panel, and then then click on Video Volume button. You can then mute the audio by drag the volume slider to the left end. Of course, you can adjust the video audio volume per your need. This will affect the all the sounds on that video clip. If you want to mute all the clips, you need to select all the clips, or you will end up with one clip with no sound, and the rest of the clips having sound.
Once the sound has been adjusted on the clips, you can add new audio sound to the video. You can record narrations for your YouTube video in Windows Movie Maker by clicking Record narration button in Home tab and add music to video by clicking Add music button and select the music to import it. You can add music from your computer or find new music sound from AudioMicro, Vimeo or Free Music Archive online.
After importing the new audio file for your YouTube video, you can now adjust the music volume. In the Music Tools tab, there is an Option tab, you can control the volume and other options about the music.
Step 5: Add Title and Text to Video for YouTube
Windows Movie Maker allows you to add different types of text freely. You will see 3 buttons that allow different types of text to video: stationary title, captions and rolling credits. Click on Title, you can add text before the video begins; select Caption, you will write text to the video frames; and click Credits will add end credits to the end of the video.
After selecting the type of text you want, you can enter your text and edit the text effects. You can change the text duration and apply text visual effects, and change the text outline size and more.
Check the detailed information of How to Add Text in Windows Movie Maker .
Step 6: Save and Publish
Once all the edits are done, you can save the video by clicking on File then clicking on Publish Movie. You will need to select where you want to save the file and the file type. Since we are editing videos for YouTube, choose YouTube to upload the edited video to YouTube. You can also save the video in computer with different formats, resolution or burn to DVD. Windows Movie Maker also allows you to save the Video for Email or for mobile devices.
Conclusion
That’s it. That’s how you can edit your YouTube video with Windows Movie Maker. It is a great YouTube video editor to make video with various features. However, you may consider other YouTube movie maker as it won’t updated. Why not try Filmora. It is one of the best movie editor for YouTube. Download it now to have a try!
Download Mac Version ](https://tools.techidaily.com/wondershare/filmora/download/ )
Richard Bennett
Richard Bennett is a writer and a lover of all things video.
Follow @Richard Bennett
Step-by-Step Guide to Analyzing YouTube Engagement
How to View YouTube Statistics
Richard Bennett
Oct 26, 2023• Proven solutions
Learn how to view YouTube statistics and you can grow your channel faster. By paying attention to your statistics, which are available for free to every YouTuber in the Analytics section of the Creator Studio, you will be able to see how successful your individual videos are and replicate that success.
The information available for each video includes how many new subscribers it attracted and how much watch time it has so far (which is important if you want to monetize someday). By looking at which videos are performing well in these areas you can determine what you are doing right and replicate that success in future videos.
- How to View Your YouTube Statistics
- Interpreting YouTube Watch Time Reports
- Interpreting YouTube Interaction Reports
- How to View Other People’s YouTube Statistics
Making Better YouTube Videos with Filmora to Get More Views
As one of the best video editing software for YouTube, Filmora provides lots of templates and effects with an intuitive interface, which saves much time. After editing, you can upload the video to YouTube directly when export. Download the free trial version below and start making YouTube videos with Filmora.

How to View Your YouTube Statistics
In order to view your YouTube Analytics, sign in to your YouTube account and go to your Creator Studio. From there, click into the Analytics tab in the menu on the left of your screen.
In order to check which of your videos are performing the best, click on Watch time under Watch time reports. At the top of the page there’ll be a graph of your watch time in general, and if you scroll down you’ll see a list of your videos ranked by watch time. The best performing ones will be at the top and, to see more stats related to these high-performing videos, simply click on their titles. Afterwards, you’ll be able to click around the different sections in your Analytics and see reports relating to the specific video you clicked on.
The two main types of analytics reports are Watch Time Reports and Interaction Reports.
1. Interpreting YouTube Watch Time Reports
To find Watch time reports you just need to log into your Google account, go to the Creator studio, click the analytics tab, and then click on watch time. You can see the watch time of every video on your channel, which is important data to have because watch time is the most important factor when it comes to ranking your video in search results.
A watch time report includes the total amount of time that your video, or a selection of videos, is actually being watched for. In order to make sure that you are publishing only quality videos you need to make sure that your viewers are consistently sticking to your videos and watching them all away through, or at least to the half-way mark. Watch time represents one of the most meaningful metrics in ensuring that you are engaging your audience.
YouTube analytics can now display a watch time of every video that you have produced. Seeing the metrics on how long people are actually watching every video that you produce can show you what you’ve done right in the past and what you need to do more of to continue raising your watch time.
Alongside watch time you can see the average duration individual viewers are watching your videos for. The average percentage of your video that gets viewed will showcase areas where you may be struggling with your video content. For example, if an abnormally high number of viewers are clicking away during your intro, there’s probably something about that clip that needs to be changed.
In the watch time reports for individual videos, you will be able to see data on where your views are coming from and which demographics are watching the most. Where your viewers are watching, in terms of desktop or mobile, is also interesting data that is available in this section.
Click here for more tips onincreasing your views .
2. Interpreting YouTube Interaction Reports
Interaction reports are related to the actions viewers take – i.e. subscribing to your channel, liking your videos, or leaving a comments. You can find interaction reports in the Creator Studio under Analytics.
Interaction reports can be broken down into several different reports that can help determine the overall performance of any YouTube videos. The main interaction reports that you should be interested in include:
1. Subscribers: You can find extensive data on your subscribers, like demographics including age groups and gender. Learning more about your subscribers can help you to tailor your content. For example, if you learn that your viewers are mostly young women under 24 in the USA, you can do research into what is currently popular with young women under 24 in the USA.
Want to see your subscriber count in real-time?
2. Likes and dislikes: Likes and dislikes aren’t a powerful metric when it comes to search engine rankings, but they provide useful information to creators. If you’re getting a lot of dislikes on a video, you should look into why. If you’re getting a lot of likes on a video, it can indicate that you should focus on creating similar content.
3. Playlists: A viewer watching a video in a playlist is much more likely to keep watching more videos from that playlist, making playlists great for the growth of your channel. Reports in this section will help you figure out which of your playlists is performing best, which could give you an idea of which types of videos or video topics are going over best with your viewers.
4. Comments: Reading comments is a great way to figure out what your viewers think, but that’s not all they’re good for. If viewers return to a video to continue talking to you or other viewers then that will drive up your views and watch time. If a video is especially good at generating discussion, you should figure out why (i.e. your sign-off question) and keep doing it.
5. Sharing: Discovering where your video is being shared can be important for figuring out what platforms you should be on besides YouTube. If your video is shared and viewed a lot on Twitter, you should consider making a Twitter account for your channel.
6. Cards: Tracking the performance of your Cards will help you optimize them to direct traffic between your videos. By testing out different time stamps for cards you’ll find the perfect places to put them. By trying different messages in your cards you’ll learn how to write ‘calls to action’ that mobilize your viewers.
End screens: End Screens are essential for keeping viewers on your channel. The report of the click-through rates of your end screens is important for helping you figure out which kinds of links work, and which style of ends screen is most effective for you. Are people more likely to click when you talk to them through the end screen, or when it’s a static card?
7. 360 heat map reports: A heat map report works specifically with 360° videos if you are choosing to engage your audience with this type of content. Viewing YouTube video statistics for 360° heat maps will help to show the areas on your video that viewers are most interested in.
How to View Other Peoples YouTube Statistics
If you want to check out the statistics of rival YouTube channels (including the most subscribed channels on YouTube ), or channels you’re a fan of, try using Social Blade . Social Blade is one of the most trusted sources of YouTube data, and it may actually be easier to check your own basic stats there than in the Creator Studio sometimes due to their simple layout. To get started all you need to do is type the name of any YouTube channel into the search bar. You’ll be able to see reports on daily views, channel growth, and even estimated ad revenue (learn more about how to view a channel’s ad revenue here ).
Now that you know how to view YouTube statistics, what will you do with them?
Richard Bennett
Richard Bennett is a writer and a lover of all things video.
Follow @Richard Bennett
Richard Bennett
Oct 26, 2023• Proven solutions
Learn how to view YouTube statistics and you can grow your channel faster. By paying attention to your statistics, which are available for free to every YouTuber in the Analytics section of the Creator Studio, you will be able to see how successful your individual videos are and replicate that success.
The information available for each video includes how many new subscribers it attracted and how much watch time it has so far (which is important if you want to monetize someday). By looking at which videos are performing well in these areas you can determine what you are doing right and replicate that success in future videos.
- How to View Your YouTube Statistics
- Interpreting YouTube Watch Time Reports
- Interpreting YouTube Interaction Reports
- How to View Other People’s YouTube Statistics
Making Better YouTube Videos with Filmora to Get More Views
As one of the best video editing software for YouTube, Filmora provides lots of templates and effects with an intuitive interface, which saves much time. After editing, you can upload the video to YouTube directly when export. Download the free trial version below and start making YouTube videos with Filmora.
How to View Your YouTube Statistics
In order to view your YouTube Analytics, sign in to your YouTube account and go to your Creator Studio. From there, click into the Analytics tab in the menu on the left of your screen.
In order to check which of your videos are performing the best, click on Watch time under Watch time reports. At the top of the page there’ll be a graph of your watch time in general, and if you scroll down you’ll see a list of your videos ranked by watch time. The best performing ones will be at the top and, to see more stats related to these high-performing videos, simply click on their titles. Afterwards, you’ll be able to click around the different sections in your Analytics and see reports relating to the specific video you clicked on.
The two main types of analytics reports are Watch Time Reports and Interaction Reports.
1. Interpreting YouTube Watch Time Reports
To find Watch time reports you just need to log into your Google account, go to the Creator studio, click the analytics tab, and then click on watch time. You can see the watch time of every video on your channel, which is important data to have because watch time is the most important factor when it comes to ranking your video in search results.
A watch time report includes the total amount of time that your video, or a selection of videos, is actually being watched for. In order to make sure that you are publishing only quality videos you need to make sure that your viewers are consistently sticking to your videos and watching them all away through, or at least to the half-way mark. Watch time represents one of the most meaningful metrics in ensuring that you are engaging your audience.
YouTube analytics can now display a watch time of every video that you have produced. Seeing the metrics on how long people are actually watching every video that you produce can show you what you’ve done right in the past and what you need to do more of to continue raising your watch time.
Alongside watch time you can see the average duration individual viewers are watching your videos for. The average percentage of your video that gets viewed will showcase areas where you may be struggling with your video content. For example, if an abnormally high number of viewers are clicking away during your intro, there’s probably something about that clip that needs to be changed.
In the watch time reports for individual videos, you will be able to see data on where your views are coming from and which demographics are watching the most. Where your viewers are watching, in terms of desktop or mobile, is also interesting data that is available in this section.
Click here for more tips onincreasing your views .
2. Interpreting YouTube Interaction Reports
Interaction reports are related to the actions viewers take – i.e. subscribing to your channel, liking your videos, or leaving a comments. You can find interaction reports in the Creator Studio under Analytics.
Interaction reports can be broken down into several different reports that can help determine the overall performance of any YouTube videos. The main interaction reports that you should be interested in include:
1. Subscribers: You can find extensive data on your subscribers, like demographics including age groups and gender. Learning more about your subscribers can help you to tailor your content. For example, if you learn that your viewers are mostly young women under 24 in the USA, you can do research into what is currently popular with young women under 24 in the USA.
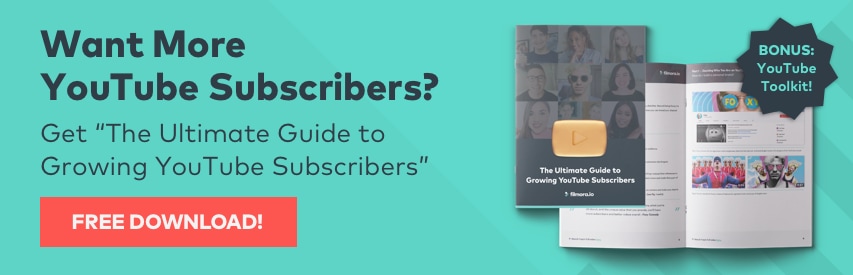
Want to see your subscriber count in real-time?
2. Likes and dislikes: Likes and dislikes aren’t a powerful metric when it comes to search engine rankings, but they provide useful information to creators. If you’re getting a lot of dislikes on a video, you should look into why. If you’re getting a lot of likes on a video, it can indicate that you should focus on creating similar content.
3. Playlists: A viewer watching a video in a playlist is much more likely to keep watching more videos from that playlist, making playlists great for the growth of your channel. Reports in this section will help you figure out which of your playlists is performing best, which could give you an idea of which types of videos or video topics are going over best with your viewers.
4. Comments: Reading comments is a great way to figure out what your viewers think, but that’s not all they’re good for. If viewers return to a video to continue talking to you or other viewers then that will drive up your views and watch time. If a video is especially good at generating discussion, you should figure out why (i.e. your sign-off question) and keep doing it.
5. Sharing: Discovering where your video is being shared can be important for figuring out what platforms you should be on besides YouTube. If your video is shared and viewed a lot on Twitter, you should consider making a Twitter account for your channel.
6. Cards: Tracking the performance of your Cards will help you optimize them to direct traffic between your videos. By testing out different time stamps for cards you’ll find the perfect places to put them. By trying different messages in your cards you’ll learn how to write ‘calls to action’ that mobilize your viewers.
End screens: End Screens are essential for keeping viewers on your channel. The report of the click-through rates of your end screens is important for helping you figure out which kinds of links work, and which style of ends screen is most effective for you. Are people more likely to click when you talk to them through the end screen, or when it’s a static card?
7. 360 heat map reports: A heat map report works specifically with 360° videos if you are choosing to engage your audience with this type of content. Viewing YouTube video statistics for 360° heat maps will help to show the areas on your video that viewers are most interested in.
How to View Other Peoples YouTube Statistics
If you want to check out the statistics of rival YouTube channels (including the most subscribed channels on YouTube ), or channels you’re a fan of, try using Social Blade . Social Blade is one of the most trusted sources of YouTube data, and it may actually be easier to check your own basic stats there than in the Creator Studio sometimes due to their simple layout. To get started all you need to do is type the name of any YouTube channel into the search bar. You’ll be able to see reports on daily views, channel growth, and even estimated ad revenue (learn more about how to view a channel’s ad revenue here ).
Now that you know how to view YouTube statistics, what will you do with them?
Richard Bennett
Richard Bennett is a writer and a lover of all things video.
Follow @Richard Bennett
Also read:
- Brief Basslines Video Music Mosaics
- 2024 Approved Craft Engaging Videos with 7 Free, Premium Soundscapes
- Branding with Visuals Inserting Watermarks Into YouTube Vids for 2024
- Adding Emojis in YouTube Discussions
- YouTube's Power Houses Most Subscribered Channels
- YouTube TV Demystified Your Complete Reference
- 2024 Approved Essential Video Concepts Fueling Creativity in YouTube Channels
- Deciphering Digital Domination A Deep Dive Into Directors' Videos
- Free End Credits Excellence Top 6 Tutorials
- In 2024, A Beginner's Path to Compiling a YouTube Playlist
- Dissecting YouTube Revenue How Much Do You Earning From AdSense per KV for 2024
- Crafting Illusions with Video Edits for 2024
- [New] Deciphering the Language of YouTube Thumbnails Effectiveness
- Top 8 Access Free Eco-Friendly VFX Backdrops Online
- In 2024, Advanced Filmmaking Techniques Selecting Top-Notch Lenses
- In 2024, Enhancing Engagement Adding Text and Links to YouTube Content
- Jumpstart Your Channel’stopwatch-Seeking Viewers with These YouTube SEO Essentials.
- [New] Avoiding Blur Techniques for Hand-Held Stability
- Your Guide to Gaining From Google A Stepwise Strategy for Tracking YouTube Income
- In 2024, Bursting Boundaries, Breaking Barriers The Top Ten Reasons for Your YouTube Viewer Void
- The Blueprint for YouTube Educational Video Success Stories
- [Updated] Conquer the Blackened Canvas of YouTube
- Beyond Likes Understanding YouTube’s True View Metrics
- [New] Elevate Your Soundbites Insights for YouTube Short Tunes
- 2024 Approved Channel Marketing Making a Trailer that Sells More
- 2024 Approved Analyzing User Interface and Features in YouTube Mobile App
- YouTube Live Thumbnails A Comprehensive Look
- In 2024, Birth of an Internet Persona – The VTuber Blueprint?
- Channel Milestone Hurdle – Cross the 10K View Threshold Fast
- Rise of the Titans Top Video Milestone Hits Achieved by 2024
- Tackling YouTube Challenges Head-On with Insights From Hub of Creators
- Mastery in Managing Online Discussions on YouTube
- Methodology Creating Life-Changing Video Guides
- [Updated] Digital Dominance Who Has the Largest Fanbase?
- Unlock YouTube Broadcast Google Meet Tutorial Steps
- [New] Elevate Your Edits The Beginner's Insider Look at Editing Techniques
- [New] Direct Your Media Essential Flv-to-YouTube Applications Ranked
- Essential Choices Top 10 Best Video Editing Software (Free, 2023) for 2024
- In 2024, 9 Essential Apps for Pulling YouTube Videos (Android)
- [Updated] Digestible Vid Info Quick Start
- Unveiling Crucial Details for ASMR Viewers
- In 2024, Audiovisual Quality Its Significance in Video Ranking
- [Updated] Best Practices for YouTube Card Implementation
- [Updated] Efficient Keyword Utilization Discover the Best 7 Online Video Tag Extractors Reviewed
- [New] Decoding the Essentials of Your YouTube TV Experience
- [New] 2024 Approved Breaking the 'RT' Barrier Sharing Photos & Vids on Twitter
- In 2024, How To Check if Your Motorola Is Unlocked
- How to Change/Fake Your Infinix Hot 40 Pro Location on Viber | Dr.fone
- [New] In 2024, Record Your Mac View in Minutes!
- In 2024, How to Screen Mirroring Vivo Y100 5G? | Dr.fone
- Tips for Choosing Location and Scheduling Music Video
- Elevating Your TikTok Presence The Essential 20 Caption List for 2024
- Speedster Software - Best Rapid Releases for Tablets & Computers
- Enhancing Visibility & Following on Instagram for 2024
- In 2024, How To Bypass the Required Apple Store Verification For Apple iPhone 13 | Dr.fone
- Why Does My Tecno Pova 5 Pro Keep Turning Off By Itself? 6 Fixes Are Here | Dr.fone
- New Professional Methods for Excising Auditory Elements From MP4 Formats for 2024
- How to Remove an AirTag from Your Apple ID Account On iPhone 13 mini?
- What You Need To Know To Improve Your Realme C33 2023 Hard Reset | Dr.fone
- [New] From Beginner to Pro The Ultimate Guide to Slow Motion on TikTok for 2024
- How to Exit Android Factory Mode On Vivo V27? | Dr.fone
- In 2024, Easy Ways to Manage Your Vivo S18 Location Settings | Dr.fone
- New Audio Conversion Made Easy 12 Essential Tools You Need for 2024
- How to Unlock SIM Card on Nokia C22 online without jailbreak
- Stepwise Guide to Documenting Team Sessions (Desktop/Mobile) for 2024
- How To Transfer Data From Apple iPhone 11 To Other iPhone 14 Pro devices? | Dr.fone
- In 2024, Fake the Location to Get Around the MLB Blackouts on Samsung Galaxy M14 4G | Dr.fone
- 2024 Approved Here Are 8 Best Video Animation App on Different Devices, Android, iPhone and iPad
- Updated 2024 Approved Free Music Making Software The Top 10 Picks
- Failed to play MOV movies on Redmi 13C
- [New] Rev Up Creativity Instagram's Best Inspirational Snapshots for 2024
- Solutions to Spy on Nokia G42 5G with and without jailbreak | Dr.fone
- [Updated] In 2024, Comprehensive Guide to Enhancing Facecam Movie Quality
- [New] 2024 Approved Top 5 Exhilarating Virtual Track Gaming Experiences
- To Help You Evaluate Which Webcam Software Best Suits Your Needs, Ive Featured Pros, Cons, Etc in This List of the Best Free Webcam Software for Windows 10 for 2024
- Updated In 2024, FCP Like a Pro Top 5 Editing Techniques to Take Your Videos to the Next Level
- Top 10 Fingerprint Lock Apps to Lock Your Itel A60s Phone
- Title: "Elevate YouTube Content Advanced Editing Using WM Maker for 2024"
- Author: Kevin
- Created at : 2024-05-25 15:06:59
- Updated at : 2024-05-26 15:06:59
- Link: https://youtube-videos.techidaily.com/elevate-youtube-content-advanced-editing-using-wm-maker-for-2024/
- License: This work is licensed under CC BY-NC-SA 4.0.
