
:max_bytes(150000):strip_icc()/55a66c62-7dd6-4b7c-b176-5942ad8b77a1-9693aedc51a242109ed21be18d9c340c.jpeg)
"Dive Into Old Content YouTube Video Recovery Guide"
Dive Into Old Content: YouTube Video Recovery Guide
How to Watch Deleted YouTube Videos Online in 2 Ways | Ultimate Guide

Richard Bennett
Mar 27, 2024• Proven solutions


YouTube features a wide variety of corporate and user-generated content ranging from music to DIY videos. Along with all this massive inflow, there are scenarios where the video content that you like or wanted to watch gets deleted for any reason. Either the uploading channel deleted the video, or YouTube sometimes deletes videos for violating any of the platform’s rules – showing the dismal message “We’re sorry, this video is no longer available”. You’ll be thinking it is probably impossible to access deleted YouTube videos that you wanted to watch so badly. Though it may be true to some extent, in reality, nothing gets deleted from the internet. To help you watch deleted YouTube videos, we’ll dive into the two most handy methods down below. So, let get started.
You might be interested in How to Make a Playlist of Uploaded Videos and Others’ Video on YouTube>>>
- Part 1: Watch Deleted YouTube Videos with a URL
- Part 2: Watch Deleted YouTube Videos without a URL
- Part 3: Bonus Tip—Make Your Own YouTube Video with Wondershare FilmoraX
Part 1: Watch Deleted YouTube Videos with a URL
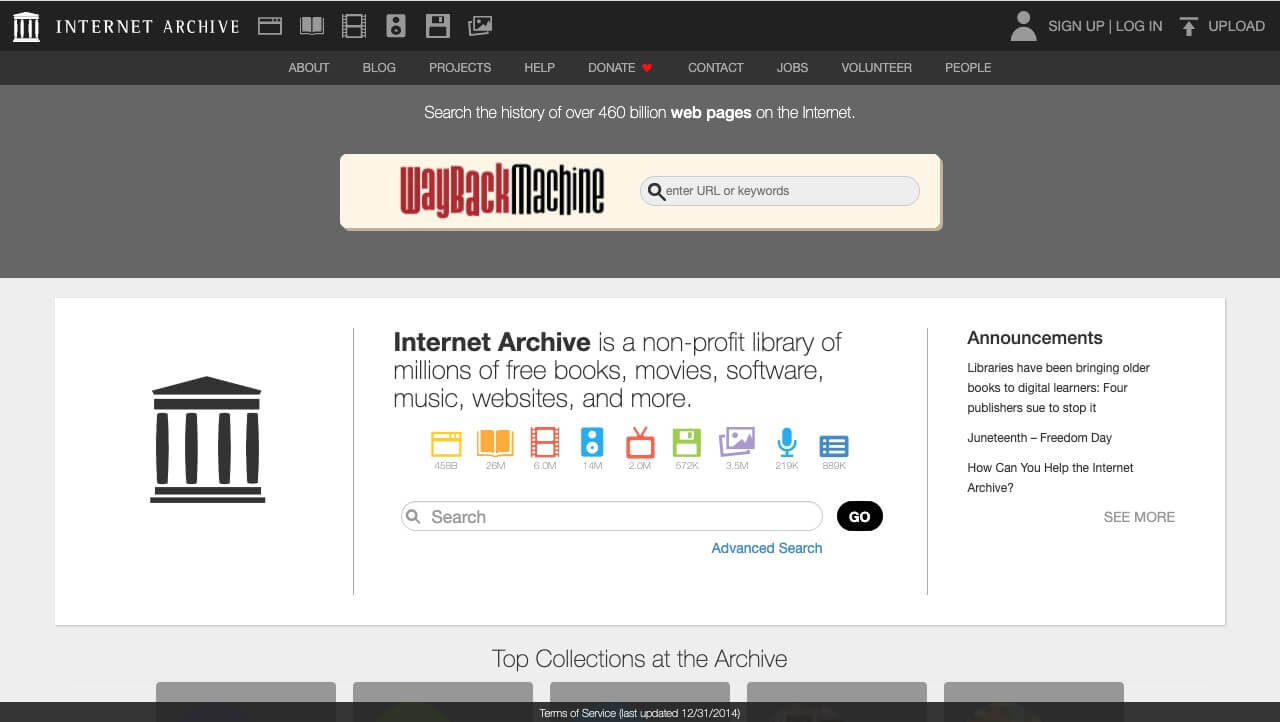
Internet Archive(known as the Wayback Machine) is a website archival system that has been collecting and cataloging websites since 1996. This means the system has effectively saved the site’s current layout and data. This enormous world archive of the Web’s past has amassed over 100 terabytes of storage with around 10 billion web pages.
On the archive.org website, you can find many of your favorite web site’s “snapshot” at a time in the past. For our case, we need to find and watch deleted YouTube videos, so for that, all we need is the link of the video, and we can most probably find it on archive.org. The steps for finding and restoring deleted YouTube videos are simple and as follows.
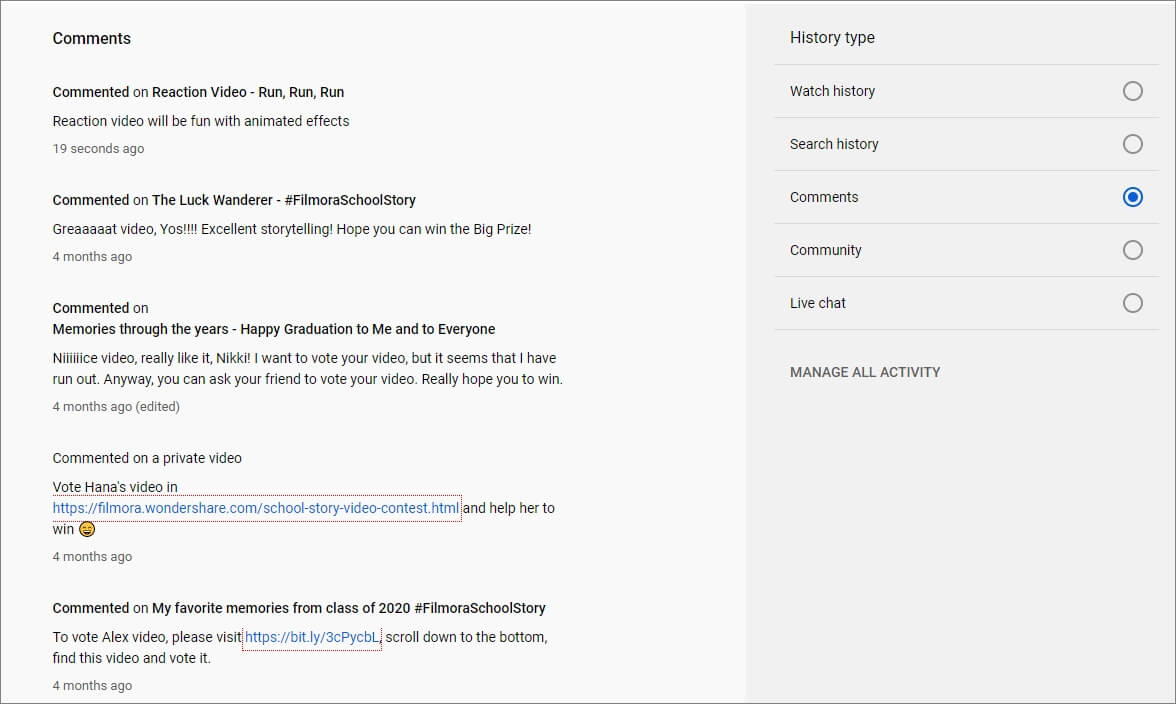
1. First of all, find the URL in your YouTube email, channel account if you’re searching for your uploaded video. You can find the link in browser history, in YouTube history, or you may have shared the link on social media.
If you want to watch a deleted YouTube video using the Wayback Machine, you must find the link to the video you want to access; without the URL, you won’t be able to access the deleted YouTube video.
2. Head over to the archive.org website and paste the YouTube video URL in the search bar and press return.
3. Once you find your video on the internet archive, you can see the details of the video.
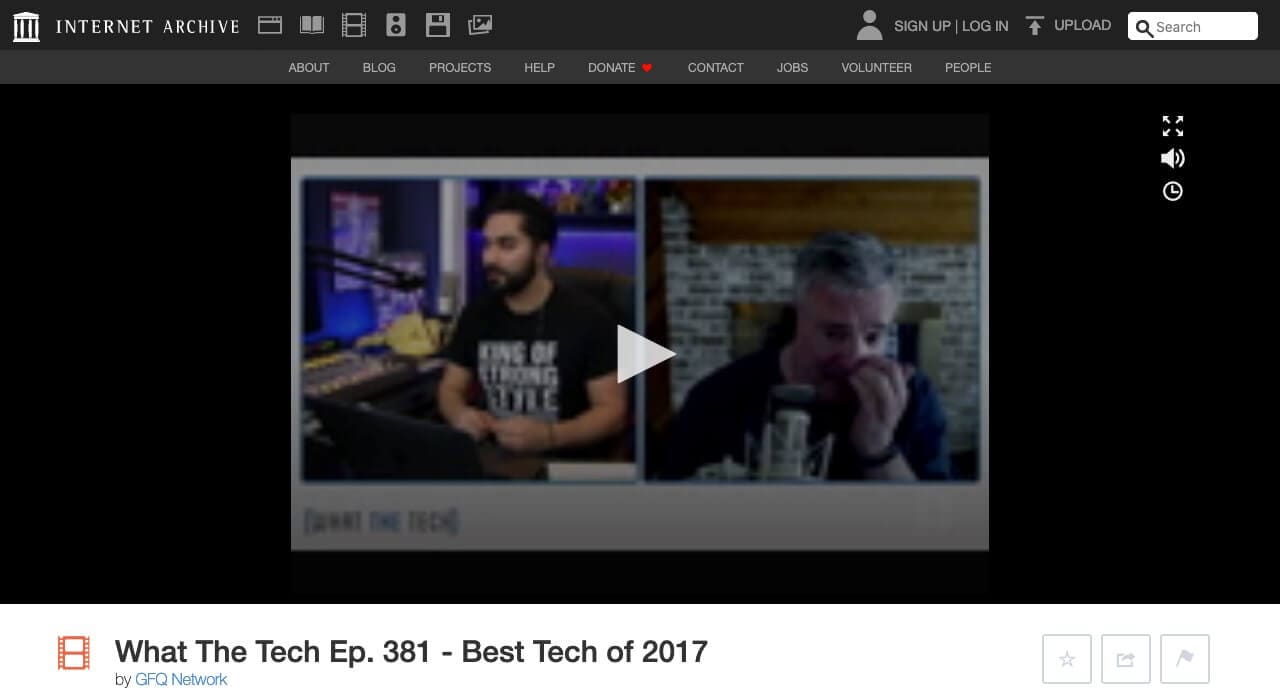
4. You won’t be able to play the video directly, but you should be able to download it. Right, click the video to find the option to download the video.

This method works mostly as the Wayback machine is pretty active and regularly crawls the web to archive the sites. But sometimes, this method may not work and would require a more sophisticated way to watch deleted YouTube videos.
Part 2: Watch Deleted YouTube Videos without a URL
But what if you don’t have a URL for the deleted YouTube video? The internet is a global village network. Everything on the internet is connected, and that connection makes it more useful for example, even though a YouTube video might be deleted, you can somehow access and watch the deleted YouTube videos without a URL because people always replicate videos and share them on other YouTube channels or social media platforms. To make sure you get to watch your favorite YouTube video again, we will dive into the vast internet and find the deleted YouTube videos.
This method can be a bit complicated and would require you to give full attention to find the video you want to watch that badly that you’ve landed on this article.
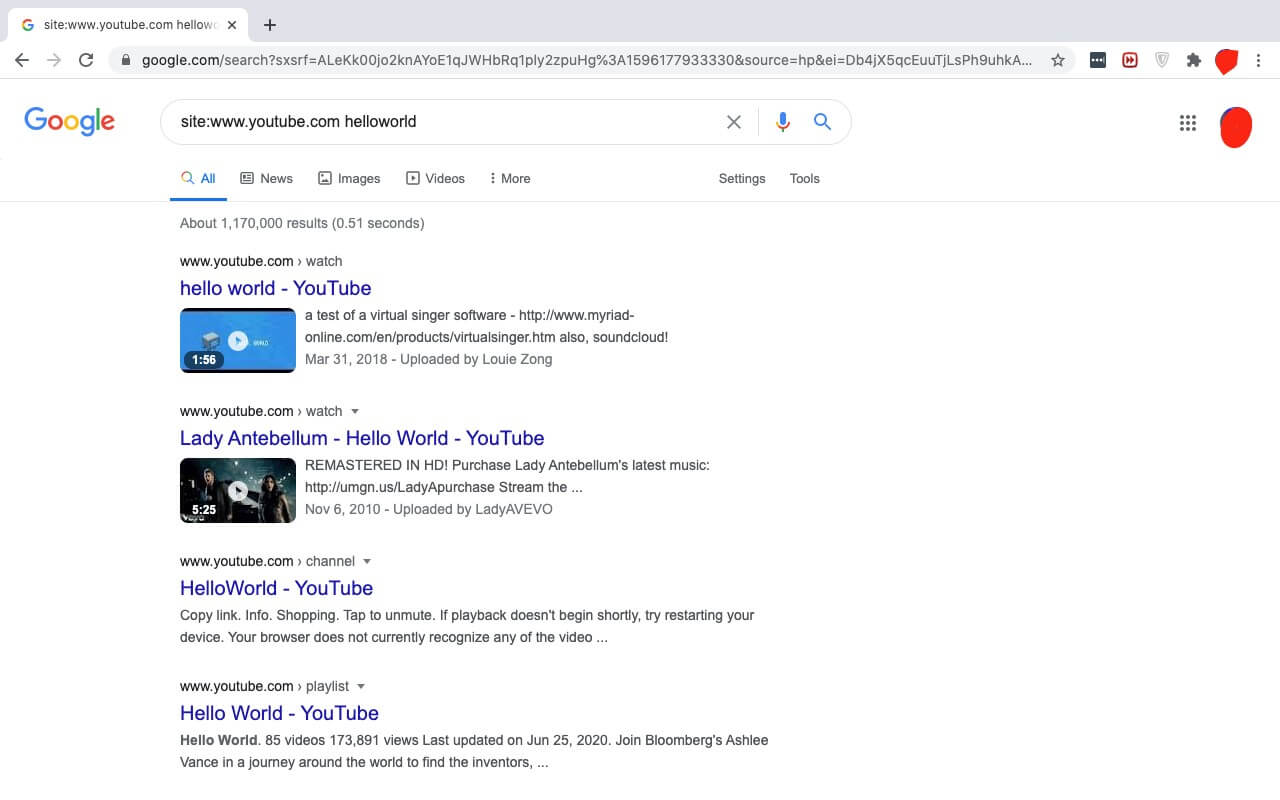
1. Open a new tab in your browser and go to the Google search bar. We’re going to employ a technique from the SEO expert’s toolbox – Google Search Operators.
2. In the search bar, type “site:www.youtube.com + name Of TheVideo”
3. This way Google will crawl all the name relevant videos only from the YouTube databases and move us closer to finding our deleted YouTube video.
4. If you know the video was shared by someone on Facebook or any other social media platform, you can change the site URL in the search bar, replacing YouTube with Facebook, for example.
5. Once you find the video URL, you can simply go back to the first method that we discussed and paste the URL into the internet archive. The archive will give you the video and you can enjoy watching a deleted YouTube video.
Note: If you still cannot find the video using this method, I’m sorry to tell you the video may be completely deleted from the server, and you cannot access it anymore.
Part 3: Bonus Tip—Make Your Own YouTube Video with Wondershare Filmora
Want to make a YouTube video again? Wondershare Filmora is a relatively lightweight and powerful platform you get an intuitive interface and the power to create wonderful, unique content. To help you make your own YouTube video with Filmora, we’ll go through a short introduction of the flow and features first:
- Organize media with folders and projects
- Cutting and trimming raw footage
- Unlimited Layering
- Visual effects and filters
- Attach/detach audio and music
- Add creative text and icons with a wide range of templates to choose from
- Advanced color correction tools
- Export videos to YouTube directly and support various output formats
Make a YouTube video with several clicks using Wondershare Filmora:
1. Download and install Wondershare Filmora on your computer by tapping the download wizard below. Remember to join the Wondershare Video Community to connect with other video creators.
2. Launch Wondershare Filmora, add your videos to the Media Library. And you’ll also be greeted with a sleek and simple interface with controls for everything such as transitions, titles, layering clips, soundtrack, and more.

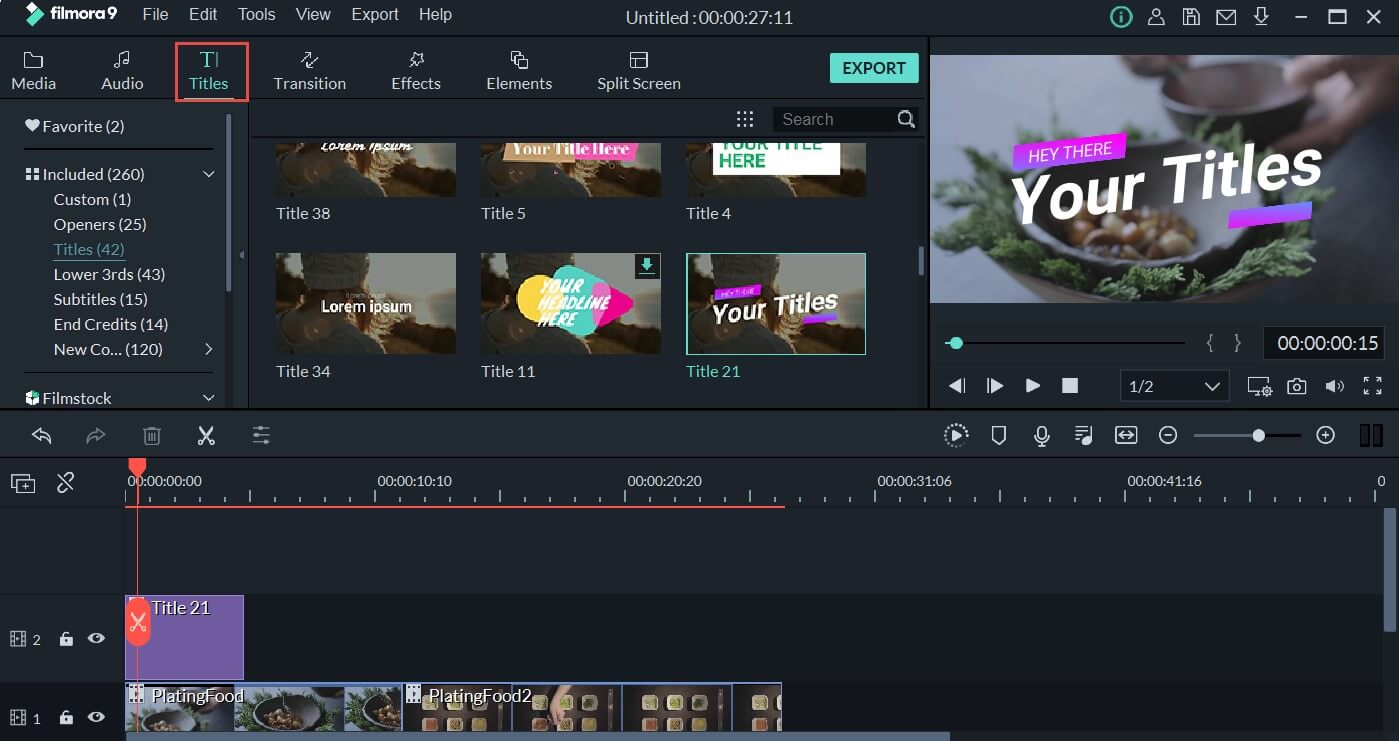
3. Add your video to the timeline, then go to the Titles tab, and you will see hundreds of titles and text templates. Select the template you love and add it to the video.
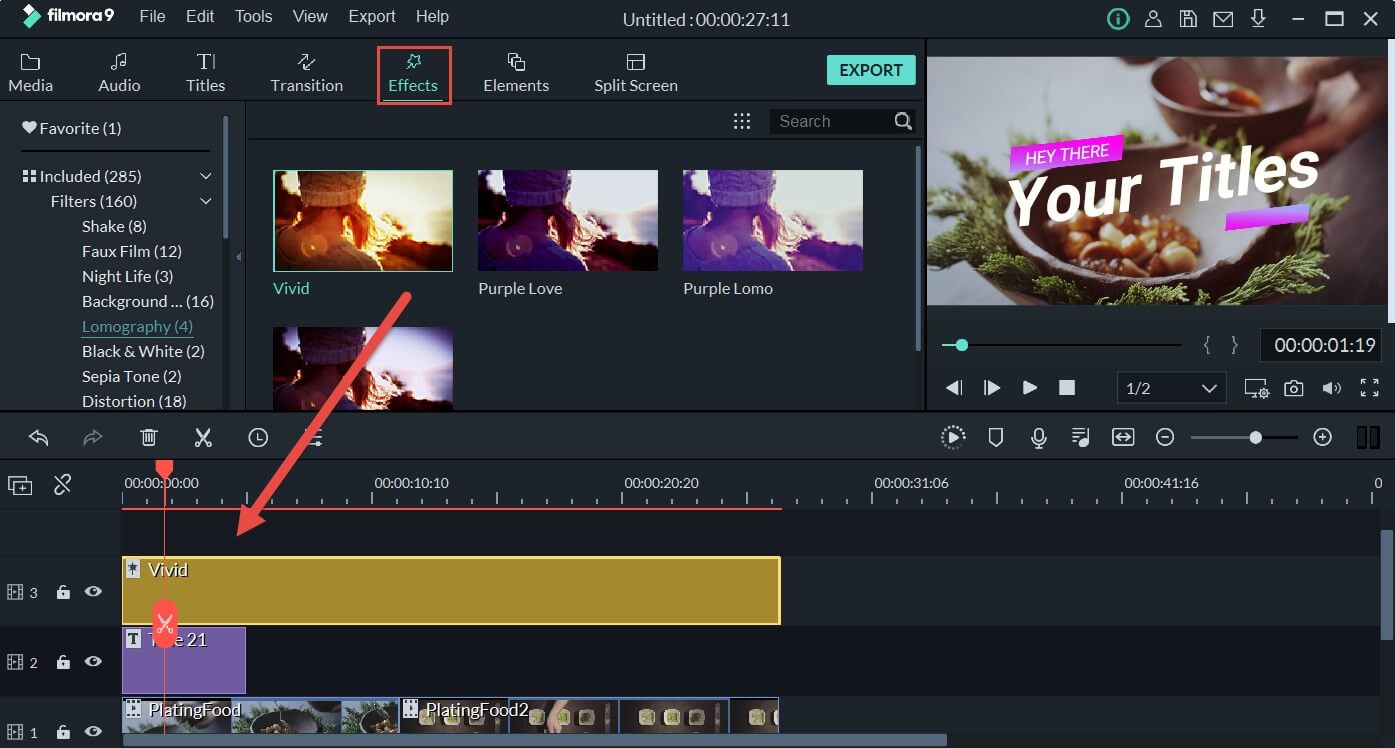
4. Then you can also go to the Effects tab and apply astonishing filters to the video
5. Once you’re done, you can click Export and upload your video to YouTube directly.
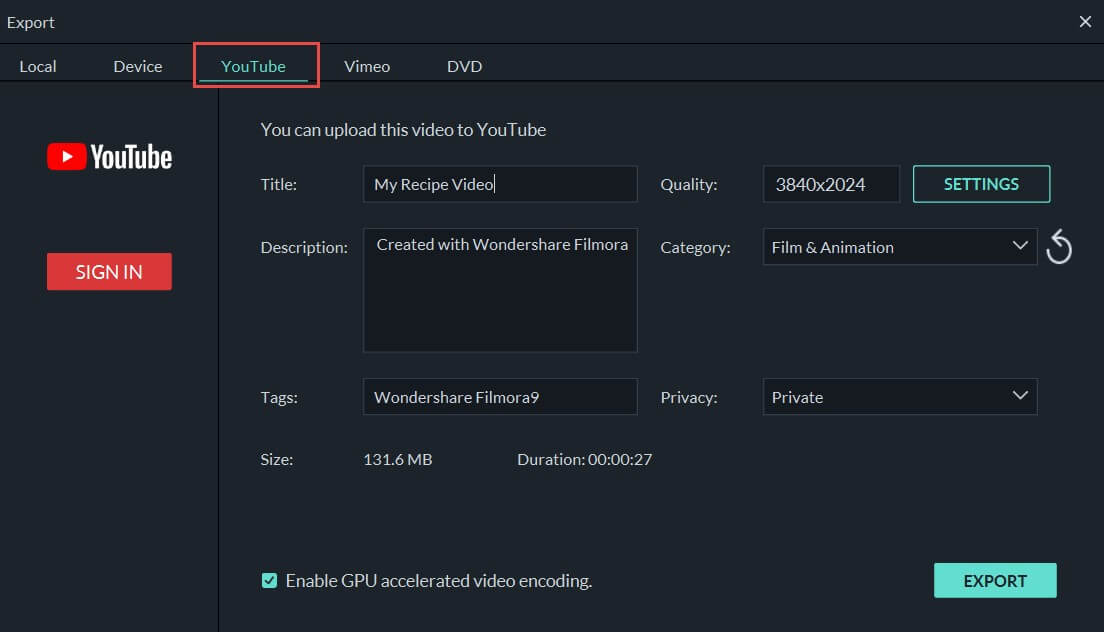
The free version will have a watermark on the exported video.
There’s nothing more delightful than to put your skills to work and save time by using Filmora. The time you save can be put into making more content and editing videos to boast of your creativity to friends.
Conclusion
YouTube has immersed so much in our day-to-day life that on average a mobile viewing session lasts more than 40 mins. To satiate our thirst for video content, YouTube has become the sole free platform. But even if your favorite song or movie gets deleted, you don’t have to worry as I’ve compiled the best solution to watch deleted YouTube videos and even be able to restore deleted YouTube videos to relish watching them with your friends and family. Leave your comments below if you love this article.
Richard Bennett
Richard Bennett is a writer and a lover of all things video.
Follow @Richard Bennett
Richard Bennett
Mar 27, 2024• Proven solutions
YouTube features a wide variety of corporate and user-generated content ranging from music to DIY videos. Along with all this massive inflow, there are scenarios where the video content that you like or wanted to watch gets deleted for any reason. Either the uploading channel deleted the video, or YouTube sometimes deletes videos for violating any of the platform’s rules – showing the dismal message “We’re sorry, this video is no longer available”. You’ll be thinking it is probably impossible to access deleted YouTube videos that you wanted to watch so badly. Though it may be true to some extent, in reality, nothing gets deleted from the internet. To help you watch deleted YouTube videos, we’ll dive into the two most handy methods down below. So, let get started.
You might be interested in How to Make a Playlist of Uploaded Videos and Others’ Video on YouTube>>>
- Part 1: Watch Deleted YouTube Videos with a URL
- Part 2: Watch Deleted YouTube Videos without a URL
- Part 3: Bonus Tip—Make Your Own YouTube Video with Wondershare FilmoraX
Part 1: Watch Deleted YouTube Videos with a URL
Internet Archive(known as the Wayback Machine) is a website archival system that has been collecting and cataloging websites since 1996. This means the system has effectively saved the site’s current layout and data. This enormous world archive of the Web’s past has amassed over 100 terabytes of storage with around 10 billion web pages.
On the archive.org website, you can find many of your favorite web site’s “snapshot” at a time in the past. For our case, we need to find and watch deleted YouTube videos, so for that, all we need is the link of the video, and we can most probably find it on archive.org. The steps for finding and restoring deleted YouTube videos are simple and as follows.
1. First of all, find the URL in your YouTube email, channel account if you’re searching for your uploaded video. You can find the link in browser history, in YouTube history, or you may have shared the link on social media.
If you want to watch a deleted YouTube video using the Wayback Machine, you must find the link to the video you want to access; without the URL, you won’t be able to access the deleted YouTube video.
2. Head over to the archive.org website and paste the YouTube video URL in the search bar and press return.
3. Once you find your video on the internet archive, you can see the details of the video.
4. You won’t be able to play the video directly, but you should be able to download it. Right, click the video to find the option to download the video.
This method works mostly as the Wayback machine is pretty active and regularly crawls the web to archive the sites. But sometimes, this method may not work and would require a more sophisticated way to watch deleted YouTube videos.
Part 2: Watch Deleted YouTube Videos without a URL
But what if you don’t have a URL for the deleted YouTube video? The internet is a global village network. Everything on the internet is connected, and that connection makes it more useful for example, even though a YouTube video might be deleted, you can somehow access and watch the deleted YouTube videos without a URL because people always replicate videos and share them on other YouTube channels or social media platforms. To make sure you get to watch your favorite YouTube video again, we will dive into the vast internet and find the deleted YouTube videos.
This method can be a bit complicated and would require you to give full attention to find the video you want to watch that badly that you’ve landed on this article.
1. Open a new tab in your browser and go to the Google search bar. We’re going to employ a technique from the SEO expert’s toolbox – Google Search Operators.
2. In the search bar, type “site:www.youtube.com + name Of TheVideo”
3. This way Google will crawl all the name relevant videos only from the YouTube databases and move us closer to finding our deleted YouTube video.
4. If you know the video was shared by someone on Facebook or any other social media platform, you can change the site URL in the search bar, replacing YouTube with Facebook, for example.
5. Once you find the video URL, you can simply go back to the first method that we discussed and paste the URL into the internet archive. The archive will give you the video and you can enjoy watching a deleted YouTube video.
Note: If you still cannot find the video using this method, I’m sorry to tell you the video may be completely deleted from the server, and you cannot access it anymore.
Part 3: Bonus Tip—Make Your Own YouTube Video with Wondershare Filmora
Want to make a YouTube video again? Wondershare Filmora is a relatively lightweight and powerful platform you get an intuitive interface and the power to create wonderful, unique content. To help you make your own YouTube video with Filmora, we’ll go through a short introduction of the flow and features first:
- Organize media with folders and projects
- Cutting and trimming raw footage
- Unlimited Layering
- Visual effects and filters
- Attach/detach audio and music
- Add creative text and icons with a wide range of templates to choose from
- Advanced color correction tools
- Export videos to YouTube directly and support various output formats
Make a YouTube video with several clicks using Wondershare Filmora:
1. Download and install Wondershare Filmora on your computer by tapping the download wizard below. Remember to join the Wondershare Video Community to connect with other video creators.
2. Launch Wondershare Filmora, add your videos to the Media Library. And you’ll also be greeted with a sleek and simple interface with controls for everything such as transitions, titles, layering clips, soundtrack, and more.
3. Add your video to the timeline, then go to the Titles tab, and you will see hundreds of titles and text templates. Select the template you love and add it to the video.
4. Then you can also go to the Effects tab and apply astonishing filters to the video
5. Once you’re done, you can click Export and upload your video to YouTube directly.
The free version will have a watermark on the exported video.
There’s nothing more delightful than to put your skills to work and save time by using Filmora. The time you save can be put into making more content and editing videos to boast of your creativity to friends.
Conclusion
YouTube has immersed so much in our day-to-day life that on average a mobile viewing session lasts more than 40 mins. To satiate our thirst for video content, YouTube has become the sole free platform. But even if your favorite song or movie gets deleted, you don’t have to worry as I’ve compiled the best solution to watch deleted YouTube videos and even be able to restore deleted YouTube videos to relish watching them with your friends and family. Leave your comments below if you love this article.
Richard Bennett
Richard Bennett is a writer and a lover of all things video.
Follow @Richard Bennett
Enhance Your Channel’s Image: Adding Watermarks & Logos to Video Posts
How to Add Logo or Watermark to YouTube Video
Richard Bennett
Mar 27, 2024• Proven solutions
A watermark is a still image that is usually plugged in the videos, for the purpose of claiming copyrights or publicity purpose. YouTube generally carries a “branding” option where you can brand your video with your channel. This doesn’t provide a stable watermark. Therefore, when someone downloads that video using a second party (YouTube downloader) it gets removed. For this purpose the legal author will have to put a Channel watemark on their YouTube videos. In this guide, we will show you how to add watermark to your YouTube videos, existing or new.
You May Also Like:
Best Watermark Apps for iPhone - How to Watermark Photos on iPhone >>
Wondershare AniEraser Seamless, Effortless, Intuitive.
AniEraser makes it easy to perfect any photo or video; no matter the device or platform - experience a smooth, effortless transformation of your image and maximize its potential with just one click.
Make your moment perfect.
Free Download Free Download Edit online

![]()
How to Add a Watermark to Your YouTube Videos
- Part 1: How to add logo or watermark to in existing YouTube videos
- Part 2: Add logos or watermarks to your videos before uploading
Part 1: How to add logo or watermark to in existing YouTube videos
To add a watermark to your previously uploaded videos you will need to have created and saved your watermark outside of your video editing program.
- Sign in to your YouTube account. Click on the thumbnail image of your account at the top right corner. This will give you a drop down menu. Then Click on the small gear (indicating settings)

- This will lead you to setting center. Click on “view additional features”

- To the left of the window, Click the third option of “branding”
- Click on “add watermark”. Then you can choose an image from your computer. After your image is uploaded, click save.

Notes
YouTube watermark size: Your watermark should be transparent, square, and larger than 50x50 pixels, which is the size it will be shrunk down to when it appears in the corner of your videos.
YouTube watermark starting time: you will have the option of choosing a start time for your watermark, making it appear only at the end of your video, or having it there for the entire length of your video. Once that is done click ‘Update’ and your watermark will be applied to your videos.
YouTube watermark color: Youtube suggests that your watermark have only one color. The point is that you should not use anything flashy that will take attention away from your video, so having two or three colors is not necessarily wrong if your design is subtle.
Here is a tutorial video for how to add watermark to Your YouTube videos:
Part 2: Add logos or watermarks to your videos before uploading
1. Wondershare Filmora
Wondershare Filmora which is one of the ideal video editing tools especially when it comes to watermarking your videos . It helps you in adding static and video watermarks over the video. The basic theme of the video watermarking is the concept of picture-in-picture .
![]()
The following steps have to be taken to add a watermark:
- Add the video and watermarking data by drag dropping it into the workspace
- Drag the required video on the timeline and the watermark on it as well
- Adjust the watermark and add pre-made special effects to it
- Mask the watermark in the shape you like
- Save the video
Download Mac Version ](https://tools.techidaily.com/wondershare/filmora/download/ )
2. Windows movie maker
Windows movie maker is free default windows software that can easily add watermark to your videos to secure your copyrights. It can cater two types of watermarks; images and text. For images, it just supports PNG and GIF format files and generally doesn’t support transparency. Moreover, an external file, Windows Logo Locator is needed for placing the logo at different positions.
How to add watermark to video with Windows Movie Maker
Adding Text watermark:
- Open windows movie maker
- Click on ‘videos’ under the title of import.
- Import your video to the timeline.
- Right beneath imports under the category of edit you will find ‘titles and credits’. Click.
- Enter the text for watermark.
- Choose the title positioning, font and transparency.
- Add title. You will find it along the length of timeline. You may drag to expand it, for viewing it during the entire videos length. Select file and click publish video.
Adding image watermark:
The image should be in .PNG or .GIF format.
- Save the image in >C:\Program Files\Movie Maker\Shared\AddOnTFX\.
- Download a logo Locator as per your installed windows from FX archives.
- Select the location of the logo in your video where you want it to appear.
- Choose the screen size and the logo size
- Type the name of the file of the logo you had already saved with the extension. For e.g. logo.png
- Copy the text that appears underneath and paste it on the notepad and save the typed file in >C:\Program Files\Movie Maker\Shared\AddOnTFX\.
- Open windows movie maker again.
- Choose title and credits underneath the edit category.
- Press space bar once and then click ‘change the title animation’.
- You will see your image there. Click on ad title and press Ctrl+p to publish.
Part 3: How to Create a Transparent logo for Youtube Channel
Do you want to make a transparent image as logo for your YouTube? If you want to brand your YouTube channel, we believe it is a must to add transparent logo for YouTube branding. Actually, you can do this in Filmora just with a green screen image. Check the steps below to know the secret.
Step 1: Import video and image to Filmora
Open Filmora. Choose Create New Project. Click import media files here in Media library. Select your video and a green screen image. In fact, a green screen video is also accessable, but usually brand logo is image. Now drag them onto timeline.

Step 2: Import video and image to Filmora
Right click on the image clip in the timeline. Choose Green Screen. You will see the image is transparent in the preview window. Now, you need to adjust some details. You can adjust edge thickness and edge feather to better edge. If the green screen background is not totally removed, drag tolerance to adjust it.

Step 3: Scale the logo
You can clip the image clip first and go to preview window to scale it down or up by dragging the green dot. You can put the YouTube logo at corner.
![]()
Richard Bennett
Richard Bennett is a writer and a lover of all things video.
Follow @Richard Bennett
Richard Bennett
Mar 27, 2024• Proven solutions
A watermark is a still image that is usually plugged in the videos, for the purpose of claiming copyrights or publicity purpose. YouTube generally carries a “branding” option where you can brand your video with your channel. This doesn’t provide a stable watermark. Therefore, when someone downloads that video using a second party (YouTube downloader) it gets removed. For this purpose the legal author will have to put a Channel watemark on their YouTube videos. In this guide, we will show you how to add watermark to your YouTube videos, existing or new.
You May Also Like:
Best Watermark Apps for iPhone - How to Watermark Photos on iPhone >>
Wondershare AniEraser Seamless, Effortless, Intuitive.
AniEraser makes it easy to perfect any photo or video; no matter the device or platform - experience a smooth, effortless transformation of your image and maximize its potential with just one click.
Make your moment perfect.
Free Download Free Download Edit online
![]()
How to Add a Watermark to Your YouTube Videos
- Part 1: How to add logo or watermark to in existing YouTube videos
- Part 2: Add logos or watermarks to your videos before uploading
Part 1: How to add logo or watermark to in existing YouTube videos
To add a watermark to your previously uploaded videos you will need to have created and saved your watermark outside of your video editing program.
- Sign in to your YouTube account. Click on the thumbnail image of your account at the top right corner. This will give you a drop down menu. Then Click on the small gear (indicating settings)
- This will lead you to setting center. Click on “view additional features”
- To the left of the window, Click the third option of “branding”
- Click on “add watermark”. Then you can choose an image from your computer. After your image is uploaded, click save.
Notes
YouTube watermark size: Your watermark should be transparent, square, and larger than 50x50 pixels, which is the size it will be shrunk down to when it appears in the corner of your videos.
YouTube watermark starting time: you will have the option of choosing a start time for your watermark, making it appear only at the end of your video, or having it there for the entire length of your video. Once that is done click ‘Update’ and your watermark will be applied to your videos.
YouTube watermark color: Youtube suggests that your watermark have only one color. The point is that you should not use anything flashy that will take attention away from your video, so having two or three colors is not necessarily wrong if your design is subtle.
Here is a tutorial video for how to add watermark to Your YouTube videos:
Part 2: Add logos or watermarks to your videos before uploading
1. Wondershare Filmora
Wondershare Filmora which is one of the ideal video editing tools especially when it comes to watermarking your videos . It helps you in adding static and video watermarks over the video. The basic theme of the video watermarking is the concept of picture-in-picture .
![]()
The following steps have to be taken to add a watermark:
- Add the video and watermarking data by drag dropping it into the workspace
- Drag the required video on the timeline and the watermark on it as well
- Adjust the watermark and add pre-made special effects to it
- Mask the watermark in the shape you like
- Save the video
Download Mac Version ](https://tools.techidaily.com/wondershare/filmora/download/ )
2. Windows movie maker
Windows movie maker is free default windows software that can easily add watermark to your videos to secure your copyrights. It can cater two types of watermarks; images and text. For images, it just supports PNG and GIF format files and generally doesn’t support transparency. Moreover, an external file, Windows Logo Locator is needed for placing the logo at different positions.
How to add watermark to video with Windows Movie Maker
Adding Text watermark:
- Open windows movie maker
- Click on ‘videos’ under the title of import.
- Import your video to the timeline.
- Right beneath imports under the category of edit you will find ‘titles and credits’. Click.
- Enter the text for watermark.
- Choose the title positioning, font and transparency.
- Add title. You will find it along the length of timeline. You may drag to expand it, for viewing it during the entire videos length. Select file and click publish video.
Adding image watermark:
The image should be in .PNG or .GIF format.
- Save the image in >C:\Program Files\Movie Maker\Shared\AddOnTFX\.
- Download a logo Locator as per your installed windows from FX archives.
- Select the location of the logo in your video where you want it to appear.
- Choose the screen size and the logo size
- Type the name of the file of the logo you had already saved with the extension. For e.g. logo.png
- Copy the text that appears underneath and paste it on the notepad and save the typed file in >C:\Program Files\Movie Maker\Shared\AddOnTFX\.
- Open windows movie maker again.
- Choose title and credits underneath the edit category.
- Press space bar once and then click ‘change the title animation’.
- You will see your image there. Click on ad title and press Ctrl+p to publish.
Part 3: How to Create a Transparent logo for Youtube Channel
Do you want to make a transparent image as logo for your YouTube? If you want to brand your YouTube channel, we believe it is a must to add transparent logo for YouTube branding. Actually, you can do this in Filmora just with a green screen image. Check the steps below to know the secret.
Step 1: Import video and image to Filmora
Open Filmora. Choose Create New Project. Click import media files here in Media library. Select your video and a green screen image. In fact, a green screen video is also accessable, but usually brand logo is image. Now drag them onto timeline.
Step 2: Import video and image to Filmora
Right click on the image clip in the timeline. Choose Green Screen. You will see the image is transparent in the preview window. Now, you need to adjust some details. You can adjust edge thickness and edge feather to better edge. If the green screen background is not totally removed, drag tolerance to adjust it.
Step 3: Scale the logo
You can clip the image clip first and go to preview window to scale it down or up by dragging the green dot. You can put the YouTube logo at corner.
![]()
Richard Bennett
Richard Bennett is a writer and a lover of all things video.
Follow @Richard Bennett
Also read:
- In 2024, Common YouTube Shorts When Thumbnails Disappear Without Notice
- [Updated] 2024 Edition The Definitive Strategy for YouTube Monetization
- Maximizing Revenue with YouTube's 2024 Partner Program
- Innovative YouTube Channel Titles The Key to Successful Blogging & Filmmaking (No More than 156 Characters)
- Unlocking Secure Video Sharing YouTube to Gmail with Google Access
- [New] Enhance Visibility Must-Have YouTube SEO Tactics Explained
- In 2024, Curate a Perfect Playlist on YouTube A Step-by-Step Guide
- 2024 Approved Breaking Down Barriers with Shared YouTube Curations
- Exploring the World of YouTube Where Are My Comments?
- 2024 Approved Accelerate How To Swiftly Broadcast Playlists
- Mastering YouTube Money Policy Overhaul Details
- The Essential Playbook Achieving Peak Video Editing on YouTube Studio
- Double the Joy Master Looping of YouTube Media on Televisions for 2024
- Elite Creator Hub Professional PC Cutting and Tunes for 2024
- [Updated] A Comprehensive Look at Decelerating YouTube Video Speed (50 Chars)
- Tailored Titling Techniques for Impactful YouTube Channels
- Simplified Methods to Validate Your YouTube Status
- In 2024, Beyond Simplicity Exploring the Intricacies of YouTube’s View Count Algorithm
- 2024 Approved Best YouTube Beginnings 15 Editing Samples
- [Updated] Can Subtle Strategies Trump Directly Buying Views for Content Creators?
- Sustained Engagement Determining the Ideal Frequency for Your YouTube Channel
- Dive Into the Deep End - Your Guide to the Best Free Movies on YouTube for 2024
- Crafting the Perfect Pitch Inviting Listeners to Join Us for 2024
- 15 Best Free YouTube Introduction Tools for 2024
- Streamlining Your Device by Clearing YouTube Downloads
- Best Practices in Selecting YouTube Video Extractor Apps for Android for 2024
- The Hidden Truths About YouTube Earnings
- Proven Paths to Owning Successful Monetized Youtubes
- The Sound Sphere Navigating Music Uploads
- New Calculating Image Dimensions A Simple and Accurate Method for 2024
- 2024 Approved Ultimate List Top-Tier UbuNo Videography
- Stellar Data Recovery for iPhone 8 failed to recognize my iPhone. How to fix it? | Stellar
- New Silencing the Howling Winds of Digital Footage Captured by Mobile Phones for 2024
- Strategies to Have Your Video Embrace by Vimeo Experts
- Best 4 Morgan Freeman Voice Generator Tools for Voice Cloning
- How to Recover Deleted Screenshots on iPhone SE (2022)? | Stellar
- The Most Effective Ways to Bypass iPhone XS Activation Lock
- 10 Pro-Rated Secrets for Stunning Viral TikTok Edits
- Streamlined Techniques for Sharing Your Desktop/Mobile Screen for 2024
- [New] 2024 Approved Viral TikTok Rhythms and Your Step Guide
- [Updated] In 2024, Mastering Switch Saving Gameplay Footage
- New 2024 Approved PC Intro Maker Showdown Top 10 Tools Online, Offline, and More
- [New] In 2024, Restoring Streamlined Views Where Are Your Vids?
- [Updated] 2024 Approved How to View Instagram Stories Anonymously on PC, Android and iPhone [Free]
- [Updated] In 2024, From Screen to Stage Best Anime-Inspired TikTok Plays
- Make a Lasting Impression Top Movie Intro Design Software for 2024
- Ultimate HD Capture Software for Windows & macOS
- Updated Minitool Movie Maker Review, Guideline and Alternatives for 2024
- [Updated] Live Broadcasting on FB Tips for Success
- 2024 Approved ScreenMasters Unite!
- [Updated] Twitter's Hot Spots #1-#10 Viral Visits
- Updated 2024 Approved SopranoSculptor & TenorTamer - Revolutionary Audio Modification Software
- In 2024, How to Transfer Contacts from Oppo Find X6 to Other Android Devices Using Bluetooth? | Dr.fone
- In 2024, 10 Excellent Facial Editors for Smartphones
- New In 2024, Live Deepfakes Made Easy How to Download and Make Your Own Live Model
- Title: "Dive Into Old Content YouTube Video Recovery Guide"
- Author: Kevin
- Created at : 2024-05-25 15:00:58
- Updated at : 2024-05-26 15:00:58
- Link: https://youtube-videos.techidaily.com/dive-into-old-content-youtube-video-recovery-guide/
- License: This work is licensed under CC BY-NC-SA 4.0.
