
:max_bytes(150000):strip_icc()/15dinradio-592753063df78cbe7e3d333e.jpg)
"Compare & Contrast Leading Online & Desktop GIF Tools for 2024"
Compare & Contrast: Leading Online & Desktop GIF Tools
10 Best YouTube To GIF Makers: How to Create GIF from YouTube Video?

Richard Bennett
Mar 27, 2024• Proven solutions
GIF (Graphic Interchange Format) is an image file format supporting both uniform and animated images. Before, GIF was a basic 8-bit colored image until PNG image format was introduced as a more feasible alternative. Today, you can find them being used on all the trending social media applications like WhatsApp, Instagram, Snapchat, Twitter, Facebook, and various others.
The good thing here is that you can make GIFs from YouTube videos or any of your favorite videos for that matter which you think can help express your sentiments or ideas in an enhanced manner. There is a huge market available of apps and web software that can help create GIFs from YouTube without much trouble.
In this short guide ahead, we’ve brought for you the best YouTube to GIF maker available in the digital market. Let’s go GIF-ing!
Part 1: Best Online YouTube to GIFs Makers
Here is our curated list of the best 11 YouTube to GIF Maker that you can use to make GIF from YouTube video.
1. GIFS
Gifs.com is one the best GIF maker site that makes crafting GIFs from YouTube videos incredibly easy and quick with no time. If you’re looking for some straight and simple video to gif converter to help you convert YouTube videos into GIFs, this is the smoothest editor that will do the job and craft interesting gifs for your blogging platforms.
All you have to do is enter the URL of the video you want to convert into a GIF. At this point, the site accepts Instagram, YouTube, Facebook, and Vine links. In addition to that, there is also an option that allows users to upload from the desktop computer.
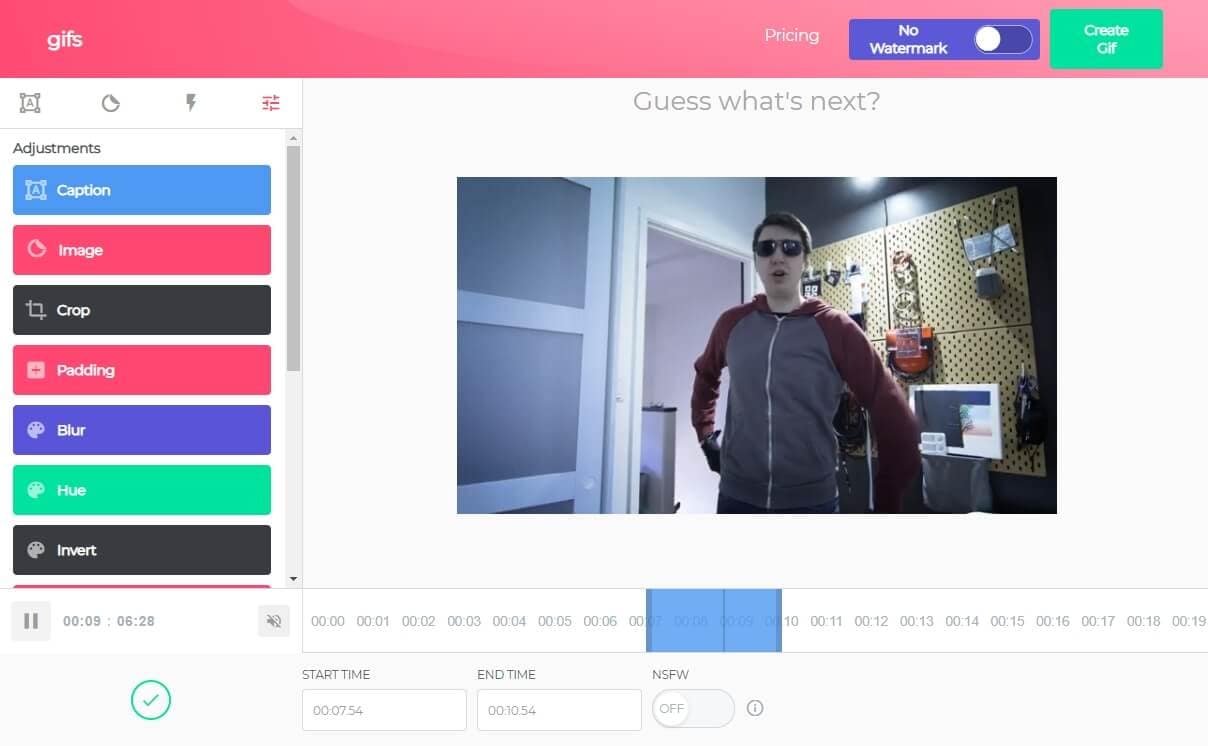
Once you’ve entered the YouTube video URL, it prompts a basic video editor wherein you select the frame and durations for your GIF. If you want to customize it further, you can add stickers, captions, and tools like blurring, cropping, and others.
Once you’re done exploring the filters and editing the GIF, you can directly share the URL on different platforms or just download it and store it on your device.
Note: If you want to remove the watermark and get full access to extra features, you may need to pay $1.99/month.
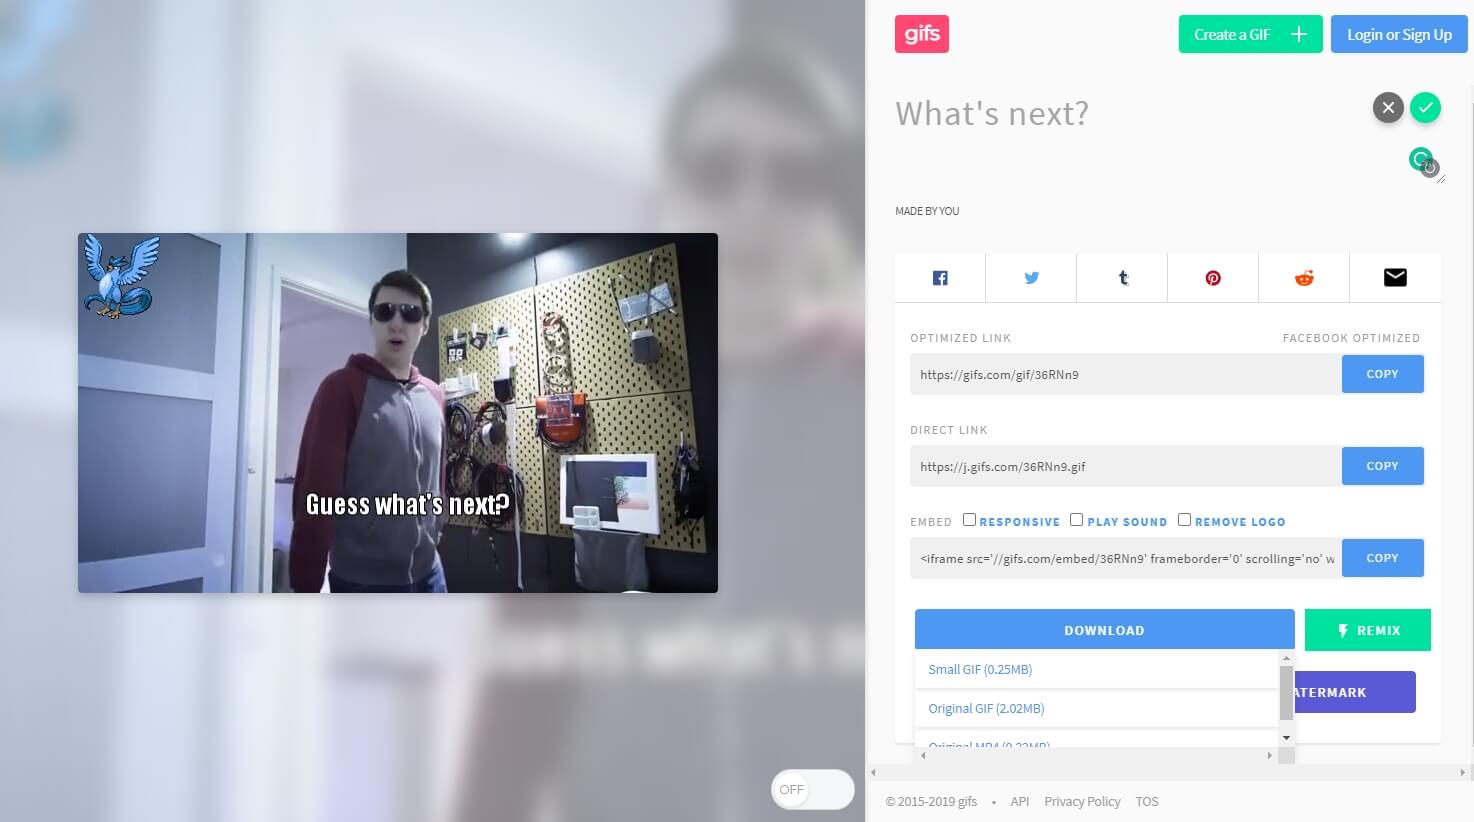
You can check the gif that I made from our YouTube video How to Edit Galaxy Effects with Green Screen | Wondershare FilmoraPro Tutorial on gifs.com here: https://gifs.com/gif/36RNn9 .
2. GIPHY
Giphy, as we all know, is the most used search engine for GIFs due to its limitless collection. Giphy here maintains its own GIF maker to create your customized GIFs effortlessly. The Giphy online GIF maker is quite simple and easy to use; it also has steadfast mobile applications for both Android and iOS devices.
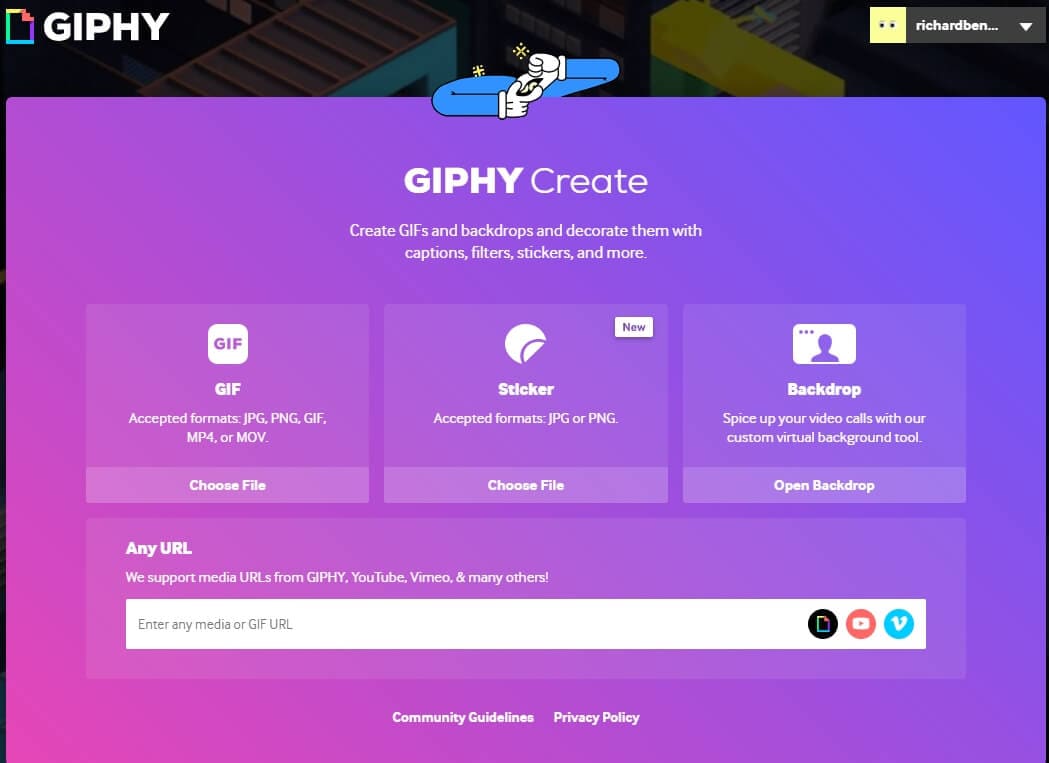
To begin converting YouTube videos into GIFs, click the Create button at the top and then you can either enter the URL or upload images/videos from local files. This GIF maker only accepts JPG, PNG, GIF, MP4, and MOV for people uploading images or videos.
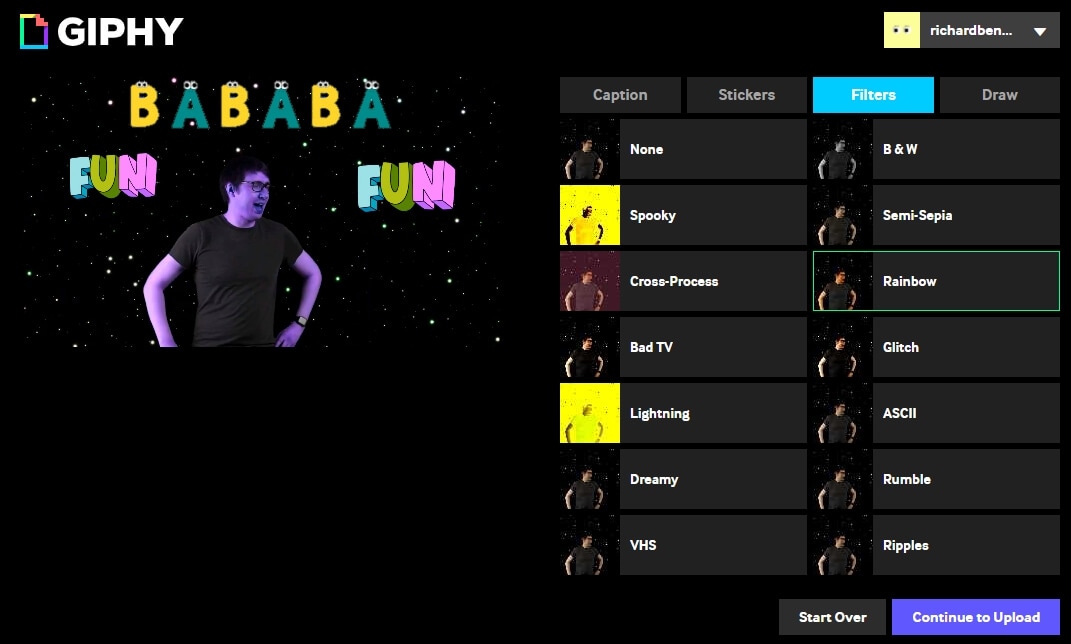
Then, trim the part from the video you want to convert into a GIF. Later, you can embellish your GIFs by adding filters, tags, text captions, and stickers to make them look eye-catching. If you’re looking for a clean and simple GIF maker, then Giphy GIF maker is the perfect choice for you.
Here is the gig that I made with Giphy: https://media.giphy.com/media/2Dtlp2MAXtoC0EyMsx/giphy.gif .
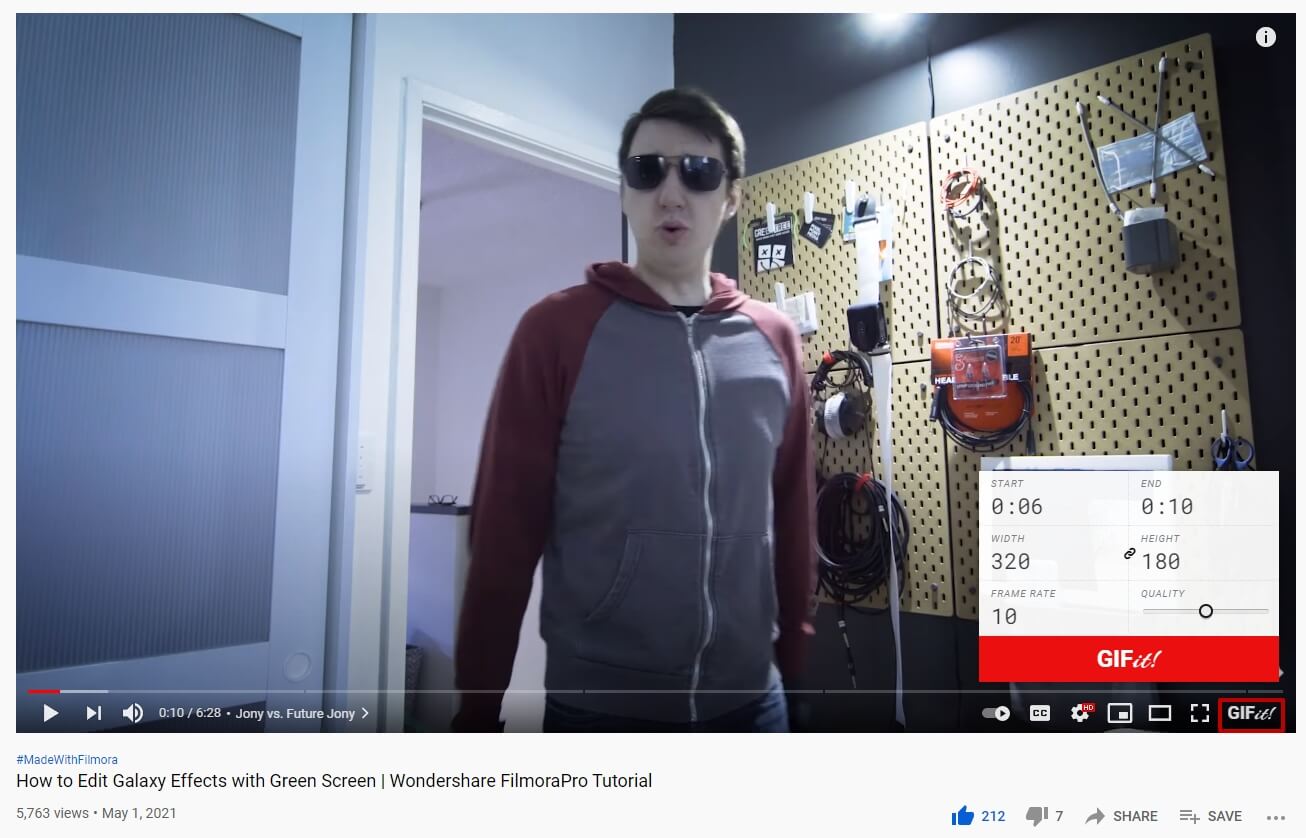
3. GIFit!
GIFit is a well-known online extension available on the Chrome Web Store for free that aids in making GIFs from YouTube videos. The GIFit extension has been recently updated to work with the new YouTube interface to help you craft Gifs smoothly. One thing to remember about GIFit is that with YouTube HTML5 mode only.
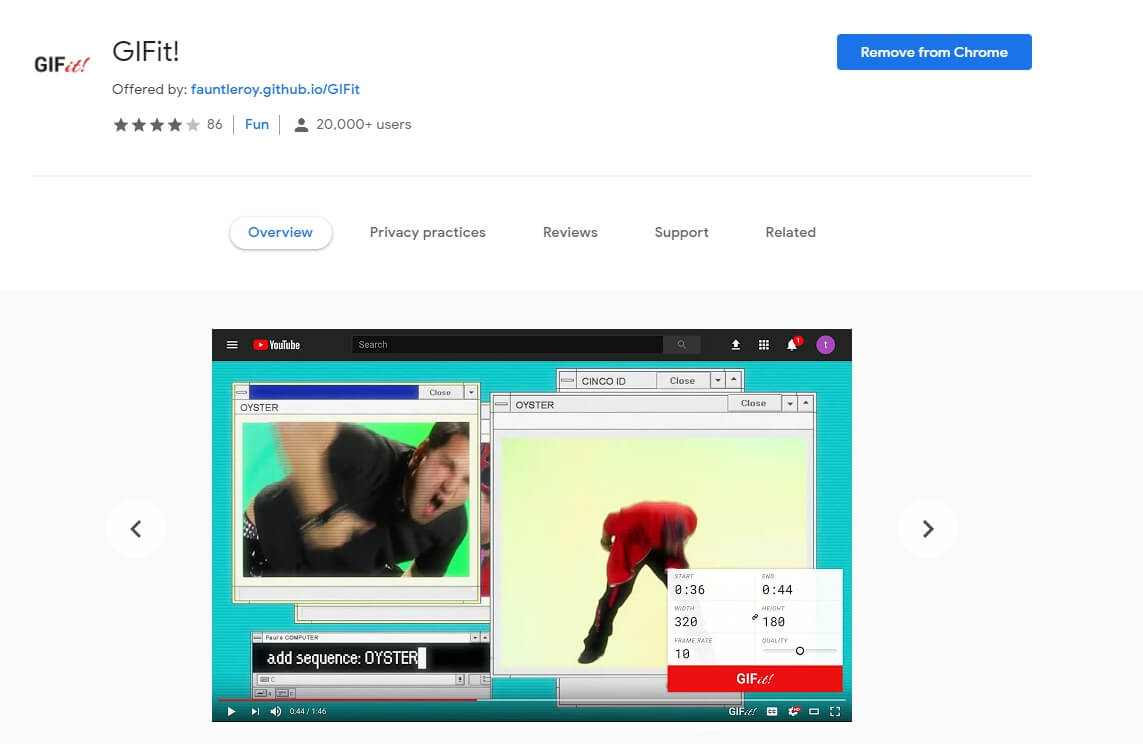
To use this Chrome extension, install it from the Chrome Web Store. Now, run the attachment and visit any video on YouTube that you would like to convert into GIF. Once decided, simply press on the GIFit icon in the YouTube toolbar. Then, edit according to your requirements and hit the red button with GIFit on it. After a few minutes, your GIF will be ready to be shared and saved. Currently, it offers convert YouTube to GIF feature only, so you can’t add stickers nor captions.
4. Make A GIF
Makeagif is an ideal online GIF maker for you that can convert videos into animated GIFs in no time. It allows you to create GIFs using local images, YouTube, Facebook, and Webcam. Makeagif even will enable you to develop new GIFs using the already existing ones.

The GIF maker also comes with a variety of free GIFs to download and add to your collection. Moreover, it allows you to edit existing GIFs by enhancing their quality, speed and adding filters to them. It offers functions that can enrich the standard of your GIFs.
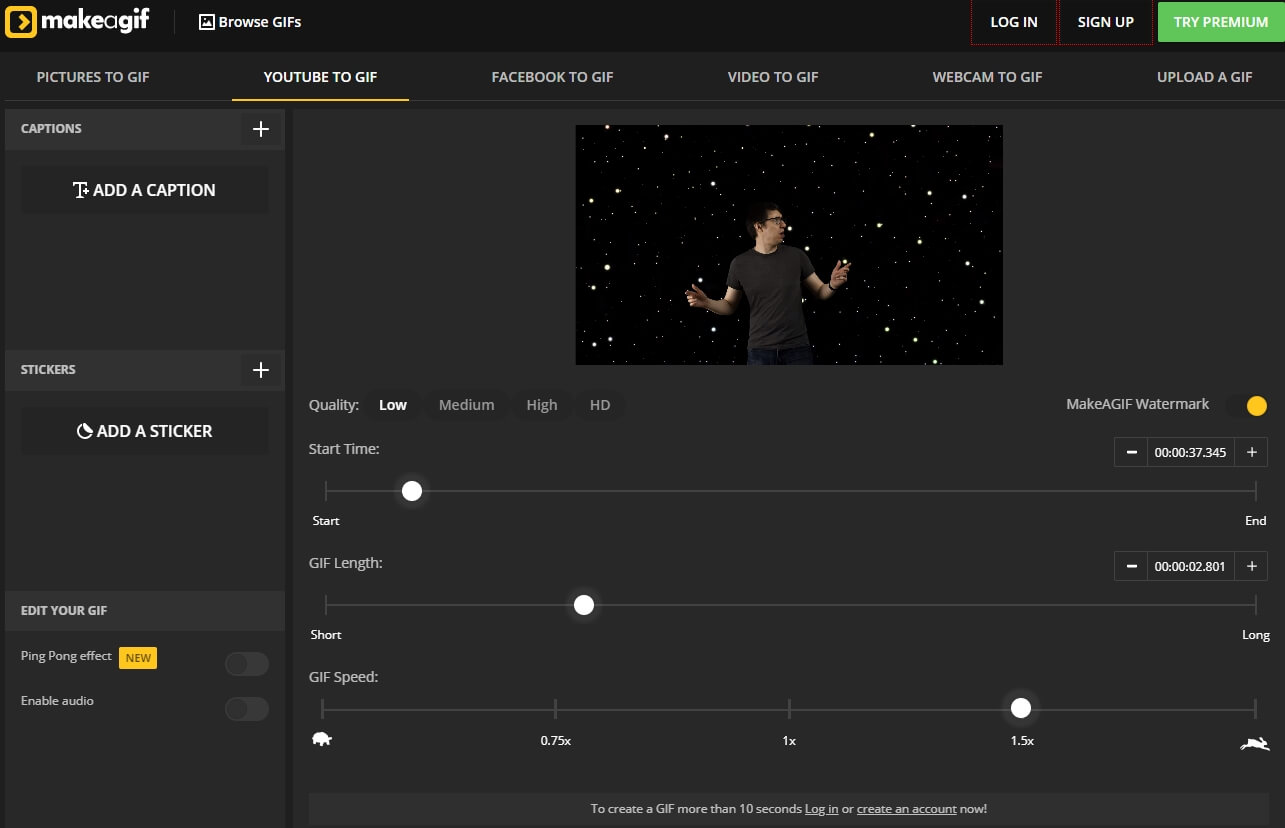
To create GIFs using this, first, create your account on the site. Next, select the ‘YouTube to GIF’ option from the drop-down menu, among other alternatives. Then, enter the link to the YouTube video that you wish to transfigure into GIF, after which you can tailor-make the gifs by adjusting the configuration settings, such as adding captions and sticker. Once done, simply download and share your newly crafted GIF.
5. Imgur
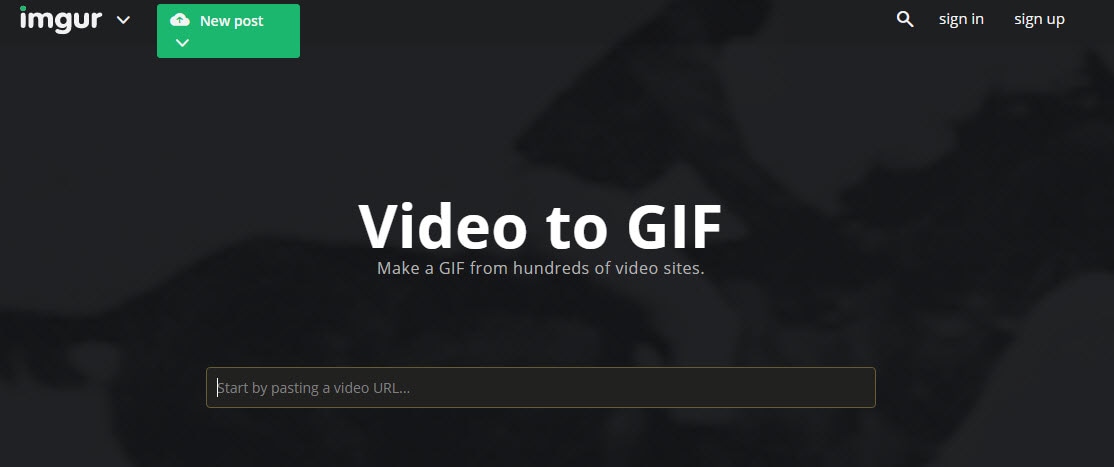
Imgur might not be the best application to be included in the list. But it is definitely an amazing site where you can go looking for all kinds of images, Gifs, memes, or other digital stories. Imgur’s wide collection of visuals can never disappoint you, no matter what you’re searching for, from funny to sad, inspiring to aspiring, everything can be discovered in this treasure.

Now, this might not be the best YouTube to gif maker, but it does have the potential to provide you with great ideas for GIF-making. Besides, you can download all the interesting GIfs from here and save them for future reference.
6. GiFRun
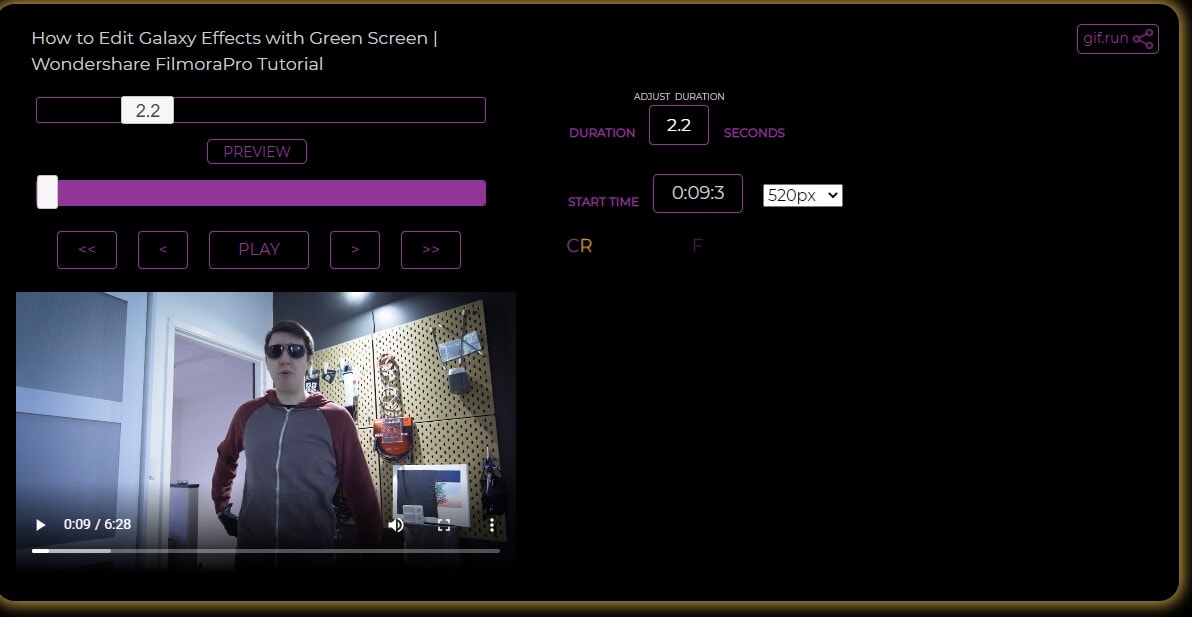
Are you worried about searching for a gif converter with no prior experience in editing? Don’t worry; this GiFRun Maker is the simplest online service that requires minimum to zero skill for creating GIFs. GifRun is an easy enough site to navigate through and produce quality GIFs for your blogging sites.
To convert a YouTube video to GIF, simply enter the link. After that, it will prompt you to the editing page, where you can set the start/end time, duration, and resolution for your gif. You can preview your edit before finalizing it, making necessary changes, and then downloading it on your device.
7. Free Gif Maker Me
Free Gif maker is one of the straightforward and easily manageable GIF-making applications. It offers YouTube to gif, reverse gif, and gif effects tools to enhance your GIF quality and make it effortless to create your own GIFs.
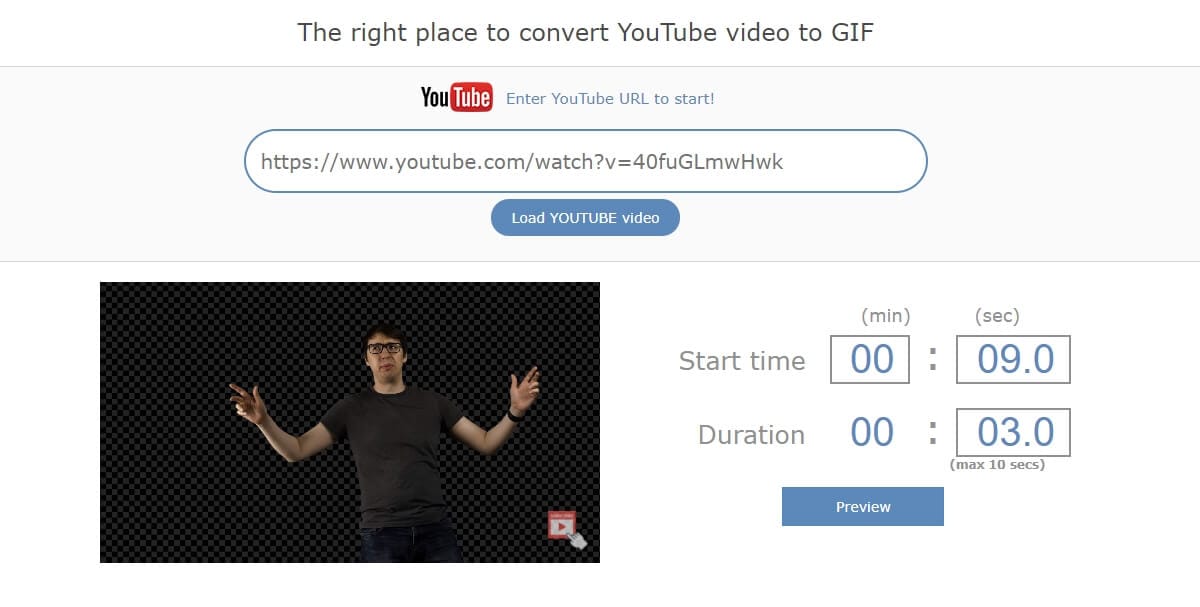
To make GIF from YT Video on free Gif Maker, copy the video link in the input text field in the middle of your screen and then tap on ‘Load YouTube Video.’ Within seconds you will be redirected to the video preview and GIF editing page. Now, set the duration, start time, resolution, output, and other details. Then, click on the ‘Make A GIF’ option and save it on your device once ready.
8. Imgflip
Another website is known for creating and sharing visual content on different social media channels. Imgflip allows you to make customized animations from YouTube and other digital platforms. The site is completely safe to use and produces good-quality memes and GIFs quickly without incurring a dime.
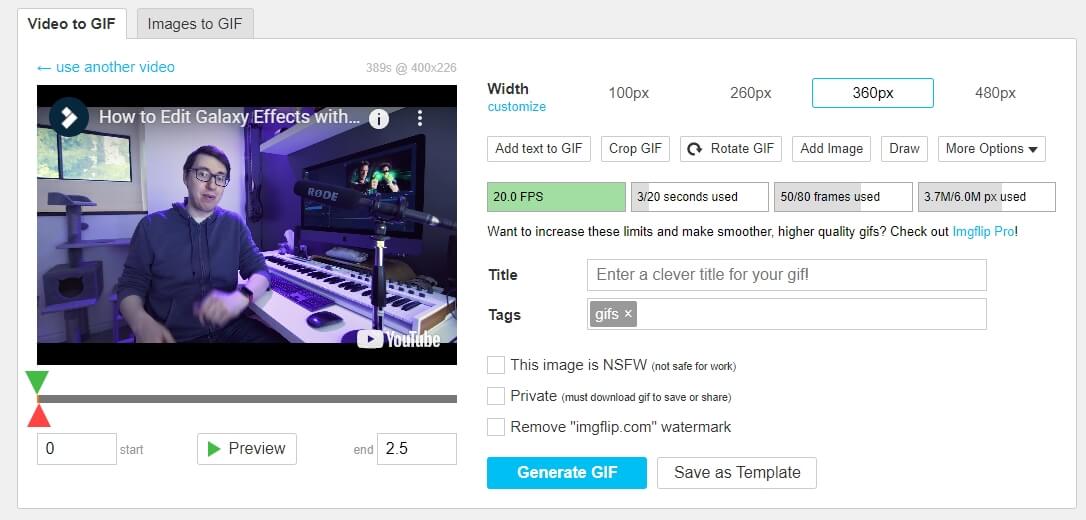
Imgflip supports all the popular video formats such as AVI, MP4, 3GP, OGG, FLV, MOV, and various other video formats. To produce a high-quality GIF, make sure your video is at least 480P or higher. More so, the Imgflip supports GIF with audio features of all the videos with audio that can only be accessed using the Imgflip Pro at a minimum price of $9.95/ month.
9. GIF Maker
GIF Maker is a pretty basic application that everyone can navigate with or without any expertise in the tech department. Along with GIF maker, it also has other tools such as GIF resizer, GIF compressor, and GIF cropper, all specifically designed tools to help you create riveting GIFs ever!
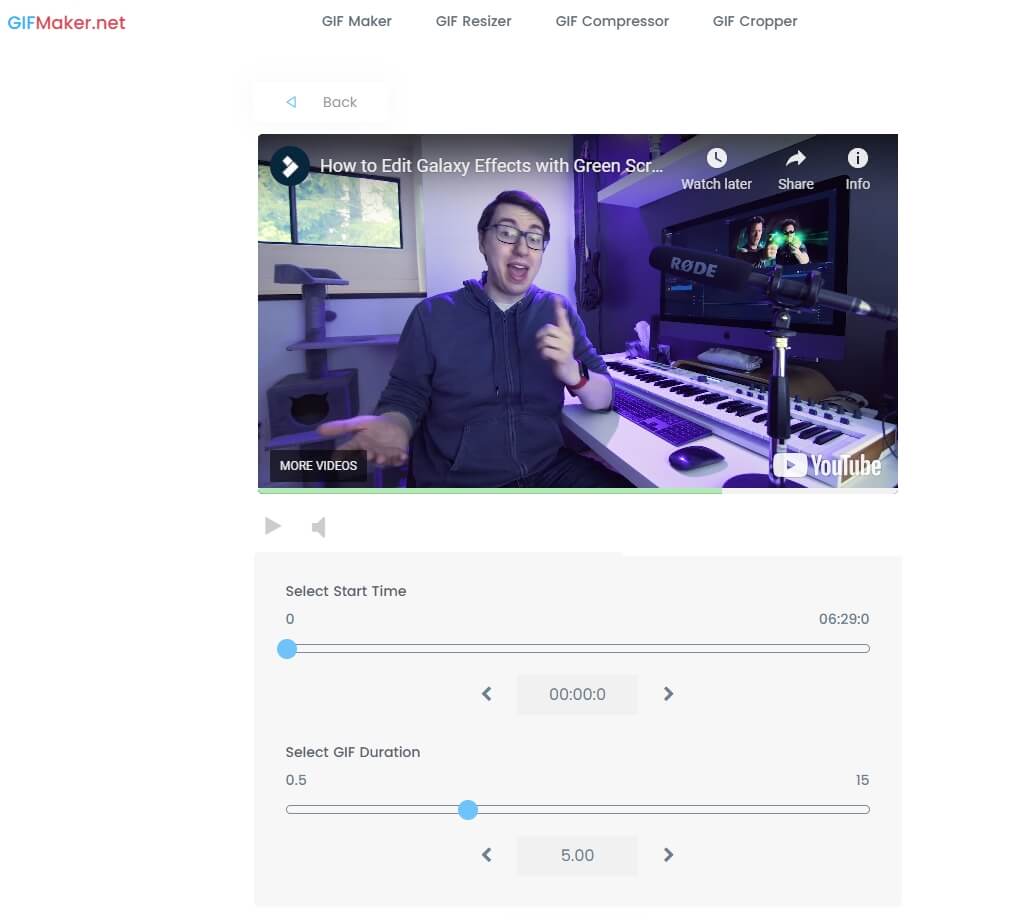
GIF Maker provides two options; one video to gif and second Images to gif that you can use as per their need. One simply is to enter the YT video link/upload video to the upload box. Next, alter the animation, filter, speed, duration, and set start and endpoint in the editor. You can upload files in all the popular formats and upload up to 25Mb image files and 30 Mb for animated GIFs.
Another point to remember while using this GIF Maker, it only supports YT videos that have not been copy-righted by the creator.
Part 2: Best YouTube to GIF Maker on Windows and Mac: Wondershare UniConverter
It happens so that you stumble upon a video that runs the hippocampus of your brain rigid with ingenious abstractions about converting the video into GIF to delineate those ideas through digital content on your blogs.
Now, you will require the best-quality GIF maker that is easy to navigate without any complications. Despite the plethora of GIF makers being available at hand, it could be a strenuous task to search for the ideal GIF maker for yourself.
Presently, Wondershare UniConverter is one of the best and easy-to-use YouTube to GIF makers for you. It is the handiest tool to help you accomplish your conversion, customization, compressing, and revamping goals like a professional with its effective editing features. Wondershare offers many benefits, from converting files in hundred different formats to crafting your one GIF out of videos along with other fundamental editing attributes.
How to User UniConverter Video to GIF Maker?
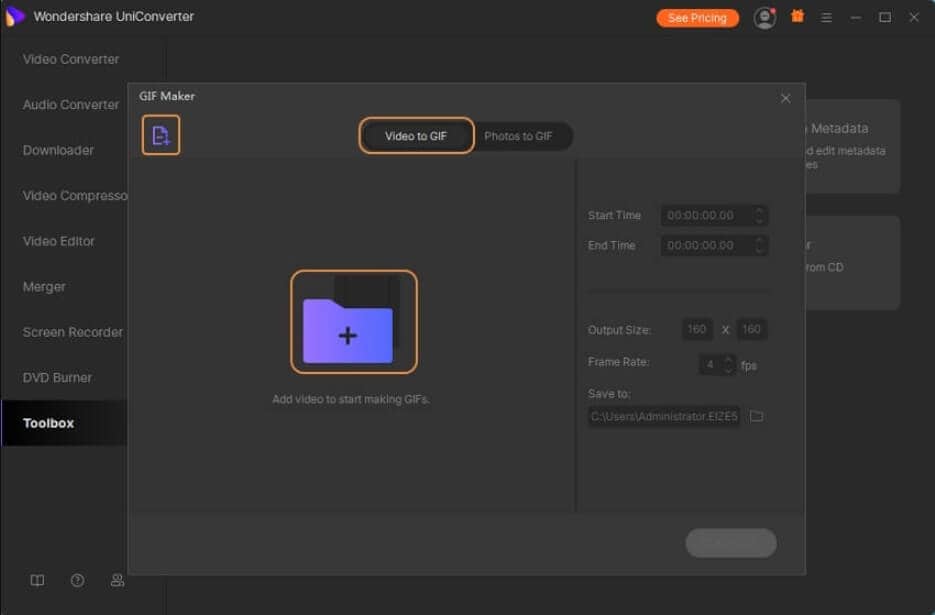
Step 1: Download and install the Wondershare Converter on your device. Now, run the app and launch the Wondershare GIF Maker by selecting the GIF Maker Icon on the toolbar.
Step 2: Click on the Video to GIF option before tapping on the Add File option to upload YT video for GIF conversion.
Step 3: Next, you can customize your uploaded video by setting the start and end time. In addition to that, you can enter the frame rate and output size according to your requirement.
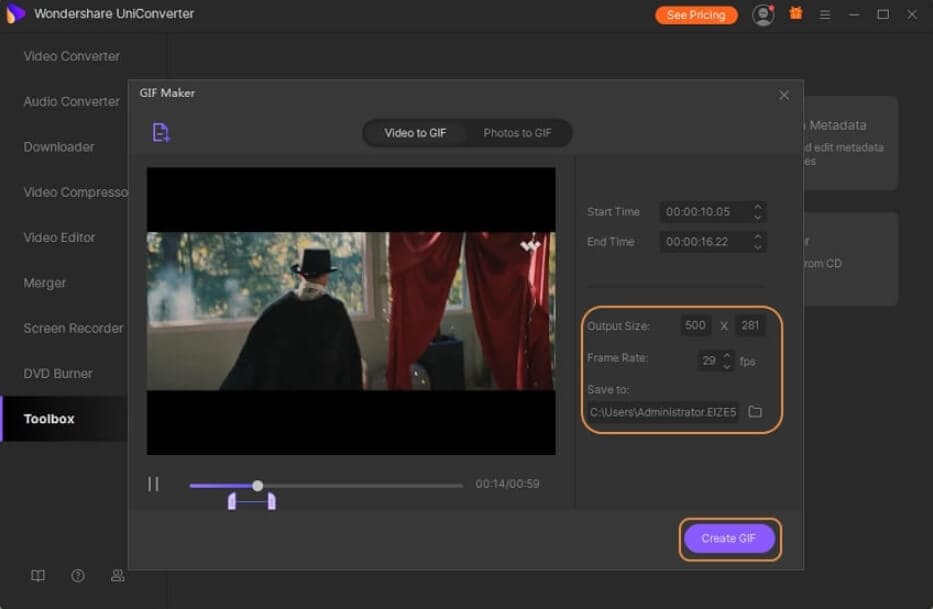
Step 4: Once finished with all the customization, convert the YouTube video into a GIF by tapping the Create GIF option.
Step 5: Ta-da! UniConverter will transform your YT video into a GIF within a minute or two. You can now export and share the GIF further.
That’s right, with five easy steps, you can convert all your favorite YouTube video into GIF with this YouTube to GIF maker.
Without any doubt, I can say that usage of GIFs during your regular texting and socialization can make your conversations more interesting. GIFs are the best shortcuts to express your mood, emotions, and humor without having to type much. No other digital medium provides an avenue that offers such proficiency in demonstrating your emotions, possibly the reason behind its escalating popularity.
With the help of this little guide, you can create gif from YouTube videos with a wave of your hand! I hope you’ve fun GIF-ing!
Richard Bennett
Richard Bennett is a writer and a lover of all things video.
Follow @Richard Bennett
Richard Bennett
Mar 27, 2024• Proven solutions
GIF (Graphic Interchange Format) is an image file format supporting both uniform and animated images. Before, GIF was a basic 8-bit colored image until PNG image format was introduced as a more feasible alternative. Today, you can find them being used on all the trending social media applications like WhatsApp, Instagram, Snapchat, Twitter, Facebook, and various others.
The good thing here is that you can make GIFs from YouTube videos or any of your favorite videos for that matter which you think can help express your sentiments or ideas in an enhanced manner. There is a huge market available of apps and web software that can help create GIFs from YouTube without much trouble.
In this short guide ahead, we’ve brought for you the best YouTube to GIF maker available in the digital market. Let’s go GIF-ing!
Part 1: Best Online YouTube to GIFs Makers
Here is our curated list of the best 11 YouTube to GIF Maker that you can use to make GIF from YouTube video.
1. GIFS
Gifs.com is one the best GIF maker site that makes crafting GIFs from YouTube videos incredibly easy and quick with no time. If you’re looking for some straight and simple video to gif converter to help you convert YouTube videos into GIFs, this is the smoothest editor that will do the job and craft interesting gifs for your blogging platforms.
All you have to do is enter the URL of the video you want to convert into a GIF. At this point, the site accepts Instagram, YouTube, Facebook, and Vine links. In addition to that, there is also an option that allows users to upload from the desktop computer.
Once you’ve entered the YouTube video URL, it prompts a basic video editor wherein you select the frame and durations for your GIF. If you want to customize it further, you can add stickers, captions, and tools like blurring, cropping, and others.
Once you’re done exploring the filters and editing the GIF, you can directly share the URL on different platforms or just download it and store it on your device.
Note: If you want to remove the watermark and get full access to extra features, you may need to pay $1.99/month.
You can check the gif that I made from our YouTube video How to Edit Galaxy Effects with Green Screen | Wondershare FilmoraPro Tutorial on gifs.com here: https://gifs.com/gif/36RNn9 .
2. GIPHY
Giphy, as we all know, is the most used search engine for GIFs due to its limitless collection. Giphy here maintains its own GIF maker to create your customized GIFs effortlessly. The Giphy online GIF maker is quite simple and easy to use; it also has steadfast mobile applications for both Android and iOS devices.
To begin converting YouTube videos into GIFs, click the Create button at the top and then you can either enter the URL or upload images/videos from local files. This GIF maker only accepts JPG, PNG, GIF, MP4, and MOV for people uploading images or videos.
Then, trim the part from the video you want to convert into a GIF. Later, you can embellish your GIFs by adding filters, tags, text captions, and stickers to make them look eye-catching. If you’re looking for a clean and simple GIF maker, then Giphy GIF maker is the perfect choice for you.
Here is the gig that I made with Giphy: https://media.giphy.com/media/2Dtlp2MAXtoC0EyMsx/giphy.gif .
3. GIFit!
GIFit is a well-known online extension available on the Chrome Web Store for free that aids in making GIFs from YouTube videos. The GIFit extension has been recently updated to work with the new YouTube interface to help you craft Gifs smoothly. One thing to remember about GIFit is that with YouTube HTML5 mode only.
To use this Chrome extension, install it from the Chrome Web Store. Now, run the attachment and visit any video on YouTube that you would like to convert into GIF. Once decided, simply press on the GIFit icon in the YouTube toolbar. Then, edit according to your requirements and hit the red button with GIFit on it. After a few minutes, your GIF will be ready to be shared and saved. Currently, it offers convert YouTube to GIF feature only, so you can’t add stickers nor captions.
4. Make A GIF
Makeagif is an ideal online GIF maker for you that can convert videos into animated GIFs in no time. It allows you to create GIFs using local images, YouTube, Facebook, and Webcam. Makeagif even will enable you to develop new GIFs using the already existing ones.
The GIF maker also comes with a variety of free GIFs to download and add to your collection. Moreover, it allows you to edit existing GIFs by enhancing their quality, speed and adding filters to them. It offers functions that can enrich the standard of your GIFs.
To create GIFs using this, first, create your account on the site. Next, select the ‘YouTube to GIF’ option from the drop-down menu, among other alternatives. Then, enter the link to the YouTube video that you wish to transfigure into GIF, after which you can tailor-make the gifs by adjusting the configuration settings, such as adding captions and sticker. Once done, simply download and share your newly crafted GIF.
5. Imgur
Imgur might not be the best application to be included in the list. But it is definitely an amazing site where you can go looking for all kinds of images, Gifs, memes, or other digital stories. Imgur’s wide collection of visuals can never disappoint you, no matter what you’re searching for, from funny to sad, inspiring to aspiring, everything can be discovered in this treasure.
Now, this might not be the best YouTube to gif maker, but it does have the potential to provide you with great ideas for GIF-making. Besides, you can download all the interesting GIfs from here and save them for future reference.
6. GiFRun
Are you worried about searching for a gif converter with no prior experience in editing? Don’t worry; this GiFRun Maker is the simplest online service that requires minimum to zero skill for creating GIFs. GifRun is an easy enough site to navigate through and produce quality GIFs for your blogging sites.
To convert a YouTube video to GIF, simply enter the link. After that, it will prompt you to the editing page, where you can set the start/end time, duration, and resolution for your gif. You can preview your edit before finalizing it, making necessary changes, and then downloading it on your device.
7. Free Gif Maker Me
Free Gif maker is one of the straightforward and easily manageable GIF-making applications. It offers YouTube to gif, reverse gif, and gif effects tools to enhance your GIF quality and make it effortless to create your own GIFs.
To make GIF from YT Video on free Gif Maker, copy the video link in the input text field in the middle of your screen and then tap on ‘Load YouTube Video.’ Within seconds you will be redirected to the video preview and GIF editing page. Now, set the duration, start time, resolution, output, and other details. Then, click on the ‘Make A GIF’ option and save it on your device once ready.
8. Imgflip
Another website is known for creating and sharing visual content on different social media channels. Imgflip allows you to make customized animations from YouTube and other digital platforms. The site is completely safe to use and produces good-quality memes and GIFs quickly without incurring a dime.
Imgflip supports all the popular video formats such as AVI, MP4, 3GP, OGG, FLV, MOV, and various other video formats. To produce a high-quality GIF, make sure your video is at least 480P or higher. More so, the Imgflip supports GIF with audio features of all the videos with audio that can only be accessed using the Imgflip Pro at a minimum price of $9.95/ month.
9. GIF Maker
GIF Maker is a pretty basic application that everyone can navigate with or without any expertise in the tech department. Along with GIF maker, it also has other tools such as GIF resizer, GIF compressor, and GIF cropper, all specifically designed tools to help you create riveting GIFs ever!
GIF Maker provides two options; one video to gif and second Images to gif that you can use as per their need. One simply is to enter the YT video link/upload video to the upload box. Next, alter the animation, filter, speed, duration, and set start and endpoint in the editor. You can upload files in all the popular formats and upload up to 25Mb image files and 30 Mb for animated GIFs.
Another point to remember while using this GIF Maker, it only supports YT videos that have not been copy-righted by the creator.
Part 2: Best YouTube to GIF Maker on Windows and Mac: Wondershare UniConverter
It happens so that you stumble upon a video that runs the hippocampus of your brain rigid with ingenious abstractions about converting the video into GIF to delineate those ideas through digital content on your blogs.
Now, you will require the best-quality GIF maker that is easy to navigate without any complications. Despite the plethora of GIF makers being available at hand, it could be a strenuous task to search for the ideal GIF maker for yourself.
Presently, Wondershare UniConverter is one of the best and easy-to-use YouTube to GIF makers for you. It is the handiest tool to help you accomplish your conversion, customization, compressing, and revamping goals like a professional with its effective editing features. Wondershare offers many benefits, from converting files in hundred different formats to crafting your one GIF out of videos along with other fundamental editing attributes.
How to User UniConverter Video to GIF Maker?
Step 1: Download and install the Wondershare Converter on your device. Now, run the app and launch the Wondershare GIF Maker by selecting the GIF Maker Icon on the toolbar.
Step 2: Click on the Video to GIF option before tapping on the Add File option to upload YT video for GIF conversion.
Step 3: Next, you can customize your uploaded video by setting the start and end time. In addition to that, you can enter the frame rate and output size according to your requirement.
Step 4: Once finished with all the customization, convert the YouTube video into a GIF by tapping the Create GIF option.
Step 5: Ta-da! UniConverter will transform your YT video into a GIF within a minute or two. You can now export and share the GIF further.
That’s right, with five easy steps, you can convert all your favorite YouTube video into GIF with this YouTube to GIF maker.
Without any doubt, I can say that usage of GIFs during your regular texting and socialization can make your conversations more interesting. GIFs are the best shortcuts to express your mood, emotions, and humor without having to type much. No other digital medium provides an avenue that offers such proficiency in demonstrating your emotions, possibly the reason behind its escalating popularity.
With the help of this little guide, you can create gif from YouTube videos with a wave of your hand! I hope you’ve fun GIF-ing!
Richard Bennett
Richard Bennett is a writer and a lover of all things video.
Follow @Richard Bennett
Initiate, Ideate, Implement: Step-by-Step Guide to Building a YouTube Channel
How to Create A YouTube Channel Today
Richard Bennett
Oct 26, 2023• Proven solutions
After all the planning and brainstorming, you are ready to create a YouTube channel. You have spent countless hours watching videos and aspiring to be a creator. You know it will be work, but you are passionate. You are willing to learn. You are ready!
YouTube fame is in your future, but where do you start?
In this guide, we’ll start at the beginning, at the point before you even have a YouTube channel. From there, we will walk you through your content strategy and properly prepare you for the journey of creating videos for a massive YouTube following. Then we will wrap it up by teaching you the best practices for YouTube video optimization, ensuring that all your efforts will lead to the best results.
Part 1: Setting Up Your YouTube Channel
Part 2: Building Out a YouTube Content Plan
Part 3: Producing Your Content
Part 4: Optimizing and Distributing Your YouTube Video
Okay, there is a lot to cover, so enough small talk. Let’s get started.
Part 1: Setting Up Your YouTube Channel
Before you start making awesome videos, you got to set up your YouTube account. Activating YouTube is pretty straightforward if you already have a Google account. The odds are you have already set one up to subscribe to all your favorite channels. If not, here are the steps:
Step 1: Sign in to YouTube with your Google account
Step 2: Access YouTube Creator Studio to Activate YouTube
Step 3: Create a Channel
1. Picking a YouTube Channel Name
A YouTube channel name is beneficial to your channel’s growth if selected strategically. It can separate you from all the other channels on the platform, it can help the viewers understand what your channel is all about, and it will represent you and your brand. When naming your channel, here are 3 things to remember:
- Memorable: You’d want a name that sticks in people’s brains. Picking a name that is hard to forget will be a huge advantage for you while growing your channel. But what makes a name memorable?
- Alliteration and assonance: By using the repetition of consonant or vowel sounds, you create a fluidity to the name. examples: Pewdiepie, GoPro, or League of Legend.
- Fun to say: Some words stay in the brain because it is simply pleasurable to say. It could have a genuine meaning or it can be an abstract word. Commonly these names have one of these sharp, biting consonants: C, K, Q, X, or Z. examples: Markiplier, Kwebbelkop, Squeezie, and Vox.
- Abbreviations: A name can have a greater meaning, but long names might not be catchy, therefore, you should abbreviate it to a few memorable letters. Examples: TED ED, TGFbro, ERB, and FBE.
- Longer Phrases: You may think that having a long name may be hard to remember, but sometimes, depending on your channel, a snappy phrase works. Example: How It Should Have Ended, You Always Win, and People Are Awesome.
- Your Name Plus Descriptor: Combining two words effectively can make a name more memorable like Markiplier (Mark + Multiplier), LaurDIY (Lauren and she makes DIY projects), and Shameless Maya (Maya and she’s shameless).
- Unique: Be creative with your name, especially if your real name is generic. YouTube is a crowded space and if you simply call your channel: Jake, not only will you be competing with all the creators named Jake, but also all the content with Jake as the keywords.
Also, avoid generic names that are based around your channel topics. For example, Fashion Talk sounds like a good name, but if you do a quick search you will see that it is a crowded space with vloggers, keynote presentations, and product reviews.
If you are starting a fashion channel why not try to find a link between your name and the topic? The connection between two different things often spawns something creative: Fabric Feud, for example. Just by the name, I know this channel will contain interesting perspectives on garments.
- Keep it Simple: In the end, simplicity is the way to go. Don’t make it hard to type or hard to remember: cantunderstandthistopic88768 is not a good name, even if it’s strange and cryptic.
If you have a simple name in mind, it’s also a good idea to do a quick search on YouTube and Google to make sure it isn’t already used or similar to another account. Additionally, it’s worth knowing whether the social media handle is available as you will need it to expand your channel.
Consider using your real full name, it’s unlikely to ever change. Many YouTubers start out with a stage name but end up growing out of it and simply using their real name later on in their journey.
We’ve summarized some creative ways of picking up a YouTube name, you can check our guide to picking YouTube Channel Name [4 Aspects]
2. Writing a YouTube Channel Description
YouTube is a search engine and the channel description can be treated much like an About page for a website. That is why keywords are important when composing the channel description.
What are YouTube SEO keywords?
Keywords are the words and phrases people use when they are typing into the search engine to find content. Without the right keywords, your audience may never find your videos.
If you want to start discovering new keywords for your YouTube channel, you can use Ubersuggest . This tool shows you the search volume (how frequently it is searched for) as well as how competitive (how many other channels are using it) the keyword is.
Heighten your chance of discoverability by putting keywords as close to the beginning of the description as possible. Later on in this post, we will go through how to properly conduct a keyword strategy. Hang tight.
In addition to keywords, you should also introduce who you are and what the channel is about. Give them a reason to care about your channel, how is it different than all the other ones on YouTube? Why are you the best person to be producing the content on your channel?
Then encourage the viewers to subscribe if they are interested in what the channel offers: education, entertainment, adventure, or something they can’t get anywhere else. It’s your channel, sell it.
Finally supply some extra details, including when to expect videos to be published and other social platforms where you are active on. If someone is reading your YouTube description , you have already hooked them. Here is your chance to reel them in with your channel’s purpose.
3. Creating the Perfect Logo for Your YouTube Channel
#1. What Icon Should You Use for YouTube?
You may choose an icon that best represents the content your channel is producing. For example, if your channel is about technology, you can have an icon of a robot or an iPhone. This way, when viewers only see your icon, they have an idea that they can expect content around tech.
Here are some websites in which you can download logos and icons for YouTube videos .
#2. What Color Should Your YouTube Logo Be?
When creating your logo, avoid trendy colors as they may go out of style. Instead, consider the psychology of color .
What emotions do you want your channel to evoke to your viewers?
Answering this question helps you develop a consistent branding that applies to all your content as your channel grows. Blue evokes calm and trust, whereas, red is known to increase heart rate and is associated with danger. Before you select a color scheme, know how you want your audience to feel.
#3. What Font Should Your YouTube Logo Have?
While YouTube doesn’t offer a lot of real-estate for text, you might still want to include the name of your brand on your logo.
Potentially, the font you choose for your logo will also be the font for the text that appears on your YouTube videos and your channel art. With that in mind, it is important that you pick one that works best for you at the start. Here are some details to look for when selecting a font.
Legibility: Does the font get too hard to read the smaller it gets? It’s not uncommon for some fonts to become a messy blur once the size is reduced on desktop and mobile.
Simplicity: The most important thing about the font is its readability. If it looks like your doctor’s handwriting, then it might not be the best choice.
Consistency: Placed next to your icon, does the font look natural? You might not want to put an icon of a robot next to a font that looks like calligraphy.
#4. How Should You Design Your YouTube Logo?
Do you really need borders or supporting texts? I ask because the more you have on your logo, the less space it will have to stand out.
White space is your friend, it keeps the viewer’s attention focused on what matters and keeps the design uncluttered.
Save your logo as a vector so that you have the ability to scale without losing the image’s quality.
I get it, you are here to make a YouTube channel, not to design a logo. You’re not a designer. Don’t fret, we have a bunch of free logo making tools for you to create an awesome logo.
If you don’t want to create a logo or if the channel is of your own personal brand, then use a quality photograph or headshot of yourself. Doing so allows people to see who you are and develop an instant connection with you.
#5. What Makes A Good YouTube Channel Banner?
Your YouTube banner, or sometimes known as the channel art, is the cover page for your YouTube channel.
While the old adage tells us not to judge anything by the cover, in a world where we have a surplus of content, it is something we all must do for the sake of our time. If we see channel art that doesn’t appeal to us or doesn’t match the video content created, it is jarring. We are distracted from what matters and left questioning why we are on this channel in the first place.
Alternatively, if YouTube channel art is well designed and matches the aesthetic of the channel, then it can inspire your viewers to watch more, share, and subscribe.
So with that said, what makes a great YouTube banner?
Sizing: YouTube comes with sizing recommendations . The size they suggest is because of all the different devices viewers use to consume content.
You cannot control where and how your viewers consume your content. They can be watching on desktop, smartphone, tablet, or tv via Apple TV or Chromecast. That is why it is so important to have a responsive design: appropriate sizing and layout ensures that nothing important is cut off.

Less is more: There is already a lot happening on your YouTube channel page. Crowding your channel art will add more chaos than clarity. Additionally, since the design will shift from device to device, you may lose elements of the design if it is overcrowded.
Keep it in the middle: By keeping all the design elements and text within the safe zone, you can assure nothing will be cut out even if it is viewed on a less than optimal screen. It is a shame when you see that a headline is cut out and you cannot read the whole banner. Use YouTube’s template to help guide your design and ensure that everything important is visible.
High-resolution images: Nothing shouts “I’m an amateur” like having a pixelated image for your banner. Setting a high standard for images at the start will ensure that your whole channel will look professional from the beginning.
Take a go at creating your own channel art with some great YouTube design tools such as Canva and Crello.
Don’t have time to design at the moment? Download 50 free YouTube banner that we created to help busy creators like yourself get a professional page up and running right away.
Part 2: Building Out a YouTube Content Plan
Now that you know how to create a YouTube channel, you will need content to fill it up.
There are many factors to having success on YouTube and one has always been delivering content consistently. You may feel at this moment, that your brain is storming with ideas, but believe me, you don’t want to get caught in a drought. The way to avoid major blockers for your channel is to have a content plan at the onset.
A content plan helps guide you towards the mission, the reason you are building this YouTube channel in the first place.
Topics: Your YouTube channel will be focused on one broad topic, whether it be fashion, health, food, etc. It is hard to fly on a whim with a topic that covers such a wide scope. Creating content for these topics will require preparations and that’s why the earlier you have the content ideas for your video the more time you’ll have to research, rehearse, and get the best result.
Begin with a blank piece of paper and break down your topic into 5-10 different categories. If you have a channel about cooking, it may look something like this: breakfast, lunch, dinner, dessert, snack, etc.
From there, you can drill down more and explore specific topics such as “cheap meals,” “street food,” , etc. Niching down allows those who are looking for a more specific piece of content to find your material. Also, when one specific piece of content performs well, it will give a boost to all the other content related to that broader topic.
Researching Your Ideas: Now that you have a big list of ideas, it’s time to do some research. With so many idea options, it’s easy to get overwhelmed by the work ahead, but stay focused and tackle one idea at a time.
When it comes to videos, discoverability is an important aspect of everything you create. You aren’t only competing with other YouTube channels, you are competing with everything in the world that can turn your viewer away from your channel. That is why you should make it as easy as possible for your content to be discovered.
Pro Tip: Search on YouTube and see if there is already a video for the idea you have. By taking a quick look at what content is out there, you can see who you’ll be competing with and determine if it is worth pursuing. If there are already a lot of existing videos on that topic, it might be too hard to for people find your content at first.
Keyword Research: For each of your ideas, you will want to conduct extensive keyword research. This research will help dictate the tags, titles, and descriptions of your videos once they are ready to publish.
There are a few ways to conduct keyword research, but we suggest using free online tools to help cut down the time spent.
1. Free tools
Ubersuggest : Type in a keyword and Ubersuggest will populate with related terms that you can use in your strategy.
Google Trends : Examine the historical trends of a keyword and determine its popularity in Google search and how it is affected annually and seasonally. Google Trends is also a good tool for seeing which topics are trending. By understanding this, you can plan your content around the hottest trends and ride the wave.
YouTube search bar : Enter your keyword into the YouTube search bar and the platform will automatically suggest the most popular searches with your keywords.
VidIQ : See what keywords other popular videos in your niche are using.
Google Adwords : Created as an advertising platform, Google Adwords also has a tool called Keyword Planner that allows you to see the monthly search traffic and the level of competition for each keyword. This tool is extremely useful for trimming down your long list of keyword ideas.
2. What Are Some Value-adding Content for YouTube?
Inspirational, educational, and entertaining: these are 3 resonating types of content as defined by Google for a YouTube audience.
Inspirational content that triggers an emotion in your audience. These content lean on good storytelling and relatable or unique experiences.
Educational content teaches the audience how to accomplish a task, improve a skill set, and discover new products or ideas.
Entertaining content is an escape for the audience. It allows them to sit back and enjoy your content and forget about what they have to deal with in real life.
You might be interested in:
3. Set Up a Content Calendar to Be Consistent on YouTube
A common issue for many YouTubers is consistency and accountability. Without a proper routine and schedule, YouTubers will end up procrastinating and publishing whenever they finish their content.
In order to properly establish an audience for your channel, there needs to be consistency and that is why it is so important to have a content calendar to affirm when a piece of content is due to be published, thus giving the creator a good idea of when to start each step of the process to meet publishing date.
There are many ways to build out a content calendar, you can simply use a spreadsheet, a calendar, or you can use other management/organization tools such as Trello or Asana . We recommend using Google Sheet and Google Calendar to start, as it is free and easy to use.
Since you are starting out, we suggest that you plan on a monthly basis, as it’ll allow you to be flexible to trending topics and adjust to insights that you’ll acquire as you analyze your content’s performance.
Part 3: Producing Your Content

Now that you have a plan it is time to start producing your content. There are many ways to approach this, as different types of channels will have different processes for researching, capturing footage, and editing.
Planning: It doesn’t have to be a fully flushed script, but any bit of planning before hitting the record button will help you prepare some valuable content to be captured. It can be an outline, breaking down the topics you want to touch on.
If it’s a food YouTube channel, you’d want the recipe and all the ingredients ready on hand. Mise en place is the French phrase that chefs use meaning “everything in its place” or having everything they need on hand so when dinner rush comes preparation is done and now they are ready to produce. This same mentality works when preparing to shoot a YouTube video. The more you prepare the easier the shoot and the editing will be.
Equipment: At the start, you can get everything done on your smartphone. But that does depend on what your channel is going to be about and who your target audiences are. If you want to film some simple sketches to entertain people, yes, a smartphone camera can work for start. But if you are reaching a professional crowd or want to appear credible, then it might be worth it to invest in a better camera, audio, and lighting equipment.
Filming/Capturing: Always do some checks before shooting your YouTube videos as bad camera angles, poor audio quality, inadequate lighting are all easier to fix before rather than after the filming. Additionally, set a reminder to backup your footage and charge your batteries after every shoot and have an extension cord or a separate hard drive ready.
Editing: Over time, you will develop your own editing style. At the start, it is best to learn the fundamentals and improve on the basics.
Selecting the software: Some video editing software programs are free and others cost a lot. Do your research, sign up for free trials, and understand the limitations of the applications and the requirements you need. If money is a factor, you might want to stick with the free options such as iMovie or affordable options such as Filmora .


Storytelling: Skilled editing enables YouTube creators to tell the story in the most effective way. This does not mean in chronological order. Think of what will hook the audience right away and what will be most impactful at the very end. Pro-tip: Use pre-set transitions sparingly, jump cuts are often the most effective and least distracting. Editing is an invisible art.
Text, graphic or special effects: Video is a show that doesn’t tell medium, so use text sparingly. People aren’t going to your channel to read. However, text when used properly compliments the video and supplies context. Graphics and special effects are good when they support the story you are telling and cheesy when used egregiously to impress the viewer.
Export to the right format: You can pretty much upload any video format to YouTube and they can figure it out. Nevertheless, YouTube recommends using MP4 and encoded with the codec.
Part 4: Optimizing and Distributing Your YouTube Video
Your job is not done after you’ve filmed, edited, and published your video on YouTube. In order to help it get discovered, you’ll need to understand what will drive your audience to click and watch your video as opposed to all the other videos on YouTube.
By performing video optimization and sharing your content in communities interested in what you are creating, you can increase the chances that your video will be seen.
1. Tips for Writing the Best Title for YouTube Video
When coming up with titles for your YouTube video, you should always have your keyword research-ready on hand for reference.
YouTube keyword crawlers read from top to bottom, so it is most effective to have your keywords at the beginning of the title. Strive to build click-worthy titles that inspire curiosity, evoke an emotion, or offer a benefit.
Example:
Good: How to Deep Fry Chicken
Better: Deep Frying Chicken That’s Better Than KFC
While you have 100 characters to work with, anything beyond 70 characters will be truncated by YouTube.
Caution: Always deliver what your title is selling. Misleading viewers can cause mistrust in your content and will turn people off your channel.
2. Tips for Writing the Best Description for YouTube Video
Treat the description as a short synopsis for your video with the keywords strategically placed at the beginning. Include a URL to your website or blog and have any other supporting information or links.
Also, the description is where you can include some boilerplate channel information.
You have 5,000 characters to work with, but only the first three lines will be above the fold.
Pro Tip: If your video is on the longer end (over 20 minutes) or has multiple sections, then you should consider adding timestamps in the description to help the viewer skip to the spot they are most interested in.
3. Tips for Writing the Best Tags for YouTube Video
Keeping that keyword research handy write 5-15 tags. Start with specific keywords, then move into general keywords, and then branded keywords.
Specific keywords: how to deep fry chicken
General keywords: fried chicken recipe
Branded keywords: KFC
4. Tips for Designing the Best Thumbnail Image
Customize thumbnails: It is recommended that you take some time to customize a thumbnail image for your video. This is the first impression and you want to entice the viewer to click and watch.
YouTube auto-selects your thumbnail from a random position on your timeline, so it isn’t mandatory to create a thumbnail, however, the image YouTube selects might not be what you want to use to attract your audience.
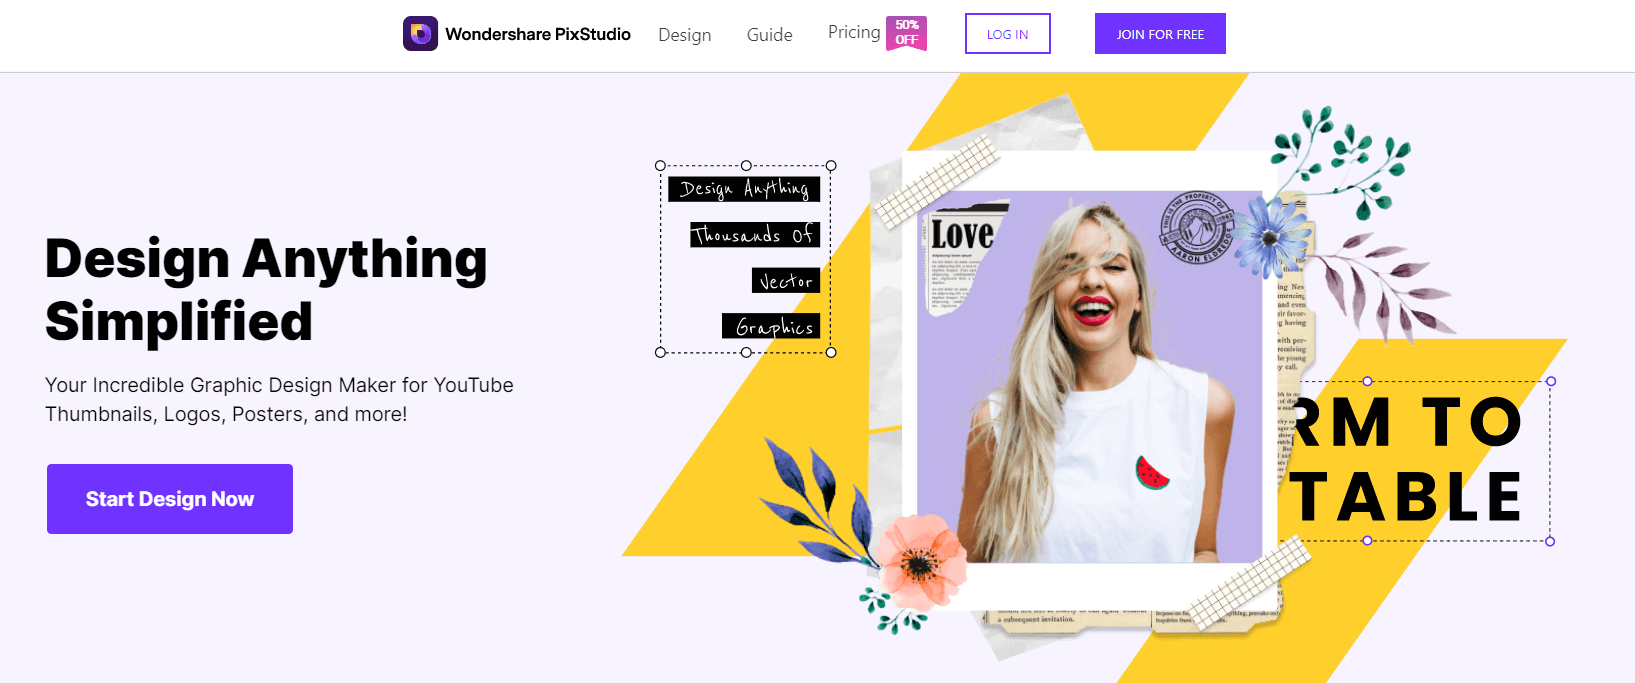
Use photo editing software: To control how you want an image to look, you will need to choose a photo editing software. Wondershare PixStudio is a good choice that provides various types of templates for YouTube Thumbnails, Logos, Posters, etc.
Have a consistent look: By having consistency, people will begin to recognize your thumbnails and even getting them excited to watch your video.
Pro Tips:
- Avoid using YouTube’s randomly selected thumbnail. Personalize it to stay consistent with your brand.
- Don’t clutter thumbnails. Less is more.
- Make fonts big if you are going to use text.
- Thumbnails have to have context, what is their story? Deliver on that promise.
- Using emotive faces have shown to appeal to people’s emotional cues and increases the likelihood of them clicking.
- Thumbnail file size should be 1280 x 720
5. Closed Captions and Uploading a Transcript
There are two key reasons why it is worth your time to use closed captions or upload a transcript for your YouTube videos.
- Having closed captions improves the video’s SEO, as Google indexes and crawls the keywords.
- For those that don’t want to or can’t hear the audio will appreciate having closed caption to allow them to enjoy the content.
6. How to Share Your Video with Social Media
Unless you have a huge social media following, it will be challenging to get many views from those channels at the start.
Grow your social media channel gradually by targeting your ideal viewer persona and hashtagging your content. On social media channels such as Facebook and Twitter, keep producing content for them, but don’t forget to share content from other YouTubers. If you see a cool video relevant to your audience, share it as well.
Lead your followers to your YouTube channel with content designed specifically for your social media channel. For example, Instagram Stories are a great way to engage directly with your followers, giving them a sneak peek or letting them know that your latest YouTube videos are up. You can even link directly to your YouTube channel from your Instagram story.
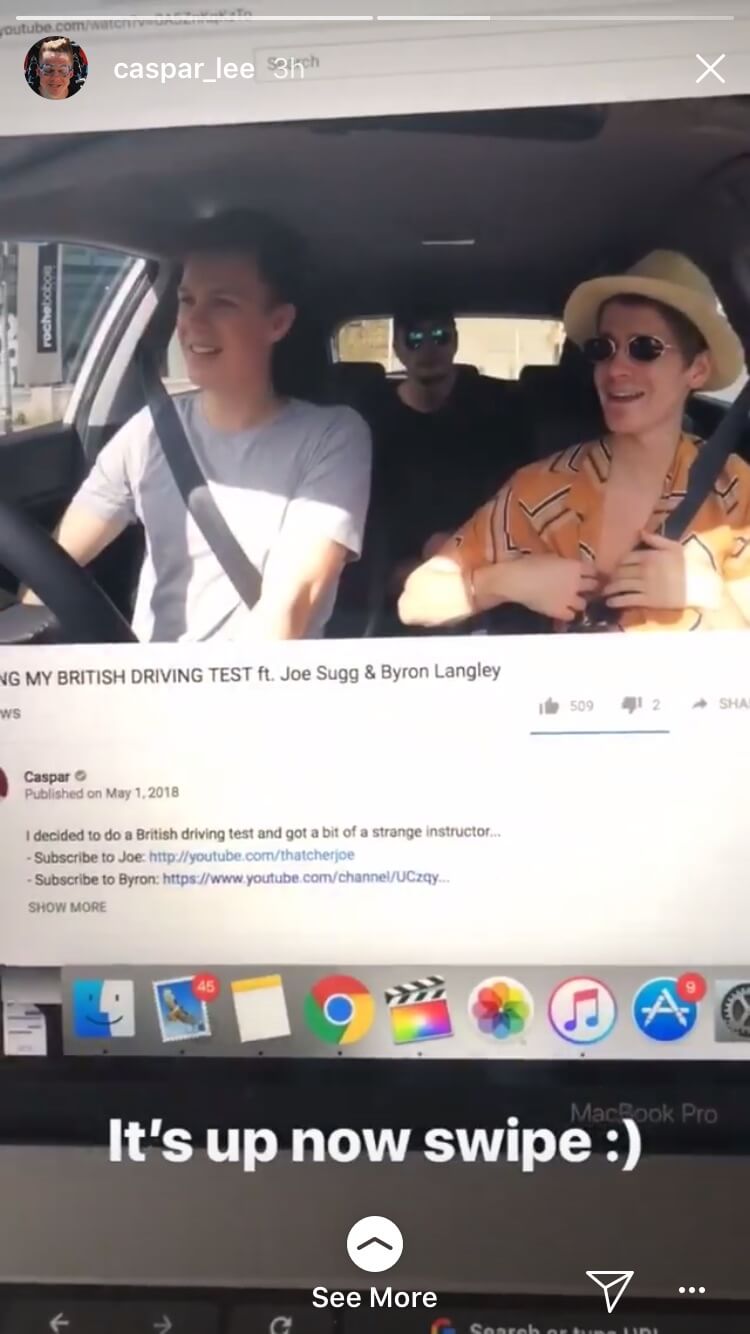
YouTuber, Caspar Lee
Join groups on social networks such as Facebook, Reddit, etc. and engage in conversations that are related or complementary to your YouTube channel. The key is to find communities that are interested in the content you are producing, but approach those groups with caution and ensure that anything you share won’t be perceived as spam.
Conclusion
There you go, now you have made your first YouTube video. It might be something you are incredibly proud of or it might have been a great learning experience. It might have gone without a hitch or you might have encountered obstacles you weren’t anticipating. Either way, you followed through and we are happy for you.
Now, get ready for the next one. The job of a YouTuber is never complete as there is always another video to make. By executing what we taught you in this guide, you now have the foundation to grow your channel. Good luck!
Richard Bennett
Richard Bennett is a writer and a lover of all things video.
Follow @Richard Bennett
Richard Bennett
Oct 26, 2023• Proven solutions
After all the planning and brainstorming, you are ready to create a YouTube channel. You have spent countless hours watching videos and aspiring to be a creator. You know it will be work, but you are passionate. You are willing to learn. You are ready!
YouTube fame is in your future, but where do you start?
In this guide, we’ll start at the beginning, at the point before you even have a YouTube channel. From there, we will walk you through your content strategy and properly prepare you for the journey of creating videos for a massive YouTube following. Then we will wrap it up by teaching you the best practices for YouTube video optimization, ensuring that all your efforts will lead to the best results.
Part 1: Setting Up Your YouTube Channel
Part 2: Building Out a YouTube Content Plan
Part 3: Producing Your Content
Part 4: Optimizing and Distributing Your YouTube Video
Okay, there is a lot to cover, so enough small talk. Let’s get started.
Part 1: Setting Up Your YouTube Channel
Before you start making awesome videos, you got to set up your YouTube account. Activating YouTube is pretty straightforward if you already have a Google account. The odds are you have already set one up to subscribe to all your favorite channels. If not, here are the steps:
Step 1: Sign in to YouTube with your Google account
Step 2: Access YouTube Creator Studio to Activate YouTube
Step 3: Create a Channel
1. Picking a YouTube Channel Name
A YouTube channel name is beneficial to your channel’s growth if selected strategically. It can separate you from all the other channels on the platform, it can help the viewers understand what your channel is all about, and it will represent you and your brand. When naming your channel, here are 3 things to remember:
- Memorable: You’d want a name that sticks in people’s brains. Picking a name that is hard to forget will be a huge advantage for you while growing your channel. But what makes a name memorable?
- Alliteration and assonance: By using the repetition of consonant or vowel sounds, you create a fluidity to the name. examples: Pewdiepie, GoPro, or League of Legend.
- Fun to say: Some words stay in the brain because it is simply pleasurable to say. It could have a genuine meaning or it can be an abstract word. Commonly these names have one of these sharp, biting consonants: C, K, Q, X, or Z. examples: Markiplier, Kwebbelkop, Squeezie, and Vox.
- Abbreviations: A name can have a greater meaning, but long names might not be catchy, therefore, you should abbreviate it to a few memorable letters. Examples: TED ED, TGFbro, ERB, and FBE.
- Longer Phrases: You may think that having a long name may be hard to remember, but sometimes, depending on your channel, a snappy phrase works. Example: How It Should Have Ended, You Always Win, and People Are Awesome.
- Your Name Plus Descriptor: Combining two words effectively can make a name more memorable like Markiplier (Mark + Multiplier), LaurDIY (Lauren and she makes DIY projects), and Shameless Maya (Maya and she’s shameless).
- Unique: Be creative with your name, especially if your real name is generic. YouTube is a crowded space and if you simply call your channel: Jake, not only will you be competing with all the creators named Jake, but also all the content with Jake as the keywords.
Also, avoid generic names that are based around your channel topics. For example, Fashion Talk sounds like a good name, but if you do a quick search you will see that it is a crowded space with vloggers, keynote presentations, and product reviews.
If you are starting a fashion channel why not try to find a link between your name and the topic? The connection between two different things often spawns something creative: Fabric Feud, for example. Just by the name, I know this channel will contain interesting perspectives on garments.
- Keep it Simple: In the end, simplicity is the way to go. Don’t make it hard to type or hard to remember: cantunderstandthistopic88768 is not a good name, even if it’s strange and cryptic.
If you have a simple name in mind, it’s also a good idea to do a quick search on YouTube and Google to make sure it isn’t already used or similar to another account. Additionally, it’s worth knowing whether the social media handle is available as you will need it to expand your channel.
Consider using your real full name, it’s unlikely to ever change. Many YouTubers start out with a stage name but end up growing out of it and simply using their real name later on in their journey.
We’ve summarized some creative ways of picking up a YouTube name, you can check our guide to picking YouTube Channel Name [4 Aspects]
2. Writing a YouTube Channel Description
YouTube is a search engine and the channel description can be treated much like an About page for a website. That is why keywords are important when composing the channel description.
What are YouTube SEO keywords?
Keywords are the words and phrases people use when they are typing into the search engine to find content. Without the right keywords, your audience may never find your videos.
If you want to start discovering new keywords for your YouTube channel, you can use Ubersuggest . This tool shows you the search volume (how frequently it is searched for) as well as how competitive (how many other channels are using it) the keyword is.
Heighten your chance of discoverability by putting keywords as close to the beginning of the description as possible. Later on in this post, we will go through how to properly conduct a keyword strategy. Hang tight.
In addition to keywords, you should also introduce who you are and what the channel is about. Give them a reason to care about your channel, how is it different than all the other ones on YouTube? Why are you the best person to be producing the content on your channel?
Then encourage the viewers to subscribe if they are interested in what the channel offers: education, entertainment, adventure, or something they can’t get anywhere else. It’s your channel, sell it.
Finally supply some extra details, including when to expect videos to be published and other social platforms where you are active on. If someone is reading your YouTube description , you have already hooked them. Here is your chance to reel them in with your channel’s purpose.
3. Creating the Perfect Logo for Your YouTube Channel
#1. What Icon Should You Use for YouTube?
You may choose an icon that best represents the content your channel is producing. For example, if your channel is about technology, you can have an icon of a robot or an iPhone. This way, when viewers only see your icon, they have an idea that they can expect content around tech.
Here are some websites in which you can download logos and icons for YouTube videos .
#2. What Color Should Your YouTube Logo Be?
When creating your logo, avoid trendy colors as they may go out of style. Instead, consider the psychology of color .
What emotions do you want your channel to evoke to your viewers?
Answering this question helps you develop a consistent branding that applies to all your content as your channel grows. Blue evokes calm and trust, whereas, red is known to increase heart rate and is associated with danger. Before you select a color scheme, know how you want your audience to feel.
#3. What Font Should Your YouTube Logo Have?
While YouTube doesn’t offer a lot of real-estate for text, you might still want to include the name of your brand on your logo.
Potentially, the font you choose for your logo will also be the font for the text that appears on your YouTube videos and your channel art. With that in mind, it is important that you pick one that works best for you at the start. Here are some details to look for when selecting a font.
Legibility: Does the font get too hard to read the smaller it gets? It’s not uncommon for some fonts to become a messy blur once the size is reduced on desktop and mobile.
Simplicity: The most important thing about the font is its readability. If it looks like your doctor’s handwriting, then it might not be the best choice.
Consistency: Placed next to your icon, does the font look natural? You might not want to put an icon of a robot next to a font that looks like calligraphy.
#4. How Should You Design Your YouTube Logo?
Do you really need borders or supporting texts? I ask because the more you have on your logo, the less space it will have to stand out.
White space is your friend, it keeps the viewer’s attention focused on what matters and keeps the design uncluttered.
Save your logo as a vector so that you have the ability to scale without losing the image’s quality.
I get it, you are here to make a YouTube channel, not to design a logo. You’re not a designer. Don’t fret, we have a bunch of free logo making tools for you to create an awesome logo.
If you don’t want to create a logo or if the channel is of your own personal brand, then use a quality photograph or headshot of yourself. Doing so allows people to see who you are and develop an instant connection with you.
#5. What Makes A Good YouTube Channel Banner?
Your YouTube banner, or sometimes known as the channel art, is the cover page for your YouTube channel.
While the old adage tells us not to judge anything by the cover, in a world where we have a surplus of content, it is something we all must do for the sake of our time. If we see channel art that doesn’t appeal to us or doesn’t match the video content created, it is jarring. We are distracted from what matters and left questioning why we are on this channel in the first place.
Alternatively, if YouTube channel art is well designed and matches the aesthetic of the channel, then it can inspire your viewers to watch more, share, and subscribe.
So with that said, what makes a great YouTube banner?
Sizing: YouTube comes with sizing recommendations . The size they suggest is because of all the different devices viewers use to consume content.
You cannot control where and how your viewers consume your content. They can be watching on desktop, smartphone, tablet, or tv via Apple TV or Chromecast. That is why it is so important to have a responsive design: appropriate sizing and layout ensures that nothing important is cut off.
Less is more: There is already a lot happening on your YouTube channel page. Crowding your channel art will add more chaos than clarity. Additionally, since the design will shift from device to device, you may lose elements of the design if it is overcrowded.
Keep it in the middle: By keeping all the design elements and text within the safe zone, you can assure nothing will be cut out even if it is viewed on a less than optimal screen. It is a shame when you see that a headline is cut out and you cannot read the whole banner. Use YouTube’s template to help guide your design and ensure that everything important is visible.
High-resolution images: Nothing shouts “I’m an amateur” like having a pixelated image for your banner. Setting a high standard for images at the start will ensure that your whole channel will look professional from the beginning.
Take a go at creating your own channel art with some great YouTube design tools such as Canva and Crello.
Don’t have time to design at the moment? Download 50 free YouTube banner that we created to help busy creators like yourself get a professional page up and running right away.
Part 2: Building Out a YouTube Content Plan
Now that you know how to create a YouTube channel, you will need content to fill it up.
There are many factors to having success on YouTube and one has always been delivering content consistently. You may feel at this moment, that your brain is storming with ideas, but believe me, you don’t want to get caught in a drought. The way to avoid major blockers for your channel is to have a content plan at the onset.
A content plan helps guide you towards the mission, the reason you are building this YouTube channel in the first place.
Topics: Your YouTube channel will be focused on one broad topic, whether it be fashion, health, food, etc. It is hard to fly on a whim with a topic that covers such a wide scope. Creating content for these topics will require preparations and that’s why the earlier you have the content ideas for your video the more time you’ll have to research, rehearse, and get the best result.
Begin with a blank piece of paper and break down your topic into 5-10 different categories. If you have a channel about cooking, it may look something like this: breakfast, lunch, dinner, dessert, snack, etc.
From there, you can drill down more and explore specific topics such as “cheap meals,” “street food,” , etc. Niching down allows those who are looking for a more specific piece of content to find your material. Also, when one specific piece of content performs well, it will give a boost to all the other content related to that broader topic.
Researching Your Ideas: Now that you have a big list of ideas, it’s time to do some research. With so many idea options, it’s easy to get overwhelmed by the work ahead, but stay focused and tackle one idea at a time.
When it comes to videos, discoverability is an important aspect of everything you create. You aren’t only competing with other YouTube channels, you are competing with everything in the world that can turn your viewer away from your channel. That is why you should make it as easy as possible for your content to be discovered.
Pro Tip: Search on YouTube and see if there is already a video for the idea you have. By taking a quick look at what content is out there, you can see who you’ll be competing with and determine if it is worth pursuing. If there are already a lot of existing videos on that topic, it might be too hard to for people find your content at first.
Keyword Research: For each of your ideas, you will want to conduct extensive keyword research. This research will help dictate the tags, titles, and descriptions of your videos once they are ready to publish.
There are a few ways to conduct keyword research, but we suggest using free online tools to help cut down the time spent.
1. Free tools
Ubersuggest : Type in a keyword and Ubersuggest will populate with related terms that you can use in your strategy.
Google Trends : Examine the historical trends of a keyword and determine its popularity in Google search and how it is affected annually and seasonally. Google Trends is also a good tool for seeing which topics are trending. By understanding this, you can plan your content around the hottest trends and ride the wave.
YouTube search bar : Enter your keyword into the YouTube search bar and the platform will automatically suggest the most popular searches with your keywords.
VidIQ : See what keywords other popular videos in your niche are using.
Google Adwords : Created as an advertising platform, Google Adwords also has a tool called Keyword Planner that allows you to see the monthly search traffic and the level of competition for each keyword. This tool is extremely useful for trimming down your long list of keyword ideas.
2. What Are Some Value-adding Content for YouTube?
Inspirational, educational, and entertaining: these are 3 resonating types of content as defined by Google for a YouTube audience.
Inspirational content that triggers an emotion in your audience. These content lean on good storytelling and relatable or unique experiences.
Educational content teaches the audience how to accomplish a task, improve a skill set, and discover new products or ideas.
Entertaining content is an escape for the audience. It allows them to sit back and enjoy your content and forget about what they have to deal with in real life.
You might be interested in:
3. Set Up a Content Calendar to Be Consistent on YouTube
A common issue for many YouTubers is consistency and accountability. Without a proper routine and schedule, YouTubers will end up procrastinating and publishing whenever they finish their content.
In order to properly establish an audience for your channel, there needs to be consistency and that is why it is so important to have a content calendar to affirm when a piece of content is due to be published, thus giving the creator a good idea of when to start each step of the process to meet publishing date.
There are many ways to build out a content calendar, you can simply use a spreadsheet, a calendar, or you can use other management/organization tools such as Trello or Asana . We recommend using Google Sheet and Google Calendar to start, as it is free and easy to use.
Since you are starting out, we suggest that you plan on a monthly basis, as it’ll allow you to be flexible to trending topics and adjust to insights that you’ll acquire as you analyze your content’s performance.
Part 3: Producing Your Content
Now that you have a plan it is time to start producing your content. There are many ways to approach this, as different types of channels will have different processes for researching, capturing footage, and editing.
Planning: It doesn’t have to be a fully flushed script, but any bit of planning before hitting the record button will help you prepare some valuable content to be captured. It can be an outline, breaking down the topics you want to touch on.
If it’s a food YouTube channel, you’d want the recipe and all the ingredients ready on hand. Mise en place is the French phrase that chefs use meaning “everything in its place” or having everything they need on hand so when dinner rush comes preparation is done and now they are ready to produce. This same mentality works when preparing to shoot a YouTube video. The more you prepare the easier the shoot and the editing will be.
Equipment: At the start, you can get everything done on your smartphone. But that does depend on what your channel is going to be about and who your target audiences are. If you want to film some simple sketches to entertain people, yes, a smartphone camera can work for start. But if you are reaching a professional crowd or want to appear credible, then it might be worth it to invest in a better camera, audio, and lighting equipment.
Filming/Capturing: Always do some checks before shooting your YouTube videos as bad camera angles, poor audio quality, inadequate lighting are all easier to fix before rather than after the filming. Additionally, set a reminder to backup your footage and charge your batteries after every shoot and have an extension cord or a separate hard drive ready.
Editing: Over time, you will develop your own editing style. At the start, it is best to learn the fundamentals and improve on the basics.
Selecting the software: Some video editing software programs are free and others cost a lot. Do your research, sign up for free trials, and understand the limitations of the applications and the requirements you need. If money is a factor, you might want to stick with the free options such as iMovie or affordable options such as Filmora .
Storytelling: Skilled editing enables YouTube creators to tell the story in the most effective way. This does not mean in chronological order. Think of what will hook the audience right away and what will be most impactful at the very end. Pro-tip: Use pre-set transitions sparingly, jump cuts are often the most effective and least distracting. Editing is an invisible art.
Text, graphic or special effects: Video is a show that doesn’t tell medium, so use text sparingly. People aren’t going to your channel to read. However, text when used properly compliments the video and supplies context. Graphics and special effects are good when they support the story you are telling and cheesy when used egregiously to impress the viewer.
Export to the right format: You can pretty much upload any video format to YouTube and they can figure it out. Nevertheless, YouTube recommends using MP4 and encoded with the codec.
Part 4: Optimizing and Distributing Your YouTube Video
Your job is not done after you’ve filmed, edited, and published your video on YouTube. In order to help it get discovered, you’ll need to understand what will drive your audience to click and watch your video as opposed to all the other videos on YouTube.
By performing video optimization and sharing your content in communities interested in what you are creating, you can increase the chances that your video will be seen.
1. Tips for Writing the Best Title for YouTube Video
When coming up with titles for your YouTube video, you should always have your keyword research-ready on hand for reference.
YouTube keyword crawlers read from top to bottom, so it is most effective to have your keywords at the beginning of the title. Strive to build click-worthy titles that inspire curiosity, evoke an emotion, or offer a benefit.
Example:
Good: How to Deep Fry Chicken
Better: Deep Frying Chicken That’s Better Than KFC
While you have 100 characters to work with, anything beyond 70 characters will be truncated by YouTube.
Caution: Always deliver what your title is selling. Misleading viewers can cause mistrust in your content and will turn people off your channel.
2. Tips for Writing the Best Description for YouTube Video
Treat the description as a short synopsis for your video with the keywords strategically placed at the beginning. Include a URL to your website or blog and have any other supporting information or links.
Also, the description is where you can include some boilerplate channel information.
You have 5,000 characters to work with, but only the first three lines will be above the fold.
Pro Tip: If your video is on the longer end (over 20 minutes) or has multiple sections, then you should consider adding timestamps in the description to help the viewer skip to the spot they are most interested in.
3. Tips for Writing the Best Tags for YouTube Video
Keeping that keyword research handy write 5-15 tags. Start with specific keywords, then move into general keywords, and then branded keywords.
Specific keywords: how to deep fry chicken
General keywords: fried chicken recipe
Branded keywords: KFC
4. Tips for Designing the Best Thumbnail Image
Customize thumbnails: It is recommended that you take some time to customize a thumbnail image for your video. This is the first impression and you want to entice the viewer to click and watch.
YouTube auto-selects your thumbnail from a random position on your timeline, so it isn’t mandatory to create a thumbnail, however, the image YouTube selects might not be what you want to use to attract your audience.
Use photo editing software: To control how you want an image to look, you will need to choose a photo editing software. Wondershare PixStudio is a good choice that provides various types of templates for YouTube Thumbnails, Logos, Posters, etc.
Have a consistent look: By having consistency, people will begin to recognize your thumbnails and even getting them excited to watch your video.
Pro Tips:
- Avoid using YouTube’s randomly selected thumbnail. Personalize it to stay consistent with your brand.
- Don’t clutter thumbnails. Less is more.
- Make fonts big if you are going to use text.
- Thumbnails have to have context, what is their story? Deliver on that promise.
- Using emotive faces have shown to appeal to people’s emotional cues and increases the likelihood of them clicking.
- Thumbnail file size should be 1280 x 720
5. Closed Captions and Uploading a Transcript
There are two key reasons why it is worth your time to use closed captions or upload a transcript for your YouTube videos.
- Having closed captions improves the video’s SEO, as Google indexes and crawls the keywords.
- For those that don’t want to or can’t hear the audio will appreciate having closed caption to allow them to enjoy the content.
6. How to Share Your Video with Social Media
Unless you have a huge social media following, it will be challenging to get many views from those channels at the start.
Grow your social media channel gradually by targeting your ideal viewer persona and hashtagging your content. On social media channels such as Facebook and Twitter, keep producing content for them, but don’t forget to share content from other YouTubers. If you see a cool video relevant to your audience, share it as well.
Lead your followers to your YouTube channel with content designed specifically for your social media channel. For example, Instagram Stories are a great way to engage directly with your followers, giving them a sneak peek or letting them know that your latest YouTube videos are up. You can even link directly to your YouTube channel from your Instagram story.
YouTuber, Caspar Lee
Join groups on social networks such as Facebook, Reddit, etc. and engage in conversations that are related or complementary to your YouTube channel. The key is to find communities that are interested in the content you are producing, but approach those groups with caution and ensure that anything you share won’t be perceived as spam.
Conclusion
There you go, now you have made your first YouTube video. It might be something you are incredibly proud of or it might have been a great learning experience. It might have gone without a hitch or you might have encountered obstacles you weren’t anticipating. Either way, you followed through and we are happy for you.
Now, get ready for the next one. The job of a YouTuber is never complete as there is always another video to make. By executing what we taught you in this guide, you now have the foundation to grow your channel. Good luck!
Richard Bennett
Richard Bennett is a writer and a lover of all things video.
Follow @Richard Bennett
Also read:
- Earnings Breakdown Youtube's AdSense Payments by Thousands of Views for 2024
- [Updated] Elevating Engagement Strategic Use of Youtube Titles
- Skyrocketing YouTube Traffic 11 SEO Insights Unveiled
- Essential YouTube Short Content Techniques Unveiled for 2024
- [New] Elevating Video Previews A Compreayer Approach for YouTube
- In 2024, Beyond Mainstream A List of 6 Exclusive Icon & Logo Providers
- Yield Cash Reviewing Gadgets, Apparel, and More on the Web
- [Updated] Bridging Streaming Realms Twitch to YouTube Conversion Strategies
- Immediate Mastery - Skilled Thumbnails for Valorant's Highlights
- Unraveling the Economic Power of Mr. Beast
- The Compreenas Guide to Seamless Time Marking in YouTube Videos (Desktop/Mobile)
- [New] Crafting a Dynamic YouTube Subscriber Shortcut
- In 2024, Earnings Engineering Crafting a High Yield Strategy for Your YouTube Channel
- Mobile-Savvy Tailoring YouTube Video Thumbnails with Phones
- Cutting-Edge Taggification Top 7 Affordable Online Extractors for YouTube for 2024
- 2024 Approved Adaptive Gaming Techniques by Pros
- Endless Eradication Guide Bypassing YouTube's Snappy Content
- Channel Acquisition 101 Maximizing Youtubers' Earnings
- In 2024, Dynamic Techniques for YouTube Promotional Videos
- [Updated] Debating Platform Preferences IGTV Versus YouTube Video Sharing
- [Updated] Efficiently Broadcasting Your Videos as Shorts via Computers & Mobile
- [New] Elevate Your Content Strategies to Climb YouTube Ranks
- Essentials of YouTube Mastery Free Online Course Series
- In 2024, Chuckling Chords & Clever Cuts 10 Parody Classics
- In 2024, Budget-Friendly Tactics to Increase Your YouTube Video Impact
- Navigating Video Earnings Dailymotion vs YouTube Showdown
- 2024 Approved Breaking Down the Monetization Barriers
- [New] Essential YouTube Video Editing Techniques
- YouTube Profile Picture Templates – Free Downloads
- [New] Channel Exploration Guide The Best Historical YouTube Selections for Students
- Boost Engagement with Creative Video Titling and Tagging Techniques
- [New] Converting Spotify Playlist Content for YouTube Music Compatibility
- 1K+ Followers in a Flash The YouTube Ultimate Playbook
- Swift Comment Removal on YouTube A Practical Guide
- [New] Everyone's Guide to YouTube Success 10 Straightforward Video Tips
- In 2024, Demystifying T-Series Income Streams via YouTube Platforms
- In 2024, Boosting Engagement A Guide to More YouTube Shorts Success
- Elevate Video Popularity with Strategic #Hashtags
- [Updated] Digital Deviation Expert Strategies to Rotate Videos on YouTube
- [New] Create Memorable Thumbnails - Discover These 8 YouTube Aids
- Valorant Portraits - Instant Professional Thumbnail Designs
- Voice Purification Solutions A Comprehensive List for All Singers Needs for 2024
- [Updated] 2024 Approved Streaming Facebook Made Easy PC/Mac/Laptop Tips and Tricks
- [Updated] A Step-by-Step Approach to Snapchat Commerce
- [Updated] Convenient Tactics for Transferring iMovie Projects to Vimeo for 2024
- [New] Frame Your Filmmaking The 3 Secrets to Instagram Borders
- [New] Using OBS with Zoom [The Easiest Steps] for 2024
- In 2024, Exploring Free Screencast Software Options on Mac
- Logo Innovations Branding Your Podcast Visually
- Latest way to get Shiny Meltan Box in Pokémon Go Mystery Box On Oppo A78 5G | Dr.fone
- What To Do if Your Nokia C12 Pro Auto Does Not Work | Dr.fone
- A Comical Voyage Analyzing 'The Goofy Escapade'
- 3 Effective Ways to Bypass Activation Lock on Apple iPhone 12 mini
- Vanguard Video Workshop Titlewright
- In 2024, 8 Best Apps for Screen Mirroring Lava Blaze 2 Pro PC | Dr.fone
- 2024 Approved High-Quality Video Webcams - Top 5 Combo's With Sound
- In 2024, Top 10 Samsung Galaxy M34 5G Android SIM Unlock APK
- Top 10 Best Free Video Compressors for 2024
- [New] In 2024, Best Video Editor for Vimeo
- How can I play .mov files on Moto G84 5G ?
- Updated Audio-Rich Experience on a Budget Unveiling the Top Six Free Video-to-Audio Techniques
- How To Repair Apple iPhone 13 iOS? | Dr.fone
- Gently Lower Sound Amplitude Tutorial
- [Updated] In 2024, Jumpstart High-Res WebCam Filming for Amazing Results
- New In 2024, Slow Down Your Videos A VLC Tutorial
- Title: "Compare & Contrast Leading Online & Desktop GIF Tools for 2024"
- Author: Kevin
- Created at : 2024-05-25 14:50:31
- Updated at : 2024-05-26 14:50:31
- Link: https://youtube-videos.techidaily.com/compare-and-contrast-leading-online-and-desktop-gif-tools-for-2024/
- License: This work is licensed under CC BY-NC-SA 4.0.
