
:max_bytes(150000):strip_icc()/difference-between-usb-and-aux-534612-8a6e2fd2677145eaaa8fb0d8635b39d5.png)
"Captivating Clicks The Top 8 YT Thumbnails to Use"
Captivating Clicks: The Top 8 YT Thumbnails to Use
Best 8 YouTube Thumbnail Grabbers You Should Know

Richard Bennett
Oct 26, 2023• Proven solutions
A YouTube thumbnail must be made very engaging and attractive to tell the potential viewers what the video is about and make them watch it. Since YouTube is a visual media platform, viewers set their eyes on the thumbnails first before they read the title of the video. If you’ve made a collage of YouTube thumbnails or designed YouTube channel art containing various freeze-frame images from different YouTube videos, you are no stranger to needing a fast way to collect YouTube thumbnail images. Online, there are several tools dedicated to solving this exact problem. These are the top five YouTube Thumbnail grabbers:
These thumbnails can be then be used in videos, blogs, articles, web pages, etc. Let’s have a look at 8 best thumbnail grabbers in the market:
- YouTube Thumbnail Grabber
- BoingBoing
- Thumbnailsave.com
- Get YouTube Thumbnail
- Fbutube.com
- YT Thumbnail Downloader
- Youtubethumbnailimage.com
- Youthumbnail.com
#1: YouTube Thumbnail Grabber
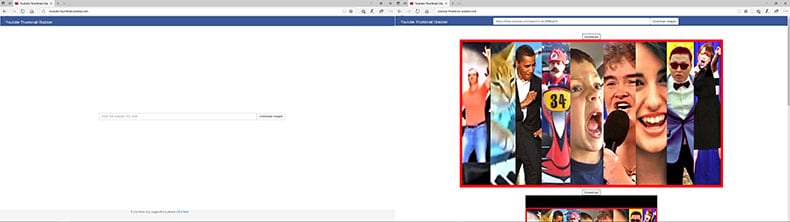
https://youtube-thumbnail-grabber.com
YouTube Thumbnail Grabber is at the top of our list. The website is very simple and clean with no ads. All you need to do is enter the YouTube video URL and click on the “Download Images” button. The site will then present you with your downloadable images in different sizes. It’s free and fast!
#2: BoingBoing
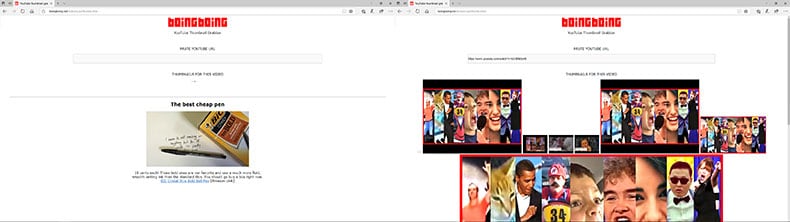
https://boingboing.net/features/getthumbs.html
BoingBoing is faster than YouTube Thumbnail grabber because it skips the “Download Images” step. As soon as you enter in your YouTube video URL, BoingBoing will automatically present you with your downloadable images. Although it is one step faster than YouTube Thumbnail Grabber, you will have to deal with having to view one small ad at the bottom of the page. In case you also want to download freeze frames that occur midway through the video, BoingBoing also gives you the option to download those images as well.
#3: Thumbnailsave.com
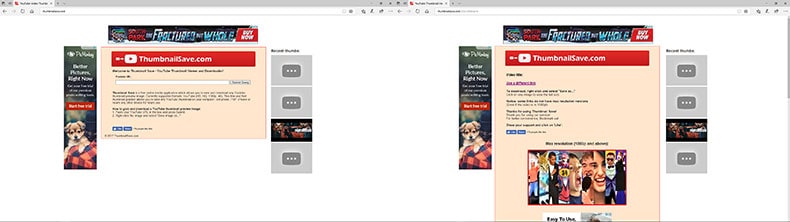
Another free, straightforward website for grabbing your YouTube thumbnails is Thumbnailsave.com. Again, all you need to do is enter the YouTube video URL and click the “Submit” button. Unlike our first two options, this site has a lot more ads. You’ll see a banner ad at the top as well as an ad to the side of the page. One interesting thing about this website is that it displays a column of thumbnails recently grabbed by users all over the world (displayed on the right side of the page). You might find this entertaining. If you are captivated by one of the thumbnail images, you can download it onto your computer and then do a reverse image search on Google to find the video.
#4: Get YouTube Thumbnail
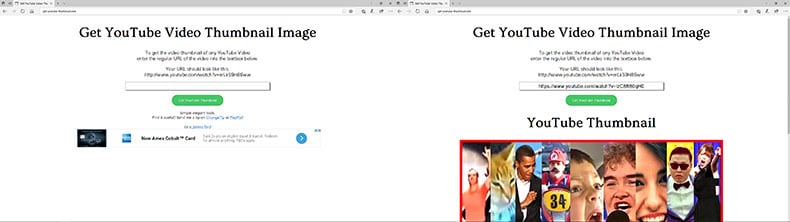
http://www.get-youtube-thumbnail.com
Get YouTube Thumbnail is another free, straightforward tool for grabbing YouTube thumbnail images. All you need to do is paste the URL of the YouTube video and click on the “Get YouTube Thumbnail” button to retrieve your thumbnail. Yes, that’s right. One thumbnail image. What’s different about this website is that it provides you with a unique image URL. This might be useful for anyone not wanting to deal with files. While this website is free to use, it does have ads.
#5: Fbutube.com
Fbtube.com is a tool that is used to download YouTube thumbnails by bloggers, YouTubers, graphic designers, etc. This tool helps to grab all the thumbnails available for a YouTube video. All you need to do is copy and paste the link of the YouTube video you like in the search bar and tap on the Generate tab.
A number of thumbnail images will be displayed of different sizes and resolutions (720p, 360p, 180p, and 90p) will be displayed for you to choose from. You can download the thumbnail you like by hitting the Download tab. This tool also offers an option to create a custom YouTube thumbnail for sharing on Facebook.
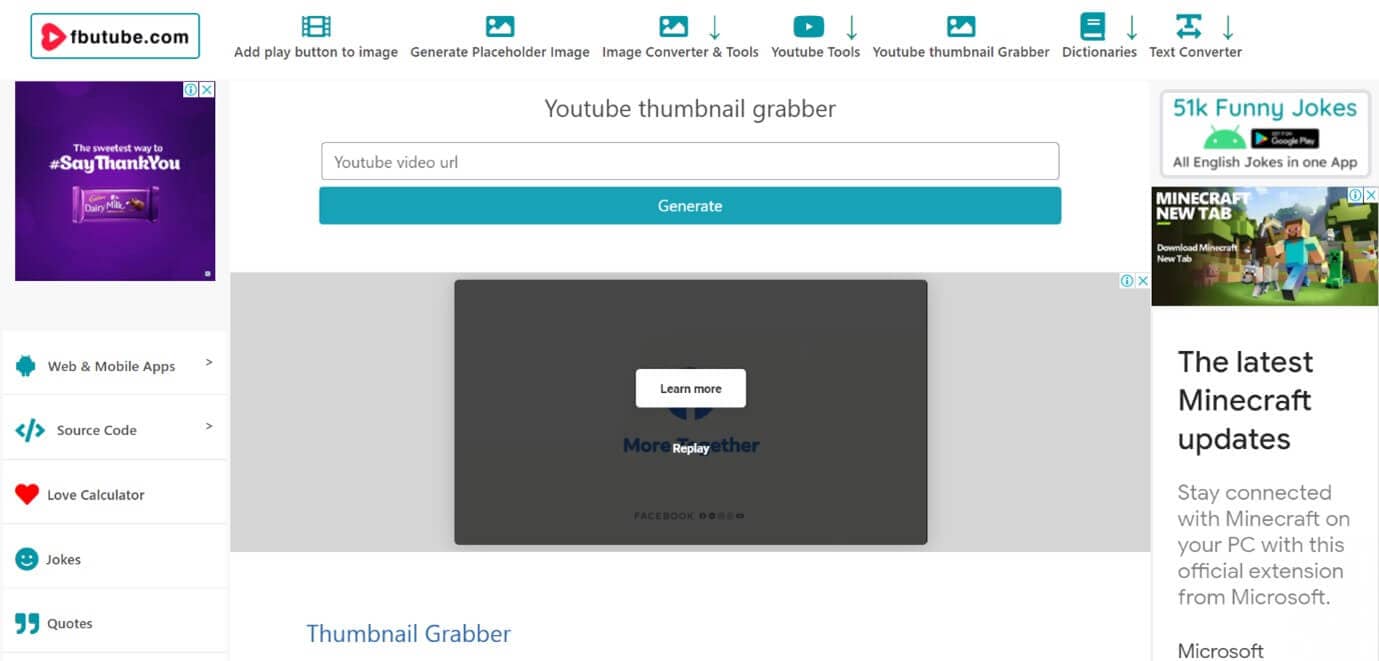
https://fbutube.com/youtube-thumbnail-grabber
#6: YT Thumbnail Downloader
YT Thumbnail Downloader is a free online tool that you can use to download the thumbnail of any YouTube video you wish. This tool is very easy to use, contains no ads, and offers thumbnails in 1080p, 720p, 480p, and 360p format.
To download the thumbnail simply paste the link of the YouTube video you like and hit the Download button. A list of thumbnails of different qualities will be displayed. Choose your desired quality and hit Download again. Another plus point of YTThumbnail Downloader is that it allows extracting thumbnails of live streaming videos.
https://yt-thumbnail-downloader.com/
#7: Youtubethumbnailimage.com
Youtubethumbnailimage.com is another free site that allows you to download YouTube thumbnails. This site allows to download thumbnails in 4 different dimensions, HD 1920x1080, SD 640x480, HQ 480x360, and MQ 320x180.
To download the thumbnail you just have to copy and paste the URL of your desired YouTube video in the search bar and hit Search. Once the results are displayed, choose a dimension and hit Download.
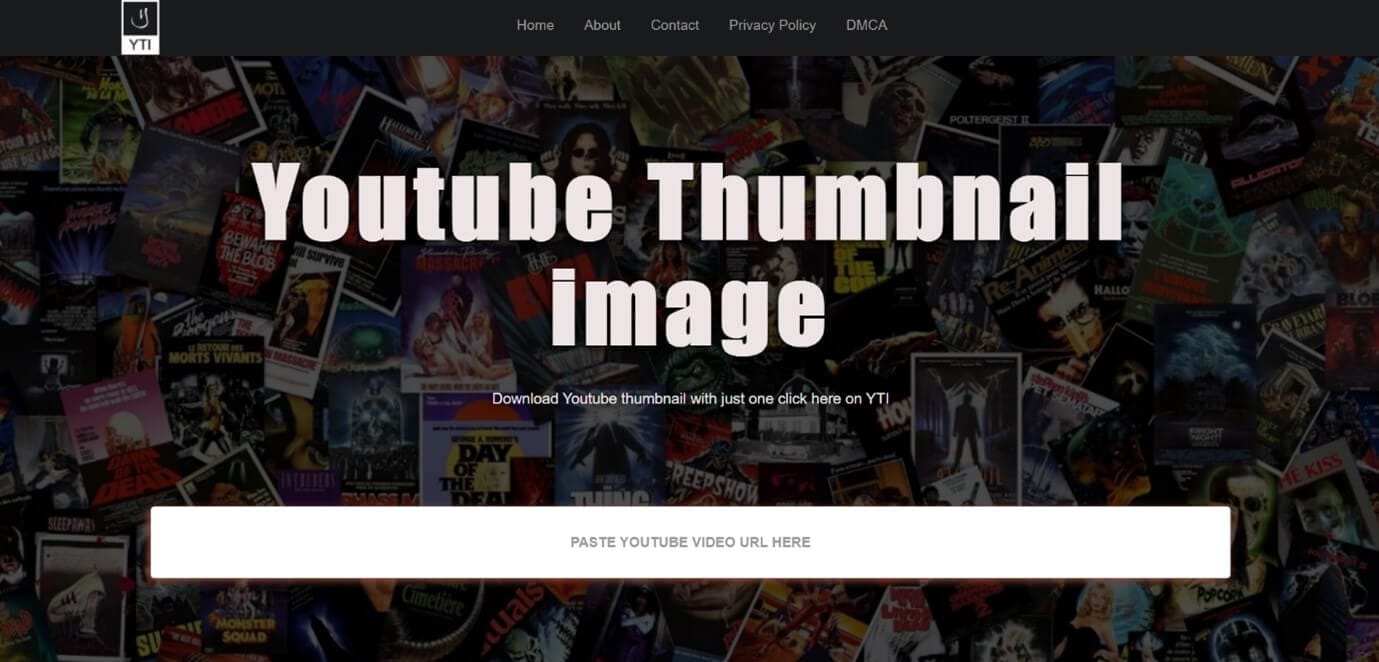
https://youtubethumbnailimage.com/
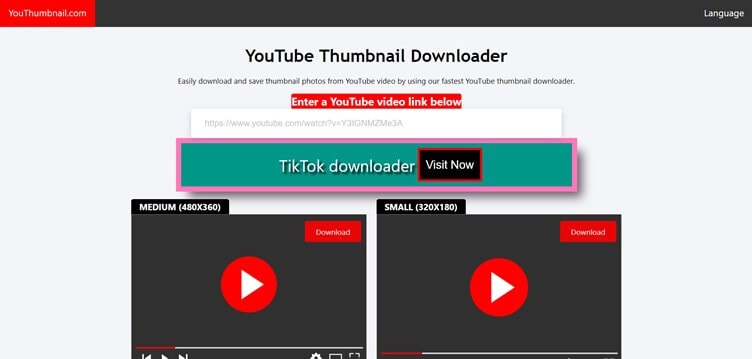
#8: Youthumbnail.com
Youthumbnail.com is the final tool we will be talking about that can help you save the YouTube thumbnail of a YouTube video. This free tool contains some annoying ads but can download YouTube thumbnail fast and easily in 3 different qualities.
To download the YouTube thumbnail, paste the link of the YouTube video you like in the search box and press Enter. Select the image of your choice from the three images displayed and the thumbnail will be downloaded for your later use.
So that’s our list of top online tools to grab your YouTube thumbnails with our favorite one being YouTube Thumbnail Grabber.
Want to know more about what makes a great YouTube thumbnail? Read all about it in our Ultimate Guide to YouTube Thumbnails.
Custom Videos with Versatile Video Editor
Filmora is a stunning video editing software that is suggested both by beginners and professionals alike for creating and editing all sorts of videos, from Gifs and one-minute videos to high-quality movies and YouTube videos. It packs in a wide variety of features like 4K editing, noise removal, color tuning, audio mixer, scene detection, video stabilization, advanced text editor, GIF support, audio equalizer, etc. that can be used to create an outstanding YouTube video of your own.
Some other features offered by Filmora that can be used to make your YouTube video more attractive are 800+ video effects, motion tracking, green screen editing, screen recording, 3D Lut, and the option to export videos to YouTube directly


Conclusion
The thumbnail is one of the most important metadata of a YouTube video and hence all the YouTubers try to design it in the best way possible. As a result, most of the thumbnails are very attractive, creative and speak a lot about the content. Hence many people including bloggers, YouTubers, content creators, etc. want to download and save these thumbnails for their videos, blogs, articles wallpapers, and much more.
The YouTube thumbnail grabbers we have listed above are free and can be used by anyone to download their desired YouTube video thumbnail in good quality. Along with that anyone who wishes to create an attractive YouTube video that stands out can use Wondershare Filmora and its extensive video editing features. Hope our suggestions help you in the future. Thank you.
Richard Bennett
Richard Bennett is a writer and a lover of all things video.
Follow @Richard Bennett
Richard Bennett
Oct 26, 2023• Proven solutions
A YouTube thumbnail must be made very engaging and attractive to tell the potential viewers what the video is about and make them watch it. Since YouTube is a visual media platform, viewers set their eyes on the thumbnails first before they read the title of the video. If you’ve made a collage of YouTube thumbnails or designed YouTube channel art containing various freeze-frame images from different YouTube videos, you are no stranger to needing a fast way to collect YouTube thumbnail images. Online, there are several tools dedicated to solving this exact problem. These are the top five YouTube Thumbnail grabbers:
These thumbnails can be then be used in videos, blogs, articles, web pages, etc. Let’s have a look at 8 best thumbnail grabbers in the market:
- YouTube Thumbnail Grabber
- BoingBoing
- Thumbnailsave.com
- Get YouTube Thumbnail
- Fbutube.com
- YT Thumbnail Downloader
- Youtubethumbnailimage.com
- Youthumbnail.com
#1: YouTube Thumbnail Grabber
https://youtube-thumbnail-grabber.com
YouTube Thumbnail Grabber is at the top of our list. The website is very simple and clean with no ads. All you need to do is enter the YouTube video URL and click on the “Download Images” button. The site will then present you with your downloadable images in different sizes. It’s free and fast!
#2: BoingBoing
https://boingboing.net/features/getthumbs.html
BoingBoing is faster than YouTube Thumbnail grabber because it skips the “Download Images” step. As soon as you enter in your YouTube video URL, BoingBoing will automatically present you with your downloadable images. Although it is one step faster than YouTube Thumbnail Grabber, you will have to deal with having to view one small ad at the bottom of the page. In case you also want to download freeze frames that occur midway through the video, BoingBoing also gives you the option to download those images as well.
#3: Thumbnailsave.com
Another free, straightforward website for grabbing your YouTube thumbnails is Thumbnailsave.com. Again, all you need to do is enter the YouTube video URL and click the “Submit” button. Unlike our first two options, this site has a lot more ads. You’ll see a banner ad at the top as well as an ad to the side of the page. One interesting thing about this website is that it displays a column of thumbnails recently grabbed by users all over the world (displayed on the right side of the page). You might find this entertaining. If you are captivated by one of the thumbnail images, you can download it onto your computer and then do a reverse image search on Google to find the video.
#4: Get YouTube Thumbnail
http://www.get-youtube-thumbnail.com
Get YouTube Thumbnail is another free, straightforward tool for grabbing YouTube thumbnail images. All you need to do is paste the URL of the YouTube video and click on the “Get YouTube Thumbnail” button to retrieve your thumbnail. Yes, that’s right. One thumbnail image. What’s different about this website is that it provides you with a unique image URL. This might be useful for anyone not wanting to deal with files. While this website is free to use, it does have ads.
#5: Fbutube.com
Fbtube.com is a tool that is used to download YouTube thumbnails by bloggers, YouTubers, graphic designers, etc. This tool helps to grab all the thumbnails available for a YouTube video. All you need to do is copy and paste the link of the YouTube video you like in the search bar and tap on the Generate tab.
A number of thumbnail images will be displayed of different sizes and resolutions (720p, 360p, 180p, and 90p) will be displayed for you to choose from. You can download the thumbnail you like by hitting the Download tab. This tool also offers an option to create a custom YouTube thumbnail for sharing on Facebook.
https://fbutube.com/youtube-thumbnail-grabber
#6: YT Thumbnail Downloader
YT Thumbnail Downloader is a free online tool that you can use to download the thumbnail of any YouTube video you wish. This tool is very easy to use, contains no ads, and offers thumbnails in 1080p, 720p, 480p, and 360p format.
To download the thumbnail simply paste the link of the YouTube video you like and hit the Download button. A list of thumbnails of different qualities will be displayed. Choose your desired quality and hit Download again. Another plus point of YTThumbnail Downloader is that it allows extracting thumbnails of live streaming videos.
https://yt-thumbnail-downloader.com/
#7: Youtubethumbnailimage.com
Youtubethumbnailimage.com is another free site that allows you to download YouTube thumbnails. This site allows to download thumbnails in 4 different dimensions, HD 1920x1080, SD 640x480, HQ 480x360, and MQ 320x180.
To download the thumbnail you just have to copy and paste the URL of your desired YouTube video in the search bar and hit Search. Once the results are displayed, choose a dimension and hit Download.
https://youtubethumbnailimage.com/
#8: Youthumbnail.com
Youthumbnail.com is the final tool we will be talking about that can help you save the YouTube thumbnail of a YouTube video. This free tool contains some annoying ads but can download YouTube thumbnail fast and easily in 3 different qualities.
To download the YouTube thumbnail, paste the link of the YouTube video you like in the search box and press Enter. Select the image of your choice from the three images displayed and the thumbnail will be downloaded for your later use.
So that’s our list of top online tools to grab your YouTube thumbnails with our favorite one being YouTube Thumbnail Grabber.
Want to know more about what makes a great YouTube thumbnail? Read all about it in our Ultimate Guide to YouTube Thumbnails.
Custom Videos with Versatile Video Editor
Filmora is a stunning video editing software that is suggested both by beginners and professionals alike for creating and editing all sorts of videos, from Gifs and one-minute videos to high-quality movies and YouTube videos. It packs in a wide variety of features like 4K editing, noise removal, color tuning, audio mixer, scene detection, video stabilization, advanced text editor, GIF support, audio equalizer, etc. that can be used to create an outstanding YouTube video of your own.
Some other features offered by Filmora that can be used to make your YouTube video more attractive are 800+ video effects, motion tracking, green screen editing, screen recording, 3D Lut, and the option to export videos to YouTube directly
Conclusion
The thumbnail is one of the most important metadata of a YouTube video and hence all the YouTubers try to design it in the best way possible. As a result, most of the thumbnails are very attractive, creative and speak a lot about the content. Hence many people including bloggers, YouTubers, content creators, etc. want to download and save these thumbnails for their videos, blogs, articles wallpapers, and much more.
The YouTube thumbnail grabbers we have listed above are free and can be used by anyone to download their desired YouTube video thumbnail in good quality. Along with that anyone who wishes to create an attractive YouTube video that stands out can use Wondershare Filmora and its extensive video editing features. Hope our suggestions help you in the future. Thank you.
Richard Bennett
Richard Bennett is a writer and a lover of all things video.
Follow @Richard Bennett
Achieve Professional-Level YouTube Transcription Without Spending
How to Transcribe a YouTube Video for FREE
Richard Bennett
Mar 27, 2024• Proven solutions
If you want to transcribe your videos to make the dialogs and speeches available in text format, you can use YouTube Transcribe feature that the streaming site offers for free. In this article, I’ll share with you a couple of methods to transcribe a YouTube video for free.
- Part 1: Transcribe YouTube Video Automatically for Free [2 Ways]
- Part 2: Transcribe YouTube Video to Text Online with Third-Party Service
- Part 3: Benefits of Transcribing YouTube Videos
- Part 4: YouTube Video Transcription FAQs
Part 1: How to Transcribe YouTube Video Automatically for Free [2 Ways]
Besides the basic video editing features on the YouTube platform, you can now quickly transcribe YouTube videos to the text as well. The good thing is, you can either use the automatic transcription feature that YouTube offers, or upload it manually while adjusting the timing as you go further.
Below are the two methods to transcribe your YouTube videos for free:
Method 1: Use the Automated Transcription Service on YouTube
As the name suggests, YouTube automatic transcription service works automatically. This means you don’t even have to click the ‘Transcribe’ button anymore to transcribe a YouTube video, and the website takes care of it on its own. All you need to do is, choose English as the language of the video when setting up subtitles. You can follow the instructions given below to do so:
Step 1 Upload a Video
Sign in to your YouTube account, click your profile picture from the top-right corner, and click YouTube Studio from the menu. Next, click CREATE from the upper-right corner, click Upload videos from the menu, and drag and drop a video from your computer to the Upload videos box that appears next.

Step 2 Select Transcription Language
On the Details page of the next box that appears, scroll down and click MORE OPTIONS, and select English in the Video language drop-down list under the Language, subtitles, and closed captions (CC) section.

Step 3 Publish the Video
Follow the on-screen instructions from this point to publish the video, and wait while YouTube automatically transcribes and adds the close captions to it.
Note: Depending on the duration of the clip, the time YouTube would take to transcribe may vary.
After YouTube has transcribed the video, you can download the transcription file in your preferred format. The instructions are given below explain how you can do so:
- Get to the Subtitles Window
While on the YouTube Studio page, click Subtitles from the left pane to go to the Channel subtitles page. And then click the video you want to modify.
- Get to Classic Studio
In the video subtitle page of the target video, hover mouse on the Published Automatic status under the Subtitles column, click the Options icon (with three vertical dots) that appears, and click Edit on Classic Studio.

- Download Transcription File
Click and open the Actions drop-down list from the top-left corner of the left pane, click your preferred transcription format including .vtt, .srt and .sbv from the list, and save the file on your local hard disk.

Method 2: Get YouTube Transcription when Watching
In addition, if you are watching any other video, you can make YouTube transcribe that for you as well. You can follow the instructions given below to get the YouTube video to text transcription:
Step 1: Play the Video
Go to the video on YouTube and start playing it. Make sure NOT to get to full-screen mode as doing so would hide the option to transcribe the clip.
Step 2: Enable Transcription
Click the More icon (with three horizontal dots) from under the bottom-right corner of the video player, and click Open transcript to see the video transcription in the Transcript pane that appears in the right.
Step 3: Manage Timestamps
Click the Options icon (with three vertical dots) from the top-right corner of the Transcript pane, and click Toggle timestamp to enable or disable the timestamps in the video transcription.
Limitations of Using YouTube Transcribe
Although YouTube’s automatic transcription is a decent feature that saves you a lot of time, since Google uses machine learning algorithms to convert the speech to text, the level of accuracy may vary depending on the accent of the speaker, and the clarity of the audio the video has. Also, even sometime you may not be satisfied with the end-results.
Alternatively, you can use Kapwing to transcribe a YouTube video and download the transcription file with the below step-by-step instructions:
Step 1: Add YouTube Video
Copy the URL of YouTube video you want to transcribe, go to https://www.kapwing.com/subtitles , paste the URL in the Paste a URL field, wait while Kapwing fetches the content of the video, and opens the Add subtitles to Video page.
Step 2: Transcribe the Video
Click Auto-generate from the right window, and follow the on-screen instructions to transcribe YouTube video to text.

Step 3: Download the Transcription File
Click Download SRT from the left pane, and follow the instructions from there to download the transcription file in *.srt format.

Pros
- Kapwing is free to use
- The auto-transcription process is quick and less tedious
- Kapwing also allows manual transcription and uploading of an existing *.srt file
Cons
- The auto-transcribed text might lack accuracy as the task is done by the speech-to-text tools that work in the background
You can follow the step-by-step instructions to transcribe a YouTube video and download the transcription file using Kapwing:
Step 1: Add YouTube Video
Copy the URL of YouTube video you want to transcribe, go to https://www.kapwing.com/subtitles , paste the URL in the Paste a URL field, wait while Kapwing fetches the content of the video, and opens the Add subtitles to Video page.
Step 2: Transcribe the Video
Click Auto-generate from the right window, and follow the on-screen instructions to transcribe YouTube video to text.
Step 3: Download the Transcription File
Click Download SRT from the left pane, and follow the instructions from there to download the transcription file in *.srt format.
Pros
- Kapwing is free to use
- The auto-transcription process is quick and less tedious
- Kapwing also allows manual transcription and uploading of an existing *.srt file
Cons
- The auto-transcribed text might lack accuracy as the task is done by the speech-to-text tools that work in the background
Part 3: Benefits of Transcribing YouTube Videos
You may need video transcriptions for several reasons, such as analyzing the summary of the entire speech in the video, extracting a single phrase or quote that was spoken in the clip, or making the video helpful even for those suffering from hearing impairment. When you transcribe a YouTube video, the transcript can be useful in many ways. Some of the most common benefits of transcribing a video include:
- Search Engine Optimization
When you add subtitles, the text can appear in Google search results when someone types a similar phrase in the search box. This helps get more views to your videos, thus giving your channel popularity, and you, monetary gains in the long run.
- Accent
If the speaker in the video is from a different region and is using an accent that you are not much comfortable with, you can turn on the subtitles and read the dialogs along with the video.
- Repurposing on Blogs
If you own a blog that you have embedded your video to, the transcription could be used to add text to it so the target audience can get a fair idea of what the video is all about. This is useful because many people prefer reading over watching.
YouTube Video Transcription FAQs
1. How to Transcribe YouTube Video to Text
Usually the transcription files have *.srt extension that are globally accepted and supported by almost all media players. However, there might be instances when you want to have the subtitles in plain text.
That said, to convert an SRT file to TXT, you can:
- Right-click the SRT file
- Go to Rename
- Replace srt with txt and press Enter
- Click OK on the confirmation box that appears next to convert SRT to TXT
After this, you can simply double-click the file, and read and modify the transcribed content as needed.
2. How to Edit and Upload Edited Transcript to YouTube
If you made any modifications to the transcript that was automatically generated by YouTube or any other third-party transcription tool, you can follow the steps given below to upload the new file to the YouTube video:
- Go to YouTube Studio and then to the Channel subtitles page as explained earlier
- Expand the Languages column of the target video
- Click the Options icon that appears under the Subtitles column when you hover mouse on to it
- Click Edit on Classic Studio
- On the next page, click Edit from the top-right corner

- Click to open the Actions drop-down list from the upper-left corner
- Click Upload a file
- Follow the on-screen instructions from there to upload the modified transcription file
- Click Save Changes from the top-right corner of the page when done
Conclusion
If you are looking for a quick and easy way of adding subtitles to your videos, letting YouTube transcribe for you could be a good approach. However, because these auto-generated transcriptions are created by machine learning algorithms, their accuracy cannot be counted on. Therefore, the best way to get the job done accurately is, let YouTube auto-transcribe your video, download the transcription file, make the necessary changes to it, and then upload the file back to the video.
Richard Bennett
Richard Bennett is a writer and a lover of all things video.
Follow @Richard Bennett
Richard Bennett
Mar 27, 2024• Proven solutions
If you want to transcribe your videos to make the dialogs and speeches available in text format, you can use YouTube Transcribe feature that the streaming site offers for free. In this article, I’ll share with you a couple of methods to transcribe a YouTube video for free.
- Part 1: Transcribe YouTube Video Automatically for Free [2 Ways]
- Part 2: Transcribe YouTube Video to Text Online with Third-Party Service
- Part 3: Benefits of Transcribing YouTube Videos
- Part 4: YouTube Video Transcription FAQs
Part 1: How to Transcribe YouTube Video Automatically for Free [2 Ways]
Besides the basic video editing features on the YouTube platform, you can now quickly transcribe YouTube videos to the text as well. The good thing is, you can either use the automatic transcription feature that YouTube offers, or upload it manually while adjusting the timing as you go further.
Below are the two methods to transcribe your YouTube videos for free:
Method 1: Use the Automated Transcription Service on YouTube
As the name suggests, YouTube automatic transcription service works automatically. This means you don’t even have to click the ‘Transcribe’ button anymore to transcribe a YouTube video, and the website takes care of it on its own. All you need to do is, choose English as the language of the video when setting up subtitles. You can follow the instructions given below to do so:
Step 1 Upload a Video
Sign in to your YouTube account, click your profile picture from the top-right corner, and click YouTube Studio from the menu. Next, click CREATE from the upper-right corner, click Upload videos from the menu, and drag and drop a video from your computer to the Upload videos box that appears next.
Step 2 Select Transcription Language
On the Details page of the next box that appears, scroll down and click MORE OPTIONS, and select English in the Video language drop-down list under the Language, subtitles, and closed captions (CC) section.
Step 3 Publish the Video
Follow the on-screen instructions from this point to publish the video, and wait while YouTube automatically transcribes and adds the close captions to it.
Note: Depending on the duration of the clip, the time YouTube would take to transcribe may vary.
After YouTube has transcribed the video, you can download the transcription file in your preferred format. The instructions are given below explain how you can do so:
- Get to the Subtitles Window
While on the YouTube Studio page, click Subtitles from the left pane to go to the Channel subtitles page. And then click the video you want to modify.
- Get to Classic Studio
In the video subtitle page of the target video, hover mouse on the Published Automatic status under the Subtitles column, click the Options icon (with three vertical dots) that appears, and click Edit on Classic Studio.
- Download Transcription File
Click and open the Actions drop-down list from the top-left corner of the left pane, click your preferred transcription format including .vtt, .srt and .sbv from the list, and save the file on your local hard disk.
Method 2: Get YouTube Transcription when Watching
In addition, if you are watching any other video, you can make YouTube transcribe that for you as well. You can follow the instructions given below to get the YouTube video to text transcription:
Step 1: Play the Video
Go to the video on YouTube and start playing it. Make sure NOT to get to full-screen mode as doing so would hide the option to transcribe the clip.
Step 2: Enable Transcription
Click the More icon (with three horizontal dots) from under the bottom-right corner of the video player, and click Open transcript to see the video transcription in the Transcript pane that appears in the right.
Step 3: Manage Timestamps
Click the Options icon (with three vertical dots) from the top-right corner of the Transcript pane, and click Toggle timestamp to enable or disable the timestamps in the video transcription.
Limitations of Using YouTube Transcribe
Although YouTube’s automatic transcription is a decent feature that saves you a lot of time, since Google uses machine learning algorithms to convert the speech to text, the level of accuracy may vary depending on the accent of the speaker, and the clarity of the audio the video has. Also, even sometime you may not be satisfied with the end-results.
Alternatively, you can use Kapwing to transcribe a YouTube video and download the transcription file with the below step-by-step instructions:
Step 1: Add YouTube Video
Copy the URL of YouTube video you want to transcribe, go to https://www.kapwing.com/subtitles , paste the URL in the Paste a URL field, wait while Kapwing fetches the content of the video, and opens the Add subtitles to Video page.
Step 2: Transcribe the Video
Click Auto-generate from the right window, and follow the on-screen instructions to transcribe YouTube video to text.
Step 3: Download the Transcription File
Click Download SRT from the left pane, and follow the instructions from there to download the transcription file in *.srt format.
Pros
- Kapwing is free to use
- The auto-transcription process is quick and less tedious
- Kapwing also allows manual transcription and uploading of an existing *.srt file
Cons
- The auto-transcribed text might lack accuracy as the task is done by the speech-to-text tools that work in the background
You can follow the step-by-step instructions to transcribe a YouTube video and download the transcription file using Kapwing:
Step 1: Add YouTube Video
Copy the URL of YouTube video you want to transcribe, go to https://www.kapwing.com/subtitles , paste the URL in the Paste a URL field, wait while Kapwing fetches the content of the video, and opens the Add subtitles to Video page.
Step 2: Transcribe the Video
Click Auto-generate from the right window, and follow the on-screen instructions to transcribe YouTube video to text.
Step 3: Download the Transcription File
Click Download SRT from the left pane, and follow the instructions from there to download the transcription file in *.srt format.
Pros
- Kapwing is free to use
- The auto-transcription process is quick and less tedious
- Kapwing also allows manual transcription and uploading of an existing *.srt file
Cons
- The auto-transcribed text might lack accuracy as the task is done by the speech-to-text tools that work in the background
Part 3: Benefits of Transcribing YouTube Videos
You may need video transcriptions for several reasons, such as analyzing the summary of the entire speech in the video, extracting a single phrase or quote that was spoken in the clip, or making the video helpful even for those suffering from hearing impairment. When you transcribe a YouTube video, the transcript can be useful in many ways. Some of the most common benefits of transcribing a video include:
- Search Engine Optimization
When you add subtitles, the text can appear in Google search results when someone types a similar phrase in the search box. This helps get more views to your videos, thus giving your channel popularity, and you, monetary gains in the long run.
- Accent
If the speaker in the video is from a different region and is using an accent that you are not much comfortable with, you can turn on the subtitles and read the dialogs along with the video.
- Repurposing on Blogs
If you own a blog that you have embedded your video to, the transcription could be used to add text to it so the target audience can get a fair idea of what the video is all about. This is useful because many people prefer reading over watching.
YouTube Video Transcription FAQs
1. How to Transcribe YouTube Video to Text
Usually the transcription files have *.srt extension that are globally accepted and supported by almost all media players. However, there might be instances when you want to have the subtitles in plain text.
That said, to convert an SRT file to TXT, you can:
- Right-click the SRT file
- Go to Rename
- Replace srt with txt and press Enter
- Click OK on the confirmation box that appears next to convert SRT to TXT
After this, you can simply double-click the file, and read and modify the transcribed content as needed.
2. How to Edit and Upload Edited Transcript to YouTube
If you made any modifications to the transcript that was automatically generated by YouTube or any other third-party transcription tool, you can follow the steps given below to upload the new file to the YouTube video:
- Go to YouTube Studio and then to the Channel subtitles page as explained earlier
- Expand the Languages column of the target video
- Click the Options icon that appears under the Subtitles column when you hover mouse on to it
- Click Edit on Classic Studio
- On the next page, click Edit from the top-right corner
- Click to open the Actions drop-down list from the upper-left corner
- Click Upload a file
- Follow the on-screen instructions from there to upload the modified transcription file
- Click Save Changes from the top-right corner of the page when done
Conclusion
If you are looking for a quick and easy way of adding subtitles to your videos, letting YouTube transcribe for you could be a good approach. However, because these auto-generated transcriptions are created by machine learning algorithms, their accuracy cannot be counted on. Therefore, the best way to get the job done accurately is, let YouTube auto-transcribe your video, download the transcription file, make the necessary changes to it, and then upload the file back to the video.
Richard Bennett
Richard Bennett is a writer and a lover of all things video.
Follow @Richard Bennett
Also read:
- [Updated] Achieve Seamless Video Playback by Removing Bars in YouTube
- [Updated] AudioHarmony Editor for Professional PC Users
- Efficient Mac Video Resizing to Fixed Ratio for 2024
- [Updated] Defining Your Digital DNA A Guide to YouTubing Personal Branding
- Unveiling the Best Vimeo/YouTube Release Schedule
- 1 Ranked YouTube to Text Online Service
- Discover 9 Affordable Online Editors for YouTube
- Understanding YouTube Shorts Earning Potential
- 8 Free Online Video Editors for YouTube
- [Updated] Boosting Narrative Pace in Vlogging Through Jump Cuts
- Essential YouTube Yoga Channels for Fitness Enthusiasts
- How to Start Your Vlog and Make Money From It
- [Updated] Disable Non-Specific YouTube Video Alerts
- 2024 Approved A Compreehed Guide to Online Identity YouTube Account Setup
- In 2024, Demystifying YouTube's Keyword Power Play
- Proactive Strategies in Building an Irresistible Online Identity on YouTube
- The Mobile Filmmaker's Blueprint Crafting Viral Thumbnails for YouTubes
- Scripting Summative Stories
- Duration Decoded A Guide to Editing YouTube Videos
- From Zero to Hero YouTube Setup, Growth & Profit Strategies
- Exploring Trending Video Reactions
- 10 Power Players YouTube's Ladies in Gaming
- In 2024, Creating Compelling Solo Videos on a Budget
- Countdown in Forward The Counterintuitive Playlist Method
- The Latest on YouTube Ad Income Guidelines
- [New] Charting Financial Success The Tale of Ajey (CarryMinati) and YouTube
- [New] Best Free YouTube Comment Finder You Should Try
- Efficiently Engaging with Numerous YouTube Lectures for 2024
- [Updated] Amplify Your Video's Value Anywhere on Multiple Devices
- 2024 Approved Channel-Saving Techniques YouTube Meets IGTV
- [Updated] 2024 Approved Quicken Video Playback on Instagram Apps
- [Updated] Dashboard Directions Entering Google Meet (PC/Mobile) for 2024
- [New] Rookie Recording Assessment Guide for 2024
- [New] Unplugged Gaming World - The Ultimate List of Best Free Mobile Apps
- In 2024, Forgotten The Voicemail Password Of Xiaomi 14 Ultra? Try These Fixes
- In 2024, Break Free the Chuckles The Most Hilarious Facebook Detainment Stories
- [New] Practical Guide to Swapping Gender Representation Online From Basics to Expertise for 2024
- [New] 2024 Approved Mastering Filming Techniques on TikTok Platforms
- Select Your Go-To Teacher Recording Software Now for 2024
- Direct Sharing Integrating Twitter Video Into Instagram Experience
- [New] In 2024, Unraveling Friends' Pixels Speed Up Searches
- [New] 2024 Approved The Art of Changing Meeting Screens on Microsoft Teams
- In 2024, How to Use Life360 on Windows PC For Xiaomi 13 Ultra? | Dr.fone
- 2024 Approved Is Auto-Gain Control Effective in Optimizing Speech Intelligibility?
- Tutorial Transforming Images Into Engaging GIFs
- Exploring the Depth of Bandicam's Recording Features and Techniques for 2024
- Reasons why Pokémon GPS does not Work On Vivo V29 Pro? | Dr.fone
- 2024 Approved From Confinement to Comedy Selecting Lighthearted FB Incarceration Moments
- [Updated] Accelerate Image Editing Mastery with Pivotal Pixlr Tips
- In 2024, Top 10 Fingerprint Lock Apps to Lock Your Infinix Smart 8 Plus Phone
- The Financial Key to Boosting Your Video's Reach
- In 2024, How to Bypass Google FRP Lock on Samsung Galaxy M14 5G Devices
- In 2024, Tailored Approaches to PC Screen Recordings Using Dell
- In 2024, Streamline Your Social Media Find Facebook Watched Videos Easily
- Updated The Ultimate Guide to Low-Budget Film Editing Software for 2024
- Title: "Captivating Clicks The Top 8 YT Thumbnails to Use"
- Author: Kevin
- Created at : 2024-05-25 14:47:27
- Updated at : 2024-05-26 14:47:27
- Link: https://youtube-videos.techidaily.com/captivating-clicks-the-top-8-yt-thumbnails-to-use/
- License: This work is licensed under CC BY-NC-SA 4.0.
