
:max_bytes(150000):strip_icc()/snapchat-friends-83a289161f554150a202e17e23f441c9.png)
Boost Your YouTube Earnings with Effective AdSense Use for 2024
Boost Your YouTube Earnings with Effective AdSense Use
How to Use AdSense for YouTube

Richard Bennett
Mar 27, 2024• Proven solutions
Now, since your YouTube channel has a large of subscribers and views, you start thinking to make money by using YouTube AdSense. However, do you really know YouTube AdSense very well? Or even, do you even know what it is exactly. In order to let you better understand it and make money, we have rounded up all information here to explain the basic knowledge of AdSense to you. Keeping reading to learn more!
- Part1: What is Adsense
- Part2: How to Link YouTube Account to Adsense
- Part3: How to Use AdSense for YouTube
Part 1: What is Adsense?
You might have noticed several ads displayed on the videos on various social platforms. AdSense is a part of Google that is responsible for placing such ads in the videos. You can sign in from YouTube account directly.
When you wish to place an ad, you may publish it on various media through Adsense. As an advertiser, you may publish anything in videos, images or texts on the websites and pay per impression or per click or per conversion.
Having a YouTube Adsense account or your website connected to Adsense account can help you earn money when Google places ads to your channel.
Do not worry, creating a Google Adsense account is free and when you create one, your YouTube channel or your website gets free eligibility for Google Ads. You just need to copy a code and paste it to start. The AdSense returns calculation is on pay per click or on a per-impression basis. However, if you want to receive the payment, you need to set up AdSense account first.
Part 2: How to Link YouTube Account to Adsense
Step 1: Link YouTube Account To Adsense
- Click on Setup YouTube AdSense or from monetization option, click on Setup Adsense option for your channel. Press Next. You are directed to Adsense sign up page.
- Select your email account, you wish to sign up with. You may also sign up with existing id or create a new one

- In case, you are using your existing email, sign in to YouTube Adsense with the same id. Once signed up, fill personal details form with information like address, name, etc.
- While filling your payee name be very careful and fill exactly as in your bank account name.

- Submit the form. Your application goes under review and might be under process for 2-3 hours to a few days depending on your Google Adsense and channel quality.
Step 2: Enable Monetization
- Click on My Channel from the menu option. Next, click on monetization to monetize your videos
- From monetization, click on monetize videos option for selecting the type of ads to monetize the video content or your channel.

- You may also monetize videos individually selecting the one you like from Video Manager segment if you do not wish to monetize all videos at once.
- Click monetize from the Action drop-down menu. Select ad type as per your wish. Press the monetize button.

- If you need to change monetization setting for a specific video, edit from the video manager or click on the dollar icon.
- To edit, click monetization option and select monetize with ads. Select the format of ads to monetize the particular video. Save the changes made.
Part 3: How to Use AdSense for YouTube
1. Finding Your Money in AdSense
Intuitively, many YouTube creators think that the first thing they see when they open up AdSense should be their daily earnings. This is not the case. Besides how much money you have made, AdSense keeps track of a lot of things the average YouTuber will not find useful. Getting to a report on your daily earnings actually takes a bit of navigation.
First, click on Performance Report near the top of your screen in AdSense. In the next page there will be a dropdown menu that says Days. Click on that menu and change it to Products.
In Products, scroll down until you get to a chart where there are two options: Hosted AdSense for Content and AdSense for Content. AdSense for Content relates to a personal website. For information about your YouTube channel click on Hosted AdSense for Content.

The next page is a report of how much money you have made from monetizing your YouTube channel. Your earnings will be organized by date. The money you see in this report has already had YouTube’s 45% commission deducted.
2. How are my earnings determined?
How much money you make through AdSense depends on your CPMs and EPMs. CPM is an acronym for “cost per mille” and indicates how much money and advertiser is paying for 1000 impressions of an ad. RPM is your revenue per 1000 impressions.
A lot of YouTubers new to AdSense assume that “per thousand impressions” means “per thousand views”, and that is incorrect. Besides the fact that not all views are monetized, impressions are not views. They are ad clicks. For long, skippable, video ads an “impression” is when a viewer watches the ad to the end instead of skipping it.
CPMs vary depending on the type of ad, where it is being run, and current advertising trends. Advertisers pay more for certain kinds of ads or for ad space in more popular videos. Beware of MCN scams claiming they can guarantee you a certain CPM; they cannot. Which ads are displayed in your videos is determined automatically by YouTube’s system and depends on factors like how you categorized your videos and how many views they have.
3. How do I get paid?
There are five different ways to get paid through AdSense: Check, Western Union Quick Cash, Wire Transfer, Rapida, or an Electronic Funds Transfer (EFT). Generally, AdSense will begin the process of paying you your monthly earnings on the 21st of the following month. How long it takes to get your money after that depends on your payment method.
Using Western Union Quick Cash you can pick your cash up at your Western Union branch the same day.
EFTs get your money to you within seven business days after the 21st.
Checks can take two to four weeks to arrive in the mail.
Wire Transfers and Rapida can each take up to 15 days.

In order to be paid you will have to earn enough to reach the payment threshold, which is $100. So, if you only earn $5 in a month, you should not expect to receive a payment for that month. You will receive your first payment after you earn $100.
Conclusion
Making money with YouTube Adsense is one of the best media that is reliable, easy to use, and better than any other ways of creating money. With Adsense, you can create various size and kinds of ad units to add it to your website. Those ad spaces are filled by Google with the content and traffic relevant to your site. There are also some YouTuber influencer marketing platforms such as InflueNex , which enables YouTubers to learn about their own channels, their competitors’ channels, and join the platform for establishing replationship with the brands.
Richard Bennett
Richard Bennett is a writer and a lover of all things video.
Follow @Richard Bennett
Richard Bennett
Mar 27, 2024• Proven solutions
Now, since your YouTube channel has a large of subscribers and views, you start thinking to make money by using YouTube AdSense. However, do you really know YouTube AdSense very well? Or even, do you even know what it is exactly. In order to let you better understand it and make money, we have rounded up all information here to explain the basic knowledge of AdSense to you. Keeping reading to learn more!
- Part1: What is Adsense
- Part2: How to Link YouTube Account to Adsense
- Part3: How to Use AdSense for YouTube
Part 1: What is Adsense?
You might have noticed several ads displayed on the videos on various social platforms. AdSense is a part of Google that is responsible for placing such ads in the videos. You can sign in from YouTube account directly.
When you wish to place an ad, you may publish it on various media through Adsense. As an advertiser, you may publish anything in videos, images or texts on the websites and pay per impression or per click or per conversion.
Having a YouTube Adsense account or your website connected to Adsense account can help you earn money when Google places ads to your channel.
Do not worry, creating a Google Adsense account is free and when you create one, your YouTube channel or your website gets free eligibility for Google Ads. You just need to copy a code and paste it to start. The AdSense returns calculation is on pay per click or on a per-impression basis. However, if you want to receive the payment, you need to set up AdSense account first.
Part 2: How to Link YouTube Account to Adsense
Step 1: Link YouTube Account To Adsense
- Click on Setup YouTube AdSense or from monetization option, click on Setup Adsense option for your channel. Press Next. You are directed to Adsense sign up page.
- Select your email account, you wish to sign up with. You may also sign up with existing id or create a new one
- In case, you are using your existing email, sign in to YouTube Adsense with the same id. Once signed up, fill personal details form with information like address, name, etc.
- While filling your payee name be very careful and fill exactly as in your bank account name.
- Submit the form. Your application goes under review and might be under process for 2-3 hours to a few days depending on your Google Adsense and channel quality.
Step 2: Enable Monetization
- Click on My Channel from the menu option. Next, click on monetization to monetize your videos
- From monetization, click on monetize videos option for selecting the type of ads to monetize the video content or your channel.
- You may also monetize videos individually selecting the one you like from Video Manager segment if you do not wish to monetize all videos at once.
- Click monetize from the Action drop-down menu. Select ad type as per your wish. Press the monetize button.
- If you need to change monetization setting for a specific video, edit from the video manager or click on the dollar icon.
- To edit, click monetization option and select monetize with ads. Select the format of ads to monetize the particular video. Save the changes made.
Part 3: How to Use AdSense for YouTube
1. Finding Your Money in AdSense
Intuitively, many YouTube creators think that the first thing they see when they open up AdSense should be their daily earnings. This is not the case. Besides how much money you have made, AdSense keeps track of a lot of things the average YouTuber will not find useful. Getting to a report on your daily earnings actually takes a bit of navigation.
First, click on Performance Report near the top of your screen in AdSense. In the next page there will be a dropdown menu that says Days. Click on that menu and change it to Products.
In Products, scroll down until you get to a chart where there are two options: Hosted AdSense for Content and AdSense for Content. AdSense for Content relates to a personal website. For information about your YouTube channel click on Hosted AdSense for Content.
The next page is a report of how much money you have made from monetizing your YouTube channel. Your earnings will be organized by date. The money you see in this report has already had YouTube’s 45% commission deducted.
2. How are my earnings determined?
How much money you make through AdSense depends on your CPMs and EPMs. CPM is an acronym for “cost per mille” and indicates how much money and advertiser is paying for 1000 impressions of an ad. RPM is your revenue per 1000 impressions.
A lot of YouTubers new to AdSense assume that “per thousand impressions” means “per thousand views”, and that is incorrect. Besides the fact that not all views are monetized, impressions are not views. They are ad clicks. For long, skippable, video ads an “impression” is when a viewer watches the ad to the end instead of skipping it.
CPMs vary depending on the type of ad, where it is being run, and current advertising trends. Advertisers pay more for certain kinds of ads or for ad space in more popular videos. Beware of MCN scams claiming they can guarantee you a certain CPM; they cannot. Which ads are displayed in your videos is determined automatically by YouTube’s system and depends on factors like how you categorized your videos and how many views they have.
3. How do I get paid?
There are five different ways to get paid through AdSense: Check, Western Union Quick Cash, Wire Transfer, Rapida, or an Electronic Funds Transfer (EFT). Generally, AdSense will begin the process of paying you your monthly earnings on the 21st of the following month. How long it takes to get your money after that depends on your payment method.
Using Western Union Quick Cash you can pick your cash up at your Western Union branch the same day.
EFTs get your money to you within seven business days after the 21st.
Checks can take two to four weeks to arrive in the mail.
Wire Transfers and Rapida can each take up to 15 days.
In order to be paid you will have to earn enough to reach the payment threshold, which is $100. So, if you only earn $5 in a month, you should not expect to receive a payment for that month. You will receive your first payment after you earn $100.
Conclusion
Making money with YouTube Adsense is one of the best media that is reliable, easy to use, and better than any other ways of creating money. With Adsense, you can create various size and kinds of ad units to add it to your website. Those ad spaces are filled by Google with the content and traffic relevant to your site. There are also some YouTuber influencer marketing platforms such as InflueNex , which enables YouTubers to learn about their own channels, their competitors’ channels, and join the platform for establishing replationship with the brands.
Richard Bennett
Richard Bennett is a writer and a lover of all things video.
Follow @Richard Bennett
Craft a Vibrant Youtube Experience with Tracks
Create High-Quality Video - Wondershare Filmora
An easy and powerful YouTube video editor
Numerous video and audio effects to choose from
Detailed tutorials provided by the official channel
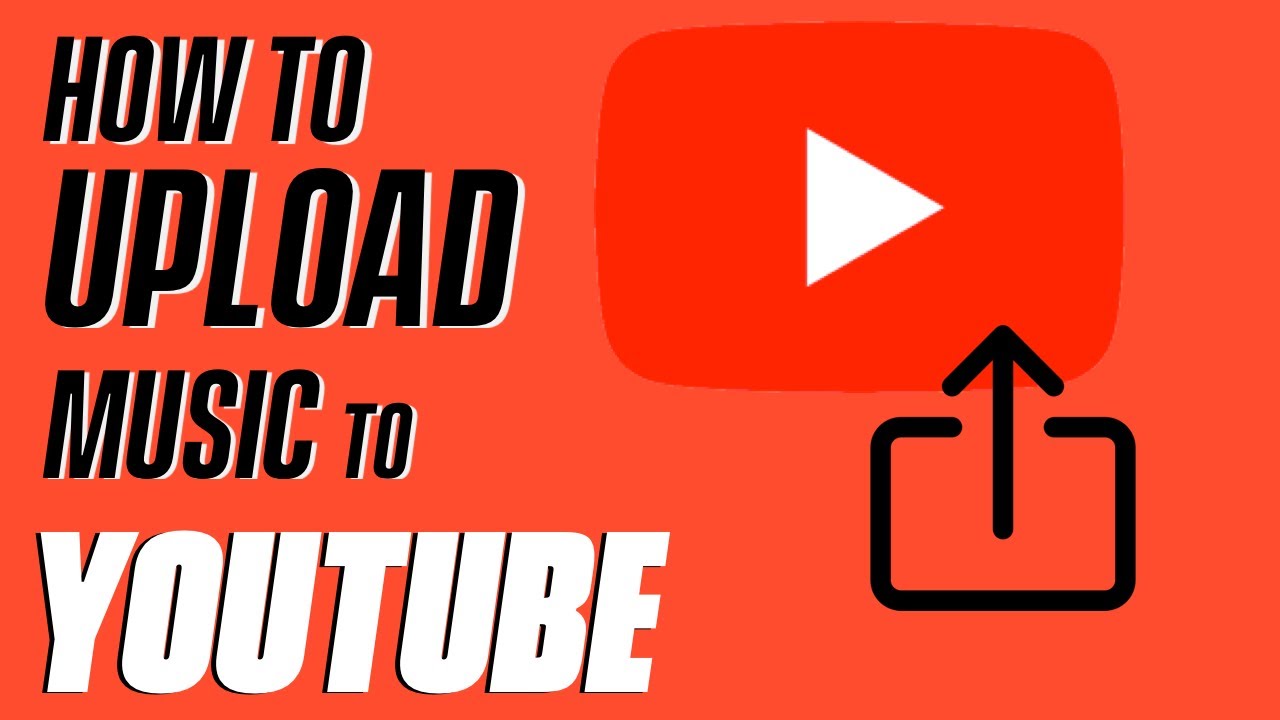
YouTube is a music lover’s paradise. With such a large community of music listeners on YouTube, many well-known and lesser-known musicians continue to upload their songs regularly. If you’re a music producer, you’ll probably want to do this as well. However, understanding how to upload music to YouTube might be difficult, so this article is created to assist you.
When you upload a song to YouTube, it becomes available to the entire globe. Unlike other streaming services, anyone can use YouTube for free. This is a one-of-a-kind platform for sharing music. This is an opportunity that every artist should take advantage of, with a potential audience of billions.
So, how do you go about uploading songs to YouTube? Regular file formats aren’t applicable; therefore, this is the only challenging component. YouTube does not recognize.mp3 or.mp4 files, which makes things a little more difficult for the average producer. It’s simple to get around this.
In this article
02 Why Is It Necessary To Upload Longer Videos And Music To Youtube?
03 How to upload your music to YouTube using Filmora?
Details On Youtube Music
YouTube recently added ‘YouTube Music’ to assist advertise the website as a music-focused destination. You don’t have to stay on the page for the music to keep playing, and there are no adverts if you pay for this service. Despite this, YouTube is still working to make its website more musical. The beauty of this is that even if you don’t want to pay, you still have access to all of YouTube’s music.
Using platforms like Spotify and Apple Music to distribute your music is a terrific way to get it out there. However, when compared to YouTube, there are several drawbacks. For starters, they are both expensive.
Even though this is critical for compensating artists, it already restricts the audience’s reach. Second, because there are so many music platforms to choose from, audiences are likely to have a favorite, which could mean they don’t have access to the platform you use to release your music. On the other hand, YouTube doesn’t have any of these problems.
YouTube’s other services are also free, making them accessible to everybody regardless of their financial position. This implies that you can access the site as long as you have a phone or a laptop. Many well-known musicians began their careers on YouTube. It provides a free platform for you to advertise yourself, regardless of your present level of popularity. Even some of the most popular profiles are musician accounts, demonstrating the site’s potential for musical promotion.
Why Is It Necessary To Upload Longer Videos And Music To Youtube?
YouTube enables video uploads of up to 15 minutes in length by default. If you try to upload a video that is more than 15 minutes long, it will fail. This is a YouTube restriction, not a Brightcove restriction. YouTube will notify you when your YouTube account has been activated for lengthier uploads. YouTube playlists are limited to 5,000 videos, and YouTube Music playlists should be similarly restricted.
Standard Accounts Have A Time Limit
The 2 GB, file size limit is backed by a 15-minute maximum runtime restriction in YouTube’s blog and Google’s 2011 upload rules. All YouTube videos had to be under 10 minutes long until 2010, but on July 29, 2010, YouTube announced that the maximum video duration had been expanded to 15 minutes. According to the company, this was the most requested modification by YouTube viewers, and it’s a natural move that takes full advantage of YouTube’s new 2 GB size restriction.
What Are The Benefits Of Uploading Music Or A Song On Youtube?
- YouTube Music is a music-specific YouTube that allows users to watch and listen to a nearly infinite archive in a music discovery app. It will enable fans to find and engage with artists by making it easier for them to discover the range and diversity of music material on YouTube.
- Adding music to your video makes it more engaging and gives it a professional look.
- Background music is intended to fill quiet and create an atmosphere rather than to be carefully listened to. It also allows for the creation of a unique ambiance with a more or less subtle background to elicit distinct emotions in the mind of an audiovisual production’s audience.
- Music can play a vital influence in the success of a video. The soundtrack can keep the viewer interested in the clip if the video itself is not entertaining.
How Can I Utilise Music Lawfully In My Youtube Videos?
If you want to use copyrighted music on YouTube lawfully, you’ll need to go out and seek permission from the original creator. The second side of music licensing is this. Copyright law ensures that creators are compensated when their work is used, and this is where YouTube’s music policy comes into play.
How to upload your music to YouTube using Filmora?
At the end of the day, YouTube is a video-sharing site. Even if listening to music with static backgrounds isn’t commonplace, including a video can’t hurt. Everything will be determined by your editing and design abilities. If you’re working on a simple project, adding some effects can help it stand out. To achieve this, there are a variety of software options available; pick one that best suits your needs. Today, we would like to recommend Filmora to you.
The songs in YouTube’s library can be used for both personal and commercial purposes. Any of the songs in Filmora’s library can be used in any way you like. There is no need for acknowledgment of non-commercial use, but you should aware that commercial use may not be permitted.
Moreover, Filmora is far more sophisticated than Windows Movie Maker and iMovie on Mac. It also allows you to create a professional-looking YouTube video with hundreds of presets such as filters, overlays, components, transitions, and blending several layers of effects and audio to enhance your YouTube tale.
Adding music to your video might help it go from excellent to extraordinary. Here’s a step-by-step guide on adding music to your YouTube videos. Knowing how to incorporate music into your YouTube videos can significantly improve the quality of your content. The majority of videos uploaded to YouTube have never been edited in any way.
This is due in part to a lack of experience, but it is also related to a lack of awareness. Including music in your films is an easy method to boost productivity, attract more viewers, and keep them watching for longer. It’s also simple to do straight within YouTube, albeit this isn’t the ideal option in the long run. So, here are a few options for adding music to YouTube videos by Filmora.
Step 1: The first step is to figure out where you want to put the audio
Download Wondershare Filmora from the official website and run it on your computer. After the software has been launched, go to ‘MEDIA’ and then to the ‘IMPORT’ option, which is located directly below the navigation bar. Now, select ‘Import Media Files’ from the drop-down menu to choose the video file, and then repeat the process to select the desired background music file.
Step 2: Adding music to a timeline
Hover your mouse over the audio and video files you just imported into Filmora, and then hit the ‘+’ sign (‘Add to Project’ will appear). You may also move the media files to the timeline by dragging them down.
Step 3: Make changes to the music file
By double-tapping the audio from the timeline, you can edit the music. The audio panel will appear at the top of the screen. You may fade in or out the audio, adjust the volume, pitch, and speed, and select suitable equalization.
Step 4: Export your work
After you’ve made the adjustments you want to your movie, click the ‘EXPORT’ tab on the toolbar to export it. The produced file can be renamed, saved in.MP4 and.WMV formats, and set the resolution.
For Win 7 or later (64-bit)
For macOS 10.12 or later
Bouns! Where Can I Find Music For Youtube Videos?
YouTube’s music library is relatively small. The songs include both traditional public domain and generic royalty-free music. Your selections will be limited if you’re adding (or replacing) music directly from YouTube. This is why pre-editing your videos is the most pleasing thing you can do for them. This will enable you to add bespoke music from services.
Conclusion
● We hope you now have a better concept of how to post your song to YouTube if you’ve ever wondered. On the surface, posting songs to YouTube may appear complicated, but once you get the hang of it, it’ll be a snap. When considering how to promote your music, YouTube should not be disregarded. It’s rare to have a free platform to distribute music on, so make use of it. With such a massive YouTube user base, your potential audience is enormous. Get your song on the platform and promote it as much as possible. You never know who might come upon your tunes until you’ve made them public. This concluded the tutorial on how to upload music to YouTube.
Also read:
- Prime Picks Easy YouTube Template Downloads
- 2024 Approved A Step-by-Step Manual on Repetitive Watch Experiences in YT
- [Updated] Digital Detox How to Turn Off Youtube on Computers and Phones
- The Ultimate Newbie's Roadmap Building a Channel, Making Cash
- Harness YouTube Opportunities via Strategic Creator Studio Application
- In 2024, Debugging Techniques Identifying and Resolving Common JavaScript Errors
- Prime Source Directory Downloading YouTube Video Intros
- 2024 Approved 5 Essential Tips for Monetizing Your Content Finding the Right Viewer Count
- [New] AdRevenue on YouTube Unpacked Average Income From 1,000 Viewers' Engagement
- [New] Boost Engagement with Creative Video Titling and Tagging Techniques
- 2024 Approved Customize Video Speed to Match Your Desired Watch Time
- [Updated] Captivating Content at Your Fingertips Download YouTube for iOS
- In 2024, Best 5 YouTube Tag Generators & Tips to Tag Videos Properly
- Elite Yoga Routines YouTube's Leading Fitness Sites
- Kickstarting Creativity An Equipment Guide for Beginners
- [Updated] Earning Through YouTube Partnerships
- The Ultimate Guide to Using YouTube on iOS/Android Devices
- [New] Elevating Engagement Professional Tips for YouTube Video Tweaks
- 2024 Approved Essential 20 YouTube Playlists Bringing You the Beat
- Enhance Youtubes' Conversations with Emojis
- [Updated] Earning in a World Dominated by YouTubers
- 2024 Approved Cease Non-Filtered YouTube Video Trail
- Stepwise Strategy for Transforming Your YouTube Videos with iMovie
- Maximize Video Quality Top 8 YouTube to AVI Converters
- In 2024, Ensuring Security in Converting YouTube Tracks to MP3 Format
- Detailed guide of ispoofer for pogo installation On Vivo T2 Pro 5G | Dr.fone
- New In 2024, 20 Wonderful Stop Motion Ideas for Beginners and Kids
- How does the stardust trade cost In pokemon go On Tecno Spark Go (2023)? | Dr.fone
- In 2024, A Sincere Look at High-Quality Audio Streaming RecordCast
- Simple Solutions to Fix Android SystemUI Has Stopped Error For Itel P40 | Dr.fone
- Audio Gear Reviews & Ratings for 2024
- [Updated] Canvas Beats The Art of Cropping and Editing Video Sound
- [New] In 2024, Comparing Leading Screen Recorder Software
- Adobe Audition 101 The Art of Fading On for 2024
- How To Recover iPhone 14 Pro Max Data From iCloud? | Dr.fone
- Updated Unleash Your Creative Potential The Best Pro Audio Editing Tools for 2024
- Updated Revolutionize Your Online Gaming with Morphvox – A Voice Changers Handbook
- [New] Boost Your Post with Three Video Border Methods for 2024
- [New] 2024 Approved Essential Skills for Assembling TikToks
- How to Transfer Data from Vivo X100 to Samsung Phone | Dr.fone
- 2024 Approved Exclusive Look at Top 10 Gamers on TikTok
- In 2024, How to Track Vivo S17 by Phone Number | Dr.fone
- Seamless Social Media Posts From Phone to Instagram
- [New] Understanding the Advantages ManyCam's MultiCam Recordings
- How To Simulate GPS Movement With Location Spoofer On Xiaomi Redmi 13C? | Dr.fone
- 3 Ways to Change Location on Facebook Marketplace for Oppo A59 5G | Dr.fone
- Prank Your Friends! Easy Ways to Fake and Share Google Maps Location On Xiaomi Redmi Note 13 Pro+ 5G | Dr.fone
- [Updated] Quick Tips for Creating and Editing Snapchat Duos
- Title: Boost Your YouTube Earnings with Effective AdSense Use for 2024
- Author: Kevin
- Created at : 2024-05-25 14:44:20
- Updated at : 2024-05-26 14:44:20
- Link: https://youtube-videos.techidaily.com/boost-your-youtube-earnings-with-effective-adsense-use-for-2024/
- License: This work is licensed under CC BY-NC-SA 4.0.
