"Beyond YouTube Elite Video Sharing Hubs Revealed"
Beyond YouTube: Elite Video Sharing Hubs Revealed
YouTube Alternatives: 3 Best Video Sharing Sites

Richard Bennett
Mar 27, 2024• Proven solutions
YouTube is a great platform where almost everyone goes to watches videos. It is not the best platform for every video creator, though. This article will introduce you to some YouTube alternatives.
There are a lot of reasons you might want to learn about other websites like YouTube. You might want a site with less ads, or different ways of monetizing. YouTube can sometimes remove videos unfairly, so you may want a site where copyright claims are handled by people instead of robots. A lot of users simply want a site that is more like YouTube was when it was younger. There are features, like customizable channel pages, which have been discarded over the years.


YouTube Alternatives: 3 Best Video Sharing Sites
Here is a list of other places where you can upload videos:
1. Dailymotion
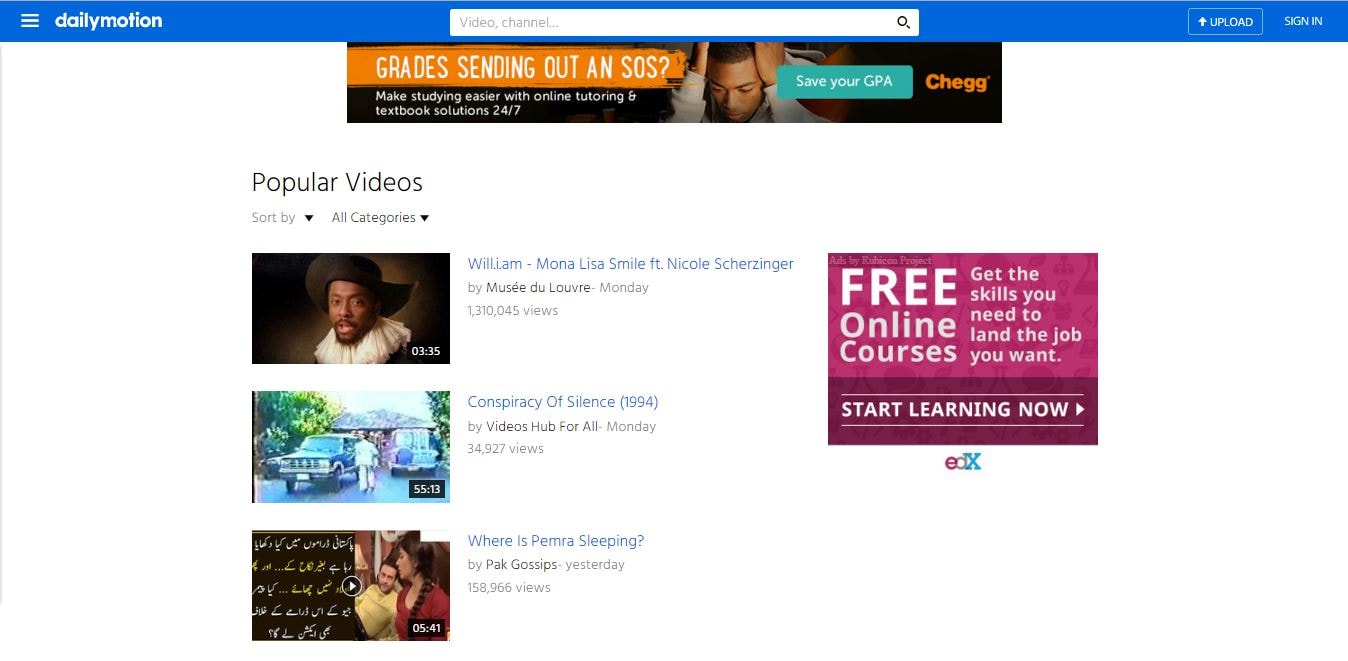
This may be the second most popular free video sharing website, and it is very similar to YouTube in appearance. Like YouTube, Dailymotion recommends videos to users based on what is trending as well as their personal viewing habits. Also like YouTube, there are ads in and around videos and you have the option of monetizing your content to earn ad revenue. There is more than one way to become a Dailymotion partner, though. You can sell a subscription for your channel instead of monetizing ads in your videos.
The main difference between Dailymotion and YouTube is that where YouTube has an abundance of both amateur and professional quality video, Dailymotion skews towards professional. There are personal vlogs and cat videos, but these are less the norm on Dailymotion than on YouTube. You may find less competition in your genre here. However, you should be aware that the expectations of viewers might be higher.
2. Vimeo
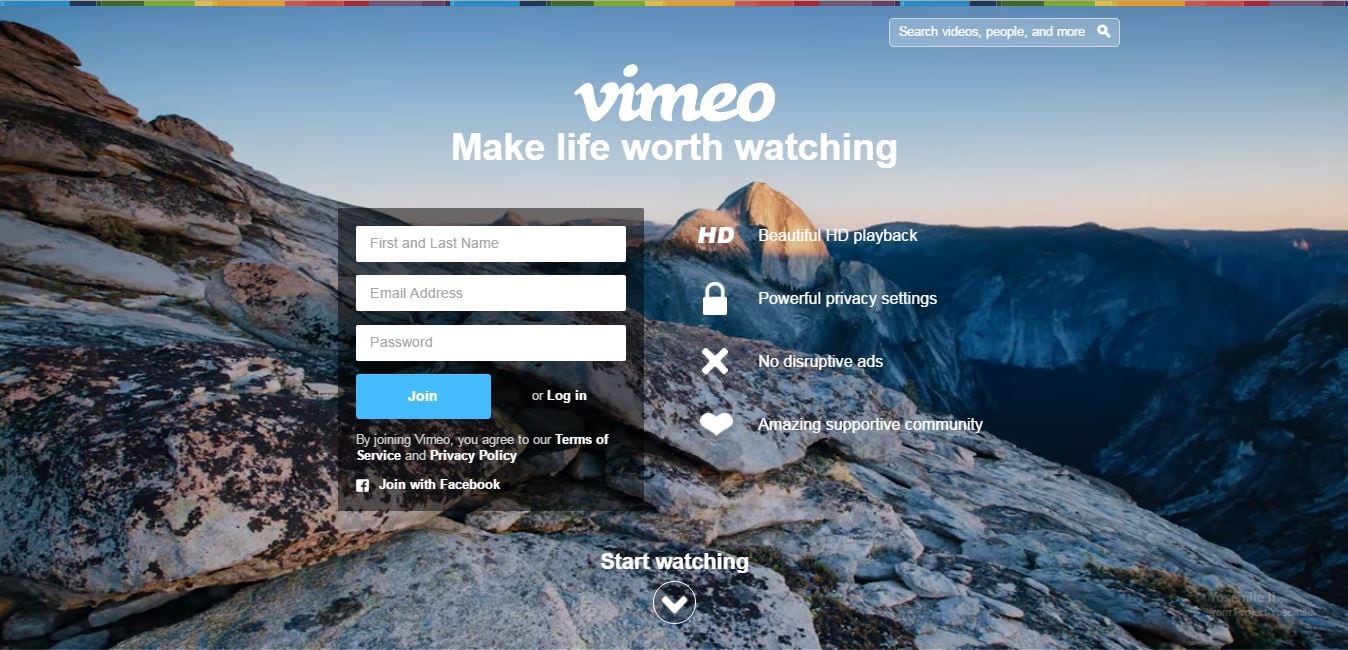
Although Vimeo is also a very popular video site, it is very different from YouTube. Everything from appearance to the types of comments left on videos is vastly different. The front page of this site does not display trending videos, for example. Instead it features high quality creative content that has been reviewed and singled out by Vimeo’s staff as some of the best the site has to offer.
There also are not any ads on Vimeo, whereas YouTube is full of them.
If you create, or are interested in creating, short films then this is where you should be posting. Many festival quality shorts are posted to Vimeo. There are vlogs there too, but they tend to be by serious video creators. The community on Vimeo tends to be a lot friendlier than YouTube so if you are still an amateur, but have dreams of being a pro, then this is probably still the site for you. You should be able to find real constructive criticism here rather than trolls.
Vimeo has a wider variety of privacy settings than YouTube. You can make videos watchable by everyone, just certain people, or require a password.
3. ZippCast
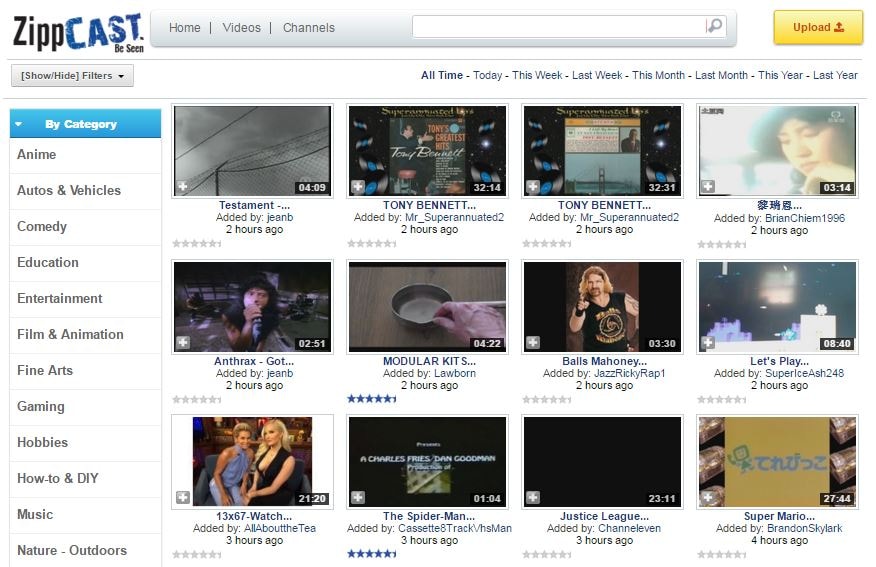
ZippCast is praised by some for being very similar to pre-Google YouTube. While the expectations for video quality may be slightly higher on DailyMotion than YouTube, and are much higher on Vimeo, they are basically the same on ZippCast. Comedy, gaming, music, animation, and vlogging are the most popular categories and almost all content is posted by average people with average skill levels. One of the ways in which ZippCast is like the ‘old’ YouTube is that you can customize the design of your channel.
One of the things users appreciate most about ZippCast is that identifying and removing copyrighted videos is done by humans rather than an automated system, like on YouTube. This means that if you use copyrighted content that is licensed to you or protected by fair use your video should not be taken down. It is common for YouTubers to have their videos unfairly removed, although disputing the copyright claim will usually result in getting the video restored.
Although it is definitely large enough to be considered an alternative to YouTube, ZippCast has been unreliable in the past (i.e shutting down randomly) and has lost the trust of many users.
Richard Bennett
Richard Bennett is a writer and a lover of all things video.
Follow @Richard Bennett
Richard Bennett
Mar 27, 2024• Proven solutions
YouTube is a great platform where almost everyone goes to watches videos. It is not the best platform for every video creator, though. This article will introduce you to some YouTube alternatives.
There are a lot of reasons you might want to learn about other websites like YouTube. You might want a site with less ads, or different ways of monetizing. YouTube can sometimes remove videos unfairly, so you may want a site where copyright claims are handled by people instead of robots. A lot of users simply want a site that is more like YouTube was when it was younger. There are features, like customizable channel pages, which have been discarded over the years.
YouTube Alternatives: 3 Best Video Sharing Sites
Here is a list of other places where you can upload videos:
1. Dailymotion
This may be the second most popular free video sharing website, and it is very similar to YouTube in appearance. Like YouTube, Dailymotion recommends videos to users based on what is trending as well as their personal viewing habits. Also like YouTube, there are ads in and around videos and you have the option of monetizing your content to earn ad revenue. There is more than one way to become a Dailymotion partner, though. You can sell a subscription for your channel instead of monetizing ads in your videos.
The main difference between Dailymotion and YouTube is that where YouTube has an abundance of both amateur and professional quality video, Dailymotion skews towards professional. There are personal vlogs and cat videos, but these are less the norm on Dailymotion than on YouTube. You may find less competition in your genre here. However, you should be aware that the expectations of viewers might be higher.
2. Vimeo
Although Vimeo is also a very popular video site, it is very different from YouTube. Everything from appearance to the types of comments left on videos is vastly different. The front page of this site does not display trending videos, for example. Instead it features high quality creative content that has been reviewed and singled out by Vimeo’s staff as some of the best the site has to offer.
There also are not any ads on Vimeo, whereas YouTube is full of them.
If you create, or are interested in creating, short films then this is where you should be posting. Many festival quality shorts are posted to Vimeo. There are vlogs there too, but they tend to be by serious video creators. The community on Vimeo tends to be a lot friendlier than YouTube so if you are still an amateur, but have dreams of being a pro, then this is probably still the site for you. You should be able to find real constructive criticism here rather than trolls.
Vimeo has a wider variety of privacy settings than YouTube. You can make videos watchable by everyone, just certain people, or require a password.
3. ZippCast
ZippCast is praised by some for being very similar to pre-Google YouTube. While the expectations for video quality may be slightly higher on DailyMotion than YouTube, and are much higher on Vimeo, they are basically the same on ZippCast. Comedy, gaming, music, animation, and vlogging are the most popular categories and almost all content is posted by average people with average skill levels. One of the ways in which ZippCast is like the ‘old’ YouTube is that you can customize the design of your channel.
One of the things users appreciate most about ZippCast is that identifying and removing copyrighted videos is done by humans rather than an automated system, like on YouTube. This means that if you use copyrighted content that is licensed to you or protected by fair use your video should not be taken down. It is common for YouTubers to have their videos unfairly removed, although disputing the copyright claim will usually result in getting the video restored.
Although it is definitely large enough to be considered an alternative to YouTube, ZippCast has been unreliable in the past (i.e shutting down randomly) and has lost the trust of many users.
Richard Bennett
Richard Bennett is a writer and a lover of all things video.
Follow @Richard Bennett
DIY Tripods| How to Stabilize Your Camera without Buying a Tripod
DIY Tripods| How to Stabilize Your Camera without Buying a Tripod
Richard Bennett
Oct 26, 2023• Proven solutions
When you’re trying to grow a channel on YouTube it can feel like equipment is a barrier, but it shouldn’t be. If you can’t afford a high-end tripod, for example, there are loads of ways to get by without one.
DIY Your Video with Wondershare Filmora
Wondershare Filmora has the best video stabilization tool is your videos have a bad frame or were recorded in dim lights. If a video is shot in bad weather or unfriendly situation where you don’t have all the equipment required for a quality recording, Wondershare Filmora can help you in the background to edit your videos like a pro. And it has all the relevant tools like effects, transitions, background removal, overlays, and background music that could turn your normal video to a professional one.
Here are 3 of our favorite DIY tripods.
DIY smartphone tripod using binder clips or hair clips
You’re a solo operation and your best camera is on your phone. That’s pretty common.
If you have a DSLR then you can set it down on any stable surface while filming yourself, but your phone can’t stand up by itself. It needs something or someone to hold it. Do you just accept that and shoot everything as a selfie?
No. No, you don’t, because there are common household items that can help you out of this problem. For this DIY tripod, you need either 2 binder clips or 2 ‘claw clips’ (also called ‘hair jaws’).
Hold your phone in landscape mode (horizontally, so it’s long rather than tall) and attach clips to the bottom corners. If you are worried about scratching your screen, fold up some paper to place between your clip and your phone.
Here it is with binder clips:

And here it is with hair clips:

Now you can set your smartphone upon any stable surface, like a table or a stack of books.
Here are some more cool ideas!
DIY adjustable tripod using books and a towel
You’ve probably heard a million times that you can stabilize your camera by sitting it down on any stable surface – on your desk, on a stack of books, up in a tree, etc. This is very true!
But if you can use any stable surface, why do people buy tripods?
Because it isn’t convenient to rearrange your furniture whenever you want to make a video, and also because tripods are adjustable. You can change their height, you can use them to pan or tilt, and it’s pretty easy to move them a bit forwards or backward while you’re setting up your shot.
To get similar functions from the ‘any stable surface’ solution you can use a table, a stack of books, and a towel.
- Set up the area where you’re going to sit while you’re filming on one end of the table.
- Put the towel down over the approximate spot you want your camera to be.
- Stack your books on top of the towel.
- Put your camera on top of the books.
Now if your camera isn’t up high enough, or is too high, you can adjust it just by adding or taking away books. If you want to move it closer or farther away from you, just pull the towel forwards or backward.
DIY gripping ‘Gorillapod’ using wire and tape
Gorillapod’s are cool because you can use them like normal tripods, carry them around like selfie sticks, or attach them to things like fences and posts. Here’s how you can make something similar using wire, electrical tape or duct tape, and a 1/4 bolt.
Your wire should be fairly stiff and you’ll need three pieces the same length, which should be at least 10 inches. Old clothes hangers work well. This needs to be something strong enough to support the weight of your camera, but soft enough that it’s not impossible for you to bend.

All of your supplies plus the finished product.
Readying your legs
Step 1: Bend 2 inches at one end of each wire into a ‘U’ shape. You will probably need pliers for this.
Step 2: Pick up one of your pieces of wire and wrap one end with electrical tape. Go around 5-10 times (to prevent it from coming undone at the end) and then, without cutting your tape, start moving up and wrapping the rest of your wire. Stop before your ‘U’ section.
Repeat this with the other two wires.
Attaching your legs
Step 1: Place the ‘U’ section of a leg against your bolt. The bolt’s threading should be pointing away from the leg. Now, use your tape to attach them. Wind it around 2 or 3 times, then repeat the process with both of the other legs individually.
Step 2: After all the legs are attached, wrap some more tape around all 3 as tightly as you can.
Your camera will mount onto the bolt! You’ll be able to use this as a normal table-top tripod or use the flexible legs to grab onto different things like a Gorillapod. Read more at Instructables.
Note: make sure the bolt is a fit for your camera before you get too far into this process.
Richard Bennett
Richard Bennett is a writer and a lover of all things video.
Follow @Richard Bennett
Richard Bennett
Oct 26, 2023• Proven solutions
When you’re trying to grow a channel on YouTube it can feel like equipment is a barrier, but it shouldn’t be. If you can’t afford a high-end tripod, for example, there are loads of ways to get by without one.
DIY Your Video with Wondershare Filmora
Wondershare Filmora has the best video stabilization tool is your videos have a bad frame or were recorded in dim lights. If a video is shot in bad weather or unfriendly situation where you don’t have all the equipment required for a quality recording, Wondershare Filmora can help you in the background to edit your videos like a pro. And it has all the relevant tools like effects, transitions, background removal, overlays, and background music that could turn your normal video to a professional one.
Here are 3 of our favorite DIY tripods.
DIY smartphone tripod using binder clips or hair clips
You’re a solo operation and your best camera is on your phone. That’s pretty common.
If you have a DSLR then you can set it down on any stable surface while filming yourself, but your phone can’t stand up by itself. It needs something or someone to hold it. Do you just accept that and shoot everything as a selfie?
No. No, you don’t, because there are common household items that can help you out of this problem. For this DIY tripod, you need either 2 binder clips or 2 ‘claw clips’ (also called ‘hair jaws’).
Hold your phone in landscape mode (horizontally, so it’s long rather than tall) and attach clips to the bottom corners. If you are worried about scratching your screen, fold up some paper to place between your clip and your phone.
Here it is with binder clips:
And here it is with hair clips:
Now you can set your smartphone upon any stable surface, like a table or a stack of books.
Here are some more cool ideas!
DIY adjustable tripod using books and a towel
You’ve probably heard a million times that you can stabilize your camera by sitting it down on any stable surface – on your desk, on a stack of books, up in a tree, etc. This is very true!
But if you can use any stable surface, why do people buy tripods?
Because it isn’t convenient to rearrange your furniture whenever you want to make a video, and also because tripods are adjustable. You can change their height, you can use them to pan or tilt, and it’s pretty easy to move them a bit forwards or backward while you’re setting up your shot.
To get similar functions from the ‘any stable surface’ solution you can use a table, a stack of books, and a towel.
- Set up the area where you’re going to sit while you’re filming on one end of the table.
- Put the towel down over the approximate spot you want your camera to be.
- Stack your books on top of the towel.
- Put your camera on top of the books.
Now if your camera isn’t up high enough, or is too high, you can adjust it just by adding or taking away books. If you want to move it closer or farther away from you, just pull the towel forwards or backward.
DIY gripping ‘Gorillapod’ using wire and tape
Gorillapod’s are cool because you can use them like normal tripods, carry them around like selfie sticks, or attach them to things like fences and posts. Here’s how you can make something similar using wire, electrical tape or duct tape, and a 1/4 bolt.
Your wire should be fairly stiff and you’ll need three pieces the same length, which should be at least 10 inches. Old clothes hangers work well. This needs to be something strong enough to support the weight of your camera, but soft enough that it’s not impossible for you to bend.
All of your supplies plus the finished product.
Readying your legs
Step 1: Bend 2 inches at one end of each wire into a ‘U’ shape. You will probably need pliers for this.
Step 2: Pick up one of your pieces of wire and wrap one end with electrical tape. Go around 5-10 times (to prevent it from coming undone at the end) and then, without cutting your tape, start moving up and wrapping the rest of your wire. Stop before your ‘U’ section.
Repeat this with the other two wires.
Attaching your legs
Step 1: Place the ‘U’ section of a leg against your bolt. The bolt’s threading should be pointing away from the leg. Now, use your tape to attach them. Wind it around 2 or 3 times, then repeat the process with both of the other legs individually.
Step 2: After all the legs are attached, wrap some more tape around all 3 as tightly as you can.
Your camera will mount onto the bolt! You’ll be able to use this as a normal table-top tripod or use the flexible legs to grab onto different things like a Gorillapod. Read more at Instructables.
Note: make sure the bolt is a fit for your camera before you get too far into this process.
Richard Bennett
Richard Bennett is a writer and a lover of all things video.
Follow @Richard Bennett
Also read:
- [New] 2024 Approved Exploring Beyond SNS HDR Pro in Photography
- [New] In 2024, Charting New Frontiers in YouTube Ad Craftsmanship
- [New] Simplify Media Handling With Top 18 Free Converters For Windows/macOS Users for 2024
- [New] Ultimate Guide on Google Podcast Upload for 2024
- 2024 Approved Are There Restrictions in Saving YouTube Videos?
- 2024 Approved Dancefloor Directives Expert DJ Video Downloads
- A Comprehensive Guide to iPhone 11 Blacklist Removal Tips and Tools | Dr.fone
- Adding Videos to Written Work A Budget-Friendly Way for 2024
- Channel Expansion at Wallet-Friendly Costs
- Complete Guide: How to Stop 'Fall Guys' From Freezing in Windows Gameplay
- Comprehensive Tips for Monitoring Subscriber Engagement for 2024
- Creating Captivating Visuals with DIY Filming Methods
- Cut Costs and Boost Creativity 8 Online Spots Offering Free Eco-Backdrops
- Cutting-Edge Editors Elevating Online Videos
- FLASKFUL FORMULA FREAKS
- In 2024, How Can I Catch the Regional Pokémon without Traveling On Lava Blaze 2 | Dr.fone
- Optimal Voice Processing Software Solutions for 2024
- Title: Beyond YouTube Elite Video Sharing Hubs Revealed
- Author: Kevin
- Created at : 2025-02-08 21:05:46
- Updated at : 2025-02-11 02:02:22
- Link: https://youtube-videos.techidaily.com/beyond-youtube-elite-video-sharing-hubs-revealed/
- License: This work is licensed under CC BY-NC-SA 4.0.