
:max_bytes(150000):strip_icc()/hands_free_02_for_web-e893b28d4c8243aabc27042e69133f38.jpg)
"Best Streaming Setup Leading Livestream Hardware & Software Guide for 2024"
Best Streaming Setup: Leading Livestream Hardware & Software Guide
Best YouTube Live Streaming Software and Hardware You Should Know

Richard Bennett
Mar 27, 2024• Proven solutions
- Part1.Best Software for Live Streaming Video to YouTube
- Part2.Best Software for Live Streaming Game to YouTube
- Part3.Best Software for Live Streaming Mobile to YouTube
- Part4.Hardware for Live Streaming to YouTube
Best Video Editor for You


Best Software for Live Streaming Video to YouTube
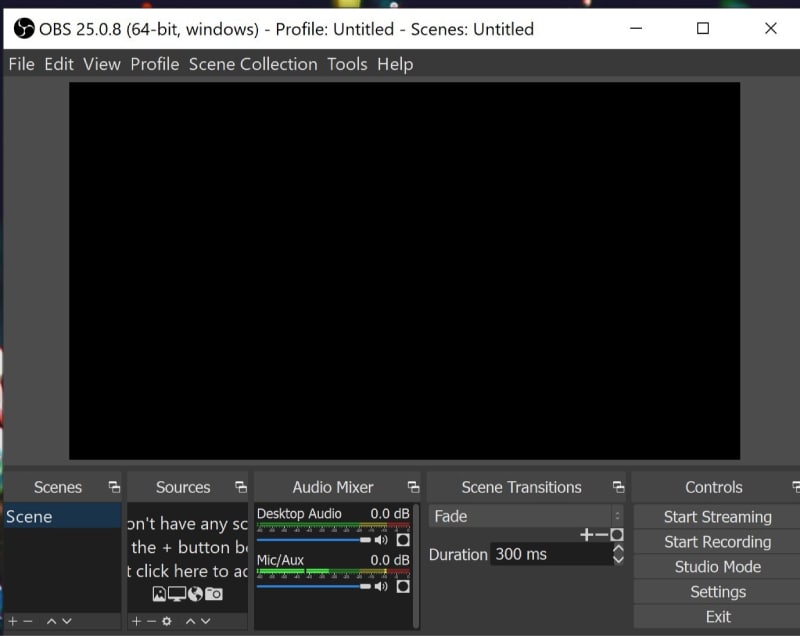
1.OBS:
Price: It is available for free.
OBS or Open Source Broadcaster is a popular recording and live streaming software tool that can be easily operated by all beginners. The best is that you can avail this software tool as an open source so it is possible to customize things as per need.
Key Features:
- It works perfectly on Linux, Mac and Windows.
- Advanced video editing tool with customized transitions.
- Filters, audio mixers, noise suppressor and automatic gain booster added for development of classic videos.
- Users can easily access light and dark themes as per their need.
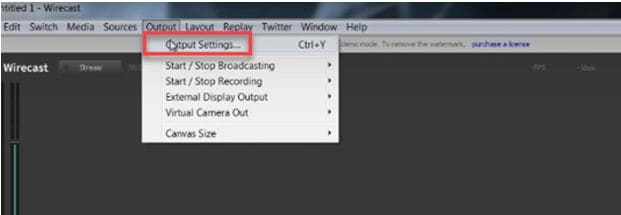
2. Wirecast Play:
Price:
- Wirecast Play 6: Free/ $9.99
- Wirecast Play Studio 6: $279
- Wirecast Play Pro 6: $549.
Wirecast play allows users to enjoy professional kind of stuff with impressive live recording facilities. Users can easily encode all live streams over multiple platforms or servers.
- The professional version of this software tool allows users to add web stream, Ip cameras and input sources.
- It possesses so many professional level editing features such as advanced audio controls, virtual sets, reply and live scoreboards.
- With its interactive user interface, Wirecast is rated as one of the most useful multicamera type live streaming package.
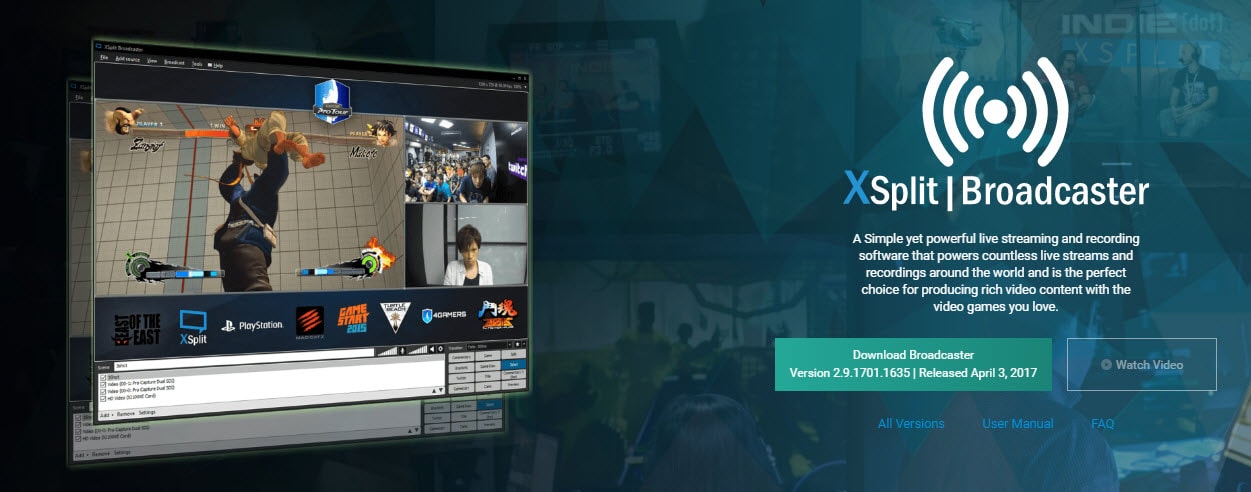
3. XSplit Broadcaster:
Price: Free and Paid
Here is a simple yet highly powerful live streaming software tool that can produce rich video content with its impressive user interface. It possesses all basic video development tools along with audio support feature. You will be glad to know that Xsplit offers Full HD recording ability; other then this you can access social features, in game annotations, in game production control as well as unique live production features.
Key Features:
- XSplit supports almost all capture cards.
- It possesses so many custom integrations and plugins.
- Easy video editing supported with professional production tools.
- You will be able to access notifications and chat option for organizing uploads in interactive manner.
Best Software for Live Streaming Game to YouTube
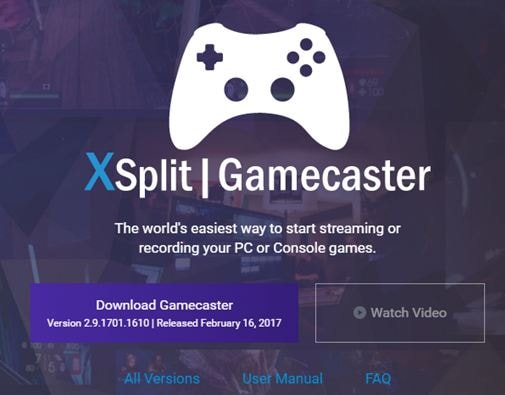
1. XSplit Gamecaster:
Price: Free and Paid
If you love gaming then Xsplit can assist you to share your memorable gaming moments on social media sites so that viewers can come to know about your creativity. Xsplit Gamecaster works perfectly with console games as well as on personal computers.
Key Features:
- It extends its support to all latest capture card designs.
- Users can easily switch to webcam mode and background can be easily removed.
- It offers loads of professional quality editing features.
- There are so many customizable integrations and plugins.
- Chat and notification feature supported.
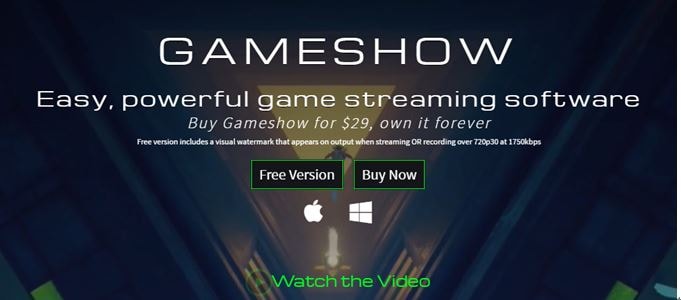
2. Gameshow (Mac/Win):
Price: $29
It is possible to start live streaming within few seconds using your gameshow oftware tool. Gameshow will help you to pick right template, adjust widgets and start streaming content within few seconds. It is possible to stream content directly to all popular social media platforms like Hitbox, YouTube and Twitch.
Key Features:
- It offers multiple layer combinations for development of interactive videos.
- Users will have complete control over scene development.
- It is possible to create playlists using transitions and customized timing effects.
- It works with low CPU usage hence will not affect your device performance.
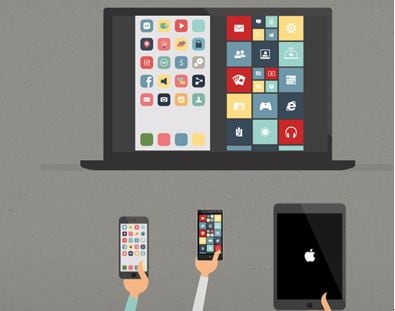
Best Software for Live Streaming Mobile to YouTube
1. Airserver:
Price: $7.99 to $11.99 only for educational needs, $14.99- Consumer License and $19.99 for Business License.
AirServer is one of the most advanced and interactive screen mirroring type software receiver tools for Xbox, PC and Mac etc. Using this tool, users can easily receive content from chromcast device, Apple TV, Miracast Streams, Google Cast and AirPlay etc.
Key Features:
- It is designed with zero client footprint feature that means everything is just ready for your needs and you will not even need any third party support.
- This software tool enables collaboration between various applications that are working on different platforms.
- It is compatible with Windows, Chrombook and Android platform.
- Comes with retina quality mirroring that can effectively improve picture quality.
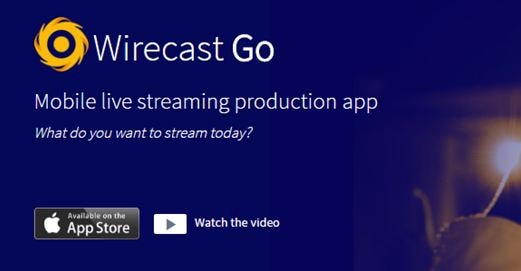
2. Wirecast Go (iOS device only):
Price: Free and upgrades demand payment of $5.99 only.
It is possible to stream rich video content from iPhone directly to Youtube using Wirecast platform. Users will be able to stream their interactive videos with effective editing and customization tools like text, replays and graphics etc. This software tool is compatible with iPod Touch, iPad and iPhone.
Key Features:
- One click type YouTube streaming option.
- Unlimited streaming available even for free version users.
- One can easily add graphics, logos and images for stream content.
- It replays all highlights for live broadcasts.
Hardware for Live Streaming to YouTube
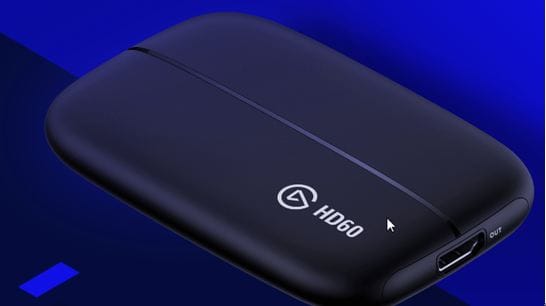
1. Elgato Game Capture HD 60:
Price: $179.95 only
Elgato Game Capture HD 60 is well known for its wide range of compatibility, efficiency and set of powerful features that assists in top quality content development. You can develop videos with 1080p resolution at 60fps frame rate using Elgato tool.
Key Features:
- Rich content quality with Full HD video support.
- It can easily record your overlays, webcam, audio and gameplay with additional facility to separate them as per need so that users can access anything upon selection.
- Easy editing functions that assist in direct upload.
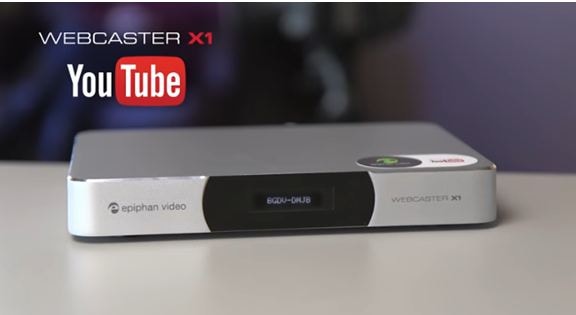
2. Webcaster X1 for YouTube:
Price: $329.95 only.
Webcaster allows users to enjoy interactive video uploading experience while offering easy connectivity to DSLR and dedicated Video camera units so that videos can be directly sent to YouTube.
Key Features:
- It offers easy setup options and starts automatically when you pair it up with a device using pairing code.
- This software tool can accept high quality audio content via HDMI inputs.
- It is possible to use advanced configuration options like keyboard, mouse and monitor connectivity for precise live streaming.
- One can easily make selections between Wi-Fi and Ethernet connections for content uploading.
Richard Bennett
Richard Bennett is a writer and a lover of all things video.
Follow @Richard Bennett
Richard Bennett
Mar 27, 2024• Proven solutions
- Part1.Best Software for Live Streaming Video to YouTube
- Part2.Best Software for Live Streaming Game to YouTube
- Part3.Best Software for Live Streaming Mobile to YouTube
- Part4.Hardware for Live Streaming to YouTube
Best Video Editor for You
Best Software for Live Streaming Video to YouTube
1.OBS:
Price: It is available for free.
OBS or Open Source Broadcaster is a popular recording and live streaming software tool that can be easily operated by all beginners. The best is that you can avail this software tool as an open source so it is possible to customize things as per need.
Key Features:
- It works perfectly on Linux, Mac and Windows.
- Advanced video editing tool with customized transitions.
- Filters, audio mixers, noise suppressor and automatic gain booster added for development of classic videos.
- Users can easily access light and dark themes as per their need.
2. Wirecast Play:
Price:
- Wirecast Play 6: Free/ $9.99
- Wirecast Play Studio 6: $279
- Wirecast Play Pro 6: $549.
Wirecast play allows users to enjoy professional kind of stuff with impressive live recording facilities. Users can easily encode all live streams over multiple platforms or servers.
- The professional version of this software tool allows users to add web stream, Ip cameras and input sources.
- It possesses so many professional level editing features such as advanced audio controls, virtual sets, reply and live scoreboards.
- With its interactive user interface, Wirecast is rated as one of the most useful multicamera type live streaming package.
3. XSplit Broadcaster:
Price: Free and Paid
Here is a simple yet highly powerful live streaming software tool that can produce rich video content with its impressive user interface. It possesses all basic video development tools along with audio support feature. You will be glad to know that Xsplit offers Full HD recording ability; other then this you can access social features, in game annotations, in game production control as well as unique live production features.
Key Features:
- XSplit supports almost all capture cards.
- It possesses so many custom integrations and plugins.
- Easy video editing supported with professional production tools.
- You will be able to access notifications and chat option for organizing uploads in interactive manner.
Best Software for Live Streaming Game to YouTube
1. XSplit Gamecaster:
Price: Free and Paid
If you love gaming then Xsplit can assist you to share your memorable gaming moments on social media sites so that viewers can come to know about your creativity. Xsplit Gamecaster works perfectly with console games as well as on personal computers.
Key Features:
- It extends its support to all latest capture card designs.
- Users can easily switch to webcam mode and background can be easily removed.
- It offers loads of professional quality editing features.
- There are so many customizable integrations and plugins.
- Chat and notification feature supported.
2. Gameshow (Mac/Win):
Price: $29
It is possible to start live streaming within few seconds using your gameshow oftware tool. Gameshow will help you to pick right template, adjust widgets and start streaming content within few seconds. It is possible to stream content directly to all popular social media platforms like Hitbox, YouTube and Twitch.
Key Features:
- It offers multiple layer combinations for development of interactive videos.
- Users will have complete control over scene development.
- It is possible to create playlists using transitions and customized timing effects.
- It works with low CPU usage hence will not affect your device performance.
Best Software for Live Streaming Mobile to YouTube
1. Airserver:
Price: $7.99 to $11.99 only for educational needs, $14.99- Consumer License and $19.99 for Business License.
AirServer is one of the most advanced and interactive screen mirroring type software receiver tools for Xbox, PC and Mac etc. Using this tool, users can easily receive content from chromcast device, Apple TV, Miracast Streams, Google Cast and AirPlay etc.
Key Features:
- It is designed with zero client footprint feature that means everything is just ready for your needs and you will not even need any third party support.
- This software tool enables collaboration between various applications that are working on different platforms.
- It is compatible with Windows, Chrombook and Android platform.
- Comes with retina quality mirroring that can effectively improve picture quality.
2. Wirecast Go (iOS device only):
Price: Free and upgrades demand payment of $5.99 only.
It is possible to stream rich video content from iPhone directly to Youtube using Wirecast platform. Users will be able to stream their interactive videos with effective editing and customization tools like text, replays and graphics etc. This software tool is compatible with iPod Touch, iPad and iPhone.
Key Features:
- One click type YouTube streaming option.
- Unlimited streaming available even for free version users.
- One can easily add graphics, logos and images for stream content.
- It replays all highlights for live broadcasts.
Hardware for Live Streaming to YouTube
1. Elgato Game Capture HD 60:
Price: $179.95 only
Elgato Game Capture HD 60 is well known for its wide range of compatibility, efficiency and set of powerful features that assists in top quality content development. You can develop videos with 1080p resolution at 60fps frame rate using Elgato tool.
Key Features:
- Rich content quality with Full HD video support.
- It can easily record your overlays, webcam, audio and gameplay with additional facility to separate them as per need so that users can access anything upon selection.
- Easy editing functions that assist in direct upload.
2. Webcaster X1 for YouTube:
Price: $329.95 only.
Webcaster allows users to enjoy interactive video uploading experience while offering easy connectivity to DSLR and dedicated Video camera units so that videos can be directly sent to YouTube.
Key Features:
- It offers easy setup options and starts automatically when you pair it up with a device using pairing code.
- This software tool can accept high quality audio content via HDMI inputs.
- It is possible to use advanced configuration options like keyboard, mouse and monitor connectivity for precise live streaming.
- One can easily make selections between Wi-Fi and Ethernet connections for content uploading.
Richard Bennett
Richard Bennett is a writer and a lover of all things video.
Follow @Richard Bennett
Audiovisual Harmony: Merging Audio and Visual Elements on YouTube
10 Tips For Shooting Profesional YouTube Videos
Richard Bennett
Mar 27, 2024• Proven solutions
We have mentioned before about the equipment you should have to start your YouTube video shooting , however, being methodical in your approach to the video making process and knowing exactly what and where you are going to stage and record will increase the quality of the content. Focus on the technical aspects of your YouTube video before you actually start shooting and strive to be well prepared for all the challenges a day on the set may bring.
These and other useful tips may help you make better videos for your YouTube channel, so let’s explore different ways of improving your video making skills.
10 Tips for Shooting Better YouTube Videos
All videographers agree that you shouldn’t come to the set unprepared. Everything has to be in its place, no matter how insignificant it may seem, because a tiny detail can completely ruin the shot or even an entire day of work. These tips are going to help you avoid common mistakes, inexperienced video producers often make.
1. Write the Script
Everything starts with a script, at least in the cinematography world. You don’t have to write long, detailed descriptions of all scenes, just make a short note of every scene, what is being said in the shot, on-screen actions, camera positions, and so on. By doing this, you’ll save yourself a lot of valuable time, you can then dedicate to other burning issues on the set. Besides, knowing what you are going to say throughout the video so you don’t have to improvise all the time is going to help you feel more relaxed in front of a camera.
2. Build the Set (Lighting included)
Don’t leave anything to chance. You should control everything that is going to be in the shot, so avoid working at locations you can’t at least partially control. Shooting in studio-like conditions will enable you to carefully select the scenography and to design light so it matches the scene perfectly. The actors must always be clearly visible to the audience, which is why you need to pay attention to where they are located in the shot and how much light you have in that part of the shot.
3. Keep Your Batteries Charged
There is nothing more frustrating than arriving at the set anxious to start shooting just to find out that the batteries are empty. Charge the batteries at the end of each day on the set, because the chances are that you are going to need them early in the morning. Always have several spare batteries with you, so even if one battery is empty you have the replacement ready. You can also prolong the battery life by switching the camera off when you are not recording.
4. Do a Microphone Check
Capturing audio with an external microphone drastically increases the quality of the sound in your videos. That’s why making absolutely sure that all cables are connected and that the microphone is perfectly placed is paramount if you want to get the sound right. The host or the hosts of the video must be at the right distance from the microphone, usually, the length of their fist with the thumb and pinky finger extended, but this can vary a few inches to either side.
Check out the best microphone for YouTuber in 2018
5. Pay Attention to The Shot Composition
The rule of thirds is a common composition principle used by videographers to create balanced and unified images. The rule suggests that the subjects in a shot should be placed at the intersections of the lines that divide the screen. Most digital cameras have a grid that makes using the rule of thirds quite simple because you can easily see when the subjects in the shot are not positioned correctly.
This is just one of many shot composition techniques you have at your disposal, and as you gain more experience you’ll learn how to combine them and get aesthetically pleasing results.
6. Always Record Videos in Landscape Mode
Posting vertically oriented videos to your YouTube channel will make you look unprofessional because portrait mode is never used for capturing videos. YouTubers who record their videos with Smartphones are more likely to fall into this trap, but all you need to do to avoid this is remember to hold the device horizontally.
By switching to portrait mode, you’ll be cropping the frame in a way, so you might unknowingly end up removing parts of the shot you wanted to record.
In case that you want to convert your portrait video to landscape, do not miss this article about How to Convert A Portrait Video to Landscape.
7. Eliminate The Background Noises
Professional microphones can pick up even the softest sounds, that might prove difficult to remove in the post-production. You can reduce the noise levels in your videos by using shotgun microphones that only capture sounds that come directly into the microphone, or by using the omnidirectional mic to eliminate the wind if you’re shooting on an outdoor location.
Background noises can be particularly unpleasant when recording narration, because the viewers of the video may not want to watch it until the end if they can’t hear what the person in the video is saying.
If it is hard for you to record your YouTube video in quite environment, you can remove the background noise by using some video editing software. For YouTubers, we recommend you to try Wondershare Filmora to de-noise. Check the video below about how to remove background noise with one click.
8. Keep The Shot in Focus
You can always keep the shot in focus by simply enabling the autofocus feature, but if you do so you won’t be able to control where the focus is going to be. Pulling focus manually is an art that takes years to master, and you have to keep practicing it as much as you can in order to become good at it.
The best way to deal with out of focus shots is to avoid shooting scenes that include a lot of action because you won’t have to pull focus that often.
9. Put The Camera on a Tripod

The footage you produce should be smooth and free of camera shakes. All video cameras pick up vibrations easily, so even the slightest movement or impact can ruin a shot. Putting the camera on a tripod is one of the best ways to stabilize the shot and avoid camera shaking.
In addition, a tripod enables you to maintain image stability even when shooting form lower or upper angles, something that cannot be achieved by simply holding the camera.
We have chosen some of the best tripods that you can use for starting a YouTube vlogging Video shooting . If you are using a 4K camera, here are some tripods that you can use for your 4K Cameras .
10. Find The Best Angle
Every scene has its perfect angle, you just have to find it. This job is much easier if you have already built the set and adjusted the lighting before approaching the shot selection process because it will allow you to know exactly where the camera should be.
The camera position depends on a number of factors, including the video’s aesthetics or the action that takes place in the shot, and you have to go through this process for each shot in your video.
Read More to Get : How to Download YouTube Videos without Any Software Easily >>
Conclusion
Hopefully, the tips we provided in this article are going to help you create better YouTube videos. There are hundreds of tricks you’ll have to learn as your skills become more polished, but sometimes just paying attention to the basic rules of videography is more than enough to create a stunning video.
Leave a comment and let us know which tips helped you the most or tell us which useful tips we failed to mention in this article.
Richard Bennett
Richard Bennett is a writer and a lover of all things video.
Follow @Richard Bennett
Richard Bennett
Mar 27, 2024• Proven solutions
We have mentioned before about the equipment you should have to start your YouTube video shooting , however, being methodical in your approach to the video making process and knowing exactly what and where you are going to stage and record will increase the quality of the content. Focus on the technical aspects of your YouTube video before you actually start shooting and strive to be well prepared for all the challenges a day on the set may bring.
These and other useful tips may help you make better videos for your YouTube channel, so let’s explore different ways of improving your video making skills.
10 Tips for Shooting Better YouTube Videos
All videographers agree that you shouldn’t come to the set unprepared. Everything has to be in its place, no matter how insignificant it may seem, because a tiny detail can completely ruin the shot or even an entire day of work. These tips are going to help you avoid common mistakes, inexperienced video producers often make.
1. Write the Script
Everything starts with a script, at least in the cinematography world. You don’t have to write long, detailed descriptions of all scenes, just make a short note of every scene, what is being said in the shot, on-screen actions, camera positions, and so on. By doing this, you’ll save yourself a lot of valuable time, you can then dedicate to other burning issues on the set. Besides, knowing what you are going to say throughout the video so you don’t have to improvise all the time is going to help you feel more relaxed in front of a camera.
2. Build the Set (Lighting included)
Don’t leave anything to chance. You should control everything that is going to be in the shot, so avoid working at locations you can’t at least partially control. Shooting in studio-like conditions will enable you to carefully select the scenography and to design light so it matches the scene perfectly. The actors must always be clearly visible to the audience, which is why you need to pay attention to where they are located in the shot and how much light you have in that part of the shot.
3. Keep Your Batteries Charged
There is nothing more frustrating than arriving at the set anxious to start shooting just to find out that the batteries are empty. Charge the batteries at the end of each day on the set, because the chances are that you are going to need them early in the morning. Always have several spare batteries with you, so even if one battery is empty you have the replacement ready. You can also prolong the battery life by switching the camera off when you are not recording.
4. Do a Microphone Check
Capturing audio with an external microphone drastically increases the quality of the sound in your videos. That’s why making absolutely sure that all cables are connected and that the microphone is perfectly placed is paramount if you want to get the sound right. The host or the hosts of the video must be at the right distance from the microphone, usually, the length of their fist with the thumb and pinky finger extended, but this can vary a few inches to either side.
Check out the best microphone for YouTuber in 2018
5. Pay Attention to The Shot Composition
The rule of thirds is a common composition principle used by videographers to create balanced and unified images. The rule suggests that the subjects in a shot should be placed at the intersections of the lines that divide the screen. Most digital cameras have a grid that makes using the rule of thirds quite simple because you can easily see when the subjects in the shot are not positioned correctly.
This is just one of many shot composition techniques you have at your disposal, and as you gain more experience you’ll learn how to combine them and get aesthetically pleasing results.
6. Always Record Videos in Landscape Mode
Posting vertically oriented videos to your YouTube channel will make you look unprofessional because portrait mode is never used for capturing videos. YouTubers who record their videos with Smartphones are more likely to fall into this trap, but all you need to do to avoid this is remember to hold the device horizontally.
By switching to portrait mode, you’ll be cropping the frame in a way, so you might unknowingly end up removing parts of the shot you wanted to record.
In case that you want to convert your portrait video to landscape, do not miss this article about How to Convert A Portrait Video to Landscape.
7. Eliminate The Background Noises
Professional microphones can pick up even the softest sounds, that might prove difficult to remove in the post-production. You can reduce the noise levels in your videos by using shotgun microphones that only capture sounds that come directly into the microphone, or by using the omnidirectional mic to eliminate the wind if you’re shooting on an outdoor location.
Background noises can be particularly unpleasant when recording narration, because the viewers of the video may not want to watch it until the end if they can’t hear what the person in the video is saying.
If it is hard for you to record your YouTube video in quite environment, you can remove the background noise by using some video editing software. For YouTubers, we recommend you to try Wondershare Filmora to de-noise. Check the video below about how to remove background noise with one click.
8. Keep The Shot in Focus
You can always keep the shot in focus by simply enabling the autofocus feature, but if you do so you won’t be able to control where the focus is going to be. Pulling focus manually is an art that takes years to master, and you have to keep practicing it as much as you can in order to become good at it.
The best way to deal with out of focus shots is to avoid shooting scenes that include a lot of action because you won’t have to pull focus that often.
9. Put The Camera on a Tripod
The footage you produce should be smooth and free of camera shakes. All video cameras pick up vibrations easily, so even the slightest movement or impact can ruin a shot. Putting the camera on a tripod is one of the best ways to stabilize the shot and avoid camera shaking.
In addition, a tripod enables you to maintain image stability even when shooting form lower or upper angles, something that cannot be achieved by simply holding the camera.
We have chosen some of the best tripods that you can use for starting a YouTube vlogging Video shooting . If you are using a 4K camera, here are some tripods that you can use for your 4K Cameras .
10. Find The Best Angle
Every scene has its perfect angle, you just have to find it. This job is much easier if you have already built the set and adjusted the lighting before approaching the shot selection process because it will allow you to know exactly where the camera should be.
The camera position depends on a number of factors, including the video’s aesthetics or the action that takes place in the shot, and you have to go through this process for each shot in your video.
Read More to Get : How to Download YouTube Videos without Any Software Easily >>
Conclusion
Hopefully, the tips we provided in this article are going to help you create better YouTube videos. There are hundreds of tricks you’ll have to learn as your skills become more polished, but sometimes just paying attention to the basic rules of videography is more than enough to create a stunning video.
Leave a comment and let us know which tips helped you the most or tell us which useful tips we failed to mention in this article.
Richard Bennett
Richard Bennett is a writer and a lover of all things video.
Follow @Richard Bennett
Also read:
- Achieve Perfect Views with Aspect Ratio Knowledge on YOUTUBE
- The Essential Checklist for Consistent Content Creators
- [Updated] Audio Adaptation Innovations for YouTubers' Videos
- FullView Media Collaboration Guidebook
- In 2024, Budget-Friendly Tactics to Increase Your YouTube Video Impact
- A Blur in the Timeline YouTube Videos Racing to 100 Million by Year's End
- [New] Designing News Outro Sequences
- Youtube's Erased Memories How to Revisit Them Online
- No Dollars, No Problem! Your Guide to the Best Free Movies on YouTube
- 2024 Approved Decoding Digital Dollars An Effective Triple Step Process to Determine Your Subscriber Profits
- Comprehensive Insights Into iMovie Techniques for YouTube Creators for 2024
- In 2024, Elevate Your Social Media Presence with These High-Impact YouTube Strategies
- In 2024, Comprehensive Review of iOS Free Video Editing Apps
- [Updated] Animated Text That Jumps Master Class with Easy Steps
- From Free to Paid Subscriber Count Surpasses 500
- [Updated] Efficient Strategies for Saving Youtube Thumbnails on Any OS
- 2024 Approved A Review of YouTube's Integration with iPhone & Android Devices
- [New] Bridging Content Creators How to Join YouTube & TikTok
- In 2024, Boosting YouTube Income Using Studio Anywhere, Anyhow
- [Updated] Enter Immersive Realms Top 10 YouTube's Most Captivating VR Videos
- Comprehensive List of Top 9 Free Video Channel Branding Aids
- Elevate Your Video Game Top Unboxer Techniques for 2024
- Elevate Your Channel's Aesthetics - Free Banners Available
- In 2024, Channel Success Stories Earning While You Edit
- Amplify Your Video's Value Anywhere on Multiple Devices for 2024
- Outro Essentials Made Simple, Top 6 Free Edition
- Boosting Your Channels Free Tips for YouTube Video Popularity for 2024
- [Updated] Breathtaking Lyric Videos Made Easy by Lyric Video Maker
- Trailblazers 8 YouTube's Leading Growth Champions
- In 2024, Cutting-Edge Method Quick Erasure of Youtube Comments
- In 2024, Dissecting YouTube Copyright Vs. Creative Commons Ethos
- YouTube Film Craft Mastering Thumbnail Creation on Mobiles
- Direct Link Between Spotify and YouTube The Top Tools for Music Sharing for 2024
- Richest Revenue Generators in the YouTube Universe
- Unlock Creator Studio Secrets A Step-by-Step Tutorial
- Enhancing Video Discoverability with Smart Thumbnails for 2024
- Discover Dynamic Channels Advanced YouTube Naming Guides for 2024
- Engaging Audiences with Thrilling Haul Content Creation for 2024
- Most Reliable Platforms to Gather Video Intro Templates
- Creating Impactful YouTube Conclusion for 2024
- Event Ensemble Curating Best DJ Templates for 2024
- Pro Stock Market Strategies in YT Reviews
- [Updated] Brief Basslines & Rhythms Video Soundscapes
- Gearing Up for YouTube Success Cross-Platform Strategies
- Crafting Charismatic Videos with DIY Camera Setups for 2024
- Essential List 7 Cost-Free Video Tags Extractors on YouTube for 2024
- In 2024, 5 Frosty Yet Inviting Backdrops for Your Vids
- Enhancing Content Quality with Advanced Video Editing for 2024
- [Updated] Digitally Delving Into Deleted YouTubes Easy Watch Options
- YouTube Image Marketing Dos vs Don'ts Explained
- In 2024, Best 3 Software to Transfer Files to/from Your Realme 12 Pro+ 5G via a USB Cable | Dr.fone
- 2024 Approved Superior Mark Extraction Tools for TikTok Clips
- Ultimate Top 5 Cost-Free Pinterest Videos Download
- Ways to trade pokemon go from far away On Motorola Moto G13? | Dr.fone
- In 2024, Master Streaming with OBS Studio - Android Edition
- 8 Ultimate Fixes for Google Play Your OnePlus Open Isnt Compatible | Dr.fone
- How to Find iSpoofer Pro Activation Key On Xiaomi Redmi Note 12 5G? | Dr.fone
- In 2024, Open Broadcasters Versus ShadowReplay
- In 2024, Reasons why Pokémon GPS does not Work On Vivo Y100A? | Dr.fone
- Updated 2024 Approved Aquatic Acoustics Transforming Your Virtual Dialogue with Discords Clownfish Voice Manipulation
- [Updated] 2024 Approved Discovering Android's Finest Multiplayer Battles
- How To Unlock Stolen iPhone SE (2022) In Different Conditionsin | Dr.fone
- Tactical Steps to Download Securely Free VLC Media on MAC
- [New] 2024 Approved X-Audio Workstation for Home Computers
- Hubsan X4 Quadcopter Examination An In-Depth Guide
- 5 Easy Ways to Copy Contacts from Oppo F25 Pro 5G to iPhone 14 and 15 | Dr.fone
- Updated Deciphering and Disarming Acoustic Distortion Simple Remedies Explored for 2024
- 2024 Approved Excellence in Social Media Video Playback Tools, 2023 Edition
- How To Remove Screen Lock PIN On Google Like A Pro 5 Easy Ways
- [New] 2024 Approved Understanding TikTok’s Creative Outpourings Animations, Music & Memes
- [New] 2024 Approved The Ultimate Guide to FB Video Calls Best Practices
- [Updated] Tips for Integrating Emojis Into Discord User Statuses
- Updated In 2024, Top 10 3D Text Animation Templates
- In 2024, Forgot Apple iPhone SE Backup Password? Heres What to Do | Dr.fone
- [New] Identifying Deceptive Accounts A Guide for Marketers for 2024
- [New] RX Memory Revamp
- 2024 Approved The Ultimate Guide 10 TikTok Tactics
- 3 Easy Solutions to Hard Reset Realme GT Neo 5 SE | Dr.fone
- 2024 Approved Step-By-Step Strategies for Creating Stunning Slow Movement Content
- 2024 Approved Revolutionizing Desktop Capturing A Look at Spring's Features
- In 2024, Why Your WhatsApp Location is Not Updating and How to Fix On Vivo X Flip | Dr.fone
- New Isolate Handclapping Vibration Symphony
- How to Rescue Lost Photos from Huawei Nova Y91?
- In 2024, Forgot Your Apple ID Password and Email On Apple iPhone 7 Plus? Heres the Best Fixes
- New 2024 Approved In-Depth Look Splice Video Editor Features and Performance
- [Updated] Groundbreaking Open Source Software for Modern Video Conferencing
- How Can I Create My Pokemon Overworld Maps On Apple iPhone 14? | Dr.fone
- Delving Into Hidden Discussions Among Viewers
- [New] 2024 Approved Elite AI Companions for Chat
- 2024 Approved Audio Docking Systems for Immersive Experience
- New 2024 Approved 4K Perfection The Most Jaw-Dropping Video Samples Out There
- [New] Unlocking Stream Efficiency OBS Meets Zoom
- Looking For A Location Changer On Vivo V30? Look No Further | Dr.fone
- In 2024, Will Pokémon Go Ban the Account if You Use PGSharp On Lava Yuva 2 | Dr.fone
- Title: "Best Streaming Setup Leading Livestream Hardware & Software Guide for 2024"
- Author: Kevin
- Created at : 2024-05-25 14:43:03
- Updated at : 2024-05-26 14:43:03
- Link: https://youtube-videos.techidaily.com/best-streaming-setup-leading-livestream-hardware-and-software-guide-for-2024/
- License: This work is licensed under CC BY-NC-SA 4.0.
