
:max_bytes(150000):strip_icc()/SocialMedia_GettyImages-1167165311_KornburutWoradee_EyeEm_CROPPED-9cc5d3f943a74a51b2f4fe746197af63.jpg)
"Best Screener Tech Perfect for Creating Viral YouTube Moments"
Best Screener Tech: Perfect for Creating Viral YouTube Moments
Best Screen Recorder for YouTube

Richard Bennett
Mar 27, 2024• Proven solutions
Taking viewers ‘in app’ is an effective way to show them how you work or play. A screen recording is a footage recorded not from your camera, but directly from the interface of your computer or mobile device. A screen recording might be footage from a game, a software tutorial, or a demonstration of your creative process in a program.
We have picked up the best 10 paid screen recorders for YouTube on Windows and Mac, but if you are looking for a complete solution to record videos on Windows, Mac, Android or iOS phone to make tutorial videos, how-to videos, or demonstration videos, or products/software review videos, or gameplay videos on YouTube, here is the all the information you need. This article will introduce you to the best screen recorders on computers, Android devices, and iPhones for YouTube.
- Part 1: Best Screen Recording Software for Recording Windows/Mac Screen for YouTube
- Part 2: Best Screen Capturing Apps for Recording Your Android Screen (No Root)
- Part 3: Best Screen Recording Apps for Recording on iOS Devices for YouTube Videos
Part 1: Best Software for Recording Your Computer Screen for YouTube Videos
1.Filmora Video Editor [Windows & Mac, Freemium]


In addition to being a powerful editing tool, Filmora can also be used to record your computer screen. In Filmora, just select Media and then Record. In the Record menu, click Record PC Screen. The recording window will pop up and you will be able to decide whether you want to record your full screen, a customized selection of it, or a specific target window. After you have finished recording your clip will automatically appear in the Media menu in your Filmora project so you can edit it right away. You can download Filmora from Filmora.wondershare.com if you do not have it yet.
If you just want to make a how-to video with some captured screens, Filmora will be a good choice. Check the video below about how to record Screen with Filmora.
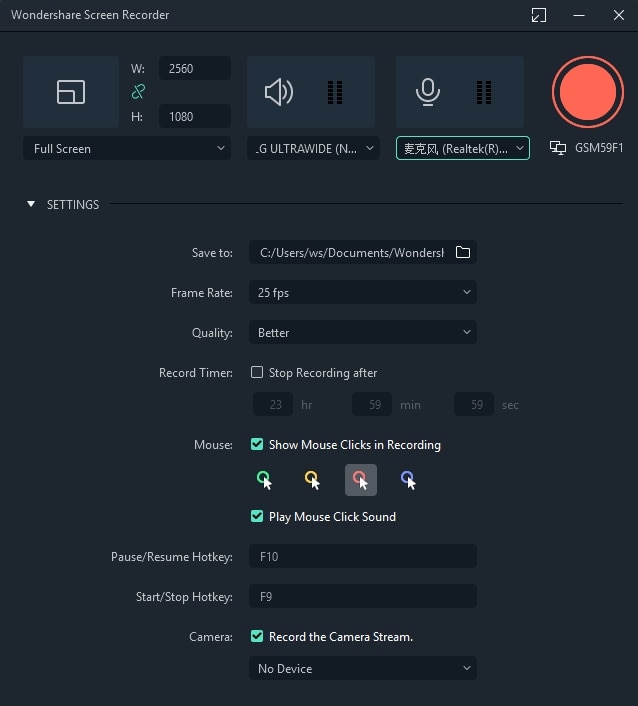
2.Wondershare DemoCreator
DemoCreator is a specially designed screen recording software from Wondershare for both gameplay recording, tutorial making, screen capturing, and webcam recording as well. You can use it to record the full screen of your Windows or Mac computer or a particular part on the screen. The best part is that you can both record and edit the video in DemoCreator and upload it to YouTube directly. This screen recorder for YouTube is a perfect solution for those who want to capture 120 frames per second and 4K videos.
3.VLC Media Player [Windows & Mac & Linux, Free]
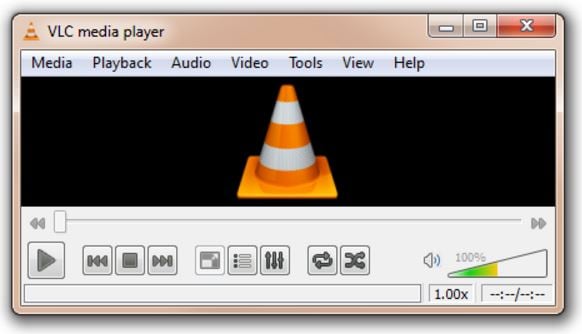
VLC Media Player is a free media player that has a great screen recording feature. You can download it from Video LAN.org. In order to take a screen recording using VLC you first need to click on View and Advanced Controls. A lot of the more advanced features, like screen recording, are initially hidden so as not to confuse users, but selecting Advanced Controls will make them visible. Then you can go to Media and Open Capture Device. In the window that opens choose Desktop next to Capture Mode and click Play. VLC will start displaying your desktop in the player window. Now you just have to click Record.
Learn more details about how to record YouTube videos with VLC
4.QuickTime [Mac, Free]

QuickTime is the default media player for Mac users. To access QuickTime’s screen recording feature select File and New Screen Recording. In the window that pops up click on the arrow next to the Record button and choose a microphone. Then you can press Record. Your recording will not start right away. First, a window will pop up explaining that you can stop your recording by pressing ‘command-control-escape’. Although QuickTime is available for PCs the PC version does not have a screen recording feature.
Learn more details about how to record YouTube video and audio with QuickTime Player on Mac
Part 2: Recording Your Android Screen for YouTube Videos (No Root)
We have already described 4 ways of recording screen videos on Android , while in this part, we will introduce some useful screen recording apps for recording YouTube videos on Android phones.
1. AZ Screen Recorder
AZ Screen Recorder is free screen recording app for Android 5.0 Lollipop. Using AZ Screen Recorder you can simultaneously record from your phone’s camera and screen. This is useful if you want to shoot a video of yourself explaining an app to add into your final video. Although the basic version of AZ Screen Recorder is free there are in-app purchases.
2.Unlimited Screen Recorder
Unlimited Screen Recorder is also for 5.0 Lollipop and is free with in-app purchases. Like the name ‘Unlimited’ suggests you can use this app to record for as long as you want. There is no time limit. You can also record audio through Unlimited Screen Recorder so it is convenient to make a voiceover for your video.
There are very few options available for recording Android devices older than Lollipop without rooting your device.
Click here to check more screen recording apps to capture videos on Android
Part 3: Recording Your iOS Device Screen for YouTube Videos
With the release of iOS 11, recording on iPhone and iPad is much easier with the built-in screen recording tool . If your iOS is above 11 (including 11) version, you can record the screen with its in-app application, check this video to know the details:
Apart from recording with the built-in recording tool, you can also use some best iOS screen recording apps to record YouTube videos, or use some mirror software to record iPhone/iPad on Windows and Mac and create a YouTube video.
1.QuickTime
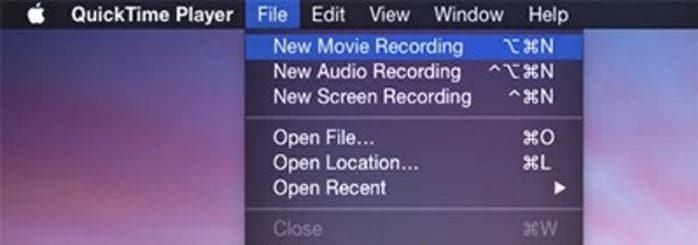
QuickTime can be used to record the screen of your iPhone or iPad in addition to the screen of your Mac. First you need to connect your device to your computer with a USB port. Instead of selecting ‘New Screen Recording’ in QuickTime, the way you would when recording your computer screen, select ‘New Movie Recording’. In the recording window click on the arrow next to the ‘Record’ button and choose your iOS device where it asks you to choose a camera. This method only works with the Mac version of QuickTime.
2.Reflector
Reflector is mirroring software available for Mac or PC. Mirroring software creates a clone of your device’s interface on your computer screen. Once your device is being displayed on the screen of your computer you can capture it by recording your computer screen. You can download Reflector from Airsquirrels.com.
In order to use Reflector to mirror your device, you will also need to use AirPlay on your iPhone or iPad, and your device and your computer will need to be connected to the same wifi network. In AirPlay, make sure mirroring is on and select your computer as a receiver. Your computer will not show up as an option if you do not have Reflector running.
Conclusion
Above are the screen and video recording software programs that we picked up for you to make a YouTube tutorial, how-to or software review video on most popular platforms including Windows and Mac computer and Android and iOS smartphones. Besides recording, you may also need thebest video editing software for editing YouTube videos . Watch the video tutorial to check how to edit your YouTube videos and get to know some terms in video editing. Remember to download Filmora and have a try today.
Richard Bennett
Richard Bennett is a writer and a lover of all things video.
Follow @Richard Bennett
Richard Bennett
Mar 27, 2024• Proven solutions
Taking viewers ‘in app’ is an effective way to show them how you work or play. A screen recording is a footage recorded not from your camera, but directly from the interface of your computer or mobile device. A screen recording might be footage from a game, a software tutorial, or a demonstration of your creative process in a program.
We have picked up the best 10 paid screen recorders for YouTube on Windows and Mac, but if you are looking for a complete solution to record videos on Windows, Mac, Android or iOS phone to make tutorial videos, how-to videos, or demonstration videos, or products/software review videos, or gameplay videos on YouTube, here is the all the information you need. This article will introduce you to the best screen recorders on computers, Android devices, and iPhones for YouTube.
- Part 1: Best Screen Recording Software for Recording Windows/Mac Screen for YouTube
- Part 2: Best Screen Capturing Apps for Recording Your Android Screen (No Root)
- Part 3: Best Screen Recording Apps for Recording on iOS Devices for YouTube Videos
Part 1: Best Software for Recording Your Computer Screen for YouTube Videos
1.Filmora Video Editor [Windows & Mac, Freemium]
In addition to being a powerful editing tool, Filmora can also be used to record your computer screen. In Filmora, just select Media and then Record. In the Record menu, click Record PC Screen. The recording window will pop up and you will be able to decide whether you want to record your full screen, a customized selection of it, or a specific target window. After you have finished recording your clip will automatically appear in the Media menu in your Filmora project so you can edit it right away. You can download Filmora from Filmora.wondershare.com if you do not have it yet.
If you just want to make a how-to video with some captured screens, Filmora will be a good choice. Check the video below about how to record Screen with Filmora.
2.Wondershare DemoCreator
DemoCreator is a specially designed screen recording software from Wondershare for both gameplay recording, tutorial making, screen capturing, and webcam recording as well. You can use it to record the full screen of your Windows or Mac computer or a particular part on the screen. The best part is that you can both record and edit the video in DemoCreator and upload it to YouTube directly. This screen recorder for YouTube is a perfect solution for those who want to capture 120 frames per second and 4K videos.
3.VLC Media Player [Windows & Mac & Linux, Free]
VLC Media Player is a free media player that has a great screen recording feature. You can download it from Video LAN.org. In order to take a screen recording using VLC you first need to click on View and Advanced Controls. A lot of the more advanced features, like screen recording, are initially hidden so as not to confuse users, but selecting Advanced Controls will make them visible. Then you can go to Media and Open Capture Device. In the window that opens choose Desktop next to Capture Mode and click Play. VLC will start displaying your desktop in the player window. Now you just have to click Record.
Learn more details about how to record YouTube videos with VLC
4.QuickTime [Mac, Free]
QuickTime is the default media player for Mac users. To access QuickTime’s screen recording feature select File and New Screen Recording. In the window that pops up click on the arrow next to the Record button and choose a microphone. Then you can press Record. Your recording will not start right away. First, a window will pop up explaining that you can stop your recording by pressing ‘command-control-escape’. Although QuickTime is available for PCs the PC version does not have a screen recording feature.
Learn more details about how to record YouTube video and audio with QuickTime Player on Mac
Part 2: Recording Your Android Screen for YouTube Videos (No Root)
We have already described 4 ways of recording screen videos on Android , while in this part, we will introduce some useful screen recording apps for recording YouTube videos on Android phones.
1. AZ Screen Recorder
AZ Screen Recorder is free screen recording app for Android 5.0 Lollipop. Using AZ Screen Recorder you can simultaneously record from your phone’s camera and screen. This is useful if you want to shoot a video of yourself explaining an app to add into your final video. Although the basic version of AZ Screen Recorder is free there are in-app purchases.
2.Unlimited Screen Recorder
Unlimited Screen Recorder is also for 5.0 Lollipop and is free with in-app purchases. Like the name ‘Unlimited’ suggests you can use this app to record for as long as you want. There is no time limit. You can also record audio through Unlimited Screen Recorder so it is convenient to make a voiceover for your video.
There are very few options available for recording Android devices older than Lollipop without rooting your device.
Click here to check more screen recording apps to capture videos on Android
Part 3: Recording Your iOS Device Screen for YouTube Videos
With the release of iOS 11, recording on iPhone and iPad is much easier with the built-in screen recording tool . If your iOS is above 11 (including 11) version, you can record the screen with its in-app application, check this video to know the details:
Apart from recording with the built-in recording tool, you can also use some best iOS screen recording apps to record YouTube videos, or use some mirror software to record iPhone/iPad on Windows and Mac and create a YouTube video.
1.QuickTime
QuickTime can be used to record the screen of your iPhone or iPad in addition to the screen of your Mac. First you need to connect your device to your computer with a USB port. Instead of selecting ‘New Screen Recording’ in QuickTime, the way you would when recording your computer screen, select ‘New Movie Recording’. In the recording window click on the arrow next to the ‘Record’ button and choose your iOS device where it asks you to choose a camera. This method only works with the Mac version of QuickTime.
2.Reflector
Reflector is mirroring software available for Mac or PC. Mirroring software creates a clone of your device’s interface on your computer screen. Once your device is being displayed on the screen of your computer you can capture it by recording your computer screen. You can download Reflector from Airsquirrels.com.
In order to use Reflector to mirror your device, you will also need to use AirPlay on your iPhone or iPad, and your device and your computer will need to be connected to the same wifi network. In AirPlay, make sure mirroring is on and select your computer as a receiver. Your computer will not show up as an option if you do not have Reflector running.
Conclusion
Above are the screen and video recording software programs that we picked up for you to make a YouTube tutorial, how-to or software review video on most popular platforms including Windows and Mac computer and Android and iOS smartphones. Besides recording, you may also need thebest video editing software for editing YouTube videos . Watch the video tutorial to check how to edit your YouTube videos and get to know some terms in video editing. Remember to download Filmora and have a try today.
Richard Bennett
Richard Bennett is a writer and a lover of all things video.
Follow @Richard Bennett
Youtube’s AdSense Income Strategy: Calculating Per Thousand Viewers
YouTubers are fantastic people who create content and make a living out of it. But have you ever thought about how much YouTube pays or what YouTube AdSense earnings are?
If you aren’t sure about the YouTube payment situation or how much AdSense pay for views, you will learn this below. Whether you’re planning to create a channel or already have one, learning how much you can expect YouTube to pay will help you in the longer run.
Be it AdSense pay on 1,000 views or AdSense pay per click; this blog features information you may appreciate.
- Type of Content
- Keywords
- User Location
- Time Requires to Get Views
- Video Duration
- Your Niche or Industry
Part 1: How Much Does AdSense Pay Per 1,000 Views

As a content creator, you might be tempted to know how much you can expect to earn through AdSense. Since it’s a free and simple way to make extra bucks, showing ads with the content you produce for online platforms, it’s essential to know how much it pays for views.
Pay Per 1,000 Views by AdSense
For 1,000 views, expect AdSense to pay around $8-$20. However, your total earnings will depend on factors such as your content type, users’ location, and setting of ads in Google AdSense, so it can pay on thousand views.
More so, AdSense opts for Revenue Per 1,000 impressions or (RPM) to showcase the amount you would get for 1,000 impressions. Remember, this RPM doesn’t include the actual amount you’ve earned. But it focuses on dividing your earnings by page views and impressions, then multiplying those by 1,000.
You can also refer to the formula for better understanding.
Formula:
RPM = (Estimated earnings / Number of page views) * 1000
From this formula provided by Google official, we can easily know that
Estimated earnings = (RPM * Number of page views) / 1000
To understand it further, see the example below.
Suppose you’ve earned around $0.10 from 20 page views; your page RPM would be $6.00 in simpler terms.
($0.10 / 25) * 1000 = $6.00
Also, if RPM is $4.00 from 45,000 ad impressions, your estimated earnings would be equal $180.00
($4.00 * 45,000) / 1000 = $180.00
AdSense Pay Per View
Lastly, if you’re looking for an exact answer regarding how much it pays per view, know that it varies and is based on different factors, such as niche or audience demographic.
But you can expect something between $8 to $12 on 1,000 views after monetizing your YouTube channel with your Google AdSense account.
Part 2: How Much Does AdSense Pay Per Click?

After understanding AdSense’s way to pay for 1,000 views, formula, or pay per view, here’s what you need to know about AdSense’s payment on per click policy.
On Average, you can expect AdSense to pay something around $0.20 to $15 on a click. Talking about estimated earnings or one click, it depends on the cost-per-click in the niche, including the publisher’s earnings and competition among rival advertisers.
And if you’re wondering, cost-per-click is when a user clicks on your ad, and you earn money for it. However, advertisers always decide the cost-per-click for ads. In this case, some advertisers don’t hesitate to pay extra, depending on what they intend to advertise.
Part 3: AdSense Earnings Per Thousand Pageviews Examples
From pay per 1,000 views to pay per click, understanding the AdSense payment policy is essential if you’re up to monetize your YouTube channel.
Since there’re YouTube AdSense requirements, such as audience demographic, niche, or content, learning about which niche is the lucrative one will also help you decide your next move.
Let’s take a look at the following examples for better understanding:
- For example, if arts and entertainment is your niche, you can expect to earn $5.62 after accumulating 1,000 pageviews.
- Creators who create content on vehicles can earn around $9.20 on every 1,000 pageviews.
- If you’re into beauty and fitness, expect to earn up to $13.01 on 1,000 pageviews.
- For real estate, health, home, and garden niches, you can earn $14.50, $17.40, and $23.35 on every 1,000 pageviews.
Remember, people from North America can make the most of these earnings. But worry not if you are based outside North America. Because Google AdSense revenue calculator can help you find the average pageviews on monthly basis.
Part 4: Earnings from AdSense: Factors to Consider
After learning how much you can earn in different niches, it’s equally important to focus on the following factors, so you can qualify and start earning from AdSense with ease.
1) Type of Content
To monetize your videos for AdSense, ensure that you own the rights to use visuals and audio elements of your video. And focus on creating all elements of your video yourself.
For YouTube, you can try creating tutorials, do-it-yourself videos, original short films, original music videos, home videos, travel vlogs, or even daily-life vlogs.
While creating content for YouTube, remember advertisers consider placing ads on more advertiser-friendly content.
As a blogger, you must provide unique but quality content to exceed AdSense’s eligibility criteria. Having unique content helps Google understand what your website is about. It’s even better if your website provides a one-of-its-kind experience and users visit it again.
Be it a vlog or blog, please ensure that it’s original and not a copy from other sources. This way, you can elevate your credibility on the respective platforms. For a great user experience, opt for intuitive navigation.

And to up your content game, you can even use the calculator to determine the value of your content and estimated revenue from AdSense.
2) Keywords
Keywords are phrases and words that describe your service or product. The ones you choose will help show your ads to users.
Therefore, go for the relevant yet high-quality keywords and add them to your ad campaigns. This strategy will put your ad in front of potential buyers.
3) User Location
Remember, AdSense follows geo-targeting strategy, so it can place ads on different pages. These ads are based on a user’s language, region, and IP address.
Put simply, ads serving to a user from Algeria may differ from the ads for a user from Georgia.
4) Time Requires to Get Views
There’s no fixed time frame; however, you can focus on search volume, audience, and competition to start getting the desired number of views.
The first 60 minutes are crucial after you post a video. Then, the next 24 hours and the first 48 hours are equally important because YouTube gives an unnatural boost to it. It helps YouTube observe responses, such as how viewers interacted with the video and what kinds of viewers were interested in it.
Remember, if a video fails to get any views in a couple of days, it won’t likely perform and will consider “dead” on the platform.
More so, if a video performs better slightly, it’ll start to reach its full potential in the next 3 to 6 months, according to the views it receives per day. Oftentimes, videos took up to a year to perform well.
And if your video starts to perform better and faster in those 3-6 months, it’ll likely do better in the longer run.
5) Video Duration
Focus on the length of your video, as it determines how many ads can be shown in it. This part also influences your earning potential. When your video is longer in length, it’ll increase its worth.
However, you must find the right balance between video duration, quality, and the number of videos on your channel, so you can continue to earn without hindrance.
6) Your Niche or Industry
Niche is another essential factor to opt for AdSense earnings. Some of the profitable topics are:
- Business
- Investment
- Health
- Insurance
- Online Marketing
You can choose the area that interest you the most and start people educating about it.
For example, people tend to think about investing their money to multiply it. You can create videos on investment-related topics, tips and tricks to get maximum views.
Part 5: Pros and Cons of Earning Money from Google AdSense
At this point, you’re familiar with almost all aspects of generating money using Google AdSense. And considering the factors, it seems like a task you can perform.
Before you try earning money via AdSense, consider the following pros and cons.
Pros
- Google AdSense doesn’t charge an extra fee. It’s a totally free service that can help you earn dollars.
- Don’t know how to make ads? Don’t worry; Google will do it for you.
- It enables you to use one account to monetize multiple websites.
- As a passive income, it doesn’t require additional effort.
Cons
- Making the first $100 is a must to get paid further.
- With AdSense, you won’t be allowed to use another ad network.
- A policy breach could make you lose your account.
- You need a lot of traffic to make some serious money.
- Adding several ads can annoy your viewers.
Final Words
Monetizing your YouTube channel for AdSense is great for having a steady passive income. But, it’s a time-consuming process and has a set of advantages and disadvantages.
If you already have a YouTube channel and a certain number of views, you can take it further using the provided information. However, focus on factors such as user demographic, content type, and quality to achieve long-term success.
Free Download For Win 7 or later(64-bit)
Free Download For macOS 10.14 or later
Part 1: How Much Does AdSense Pay Per 1,000 Views
As a content creator, you might be tempted to know how much you can expect to earn through AdSense. Since it’s a free and simple way to make extra bucks, showing ads with the content you produce for online platforms, it’s essential to know how much it pays for views.
Pay Per 1,000 Views by AdSense
For 1,000 views, expect AdSense to pay around $8-$20. However, your total earnings will depend on factors such as your content type, users’ location, and setting of ads in Google AdSense, so it can pay on thousand views.
More so, AdSense opts for Revenue Per 1,000 impressions or (RPM) to showcase the amount you would get for 1,000 impressions. Remember, this RPM doesn’t include the actual amount you’ve earned. But it focuses on dividing your earnings by page views and impressions, then multiplying those by 1,000.
You can also refer to the formula for better understanding.
Formula:
RPM = (Estimated earnings / Number of page views) * 1000
From this formula provided by Google official, we can easily know that
Estimated earnings = (RPM * Number of page views) / 1000
To understand it further, see the example below.
Suppose you’ve earned around $0.10 from 20 page views; your page RPM would be $6.00 in simpler terms.
($0.10 / 25) * 1000 = $6.00
Also, if RPM is $4.00 from 45,000 ad impressions, your estimated earnings would be equal $180.00
($4.00 * 45,000) / 1000 = $180.00
AdSense Pay Per View
Lastly, if you’re looking for an exact answer regarding how much it pays per view, know that it varies and is based on different factors, such as niche or audience demographic.
But you can expect something between $8 to $12 on 1,000 views after monetizing your YouTube channel with your Google AdSense account.
Part 2: How Much Does AdSense Pay Per Click?
After understanding AdSense’s way to pay for 1,000 views, formula, or pay per view, here’s what you need to know about AdSense’s payment on per click policy.
On Average, you can expect AdSense to pay something around $0.20 to $15 on a click. Talking about estimated earnings or one click, it depends on the cost-per-click in the niche, including the publisher’s earnings and competition among rival advertisers.
And if you’re wondering, cost-per-click is when a user clicks on your ad, and you earn money for it. However, advertisers always decide the cost-per-click for ads. In this case, some advertisers don’t hesitate to pay extra, depending on what they intend to advertise.
Part 3: AdSense Earnings Per Thousand Pageviews Examples
From pay per 1,000 views to pay per click, understanding the AdSense payment policy is essential if you’re up to monetize your YouTube channel.
Since there’re YouTube AdSense requirements, such as audience demographic, niche, or content, learning about which niche is the lucrative one will also help you decide your next move.
Let’s take a look at the following examples for better understanding:
- For example, if arts and entertainment is your niche, you can expect to earn $5.62 after accumulating 1,000 pageviews.
- Creators who create content on vehicles can earn around $9.20 on every 1,000 pageviews.
- If you’re into beauty and fitness, expect to earn up to $13.01 on 1,000 pageviews.
- For real estate, health, home, and garden niches, you can earn $14.50, $17.40, and $23.35 on every 1,000 pageviews.
Remember, people from North America can make the most of these earnings. But worry not if you are based outside North America. Because Google AdSense revenue calculator can help you find the average pageviews on monthly basis.
Part 4: Earnings from AdSense: Factors to Consider
After learning how much you can earn in different niches, it’s equally important to focus on the following factors, so you can qualify and start earning from AdSense with ease.
1) Type of Content
To monetize your videos for AdSense, ensure that you own the rights to use visuals and audio elements of your video. And focus on creating all elements of your video yourself.
For YouTube, you can try creating tutorials, do-it-yourself videos, original short films, original music videos, home videos, travel vlogs, or even daily-life vlogs.
While creating content for YouTube, remember advertisers consider placing ads on more advertiser-friendly content.
As a blogger, you must provide unique but quality content to exceed AdSense’s eligibility criteria. Having unique content helps Google understand what your website is about. It’s even better if your website provides a one-of-its-kind experience and users visit it again.
Be it a vlog or blog, please ensure that it’s original and not a copy from other sources. This way, you can elevate your credibility on the respective platforms. For a great user experience, opt for intuitive navigation.
And to up your content game, you can even use the calculator to determine the value of your content and estimated revenue from AdSense.
2) Keywords
Keywords are phrases and words that describe your service or product. The ones you choose will help show your ads to users.
Therefore, go for the relevant yet high-quality keywords and add them to your ad campaigns. This strategy will put your ad in front of potential buyers.
3) User Location
Remember, AdSense follows geo-targeting strategy, so it can place ads on different pages. These ads are based on a user’s language, region, and IP address.
Put simply, ads serving to a user from Algeria may differ from the ads for a user from Georgia.
4) Time Requires to Get Views
There’s no fixed time frame; however, you can focus on search volume, audience, and competition to start getting the desired number of views.
The first 60 minutes are crucial after you post a video. Then, the next 24 hours and the first 48 hours are equally important because YouTube gives an unnatural boost to it. It helps YouTube observe responses, such as how viewers interacted with the video and what kinds of viewers were interested in it.
Remember, if a video fails to get any views in a couple of days, it won’t likely perform and will consider “dead” on the platform.
More so, if a video performs better slightly, it’ll start to reach its full potential in the next 3 to 6 months, according to the views it receives per day. Oftentimes, videos took up to a year to perform well.
And if your video starts to perform better and faster in those 3-6 months, it’ll likely do better in the longer run.
5) Video Duration
Focus on the length of your video, as it determines how many ads can be shown in it. This part also influences your earning potential. When your video is longer in length, it’ll increase its worth.
However, you must find the right balance between video duration, quality, and the number of videos on your channel, so you can continue to earn without hindrance.
6) Your Niche or Industry
Niche is another essential factor to opt for AdSense earnings. Some of the profitable topics are:
- Business
- Investment
- Health
- Insurance
- Online Marketing
You can choose the area that interest you the most and start people educating about it.
For example, people tend to think about investing their money to multiply it. You can create videos on investment-related topics, tips and tricks to get maximum views.
Part 5: Pros and Cons of Earning Money from Google AdSense
At this point, you’re familiar with almost all aspects of generating money using Google AdSense. And considering the factors, it seems like a task you can perform.
Before you try earning money via AdSense, consider the following pros and cons.
Pros
- Google AdSense doesn’t charge an extra fee. It’s a totally free service that can help you earn dollars.
- Don’t know how to make ads? Don’t worry; Google will do it for you.
- It enables you to use one account to monetize multiple websites.
- As a passive income, it doesn’t require additional effort.
Cons
- Making the first $100 is a must to get paid further.
- With AdSense, you won’t be allowed to use another ad network.
- A policy breach could make you lose your account.
- You need a lot of traffic to make some serious money.
- Adding several ads can annoy your viewers.
Final Words
Monetizing your YouTube channel for AdSense is great for having a steady passive income. But, it’s a time-consuming process and has a set of advantages and disadvantages.
If you already have a YouTube channel and a certain number of views, you can take it further using the provided information. However, focus on factors such as user demographic, content type, and quality to achieve long-term success.
Free Download For Win 7 or later(64-bit)
Free Download For macOS 10.14 or later
Also read:
- Elevate Your Digital Presence Mastering the Art of Video Reacts for 2024
- [New] Enhance Video Appeal with Filmmaker-Friendly Subscribe Button Tutorials (Filmora)
- Capturing Attention Striking Shots for YouTube Success for 2024
- In 2024, Effortless Engagement Integrating GS & YT Strategies
- [New] Elevating Income with Mobile Video Monetization Techniques for YouTubers
- New Vloggers' Guide to Top 10 YouTube Editing Techniques
- Taking Charge of Your Visual Brand Identity
- The Rotation Ritual Youtube Video Techniques for Visual Impact
- Average Profit per Million YouTube Viewers
- [Updated] Easy Ways To Get Free Views on YouTube! Alternative Methods
- [Updated] Channel Titles That Shine How to Innovate
- A Step-by-Step Guide to Enhancing Your YouTube Content Post-Uploading
- [New] Average Gain for YouTubers per Ad Exposure?
- Cutting-Edge Techniques in YouTube Ad Design
- [New] 7 High-Impact Workout Videos That Engage and Energize Audiences
- [New] Bursting Boundaries, Breaking Barriers The Top Ten Reasons for Your YouTube Viewer Void
- Unveiled YouTube's Crème De La Crème of VR Videos
- Discover Time's Tales Top 10 Historical Channels to Study With
- 11 Useful YouTube SEO Tips to Rank Your Video
- Captivating First Impressions How to Choose Impactful Backgrounds for Thumbnails
- [Updated] Channel Transformation From Zero to Thousand Followers
- [Updated] Crafting Content Step by Step Guide to YouTube Video Editing
- Unlock Your Potential 50 FREE, High-Impact Banners at Your Disposal!
- Charting Your Path to Success in YouTube's Earnings System
- Bringing Text to Life A Guide to Dynamic Animation Methods for 2024
- 2024 Approved 7 Star-Rated Apps for Effortless YouTube LIVE Broadcast From iPhone and Android
- Streamline Your Online Experience Blocking Youtube Channels Effectively
- 2024 Approved Circulating Content The Art of Playlist Sharing
- 2024 Approved Enhance YT Experience The Most Outstanding Reaction Ideas
- Is a Quick Subscribe Worthwhile for YouTubers?
- [Updated] Dodge Digital Watchers Accelerating View Count Growth
- 2024 Approved Elevate Engagement Personalized YouTube Thumbnail Guide
- YouTube Slow How to Slow Down YouTube Videos [3 Ways]
- [New] Clearing Up Confusion Addressing YouTube Short Concerns
- [New] Elevating Video Reach The Role of Smart Backlinking Techniques
- [New] Affiliate Advancements How Small Channels Thrive Financially
- [New] Elevating Shorts Visibility A Thumbnail Transformation Journey
- How to Address and Overcome a YouTube Content ID Issue
- 2024 Approved Boost Views via Strategic Tagging Tactics
- In 2024, Engaging Vlogger Subjects Each Day
- Direct to YouTube Stepwise Process of Mobile & Desktop Video Posting for 2024
- [Updated] Essential Teacher-Friendly Screen Recording Software for 2024
- Mastering Volume Transitions Keyframe Techniques in Filmora (Mac) for 2024
- In 2024, Reasons why Pokémon GPS does not Work On Samsung Galaxy A14 5G? | Dr.fone
- In 2024, No More Snaps From Them? Potential Block on Snapchat
- How to Fix Itel P55T Find My Friends No Location Found? | Dr.fone
- Can I Remove the Apple Watch Activation Lock By Apple iPhone 11 without the Previous Owner?
- [Updated] Instagram's Social Filters Unfollow Guide for 2024
- Top 15 Augmented Reality Games Like Pokémon GO To Play On Nokia C210 | Dr.fone
- A Step-by-Step Guide on Using ADB and Fastboot to Remove FRP Lock on your Poco X5 Pro
- In 2024, Excellence in TikTok Making Leveraging Templates to Stand Out
- 2024 Approved The Best of the Best Nine Premium Portable Microphones for High-Quality Podcasts (Level 9)
- In 2024, Diagnostic Criteria for Fetal Alcohol Syndrome
- In 2024, Converting Soundcloud to MP3 Like a Pro Insider Tips
- Fostering Connection and Engagement for Brands on TikTok
- The Ultimate Guide to Earning on TikTok, Step by Step (8 Methods) for 2024
- [New] Comprehensive Tutorial for Effective Screen Recording for 2024
- 3 Ways for Android Pokemon Go Spoofing On Oppo Find N3 Flip | Dr.fone
- 2024 Approved Free & Paid Options to Perfectly Document Every Google Meet
- Expert Strategies in the Art of Win10
- [New] 2024 Approved 5 Premier Recording Software Tips for Windows Enthusiasts
- [Updated] In 2024, Unbroken Song Livestreams on QYoutube
- Title: "Best Screener Tech Perfect for Creating Viral YouTube Moments"
- Author: Kevin
- Created at : 2024-05-25 14:43:00
- Updated at : 2024-05-26 14:43:00
- Link: https://youtube-videos.techidaily.com/best-screener-tech-perfect-for-creating-viral-youtube-moments/
- License: This work is licensed under CC BY-NC-SA 4.0.
