
:max_bytes(150000):strip_icc()/GettyImages-746029735-5ba9753146e0fb00253680e0.jpg)
Beginning Your Journey to Digital Creation for 2024
Beginning Your Journey to Digital Creation
How to Create a YouTube Account

Richard Bennett
Mar 27, 2024• Proven solutions
People create YouTube accounts for a lot of different reasons. Some YouTubers just love making videos and created their channels so they would have somewhere to post their work. Others have strong opinions they need a platform to share. There are a lot of people on YouTube whose main interest is in a separate website or other social media page, but they use their YouTube channels to help generate traffic. If you are considering starting your own YouTube channel then you should take a second to consider why you want to, since this will have an impact on what kind of videos you make. Your reasons for wanting to make a YouTube account do not have to be very elaborate. Maybe you just think it will be fun. Good news; it will be!
Once you know for sure that you want to create a YouTube account, and also know why you want to do it, you have already started building your channel. There are still a few important things to consider, though. This article will walk you through signing up for a YouTube account, and give you some tips about starting your channel.
Creating Your YouTube Account in 6 Steps
1. Go to YouTube.com and look at the top right corner of your screen. There will either be a blue Sign In button, or an icon representing you. YouTube accounts and Google accounts are the same, so if you are signed into your Gmail account you are already signed into YouTube as well.
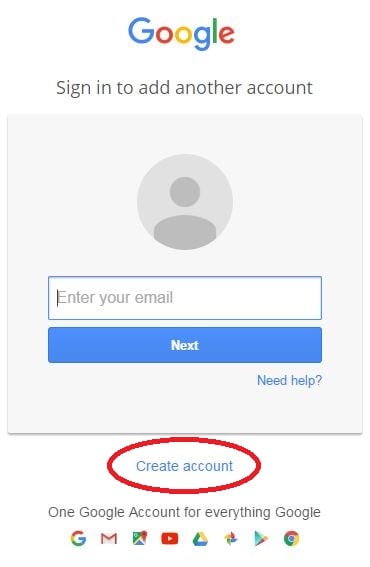
2. If you see a Sign In button, click it. If you see your icon click on that, and in the window that pops up select Add Account. Either way, you will be taken into a sign in screen. Under where it asks for your email address it will say Create Account. Click on Create Account.
3. In the sign up page you will need to put in your name, email address, and mobile phone number as well as some other personal information. Do not enter your current Gmail address. Enter an alternate email you have created for your vlog, or click on I would like a new Gmail address. This will change your page slightly so that the email field becomes Choose a Username.


You will probably need to try a few different usernames before you find one that is not taken.
4. You will have to put in both a first and last name when you create your account, but you can change it to one name later.
5. Your password will need to be at least 8 characters long. Try to use a combination of letters or numbers, and make sure it is not something easily guessable (i.e spouses name).
6. After you finish the form click Next Step and, in the next screen, Continue to YouTube.
Tips on Starting a YouTube Channel
1. Choose a Topic you Love
When choosing a topic for your YouTube channel make sure you pick something you are passionate about. If you already have an interest or hobby which you are always researching and are extremely up-to-date on then that should probably be the theme of your vlog. If you plan to have a channel where people go to learn anything then you will need to be an authority on that topic. Whatever you make videos about it will need to be something you can realistically see yourself putting a lot of time into. If you cannot think of more than a couple ideas for videos on your topic then that is a sign that you need to choose something else to focus on.
You should check to see how much demand there is for videos on your topic. This can be done by googling your topic to see what else is out there. If not many people have addressed your topic yet it probably means that it is not something a lot of people want to know about. However, it could also mean that the people who do want to watch videos like yours have been starved for content. Your channel will flop if you do not love what you are making videos about, so do not choose something just because you think it will be popular. Follow your passion.
2. Check out the Competition
You should look for other vlogs with similar topics to yours not only to gauge how much demand there is for your videos, but to check out the competition. If there are a lot of YouTube channels dedicated to the same topic you want to vlog about then this should not discourage you from going after the same viewers. People who are excited about a topic frequently watch more than one vlog about it. It might not even be correct to think of other vloggers within your genre as ‘the competition’ since you are ultimately part of the same community. You will need to watch these people’s videos as part of keeping yourself informed and will likely become a fan – maybe even a collaborator some day – of theirs.
The main reason you want to look into YouTube channels like yours is because you do not want to be creating content that is overdone and boring. You are tackling the same topic as other people, and may even make some videos on the exact same subjects as others already have. There needs to be something unique about your videos that makes them stand out from what already exists. By looking at what other people are already doing you will be able to come up with ideas for what you can do differently.
3. Choose a Great Name
Picking a great name for your YouTube account can take a lot of effort. Chances are you will not want to use your own name, at least not in full. Although your real name can work for if you are a lifestyle vlogger in most cases you will have a more specific topic that will need to be addressed in your channel’s name. Try out your name or a nickname for yourself in combination with different words associated with the topic of your vlog. Aim to create a name that is catchy and easy to remember.
Chances are a few of your first couple picks will be unavailable. YouTube is a popular site and a lot of the best names are taken. The last thing you should ever do while naming your YouTube channel is add numbers or letters to the end of a name you like because it is taken. Names with numbers at the end are hard for viewers to remember and find again. Choosing a weak name with a trail of numbers or letters after it will make it very hard for your channel to grow. Brainstorm a long list of potential names that are actually good and keep on trying them out until you find one that’s available.
For more information on naming your YouTube channel read our post ‘How To Pick a Name for Your YouTube Channel’.
4. Make a Schedule
Maintaining a YouTube channel is a big time commitment. You need to post videos regularly or people will forget about you, and videos can take a long time to make. When you are first starting your vlog you should make yourself a schedule for when you want to upload videos. Having a schedule will help you budget your time and ensure that your vlog never gets in the way of the rest of your life.
Having a posting schedule will also help you grow your channel. Viewers like it when they know when to expect new content from vloggers they like. They are more likely to subscribe and tune in for every post if they are given a chance to anticipate when your new entry is coming.
5. Take Inventory
Think about what equipment you have that you can use for your YouTube channel. The only thing you absolutely cannot get by without is a decent camera, but there are other types of equipment that it is a good idea to have too. Lights, a tripod, an external microphone – these are all things that a lot of YouTubers find they need in order to produce great videos. If you do not have these things, or money you are prepared to invest in them, then you will need to find ways around them until your situation changes. For more information check out our post ‘The Best YouTube Equipment: What You Need to Start Your Channel’.
Read More to Get : Best Video Websites Like YouTube >>
Richard Bennett
Richard Bennett is a writer and a lover of all things video.
Follow @Richard Bennett
Richard Bennett
Mar 27, 2024• Proven solutions
People create YouTube accounts for a lot of different reasons. Some YouTubers just love making videos and created their channels so they would have somewhere to post their work. Others have strong opinions they need a platform to share. There are a lot of people on YouTube whose main interest is in a separate website or other social media page, but they use their YouTube channels to help generate traffic. If you are considering starting your own YouTube channel then you should take a second to consider why you want to, since this will have an impact on what kind of videos you make. Your reasons for wanting to make a YouTube account do not have to be very elaborate. Maybe you just think it will be fun. Good news; it will be!
Once you know for sure that you want to create a YouTube account, and also know why you want to do it, you have already started building your channel. There are still a few important things to consider, though. This article will walk you through signing up for a YouTube account, and give you some tips about starting your channel.
Creating Your YouTube Account in 6 Steps
1. Go to YouTube.com and look at the top right corner of your screen. There will either be a blue Sign In button, or an icon representing you. YouTube accounts and Google accounts are the same, so if you are signed into your Gmail account you are already signed into YouTube as well.
2. If you see a Sign In button, click it. If you see your icon click on that, and in the window that pops up select Add Account. Either way, you will be taken into a sign in screen. Under where it asks for your email address it will say Create Account. Click on Create Account.
3. In the sign up page you will need to put in your name, email address, and mobile phone number as well as some other personal information. Do not enter your current Gmail address. Enter an alternate email you have created for your vlog, or click on I would like a new Gmail address. This will change your page slightly so that the email field becomes Choose a Username.
You will probably need to try a few different usernames before you find one that is not taken.
4. You will have to put in both a first and last name when you create your account, but you can change it to one name later.
5. Your password will need to be at least 8 characters long. Try to use a combination of letters or numbers, and make sure it is not something easily guessable (i.e spouses name).
6. After you finish the form click Next Step and, in the next screen, Continue to YouTube.
Tips on Starting a YouTube Channel
1. Choose a Topic you Love
When choosing a topic for your YouTube channel make sure you pick something you are passionate about. If you already have an interest or hobby which you are always researching and are extremely up-to-date on then that should probably be the theme of your vlog. If you plan to have a channel where people go to learn anything then you will need to be an authority on that topic. Whatever you make videos about it will need to be something you can realistically see yourself putting a lot of time into. If you cannot think of more than a couple ideas for videos on your topic then that is a sign that you need to choose something else to focus on.
You should check to see how much demand there is for videos on your topic. This can be done by googling your topic to see what else is out there. If not many people have addressed your topic yet it probably means that it is not something a lot of people want to know about. However, it could also mean that the people who do want to watch videos like yours have been starved for content. Your channel will flop if you do not love what you are making videos about, so do not choose something just because you think it will be popular. Follow your passion.
2. Check out the Competition
You should look for other vlogs with similar topics to yours not only to gauge how much demand there is for your videos, but to check out the competition. If there are a lot of YouTube channels dedicated to the same topic you want to vlog about then this should not discourage you from going after the same viewers. People who are excited about a topic frequently watch more than one vlog about it. It might not even be correct to think of other vloggers within your genre as ‘the competition’ since you are ultimately part of the same community. You will need to watch these people’s videos as part of keeping yourself informed and will likely become a fan – maybe even a collaborator some day – of theirs.
The main reason you want to look into YouTube channels like yours is because you do not want to be creating content that is overdone and boring. You are tackling the same topic as other people, and may even make some videos on the exact same subjects as others already have. There needs to be something unique about your videos that makes them stand out from what already exists. By looking at what other people are already doing you will be able to come up with ideas for what you can do differently.
3. Choose a Great Name
Picking a great name for your YouTube account can take a lot of effort. Chances are you will not want to use your own name, at least not in full. Although your real name can work for if you are a lifestyle vlogger in most cases you will have a more specific topic that will need to be addressed in your channel’s name. Try out your name or a nickname for yourself in combination with different words associated with the topic of your vlog. Aim to create a name that is catchy and easy to remember.
Chances are a few of your first couple picks will be unavailable. YouTube is a popular site and a lot of the best names are taken. The last thing you should ever do while naming your YouTube channel is add numbers or letters to the end of a name you like because it is taken. Names with numbers at the end are hard for viewers to remember and find again. Choosing a weak name with a trail of numbers or letters after it will make it very hard for your channel to grow. Brainstorm a long list of potential names that are actually good and keep on trying them out until you find one that’s available.
For more information on naming your YouTube channel read our post ‘How To Pick a Name for Your YouTube Channel’.
4. Make a Schedule
Maintaining a YouTube channel is a big time commitment. You need to post videos regularly or people will forget about you, and videos can take a long time to make. When you are first starting your vlog you should make yourself a schedule for when you want to upload videos. Having a schedule will help you budget your time and ensure that your vlog never gets in the way of the rest of your life.
Having a posting schedule will also help you grow your channel. Viewers like it when they know when to expect new content from vloggers they like. They are more likely to subscribe and tune in for every post if they are given a chance to anticipate when your new entry is coming.
5. Take Inventory
Think about what equipment you have that you can use for your YouTube channel. The only thing you absolutely cannot get by without is a decent camera, but there are other types of equipment that it is a good idea to have too. Lights, a tripod, an external microphone – these are all things that a lot of YouTubers find they need in order to produce great videos. If you do not have these things, or money you are prepared to invest in them, then you will need to find ways around them until your situation changes. For more information check out our post ‘The Best YouTube Equipment: What You Need to Start Your Channel’.
Read More to Get : Best Video Websites Like YouTube >>
Richard Bennett
Richard Bennett is a writer and a lover of all things video.
Follow @Richard Bennett
10 Must-Try Microphones for Exceptional ASMR Sounds
Best ASMR Microphones
Richard Bennett
Mar 27, 2024• Proven solutions
ASMR can be triggered by visual, audio, and tactile stimuli, which is the reason why most YouTubers who produce this type of content dedicate a lot of attention to the image and sound quality.
Furthermore, the vast majority of ASMR videos you can find on YouTube utilizes audio triggers to spark the autonomous sensory meridian response in one form or the other. Consequently, the quality of the audio recording determines whether or not your videos will be able to trigger ASMR. That’s why we selected some of the ASMR microphones novice and seasoned YouTubers can use to record the audio for their ASMR YouTube videos.
Part 1: Which Features Should an ASMR Microphone Have?
Thinking that you can use any microphone you can lay your hands on to record sound for you ASMR videos is a mistake, because the quality of the recording may not be at a satisfactory level if your microphone is producing a lot of self-noise or if it is not able to pick up soft noises.
Let’s take a closer look at the features and ASMR microphone should have.
1. The mic’s source of power
A microphone can draw power from two sources, as you can either connect it to a computer via a USB cable or you can use an XLR cable to connect the device to an external power source.
The so-called Phantom Power can be any type of adapter or audio recorder that supplies a microphone with power. All professional condenser microphones are connected to a power source through an XLR connection although some mics can have a built-in phantom power source that requires only an AA battery to function normally.
2. The microphone’s recording direction
Although there are a number of direction categories of microphones, ASMR content produces commonly use Omnidirectional and Binaural mics.
As its name suggests, an omnidirectional microphone can pick up sounds from all sides, which makes it a good option if you want to record ambient sounds like brushing or tapping. However, you should also keep in mind that this type of microphone can capture background noises which may impact the overall quality of the recording.
The binaural mics are composed of two microphones are used to record the left and right channel separately. You don’t necessarily have to get a binaural microphone in order to create a binaural audio recording since you can just use two different microphones to record the left and right channels individually.
3. The level of self-noise a microphone makes
Recording low sounds can be challenging if your microphone is creating humming or crackling noises automatically. The so-called self-noise level a microphone makes is quantified in A-weighted decibels, and ideally, you should get a mic that makes around 15dBA in order to keep sounds a microphone produces automatically at the very minimum.
Besides the self-noise, you should also look into S/N (Signal to Noise Ratio) that depicts the ratio of signal power to noise power. A mic that has approximately 80dBA or more should enable you to record low voices without having to worry about the unwanted noises.
Part 2: What Are The Best Budget ASMR Microphones for Beginners?
If you are thinking about starting an ASMR YouTube channel, you don’t have to get a professional microphone right away, because there lots of affordable mics that will enable you to create crystal-clear audio recordings.
We’ve shortlisted a few of the best budget ASMR microphones for beginners on the market with the aim to help you narrow down your choices. Here’s what they have to offer.
1. Tascam DR-05X Stereo Handheld Digital Recorder
Price: $89.99
This versatile digital recorder can be used for different purposes that range from capturing audio for podcasts to recording your personal notes. The Tascam DR-05X is equipped with a pair of dual condenser microphones that enable you to record low or high sounds with the same level of efficiency.
The device is powered by two AA batteries and it can record for almost 18 hours continually before you have to change the batteries. The Tascam DR-05X’s interface is intuitive which allows you to adjust audio levels, delete a take you didn’t like, or add markers to a recording effortlessly.
What’s more, this handheld digital recorder has a USB port which enables you to connect it to a computer and use it to record audio during live streams or while creating a new ASMR video for your YouTube channel. Nonetheless, this omnidirectional digital recorder doesn’t have an XLR jack and you can’t use it to capture sound from professional microphones.
2. Blue Yeti USB Microphone
Price: $129.99
Arguably the most popular microphone within YouTube’s ASMR community Blue Yeti USB microphone is a versatile mic you can use to record ambient sounds and vocals. The microphone has three condenser capsules which enables you to record audio with it in a broad range of different contexts.
In addition, you can switch between stereo, omnidirectional, cardioid, and bidirectional pattern modes and choose the direction from which the microphone is going to pick up sounds. Blue Yeti has the 20 Hz to 20 kHz frequency response and it features the mute and gain buttons so that you can quickly adjust this value even if you are still recording.
The mic’s signal to noise ratio is 100dBA which means that it produces a minimum amount of noises while you’re recording low sounds. You can use this mic on Windows XP and all other later versions of the OS as well as macOS X or higher.
3. Zoom H4N Pro
Price: $218.99
Yet another digital recorder that is frequently used to capture the audio for ASMR videos. Zoom H4N Pro is equipped with x/Y stereo microphones capable of recording audio at 140dBA SPA and it offers the possibility to record sound on four channels.
What’s more, this device enables you to create 24-bit audio files that can have up to 96kHz, while its output level is set to -10dBu. Zoom H4N Pro has two XLR/TRS jacks that are equipped with locking connectors as well as a 400 W monaural speaker.
Besides connecting XLR microphones to this digital recorder, you can also connect the device to your computer or a Smartphone through its USB port. The device supports SD cards that have up to 32GB of storage space, which means that you can record hours of audio without having to worry about the size of these files.
4. Blue Microphones Baby Bottle SL Large-Diaphragm Condenser Microphone
Price: $399.99
Music industry professionals have been using microphones manufactured by Blue Microphones for decades, which is why it is hardly surprising that their Baby Bottle mic is one of the best ASMR microphones on the market.
This is a cardioid microphone that utilizes the pressure gradient to pick up sounds from all directions. In addition, the device has a large-diaphragm capsule that enables it to produce sounds that are clear and rich in detail.
Moreover, this model has a high pass filter and -20dBA pad that ensures you can record high and soft sounds with the same level of quality. The noise level of this USB microphone is 87dbA which means that it doesn’t create humming sounds while it is recording low sounds. In addition, the microphone’s vintage design makes it a trendy option for all ASMR video content creators in search of a powerful and esthetically pleasing microphone.
Part 3: Which High-End ASMR Mics You Should Try?
As your ASMR YouTube channel grows, the quality of the audio recordings you create is becoming increasingly important, because it impacts the overall quality of the content you’re sharing with your followers.
In case you’re looking for a microphone that is going to improve the quality of your audio recordings you should check out the mics below.
1. Rode NT1-A Stereo Vocal Condenser Microphone
Price: $439.00
Rode is probably the most famous microphone manufacturer in the world, as the company produced some of the best mics ever created. Their NT1-A Stereo Vocal Condenser Microphone features a 1’’ capsule that contains a gold plated diaphragm. The mic has a cardioid polar pattern and its maximum SPL capability cannot exceed 137dBSPL.
Moreover, you can pair two of the NT1-A microphones if you want to create a stereo or binaural recordings. This Rode’s model has a noise level of just 5dB, which makes it one of the best studio microphones on the market.
This mic requires one A battery to function, and it only has an XRL jack, which means that you cannot connect it to a computer via a USB cable. Although its price may seem a bit steep, the audio quality this microphone can produce more than justifies the high cost.
2. 3Dio FS Pro II
Price: $2, 057.88
In case you want to record your ASMR videos with a microphone that meets the highest industry standards, then 3Dio FS Pro II is one of the best choices you have at your disposal. The microphone has the shape of human ears and like all omnidirectional microphones, it can pick up sounds from all directions.
This model has two XLR jacks and a 3.5mm stereo output jack so that you can connect it to a 16-channel mixer or different types of audio recording devices. 3Dio FS Pro II needs 48 V to run normally and it uses 1.9 V batteries that can provide you with up 300 hours of recording time.
The microphone is designed to imitate the way human beings hear by preserving the direction from which the sound came. This means that the listeners of your ASMR recordings are going to be able to detect the direction from which the sounds are coming from.
We’ve summarized the key features of the mics mentioned above for helping you making a quick decision.
| Product name | Polar Pattern | Self-noise / S/N ratio | Power Source type | Best for | Price |
|---|---|---|---|---|---|
| Tascam DR-05X | Stereo, omnidirectional | 92dB | USB | Whispers and low sounds | $89.99 |
| Blue Yeti | Bidirectional, omnidirectional, cardioid, stereo | 100dB | USB | Low and high sounds | $129.99 |
| Zoom H4N Pro | Stereo, omnidirectional | 140dB | USB | Whispers and ambient sounds | $218.99 |
| Blue Microphones Baby Bottle SL Large-Diaphragm Condenser Microphone | Cardioid | 87dB | Phantom power | Whispers and ambient sounds | $399.99 |
| Rode NT1-A Stereo | Cardioid or binaural | 5dB | Phantom power | Ambient sounds and voice recordings | $439.00 |
| 3Dio FS Pro II | Binaural, omnidirectional | 14dB | Phantom power | Ambient sounds and voice recordings | $2, 057.88 |
Part 4: Frequently Asked Questions About ASMR Microphones
1. Should I use a USB or XLR microphone for ASMR recordings?
Although both USB and XLR microphones are frequently used to capture ASMR recordings, and XLR microphone produces a much better sound quality. So, if you want to prioritize the audio quality you should record all your ASMR videos with an XLR microphone.
However, there are quite a few affordable USB mics on the market that will enable you to capture sound in decent quality at a relatively low price.
2. Which type of microphone should be used to record ASMR sounds?
Condenser microphones are a much better option than the dynamic mics because they pick up soft sounds easily. Also, getting an XLR mic is usually a better choice than opting for a USB mic.
3. Is an omnidirectional microphone better for ASMR than the binaural mic?
The answer to this question depends on the type of ASMR video you want to create. If it is important for you to capture tapping or scratching sounds from all sides then you should choose an omnidirectional microphone.
A binaural mic will enable you to create a more immersive audio recording, but they are also more expensive.
Conclusion
In the world of video production, the quality of your equipment often determines how good the final product is going to be. That’s why a good microphone is one of the essential items for an ASMR artist.
Finding a good microphone you can use to record ASMR sounds shouldn’t be too difficult, because you can get a high-quality option in different price tiers. If you are on a budget, then a microphone like Blue Yeti may be a great choice, because it lets you choose between different polar patterns and it produces a great quality of sound.
On the other hand, 3Dio FS Pro II or Rode NT1-A Stereo microphones are worth investing in because they will enable you to record sound at a professional level.
Richard Bennett
Richard Bennett is a writer and a lover of all things video.
Follow @Richard Bennett
Richard Bennett
Mar 27, 2024• Proven solutions
ASMR can be triggered by visual, audio, and tactile stimuli, which is the reason why most YouTubers who produce this type of content dedicate a lot of attention to the image and sound quality.
Furthermore, the vast majority of ASMR videos you can find on YouTube utilizes audio triggers to spark the autonomous sensory meridian response in one form or the other. Consequently, the quality of the audio recording determines whether or not your videos will be able to trigger ASMR. That’s why we selected some of the ASMR microphones novice and seasoned YouTubers can use to record the audio for their ASMR YouTube videos.
Part 1: Which Features Should an ASMR Microphone Have?
Thinking that you can use any microphone you can lay your hands on to record sound for you ASMR videos is a mistake, because the quality of the recording may not be at a satisfactory level if your microphone is producing a lot of self-noise or if it is not able to pick up soft noises.
Let’s take a closer look at the features and ASMR microphone should have.
1. The mic’s source of power
A microphone can draw power from two sources, as you can either connect it to a computer via a USB cable or you can use an XLR cable to connect the device to an external power source.
The so-called Phantom Power can be any type of adapter or audio recorder that supplies a microphone with power. All professional condenser microphones are connected to a power source through an XLR connection although some mics can have a built-in phantom power source that requires only an AA battery to function normally.
2. The microphone’s recording direction
Although there are a number of direction categories of microphones, ASMR content produces commonly use Omnidirectional and Binaural mics.
As its name suggests, an omnidirectional microphone can pick up sounds from all sides, which makes it a good option if you want to record ambient sounds like brushing or tapping. However, you should also keep in mind that this type of microphone can capture background noises which may impact the overall quality of the recording.
The binaural mics are composed of two microphones are used to record the left and right channel separately. You don’t necessarily have to get a binaural microphone in order to create a binaural audio recording since you can just use two different microphones to record the left and right channels individually.
3. The level of self-noise a microphone makes
Recording low sounds can be challenging if your microphone is creating humming or crackling noises automatically. The so-called self-noise level a microphone makes is quantified in A-weighted decibels, and ideally, you should get a mic that makes around 15dBA in order to keep sounds a microphone produces automatically at the very minimum.
Besides the self-noise, you should also look into S/N (Signal to Noise Ratio) that depicts the ratio of signal power to noise power. A mic that has approximately 80dBA or more should enable you to record low voices without having to worry about the unwanted noises.
Part 2: What Are The Best Budget ASMR Microphones for Beginners?
If you are thinking about starting an ASMR YouTube channel, you don’t have to get a professional microphone right away, because there lots of affordable mics that will enable you to create crystal-clear audio recordings.
We’ve shortlisted a few of the best budget ASMR microphones for beginners on the market with the aim to help you narrow down your choices. Here’s what they have to offer.
1. Tascam DR-05X Stereo Handheld Digital Recorder
Price: $89.99
This versatile digital recorder can be used for different purposes that range from capturing audio for podcasts to recording your personal notes. The Tascam DR-05X is equipped with a pair of dual condenser microphones that enable you to record low or high sounds with the same level of efficiency.
The device is powered by two AA batteries and it can record for almost 18 hours continually before you have to change the batteries. The Tascam DR-05X’s interface is intuitive which allows you to adjust audio levels, delete a take you didn’t like, or add markers to a recording effortlessly.
What’s more, this handheld digital recorder has a USB port which enables you to connect it to a computer and use it to record audio during live streams or while creating a new ASMR video for your YouTube channel. Nonetheless, this omnidirectional digital recorder doesn’t have an XLR jack and you can’t use it to capture sound from professional microphones.
2. Blue Yeti USB Microphone
Price: $129.99
Arguably the most popular microphone within YouTube’s ASMR community Blue Yeti USB microphone is a versatile mic you can use to record ambient sounds and vocals. The microphone has three condenser capsules which enables you to record audio with it in a broad range of different contexts.
In addition, you can switch between stereo, omnidirectional, cardioid, and bidirectional pattern modes and choose the direction from which the microphone is going to pick up sounds. Blue Yeti has the 20 Hz to 20 kHz frequency response and it features the mute and gain buttons so that you can quickly adjust this value even if you are still recording.
The mic’s signal to noise ratio is 100dBA which means that it produces a minimum amount of noises while you’re recording low sounds. You can use this mic on Windows XP and all other later versions of the OS as well as macOS X or higher.
3. Zoom H4N Pro
Price: $218.99
Yet another digital recorder that is frequently used to capture the audio for ASMR videos. Zoom H4N Pro is equipped with x/Y stereo microphones capable of recording audio at 140dBA SPA and it offers the possibility to record sound on four channels.
What’s more, this device enables you to create 24-bit audio files that can have up to 96kHz, while its output level is set to -10dBu. Zoom H4N Pro has two XLR/TRS jacks that are equipped with locking connectors as well as a 400 W monaural speaker.
Besides connecting XLR microphones to this digital recorder, you can also connect the device to your computer or a Smartphone through its USB port. The device supports SD cards that have up to 32GB of storage space, which means that you can record hours of audio without having to worry about the size of these files.
4. Blue Microphones Baby Bottle SL Large-Diaphragm Condenser Microphone
Price: $399.99
Music industry professionals have been using microphones manufactured by Blue Microphones for decades, which is why it is hardly surprising that their Baby Bottle mic is one of the best ASMR microphones on the market.
This is a cardioid microphone that utilizes the pressure gradient to pick up sounds from all directions. In addition, the device has a large-diaphragm capsule that enables it to produce sounds that are clear and rich in detail.
Moreover, this model has a high pass filter and -20dBA pad that ensures you can record high and soft sounds with the same level of quality. The noise level of this USB microphone is 87dbA which means that it doesn’t create humming sounds while it is recording low sounds. In addition, the microphone’s vintage design makes it a trendy option for all ASMR video content creators in search of a powerful and esthetically pleasing microphone.
Part 3: Which High-End ASMR Mics You Should Try?
As your ASMR YouTube channel grows, the quality of the audio recordings you create is becoming increasingly important, because it impacts the overall quality of the content you’re sharing with your followers.
In case you’re looking for a microphone that is going to improve the quality of your audio recordings you should check out the mics below.
1. Rode NT1-A Stereo Vocal Condenser Microphone
Price: $439.00
Rode is probably the most famous microphone manufacturer in the world, as the company produced some of the best mics ever created. Their NT1-A Stereo Vocal Condenser Microphone features a 1’’ capsule that contains a gold plated diaphragm. The mic has a cardioid polar pattern and its maximum SPL capability cannot exceed 137dBSPL.
Moreover, you can pair two of the NT1-A microphones if you want to create a stereo or binaural recordings. This Rode’s model has a noise level of just 5dB, which makes it one of the best studio microphones on the market.
This mic requires one A battery to function, and it only has an XRL jack, which means that you cannot connect it to a computer via a USB cable. Although its price may seem a bit steep, the audio quality this microphone can produce more than justifies the high cost.
2. 3Dio FS Pro II
Price: $2, 057.88
In case you want to record your ASMR videos with a microphone that meets the highest industry standards, then 3Dio FS Pro II is one of the best choices you have at your disposal. The microphone has the shape of human ears and like all omnidirectional microphones, it can pick up sounds from all directions.
This model has two XLR jacks and a 3.5mm stereo output jack so that you can connect it to a 16-channel mixer or different types of audio recording devices. 3Dio FS Pro II needs 48 V to run normally and it uses 1.9 V batteries that can provide you with up 300 hours of recording time.
The microphone is designed to imitate the way human beings hear by preserving the direction from which the sound came. This means that the listeners of your ASMR recordings are going to be able to detect the direction from which the sounds are coming from.
We’ve summarized the key features of the mics mentioned above for helping you making a quick decision.
| Product name | Polar Pattern | Self-noise / S/N ratio | Power Source type | Best for | Price |
|---|---|---|---|---|---|
| Tascam DR-05X | Stereo, omnidirectional | 92dB | USB | Whispers and low sounds | $89.99 |
| Blue Yeti | Bidirectional, omnidirectional, cardioid, stereo | 100dB | USB | Low and high sounds | $129.99 |
| Zoom H4N Pro | Stereo, omnidirectional | 140dB | USB | Whispers and ambient sounds | $218.99 |
| Blue Microphones Baby Bottle SL Large-Diaphragm Condenser Microphone | Cardioid | 87dB | Phantom power | Whispers and ambient sounds | $399.99 |
| Rode NT1-A Stereo | Cardioid or binaural | 5dB | Phantom power | Ambient sounds and voice recordings | $439.00 |
| 3Dio FS Pro II | Binaural, omnidirectional | 14dB | Phantom power | Ambient sounds and voice recordings | $2, 057.88 |
Part 4: Frequently Asked Questions About ASMR Microphones
1. Should I use a USB or XLR microphone for ASMR recordings?
Although both USB and XLR microphones are frequently used to capture ASMR recordings, and XLR microphone produces a much better sound quality. So, if you want to prioritize the audio quality you should record all your ASMR videos with an XLR microphone.
However, there are quite a few affordable USB mics on the market that will enable you to capture sound in decent quality at a relatively low price.
2. Which type of microphone should be used to record ASMR sounds?
Condenser microphones are a much better option than the dynamic mics because they pick up soft sounds easily. Also, getting an XLR mic is usually a better choice than opting for a USB mic.
3. Is an omnidirectional microphone better for ASMR than the binaural mic?
The answer to this question depends on the type of ASMR video you want to create. If it is important for you to capture tapping or scratching sounds from all sides then you should choose an omnidirectional microphone.
A binaural mic will enable you to create a more immersive audio recording, but they are also more expensive.
Conclusion
In the world of video production, the quality of your equipment often determines how good the final product is going to be. That’s why a good microphone is one of the essential items for an ASMR artist.
Finding a good microphone you can use to record ASMR sounds shouldn’t be too difficult, because you can get a high-quality option in different price tiers. If you are on a budget, then a microphone like Blue Yeti may be a great choice, because it lets you choose between different polar patterns and it produces a great quality of sound.
On the other hand, 3Dio FS Pro II or Rode NT1-A Stereo microphones are worth investing in because they will enable you to record sound at a professional level.
Richard Bennett
Richard Bennett is a writer and a lover of all things video.
Follow @Richard Bennett
Also read:
- 2024 Approved Essential Steps for Seamlessly Clearing YouTube Feedback
- The Art of YouTube Management by Studio Techniques
- Editing Excellence Identifying 10 Superior Online Trimmer Apps for 2024
- In 2024, Elevate Your Content's Visibility Strategic Use of Imagery in Video Thumbnails
- [Updated] Enhancing Social Media Reach by Uploading to YouTube via Twitch
- YouTube Monetization Changes 500 Subscribers Now Eligible
- [New] Digital Dollars in Motion A Side-by-Side of Vids Vs. Videos
- 2024 Approved Efficient Thumbnail Generation with Your Phone for Video Content
- Unlocking Permanent Turn-Off for YouTube Shorts
- Viral Video Champions The Shortlist of 100+ Million Viewers by '24
- [Updated] Earning Potential Unveiled YouTube AdSense Earning per Thousand Video Observations
- [New] Chart a Course to 6-Figure Growth with Powerful #Tags
- [Updated] Debugging Techniques Identifying and Resolving Common JavaScript Errors
- Craft a Memorable First Snap Your Shorts' Thumbnail Blueprint
- Breaking the Mold High-Fidelity Sound without a Microphone
- [New] Amplifying Your Content Free Techniques to Boost YouTube Views
- Captivate Audiences Unveiling Secrets for Striking YouTube Banners for 2024
- In 2024, DIY Dynamics Unlock Creative Animation Potential
- Elevating Your YouTube Profile with High-Impact Artwork Guide
- 2024 Approved Access YT Comments Desktop/iOS/Android Edition Explained
- YouTube's Shorts A Deep Dive Into Content Creation and Revenue
- Jump to YouTube Affiliate Ranking with a Swift 10,000 Views
- [New] Crafting a Personalized YouTube Pathway to Viewers
- Revolutionize Your Branding Strategy with Access to a Vast Library of Free YouTube Banners
- In 2024, Bite-Sized Tips for Aspiring Video Editors
- Visual Anonymous How to Make Faces and Objects Invisible
- 2024 Approved Creating a Viral Traction with 6 Strategic Steps in YouTube Marketing
- From Raw Footage to Engaging Content Streamlining Video Edits on Windows
- Super Easy Ways To Deal with Xiaomi Redmi Note 12R Unresponsive Screen | Dr.fone
- Virtual Vice Versa Top 10 Alternative Crime Games for 2024
- [New] Survive and Thrive Top 8 Zombie Game Experiences
- In 2024, Top Android Apps for Smoother Videos Free Stabilization Tools
- 2024 Approved Peaceful Productions Simplified Noise Elimination Strategies for Premiere Pro Users
- [New] Capture, Share, Enjoy!
- [Updated] Time-Saving Tricks for PowerPoint Projections for 2024
- 2024 Approved Essential Mac Captures Compilation (Under 156 Chars)
- [Updated] Enhance Your Videos with Dynamic Camera Movements - Camtasa Guide for 2024
- [Updated] Unlocking Potential Discovering Hidden Streaming Tricks
- [New] Virtual Ventures Cutting-Edge Business Strategy Gaming Review for 2024
- In 2024, How To Remove the Two Factor Authentication On iPhone 12 Pro Max
- New In 2024, Streamline Your Workflow Top Adobe Premiere Shortcuts
- Title: Beginning Your Journey to Digital Creation for 2024
- Author: Kevin
- Created at : 2024-05-25 14:41:53
- Updated at : 2024-05-26 14:41:53
- Link: https://youtube-videos.techidaily.com/beginning-your-journey-to-digital-creation-for-2024/
- License: This work is licensed under CC BY-NC-SA 4.0.
