
:max_bytes(150000):strip_icc()/cigarettelightersocketdoesntworknocharge-5bb3c7fac9e77c0051fbd30d.jpg)
"Audience Expansion Masterclass Skyrocketing Your Youtube Numbers"
Audience Expansion Masterclass: Skyrocketing Your Youtube Numbers
How to Get More Subscribers on YouTube

Richard Bennett
Mar 27, 2024• Proven solutions
Working hard to produce exciting, informative and beautiful YouTube videos only to miss out on the exposure you’re hoping for can be very demoralizing, and many people give up the practice of video production after failing to generate interest in their work.
However, don’t accept defeat just yet if you’re not quite getting the numbers you’ve been aiming for. Take these steps to if you need to get subscribers for YouTube videos. Read on to find out more about the best ways to attract new YouTube subscribers for your online video channel.
- Part 1: How to Get More Subscribers on YouTube for Beginners
- Part 2: How to Get More Subscribers on YouTube for Pros
- Part 3: How to Get Free YouTube Subscribers [With Proven Methods]
Part 1: How to Get More Subscribers on YouTube for Beginners
1. Be Real and Approachable
You should always be yourself when you vlog. People will subscribe when they feel invested in you as a person, and that happens when they feel like you are being sincere. You do not need to share all of your innermost secrets on your vlog, but you should let your viewers feel like they know you.
2. Don’t forget to add a call to action
Some people need to be prompted to subscribe to your channel, no matter how much they enjoy your content. At the end of all your videos, ask your viewers to subscribe to your channel and like your social media page.
Don’t forget to explain the benefits of subscribing to them, such as to benefit from your informative tips and gain a deeper insight into your projects. If you have any interesting videos in the pipeline, let them know about them.
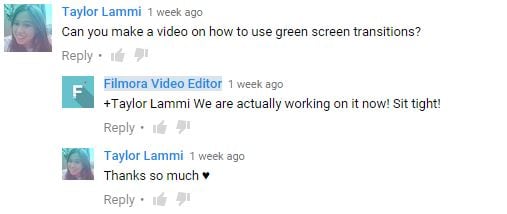
3. Listen To Your Subscribers
It feels nice to get positive comments on your videos. If people feel comfortable enough to leave you suggestions and requests then that is even better. It means that you have succeeded in making them feel like they are part of your community.
If you get a video request, try to do it. People like to feel that you are open to trying the things they want to see. However, there are also times when you should just ignore requests and suggestions. If the majority of your subscribers enjoy your jokes and you get one comment telling you to stop trying to be funny then it is fairly obvious that that ‘suggestion’ does not really reflect the wishes of your community.
4. Optimize your title
Try not to underestimate the importance of a great eye-catching title. Include relevant words and phrases that you think people will search for and don’t just hastily add the first title that comes into your head. The better your title is, the more viewers and subscribers you are likely to amass.
5. Be Patient
Almost all vlogs grow slowly at first; the first 1000 subscribers take the longest to get. It takes a lot of patience to keep producing content on a regular schedule when it seems like not many people are watching, but you need to stick with it in order to grow.
Part 2: How to Get more Subscribers on YouTube for Pros
1. Set goals
You can gain extra drive and momentum by setting yourself attainable goals and encouraging your followers to help you achieve them. These goals can include milestones such as reaching 500 followers, 1,000 followers and so on. Don’t hesitate to tell your viewers about these goals – if they think your content is of real value, chances are they will be only too happy to assist you.
2. Contests can be funny – why not enter one?
One way to increase subscribers is to take part in a contest. A site called Gleam can oversee a contest for you. It’s up to you to choose how you want the contest to work, and you can gain an edge over your competitors by getting people to leave comments, follow you on Instagram, subscribe to your channel and more.
You will be provided with a landing page for promoting your channel, and you can share this in a variety of places, including on your Facebook, Twitter and blog. The best way to heighten your chances of success is to have a clear goal in mind.

3. Make a trailer
YouTube’s channel interface allows you to add a trailer to entice viewers into watching your videos and following you on the platform. Your trailer gives you a valuable opportunity to quickly explain what your channel is all about and what the benefits of following you are.
Don’t waffle on – try to get your clip down to 90 seconds maximum. Include clips from your videos and don’t forget to add a strong call to action at the end. The more effort you put into your videos, the bigger the rewards are likely to become. And here are some of the best trailer makers that you can use on both Windows and Mac .
4. Make a Schedule and Stick To It
You want to vlog at least once a week, and making a schedule will help you keep on top of that. It will also give your subscribers a chance to anticipate your videos and get excited. They are more likely to watch an update they have been expecting than one that was not already on their minds.
Sticking to your schedule is a good wait to build up credibility with your audience, but late or skipped updates will cause you to lose that credibility. If you do not post for a month then people who already subscribed to you might still ignore your update because it has been too long and they forgot about you.
5. Collaborate With Other Vloggers
Collaboration videos are always big hits. When you collaborate with another vlogger you are essentially introducing each other to your subscribers. This is a great way to grow your community quickly: by connecting it to another community.
Collaborations work best when the other vlogger is located close enough to you that you can actually meet up, but you can do distance collaborations too. When you collaborate you and the other vlogger should have close to the same number of subscribers, so the video will benefit you both equally.

Bonus: How to Get Free YouTube Subscribers [6 Proven Methods]
There are lots of ways to get free YouTube subscribers. This proven method involves networking with other creators! Making your presence felt on YouTube is an important part of creating your network of subscribers that watch, share and talk about your videos. Interaction with your subscribers, reaching new audiences every day, and a plethora of other factors influence how well your YouTube channel is doing.
In this part, we will show you how you can build your own network of loyal YouTube supporters and prove that you don’t need the services of paid providers who promise better reach for your channel.
1. Find YouTubers in your niche
The first step to building an enviable army of YouTube subscribers starts with the realization that you are not alone. Regardless of the niche, your videos are covering, there are probably thousands of people who are just starting out or that have as many subscribers as your YouTube channel. Focus on finding them. You may even want to make a list.
2. Subscribe to YouTube channels you really like
Of the channels you found in Step 1, choose the ones you genuinely like and subscribe to them.
It goes without saying that everyone enjoys support, especially if you are not asking for anything in return. By subscribing to YouTube channels in your genre you appreciate, you will make yourself known to the channel’s owner, and there is a chance they will check out and subscribe to your channel.
3. Spend time watching videos each day
Knowledge is power and, if you want to attract real people to your channel, you should learn how to use your knowledge to your advantage. By paying attention to other new videos in your genre you’ll gain insight into what is going over well with audiences like yours, and what isn’t.
Also, be especially sure to watch videos from those channels you found in Step 1 and subscribed to in Step 2. Try to watch at least two minutes of content from those channels whenever they upload.
4. Comment thoughtfully. Don’t ask for anything in return
Most YouTubers are delighted to hear someone else’s positive opinion or constructive criticism regarding their work. The reason you are watching 2 minutes of content per video in Step 3 is so that you will really have something to say in this step.
If you do make a thoughtful comment, and especially if you use the time stamp of the part of the video you’re referring to, the video creator will know you have watched the video and that you are not just another spammer. Avoid the sub-4-sub strategy, and don’t be the person who’s always saying ‘Subscribe to my channel’. You will be ignored by both the creator and other viewers, and the creator will find you annoying. However, if you comment regularly without asking for anything, the creator and some of their viewers will naturally decide to check out your channel.
5. Reach out on social media
YouTube is just one out of many channels through which you can reach like-minded people. Facebook, Instagram, Pinterest or any other social network can help you network with other creators and potential subscribers. Create accounts on social networks you find the most suitable for your video category and share links to your videos on these accounts as often as you can. Furthermore, if you try to foster real discussions about topics that are relevant, people who get to know you through these other platforms will probably decide to check out your YouTube channel.
Social media is also a great place to reach out to other creators, whether it’s for collabs or just to chat about doing YouTube.
6. Do it all again. And again. And again
You aren’t going to see great results overnight. You have to spend time almost every day repeating the steps we just described. This might seem intimidating, but as time passes it will become routine.
When you build your presence on YouTube in this way, other creators and their subscribers will naturally start becoming your subscribers. What’s your best tip for free YouTube subscribers?
Conclusion
Some people might need to watch multiple videos by you before they decide they want to subscribe. If you stop making videos because you did not get any subscribers or comments on your first few then chances are there were people who were paying attention who may have subscribed if you had kept at it.


Richard Bennett
Richard Bennett is a writer and a lover of all things video.
Follow @Richard Bennett
Richard Bennett
Mar 27, 2024• Proven solutions
Working hard to produce exciting, informative and beautiful YouTube videos only to miss out on the exposure you’re hoping for can be very demoralizing, and many people give up the practice of video production after failing to generate interest in their work.
However, don’t accept defeat just yet if you’re not quite getting the numbers you’ve been aiming for. Take these steps to if you need to get subscribers for YouTube videos. Read on to find out more about the best ways to attract new YouTube subscribers for your online video channel.
- Part 1: How to Get More Subscribers on YouTube for Beginners
- Part 2: How to Get More Subscribers on YouTube for Pros
- Part 3: How to Get Free YouTube Subscribers [With Proven Methods]
Part 1: How to Get More Subscribers on YouTube for Beginners
1. Be Real and Approachable
You should always be yourself when you vlog. People will subscribe when they feel invested in you as a person, and that happens when they feel like you are being sincere. You do not need to share all of your innermost secrets on your vlog, but you should let your viewers feel like they know you.
2. Don’t forget to add a call to action
Some people need to be prompted to subscribe to your channel, no matter how much they enjoy your content. At the end of all your videos, ask your viewers to subscribe to your channel and like your social media page.
Don’t forget to explain the benefits of subscribing to them, such as to benefit from your informative tips and gain a deeper insight into your projects. If you have any interesting videos in the pipeline, let them know about them.
3. Listen To Your Subscribers
It feels nice to get positive comments on your videos. If people feel comfortable enough to leave you suggestions and requests then that is even better. It means that you have succeeded in making them feel like they are part of your community.
If you get a video request, try to do it. People like to feel that you are open to trying the things they want to see. However, there are also times when you should just ignore requests and suggestions. If the majority of your subscribers enjoy your jokes and you get one comment telling you to stop trying to be funny then it is fairly obvious that that ‘suggestion’ does not really reflect the wishes of your community.
4. Optimize your title
Try not to underestimate the importance of a great eye-catching title. Include relevant words and phrases that you think people will search for and don’t just hastily add the first title that comes into your head. The better your title is, the more viewers and subscribers you are likely to amass.
5. Be Patient
Almost all vlogs grow slowly at first; the first 1000 subscribers take the longest to get. It takes a lot of patience to keep producing content on a regular schedule when it seems like not many people are watching, but you need to stick with it in order to grow.
Part 2: How to Get more Subscribers on YouTube for Pros
1. Set goals
You can gain extra drive and momentum by setting yourself attainable goals and encouraging your followers to help you achieve them. These goals can include milestones such as reaching 500 followers, 1,000 followers and so on. Don’t hesitate to tell your viewers about these goals – if they think your content is of real value, chances are they will be only too happy to assist you.
2. Contests can be funny – why not enter one?
One way to increase subscribers is to take part in a contest. A site called Gleam can oversee a contest for you. It’s up to you to choose how you want the contest to work, and you can gain an edge over your competitors by getting people to leave comments, follow you on Instagram, subscribe to your channel and more.
You will be provided with a landing page for promoting your channel, and you can share this in a variety of places, including on your Facebook, Twitter and blog. The best way to heighten your chances of success is to have a clear goal in mind.
3. Make a trailer
YouTube’s channel interface allows you to add a trailer to entice viewers into watching your videos and following you on the platform. Your trailer gives you a valuable opportunity to quickly explain what your channel is all about and what the benefits of following you are.
Don’t waffle on – try to get your clip down to 90 seconds maximum. Include clips from your videos and don’t forget to add a strong call to action at the end. The more effort you put into your videos, the bigger the rewards are likely to become. And here are some of the best trailer makers that you can use on both Windows and Mac .
4. Make a Schedule and Stick To It
You want to vlog at least once a week, and making a schedule will help you keep on top of that. It will also give your subscribers a chance to anticipate your videos and get excited. They are more likely to watch an update they have been expecting than one that was not already on their minds.
Sticking to your schedule is a good wait to build up credibility with your audience, but late or skipped updates will cause you to lose that credibility. If you do not post for a month then people who already subscribed to you might still ignore your update because it has been too long and they forgot about you.
5. Collaborate With Other Vloggers
Collaboration videos are always big hits. When you collaborate with another vlogger you are essentially introducing each other to your subscribers. This is a great way to grow your community quickly: by connecting it to another community.
Collaborations work best when the other vlogger is located close enough to you that you can actually meet up, but you can do distance collaborations too. When you collaborate you and the other vlogger should have close to the same number of subscribers, so the video will benefit you both equally.
Bonus: How to Get Free YouTube Subscribers [6 Proven Methods]
There are lots of ways to get free YouTube subscribers. This proven method involves networking with other creators! Making your presence felt on YouTube is an important part of creating your network of subscribers that watch, share and talk about your videos. Interaction with your subscribers, reaching new audiences every day, and a plethora of other factors influence how well your YouTube channel is doing.
In this part, we will show you how you can build your own network of loyal YouTube supporters and prove that you don’t need the services of paid providers who promise better reach for your channel.
1. Find YouTubers in your niche
The first step to building an enviable army of YouTube subscribers starts with the realization that you are not alone. Regardless of the niche, your videos are covering, there are probably thousands of people who are just starting out or that have as many subscribers as your YouTube channel. Focus on finding them. You may even want to make a list.
2. Subscribe to YouTube channels you really like
Of the channels you found in Step 1, choose the ones you genuinely like and subscribe to them.
It goes without saying that everyone enjoys support, especially if you are not asking for anything in return. By subscribing to YouTube channels in your genre you appreciate, you will make yourself known to the channel’s owner, and there is a chance they will check out and subscribe to your channel.
3. Spend time watching videos each day
Knowledge is power and, if you want to attract real people to your channel, you should learn how to use your knowledge to your advantage. By paying attention to other new videos in your genre you’ll gain insight into what is going over well with audiences like yours, and what isn’t.
Also, be especially sure to watch videos from those channels you found in Step 1 and subscribed to in Step 2. Try to watch at least two minutes of content from those channels whenever they upload.
4. Comment thoughtfully. Don’t ask for anything in return
Most YouTubers are delighted to hear someone else’s positive opinion or constructive criticism regarding their work. The reason you are watching 2 minutes of content per video in Step 3 is so that you will really have something to say in this step.
If you do make a thoughtful comment, and especially if you use the time stamp of the part of the video you’re referring to, the video creator will know you have watched the video and that you are not just another spammer. Avoid the sub-4-sub strategy, and don’t be the person who’s always saying ‘Subscribe to my channel’. You will be ignored by both the creator and other viewers, and the creator will find you annoying. However, if you comment regularly without asking for anything, the creator and some of their viewers will naturally decide to check out your channel.
5. Reach out on social media
YouTube is just one out of many channels through which you can reach like-minded people. Facebook, Instagram, Pinterest or any other social network can help you network with other creators and potential subscribers. Create accounts on social networks you find the most suitable for your video category and share links to your videos on these accounts as often as you can. Furthermore, if you try to foster real discussions about topics that are relevant, people who get to know you through these other platforms will probably decide to check out your YouTube channel.
Social media is also a great place to reach out to other creators, whether it’s for collabs or just to chat about doing YouTube.
6. Do it all again. And again. And again
You aren’t going to see great results overnight. You have to spend time almost every day repeating the steps we just described. This might seem intimidating, but as time passes it will become routine.
When you build your presence on YouTube in this way, other creators and their subscribers will naturally start becoming your subscribers. What’s your best tip for free YouTube subscribers?
Conclusion
Some people might need to watch multiple videos by you before they decide they want to subscribe. If you stop making videos because you did not get any subscribers or comments on your first few then chances are there were people who were paying attention who may have subscribed if you had kept at it.
Richard Bennett
Richard Bennett is a writer and a lover of all things video.
Follow @Richard Bennett
Top-Tier Free Video Editing Software Guide for iPhone/iPad Users
Best Free YouTube Video Editing Apps for iPhone & iPad [2024]
Richard Bennett
Mar 27, 2024• Proven solutions
iPhones and iPads can capture footage in high resolution, however, video clips you record with an iPhone or an iPad may contain imperfections sometimes. Removing parts of a video clip you don’t want to share publicly, or stabilizing the shaky footage are just a few ways in which you can improve the quality of the videos you’re creating.
The good news is that the iPhone and iPad support a broad range of video editing apps, which enables you to edit all videos you record on these devices before you post them on YouTube or other social media platforms.
There are hundreds of video editing apps to choose from at the App Store , but such a wide range of options can make the process of choosing a video editing app you are going to use to edit your videos, more complicated.
So, in this article, we are going to take you through the some of the best video editing apps for YouTube videos on iPhones and iPads and help you determine which of these apps is the right choice for you.
- Part 1: Best Video Editing Apps for YouTube Video [Free & Paid]
- Part 2: Edit YouTube Videos on iPhone with YouTube Studio
Before we get started, I want to recommend thebest video editing software for YouTubers - Wondershare Filmora video editor , an easy to use while powerful video editor that allows you not only cut, split, crop, resize, reverse your videos, but also offers you multiple video effects specially designed for Fashion, Beauty, Gaming, Travel, Education, etc. Check the video to know more fantastic features:
For Win 7 or later (64-bit)
 Secure Download
For macOS 10.14 or later
Secure Download
Click here to get Filmora for PC by email
or Try Filmora App for mobile >>>
download filmora app for ios ](https://app.adjust.com/b0k9hf2%5F4bsu85t ) download filmora app for android ](https://app.adjust.com/b0k9hf2%5F4bsu85t )
- Windows & Mac Cross-Platform compatible
- Various Templates, Effects, Elements, Transitions, Filters for making Hollywood like movie easily
- Practical Audio Editing Tools and Color Grading Feature
Part 1: Best Free Video Editing Apps for iPhone to Edit YouTube Videos You Should Know
Before you opt for one of the apps we’ve featured in our top list, you must first make sure that the app you’re interested in offers all the video editing tools you need to process the footage you recorded for your YouTube channel. Considering the number of audio and video tracks an app supports, the number of visual effects it offers or its file-sharing capabilities can make it easier for you to decide which app you are going to install on your device. However, your choice ultimately depends on how frequently and how professionally you want to edit your YouTube videos. Here are the top 5 video editing apps for iPhones and iPads.
1. Filmora
Price: Free, but offers in-app purchases
Compatibility: Requires iOS 9.0 or later. Compatible with iPhone, iPad, and iPod touch.


This is an easy and convenient video editing app that is going to allow you to turn regular videos into artistic renditions that are going to look as if they were production-valued. All you need to do is choose the video and select the overall theme for it as well as the design and music. Furthermore, the app delivers some fantastic visual effects such as overlays, filters, elements and transitions, basic function. It also allows you to trim and split video clips, rotate and crop the footage, change the video speed, play the video backwards or add your own voiceover. Another special feature is that you can automate the video by selecting the best parts and letting the application handle everything else.
Pros
- Lots of titles, overlays, filters, elements, transitions, themes for making artistic video
- Enough editing tools to trim, split, rotate, crop videos on iPhone and iPad
Cons
- NO advanced features such as Green Screen video compositing
- Not connected to Filmora desktop video editor
2. iMovie
Price: Free
Compatibility: Requires iOS 11.4 or later.
This is a very comprehensive video editing app and a benchmark release for Apple. It is very similar to the desktop iMovie version, and it should definitely be featured on your device if you’re looking for a free YouTube video editing app for iOS. You can use it to add voiceovers, music, titles as well as photos to your work. There are a lot of templates, themes as well as filters for movie trailers that you can take advantage of if you want to make the video even better. You can enhance the video with slow motion and fast forward by changing video speed and add your own narration as well.
Pros
- Totally Free for iPhone and iPad Users
- Trailer Templates, Themes, Filters Available
- Projects can edit on Mac with iMovie or Final Cut Pro X
Cons
- No elements
- Speed up limited to 2X
Learn more details about How to Edit YouTube videos with iMovie >>
3. Adobe Premiere Rush
Price: Free, but offers in-app purchases
Compatibility: Requires iOS 11.0 or later
Adobe’s software products have been at the center of the video editing world for several decades, but most of the company’s video and audio editing products are aimed athigh-end professional users .
Adobe Premiere Rush has a built-in camera feature, which allows you to capture high-resolution footage from the app and edit it as soon as you stop recording. Creating a soundtrack for a video, arranging video clips in any way you want or customizing a title template are just a few among countless video editing options Adobe Premiere Rush offers.
Its file-sharing capabilities are also impressive since you can share your videos to all major social media platforms directly from the app or edit the file on desktop with Premiere Pro CC. This makes Adobe Premiere Rush an excellent choice for YouTubers, vloggers and all other video content creators who often shoot their videos on different locations.
Pros:
- Let users change a video’s aspect ratio effortlessly
- Records high-definition footage
- Rich title template library
- Multitrack timeline
Cons:
- A limited selection of video effects
- The rendering process can be slow
- Offers only a basic set of transitions
4. LumaFusion
Price: $29,00 – offers in-app purchases
Compatibility: Requires iOS 11 or later
The LumaFusion app is equipped with a wide spectrum of professional video editing tools, that enable video content creators to edit their footage with ease. You can choose a project’s frame rate or its aspect ratio in order to meet the content specifications of the social network on which you want to share your videos.
There are six separate video tracks as well as six audio tracks on the app’s timeline, which means that you can use media files like photos, videos and motion graphics in your projects or create stunning soundtracks.
LumaFusion’s selection of visual effects includes effects like Chroma Key or LUTs and you can also utilize the app’s color correction tools to make your own effects. This iOS-based video editor supports fast and slow-motion effects so that you can create smooth slow-motion videos at 120fps or 240fps.
Pros
- Rich media library that contains free videos, sounds, and backgrounds
- Lets users animate effects with keyframes
- The app’s titler grants users full creative control over the process of creating titles for a video
- Excellent file-sharing capabilities
Cons:
- No video recording features
- Requires previous video editing experience
Check the detailed comparison between LumaFusion and Premiere Rush
5. KineMaster
Price: Free, but offers in-app purchases
Compatibility: Requires iOS 10.3 or later
This video editor for iPhones and iPads grants you access to all the tools you are going to need to create videos that attract a lot of attention on YouTube. In fact, a lot of content creators who share their videos on TikTok, Instagram and YouTube are already using KineMaster to edit their footage.
Adding text layers, stickers or overlaying several videos or photos is easy with KineMaster, while you can also choose from a variety of blending modes that let you decide how the images are going to be combined.
The app features rich filters, music, visual and audio effect libraries and it supports 4K video editing. However, each video you create with the free version of KineMaster is going to be watermarked, and you must purchase the monthly or the annual subscription in order to remove the watermark and gain access to all of the app’s features.
Pros:
- Excellent time-lapse and slow-motion video editing tools
- Offers a broad range of image and text overlays
- Allows users to animate layers with keyframes
- The app’s Asset Store contains hundreds of free stickers, transitions, and music
Cons
- You must make an in-app purchase to remove the watermark
- No video recording capability
- Limited color correction options
6. Magisto
Price: Free, but offers in-app purchases
Compatibility: Requires iOS 11.0 or later
Creating a new video with Magisto won’t take much more than a few moments of your time. You just have to select one of the available templates such as Birthday or Wedding, import the footage from your phone’s camera roll and add music to your project. Magisto’s AI-powered super-smart editor will do the rest for you.
Such a quick and simple video editing process makes this video editor for iPhones and iPads an excellent choice for digital marketers who want to create tutorials or promotional videos they can share on social media.
Purchasing the Magisto’s Business Plan will grant you access to dozens of business-based templates that can help you grow your online audience and improve your brand’s visibility. Keep in mind that purchasing one of the available subscription models is necessary if you want to use Magisto for professional purposes.
Pros:
- A simple 3-step video creation process
- Huge library of royalty-free songs
- Offers a wide range of themes and templates
- Lets users create video collages and videos from photos
Cons:
- No 4K video editing support
- The free version of the app has limited capabilities
- More expensive than the competition
7. Filmmaker Pro Video Editor
Price: Free, but offers in-app purchases
Compatibility: Requires iOS 11.0 or later
Filmmaker Pro Video Editor is equipped with a versatile set of video editing tools that allow users to create attention-grabbing video content from their iPhones and iPads. The app lets you create as many audio and video tracks as your project demands, while it also supports 4K editing, although only on iPad Pro, iPhone SE and later iPhone models.
The Filmmaker Pro Video Editor provides more than thirty filters, as well as color grading tools that enable you to adjust a video’s contrast, exposure or brightness. Moreover, the app grants you access to Green Screen and Ken Burns effects that can be used to make your videos more visually dynamic.
In case you’re editing videos with the Filmmaker Pro Video Editor from an iPad you can use Apple Pen to draw over the footage you’re editing. The only downside is that you must make an in-app purchase to remove the watermark from the videos you export from this app.
Pros
- Excellent font selection
- Built-in fade-in and fade-out audio effects
- Offers support for 4K video editing
- The app doesn’t limit the number of projects you can create
Cons
- Pricy
- Limited file-sharing capabilities
- Requires previous video editing experience
8. QUIK
This is an app which was initially designed for Instagram users, but it quickly transitioned to being one of the best apps for video editing on iPhone. You can make a variety of tweaks to your videos such as fonts, titles, filters, styles and pace of the video and trims. It is easy and convenient for usage.
9. SPLICE
This is another convenient option that you can take advantage of. You would be provided with the chance to add transitions, filters, and text. You can adjust the speed as well as trim the video as you see fit. There is a lot of flexibility delivered by the video which is quite convenient.
Part 2: How to Edit YouTube Videos on iPhone with the YouTube Studio Application
Being able to edit the videos you’ve uploaded to YouTube on your iPhone is without a doubt something very beneficial. The YouTube iOS application - YouTube Studio is a powerful mini video-editing tool. You can easily trim your video, add different effects and filters in order to prominently enhance the way that your video looks as well as to add music as a background and many more.
To edit videos with YouTube Studio, you need to upload the video footge first. To upload the video, navigate to the upper corner of your home screen, and click on the icon like a camera. Now that you can allow access to camera and go through and select your videos, you can easily take advantage of the three convenient tools.
You can trim the beginning as well as the ending of the video quickly, and you can select new start as well as end points. However, you wouldn’t be able to separate the clip in two different ones. Once you are through with that, you can easily add different filter effects through the filter option – there are six of them that you can take advantage of. Furthermore, you can easily add background music by tapping on the music icon which is located in the lower-right part of your screen.
The YouTube Studio app might be a good idea, but it doesn’t provide you with all the necessary capabilities as it is rather limited.
As you can see, there are quite a lot of different ways to edit YouTube videos on iPhone and all you need to do is download a specific application or use the one which YouTube has built-in. There is no need for any previous specific knowledge or skills in video editing as they provide quite comprehensive features.
For Win 7 or later (64-bit)
Secure Download
For macOS 10.14 or later
Secure Download
Click here to get Filmora for PC by email
or Try Filmora App for mobile >>>
download filmora app for ios ](https://app.adjust.com/b0k9hf2%5F4bsu85t ) download filmora app for android ](https://app.adjust.com/b0k9hf2%5F4bsu85t )
Check our guide for beginners about How to Edit YouTube videos with Filmora.
Richard Bennett
Richard Bennett is a writer and a lover of all things video.
Follow @Richard Bennett
Richard Bennett
Mar 27, 2024• Proven solutions
iPhones and iPads can capture footage in high resolution, however, video clips you record with an iPhone or an iPad may contain imperfections sometimes. Removing parts of a video clip you don’t want to share publicly, or stabilizing the shaky footage are just a few ways in which you can improve the quality of the videos you’re creating.
The good news is that the iPhone and iPad support a broad range of video editing apps, which enables you to edit all videos you record on these devices before you post them on YouTube or other social media platforms.
There are hundreds of video editing apps to choose from at the App Store , but such a wide range of options can make the process of choosing a video editing app you are going to use to edit your videos, more complicated.
So, in this article, we are going to take you through the some of the best video editing apps for YouTube videos on iPhones and iPads and help you determine which of these apps is the right choice for you.
- Part 1: Best Video Editing Apps for YouTube Video [Free & Paid]
- Part 2: Edit YouTube Videos on iPhone with YouTube Studio
Before we get started, I want to recommend thebest video editing software for YouTubers - Wondershare Filmora video editor , an easy to use while powerful video editor that allows you not only cut, split, crop, resize, reverse your videos, but also offers you multiple video effects specially designed for Fashion, Beauty, Gaming, Travel, Education, etc. Check the video to know more fantastic features:
For Win 7 or later (64-bit)
Secure Download
For macOS 10.14 or later
Secure Download
Click here to get Filmora for PC by email
or Try Filmora App for mobile >>>
download filmora app for ios ](https://app.adjust.com/b0k9hf2%5F4bsu85t ) download filmora app for android ](https://app.adjust.com/b0k9hf2%5F4bsu85t )
- Windows & Mac Cross-Platform compatible
- Various Templates, Effects, Elements, Transitions, Filters for making Hollywood like movie easily
- Practical Audio Editing Tools and Color Grading Feature
Part 1: Best Free Video Editing Apps for iPhone to Edit YouTube Videos You Should Know
Before you opt for one of the apps we’ve featured in our top list, you must first make sure that the app you’re interested in offers all the video editing tools you need to process the footage you recorded for your YouTube channel. Considering the number of audio and video tracks an app supports, the number of visual effects it offers or its file-sharing capabilities can make it easier for you to decide which app you are going to install on your device. However, your choice ultimately depends on how frequently and how professionally you want to edit your YouTube videos. Here are the top 5 video editing apps for iPhones and iPads.
1. Filmora
Price: Free, but offers in-app purchases
Compatibility: Requires iOS 9.0 or later. Compatible with iPhone, iPad, and iPod touch.
This is an easy and convenient video editing app that is going to allow you to turn regular videos into artistic renditions that are going to look as if they were production-valued. All you need to do is choose the video and select the overall theme for it as well as the design and music. Furthermore, the app delivers some fantastic visual effects such as overlays, filters, elements and transitions, basic function. It also allows you to trim and split video clips, rotate and crop the footage, change the video speed, play the video backwards or add your own voiceover. Another special feature is that you can automate the video by selecting the best parts and letting the application handle everything else.
Pros
- Lots of titles, overlays, filters, elements, transitions, themes for making artistic video
- Enough editing tools to trim, split, rotate, crop videos on iPhone and iPad
Cons
- NO advanced features such as Green Screen video compositing
- Not connected to Filmora desktop video editor
2. iMovie
Price: Free
Compatibility: Requires iOS 11.4 or later.
This is a very comprehensive video editing app and a benchmark release for Apple. It is very similar to the desktop iMovie version, and it should definitely be featured on your device if you’re looking for a free YouTube video editing app for iOS. You can use it to add voiceovers, music, titles as well as photos to your work. There are a lot of templates, themes as well as filters for movie trailers that you can take advantage of if you want to make the video even better. You can enhance the video with slow motion and fast forward by changing video speed and add your own narration as well.
Pros
- Totally Free for iPhone and iPad Users
- Trailer Templates, Themes, Filters Available
- Projects can edit on Mac with iMovie or Final Cut Pro X
Cons
- No elements
- Speed up limited to 2X
Learn more details about How to Edit YouTube videos with iMovie >>
3. Adobe Premiere Rush
Price: Free, but offers in-app purchases
Compatibility: Requires iOS 11.0 or later
Adobe’s software products have been at the center of the video editing world for several decades, but most of the company’s video and audio editing products are aimed athigh-end professional users .
Adobe Premiere Rush has a built-in camera feature, which allows you to capture high-resolution footage from the app and edit it as soon as you stop recording. Creating a soundtrack for a video, arranging video clips in any way you want or customizing a title template are just a few among countless video editing options Adobe Premiere Rush offers.
Its file-sharing capabilities are also impressive since you can share your videos to all major social media platforms directly from the app or edit the file on desktop with Premiere Pro CC. This makes Adobe Premiere Rush an excellent choice for YouTubers, vloggers and all other video content creators who often shoot their videos on different locations.
Pros:
- Let users change a video’s aspect ratio effortlessly
- Records high-definition footage
- Rich title template library
- Multitrack timeline
Cons:
- A limited selection of video effects
- The rendering process can be slow
- Offers only a basic set of transitions
4. LumaFusion
Price: $29,00 – offers in-app purchases
Compatibility: Requires iOS 11 or later
The LumaFusion app is equipped with a wide spectrum of professional video editing tools, that enable video content creators to edit their footage with ease. You can choose a project’s frame rate or its aspect ratio in order to meet the content specifications of the social network on which you want to share your videos.
There are six separate video tracks as well as six audio tracks on the app’s timeline, which means that you can use media files like photos, videos and motion graphics in your projects or create stunning soundtracks.
LumaFusion’s selection of visual effects includes effects like Chroma Key or LUTs and you can also utilize the app’s color correction tools to make your own effects. This iOS-based video editor supports fast and slow-motion effects so that you can create smooth slow-motion videos at 120fps or 240fps.
Pros
- Rich media library that contains free videos, sounds, and backgrounds
- Lets users animate effects with keyframes
- The app’s titler grants users full creative control over the process of creating titles for a video
- Excellent file-sharing capabilities
Cons:
- No video recording features
- Requires previous video editing experience
Check the detailed comparison between LumaFusion and Premiere Rush
5. KineMaster
Price: Free, but offers in-app purchases
Compatibility: Requires iOS 10.3 or later
This video editor for iPhones and iPads grants you access to all the tools you are going to need to create videos that attract a lot of attention on YouTube. In fact, a lot of content creators who share their videos on TikTok, Instagram and YouTube are already using KineMaster to edit their footage.
Adding text layers, stickers or overlaying several videos or photos is easy with KineMaster, while you can also choose from a variety of blending modes that let you decide how the images are going to be combined.
The app features rich filters, music, visual and audio effect libraries and it supports 4K video editing. However, each video you create with the free version of KineMaster is going to be watermarked, and you must purchase the monthly or the annual subscription in order to remove the watermark and gain access to all of the app’s features.
Pros:
- Excellent time-lapse and slow-motion video editing tools
- Offers a broad range of image and text overlays
- Allows users to animate layers with keyframes
- The app’s Asset Store contains hundreds of free stickers, transitions, and music
Cons
- You must make an in-app purchase to remove the watermark
- No video recording capability
- Limited color correction options
6. Magisto
Price: Free, but offers in-app purchases
Compatibility: Requires iOS 11.0 or later
Creating a new video with Magisto won’t take much more than a few moments of your time. You just have to select one of the available templates such as Birthday or Wedding, import the footage from your phone’s camera roll and add music to your project. Magisto’s AI-powered super-smart editor will do the rest for you.
Such a quick and simple video editing process makes this video editor for iPhones and iPads an excellent choice for digital marketers who want to create tutorials or promotional videos they can share on social media.
Purchasing the Magisto’s Business Plan will grant you access to dozens of business-based templates that can help you grow your online audience and improve your brand’s visibility. Keep in mind that purchasing one of the available subscription models is necessary if you want to use Magisto for professional purposes.
Pros:
- A simple 3-step video creation process
- Huge library of royalty-free songs
- Offers a wide range of themes and templates
- Lets users create video collages and videos from photos
Cons:
- No 4K video editing support
- The free version of the app has limited capabilities
- More expensive than the competition
7. Filmmaker Pro Video Editor
Price: Free, but offers in-app purchases
Compatibility: Requires iOS 11.0 or later
Filmmaker Pro Video Editor is equipped with a versatile set of video editing tools that allow users to create attention-grabbing video content from their iPhones and iPads. The app lets you create as many audio and video tracks as your project demands, while it also supports 4K editing, although only on iPad Pro, iPhone SE and later iPhone models.
The Filmmaker Pro Video Editor provides more than thirty filters, as well as color grading tools that enable you to adjust a video’s contrast, exposure or brightness. Moreover, the app grants you access to Green Screen and Ken Burns effects that can be used to make your videos more visually dynamic.
In case you’re editing videos with the Filmmaker Pro Video Editor from an iPad you can use Apple Pen to draw over the footage you’re editing. The only downside is that you must make an in-app purchase to remove the watermark from the videos you export from this app.
Pros
- Excellent font selection
- Built-in fade-in and fade-out audio effects
- Offers support for 4K video editing
- The app doesn’t limit the number of projects you can create
Cons
- Pricy
- Limited file-sharing capabilities
- Requires previous video editing experience
8. QUIK
This is an app which was initially designed for Instagram users, but it quickly transitioned to being one of the best apps for video editing on iPhone. You can make a variety of tweaks to your videos such as fonts, titles, filters, styles and pace of the video and trims. It is easy and convenient for usage.
9. SPLICE
This is another convenient option that you can take advantage of. You would be provided with the chance to add transitions, filters, and text. You can adjust the speed as well as trim the video as you see fit. There is a lot of flexibility delivered by the video which is quite convenient.
Part 2: How to Edit YouTube Videos on iPhone with the YouTube Studio Application
Being able to edit the videos you’ve uploaded to YouTube on your iPhone is without a doubt something very beneficial. The YouTube iOS application - YouTube Studio is a powerful mini video-editing tool. You can easily trim your video, add different effects and filters in order to prominently enhance the way that your video looks as well as to add music as a background and many more.
To edit videos with YouTube Studio, you need to upload the video footge first. To upload the video, navigate to the upper corner of your home screen, and click on the icon like a camera. Now that you can allow access to camera and go through and select your videos, you can easily take advantage of the three convenient tools.
You can trim the beginning as well as the ending of the video quickly, and you can select new start as well as end points. However, you wouldn’t be able to separate the clip in two different ones. Once you are through with that, you can easily add different filter effects through the filter option – there are six of them that you can take advantage of. Furthermore, you can easily add background music by tapping on the music icon which is located in the lower-right part of your screen.
The YouTube Studio app might be a good idea, but it doesn’t provide you with all the necessary capabilities as it is rather limited.
As you can see, there are quite a lot of different ways to edit YouTube videos on iPhone and all you need to do is download a specific application or use the one which YouTube has built-in. There is no need for any previous specific knowledge or skills in video editing as they provide quite comprehensive features.
For Win 7 or later (64-bit)
Secure Download
For macOS 10.14 or later
Secure Download
Click here to get Filmora for PC by email
or Try Filmora App for mobile >>>
download filmora app for ios ](https://app.adjust.com/b0k9hf2%5F4bsu85t ) download filmora app for android ](https://app.adjust.com/b0k9hf2%5F4bsu85t )
Check our guide for beginners about How to Edit YouTube videos with Filmora.
Richard Bennett
Richard Bennett is a writer and a lover of all things video.
Follow @Richard Bennett
Also read:
- Creating Viral Haul Videos A Comprehensible Guide
- Year of Acceleration – YouTube's Lightning-Paced View Growth by '24
- A Closer Look at Earnings Comparing Dailymotion and YouTube Revenues for 2024
- In 2024, Digital Phenoms Who Has the Most Followers?
- [Updated] Audiovisual Standards for Success on YouTube – Top Format Choices
- Maximize Impact with Professional 360° Video Uploads for YouTube
- Easy Steps for Stellar YouTube Thumbnails
- In 2024, Building a Brand Through YouTube A Strategic Guide
- Your Step-by-Step Approach to YouTube Copyright Mastery
- Top-Tier Free Video Editing Software Guide for iPhone/iPad Users
- [New] Elevating YouTube Consumption Strategies for Organizing Videos for Future Viewing
- [Updated] Discover the Ultimate Tune Troupes on These 20 Premier YouTube Sounds
- 2024 Approved Best YouTube Video Reverser Online
- In 2024, Essential Insights Into YouTube Live Image Crafting
- Online Retrobing Navigating YouTube’s Deleted Content
- Your Pathway to a Clutter-Free Device with Video Deletion Tips
- The Key to More Views Expert Backlink Methods for YouTubers
- [New] Estimated Video Monetization Totals
- [Updated] Bring Playlists Down to YouTube The 5 Best Conversion Resources
- [New] Crafting Your Perfect YouTube Playlists A Step-by-Step Guide
- Revolutionize Your Branding Strategy with Access to a Vast Library of Free YouTube Banners
- In 2024, Amazing Alchemy YouTube's Most Magical Editing Feats
- Maximize Your YouTube Viewing Download Icons via Online & OS-Specific Methods
- 2024 Approved Deciphering YouTube Conversations
- [Updated] Cutting-Edge Tips for Low-Cost YouTube Sessions
- [Updated] Discover These Top 10 Thriving YouTube Communities
- [Updated] Earn on YouTube Decoding Recent Policy Changes
- [New] Acclaimed Storytellers with Photo-Audio Symphony
- [New] Elevating the End Scene in YouTube Productions
- Accessing Global Hitters The #1-#6 Short Video Downloaders for 2024
- Amplify Your iMovie with YouTube Audio Streams for 2024
- [Updated] Emoji Mastery for Engaging YouTube Discussions
- Techniques to Remove Black Screen Glitches in YouTube
- In 2024, Essential Resources for Crafting Eye-Catching YouTube Ends
- Updated Cut AVI Files with Ease Best Video Editors for Windows, MAC, Mobile, and Web
- [New] Make Every Snap Spectacular 20 Top Filter Recommendations for 2024
- In 2024, Is Fake GPS Location Spoofer a Good Choice On Infinix Note 30 VIP? | Dr.fone
- Are Video Selfies on Instagram Really Genuine for 2024
- New Illuminate Your Videos The Best Brightening Apps
- In 2024, Fake the Location to Get Around the MLB Blackouts on Infinix Note 30 VIP Racing Edition | Dr.fone
- [New] 2024 Approved Effortless Photo Transformations Using Instagram's Green Screen
- Updated 2024 Approved 10 Great Moving Animation PowerPoint Techniques
- Updated In 2024, Pro Audio Refinement on Windows A Compendium of Leading Tools for Quieter Recording Environments
- 11 Proven Solutions to Fix Google Play Store Not Working Issue on Samsung Galaxy M54 5G | Dr.fone
- Tapered Music Transitions An Intuitive Premiere Pro Tutorial
- New 15 Amazing GIF Splitter Examples You Need to Bookmark for 2024
- Unlock the Power of Online Interaction Essential Tips for Successful Zoom Chats
- [Updated] In 2024, Capture and Share Saving Your PPT Sessions
- Fullscreen Imprint of Site for 2024
- Fix Unfortunately Settings Has Stopped on Oppo Reno 11F 5G Quickly | Dr.fone
- [Updated] In 2024, Essential OBS Adjustments for Inexpensive Machines
- [Updated] Power Up Revenue Choose the Best 15 Facebook Insights for Sale Boosting
- [Updated] TweetTub IOS App for Fetching Twitter Vids
- [Updated] Cinematic Footage Showdown GoPro & SJ7
- Step-by-Step Tutorial How To Bypass Honor Magic5 Ultimate FRP
- How To Open Your Apple iPhone 14 Pro Max Without a Home Button | Dr.fone
- In 2024, 5 Ways to Transfer Music from Motorola Moto G14 to Other Android Devices Easily | Dr.fone
- How to Fix when Apple Account Locked On Apple iPhone 11 Pro Max?
- Hacks to do pokemon go trainer battles For Tecno Pova 5 Pro | Dr.fone
- Remove Google FRP lock on 12 Pro+ 5G
- [New] 2024 Approved Saving Smiles The Ultimate List of TwitVid Tools
- From Novice to Pro Building an Insta Highlight Showcase for 2024
- In 2024, Streamline Your Life with These 5 Chrome Tools for FB Video Grabs
- [Updated] Skyrocketing Your Earning Potential A Vimeo Monetization Guide for 2024
- Strategies for Apps That Wont Download From Play Store On Vivo Y27s | Dr.fone
- [New] In 2024, Spotlight on 11 Top Audio Capture Equipments
- [Updated] In 2024, Stream vs Record Deciding on OBS Studio or Bandicam
- [Updated] Master Racing Must-Try Bicycle Titles
- Title: "Audience Expansion Masterclass Skyrocketing Your Youtube Numbers"
- Author: Kevin
- Created at : 2024-05-25 14:40:08
- Updated at : 2024-05-26 14:40:08
- Link: https://youtube-videos.techidaily.com/audience-expansion-masterclass-skyrocketing-your-youtube-numbers/
- License: This work is licensed under CC BY-NC-SA 4.0.
