
"A Step Into Anti-Time Original Techniques to Rewind YT Videos"
A Step Into Anti-Time: Original Techniques to Rewind YT Videos
How to Reverse YouTube Video in Creative Ways

Richard Bennett
Mar 27, 2024• Proven solutions
It could be a film or a reversed meme, a boomerang video on Instagram, or a rewind effect in a playback action. The reversing results make the clip compelling and creative. At present, many video creators find YouTube as a suitable platform for such rewind effects as it has millions of diverse genre video clips. Although the mechanism behind such an act can be quite confusing, it is no more if you get to know how to reverse YouTube videos at ease. Yes, video reversers are created and developed for such a purpose, and you can read below to understand how to play YouTube videos backward.
- Part 1: How to Reverse YouTube Video in the Quickest Way?
- Part 2: Reverse YouTube Videos More Creatively
How to Reverse YouTube Video in the Quickest Way?
Let’s take a look at some online tools that can play YouTube videos backward.
2. Kapwing
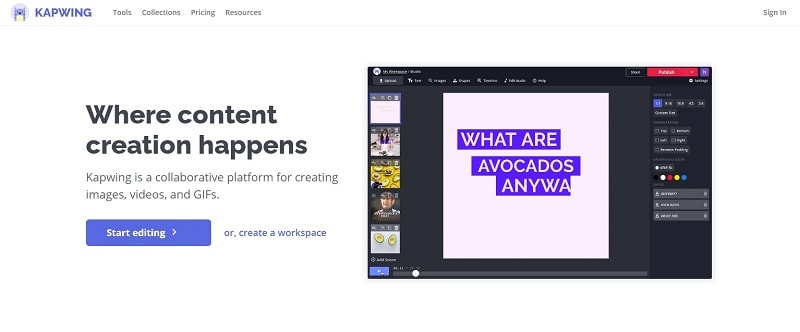
Kapwing is an online video reverser shared stage where you can create images, videos, and GIFs to share on social media. It suits to be perfect for any content that performs varied tasks with video editor tools like trimmer, resizes, studio, subtitles, and audio addition. Kapwing is an all-in-one workspace asset that is a single secure place to place over your backup safely facilitated with cross-device capability. To whatever field of interest you might belong to from a school student, professional, media, or a design team, Kapwing is the right platform ease-to-use.
3. Clideo
Like Kapwing, Clideo is an online video reverser tool that does multiple tasking like video converter, file converter, audio joiner, video maker, and a slideshow maker. We have taken up Clideo in our list as it follows a simple interface and comes up with useful tools of the loop, stops motion, and meme required in the present video creation industry. Supporting all video formats like MPG, MOV, and VOB, Clideo is a fast editor with a high-level of data protection. Developed by Softo Ltd., Clideo has got more than 4.1M users and had made up 25M videos.
Now, let’s take a simple guide to reverse a YouTube video quickly with Clideo.
Step 1: Enter the link, https://clideo.com/reverse-video on your desired web browser like Chrome or Firefox.
Now add the files from your desktop or your smartphone from the “Choose File” option or the drop-down choose your convenient option like Dropbox, Google Drive, or YouTube URL to reverse the video.
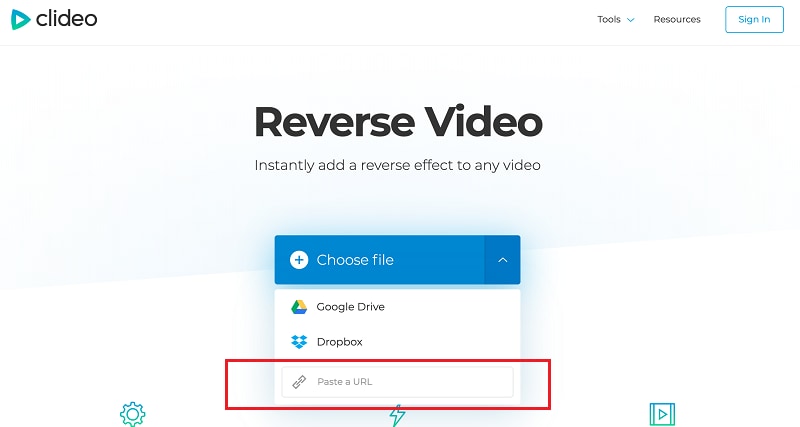
Source: clideo.com
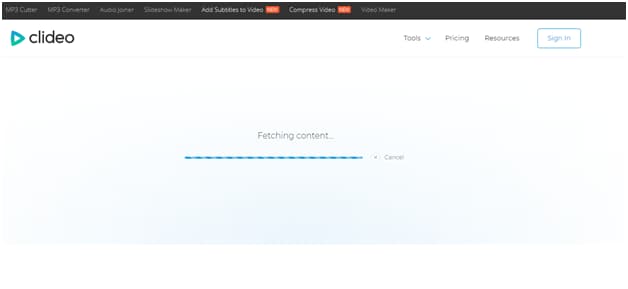
Step 2: Paste the YouTube link on the search box, and the video will process.
Step 3: The YouTube video will now start to play from backward where you can reverse the speed by changing the levels from 0.5X to 2X.
You can make a preview by playing or pausing the timeline of the YouTube video.
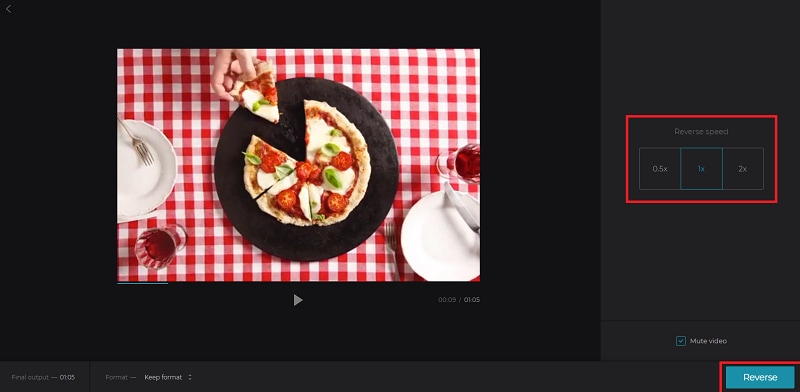
Once satisfied, hit the “Reverse” button on the right corner of the screen.
Step 4: Before downloading the revered Youtube video, you can play it once, and upon satisfaction, tap the “Download” button else you can go on with the “Back to edit” option.
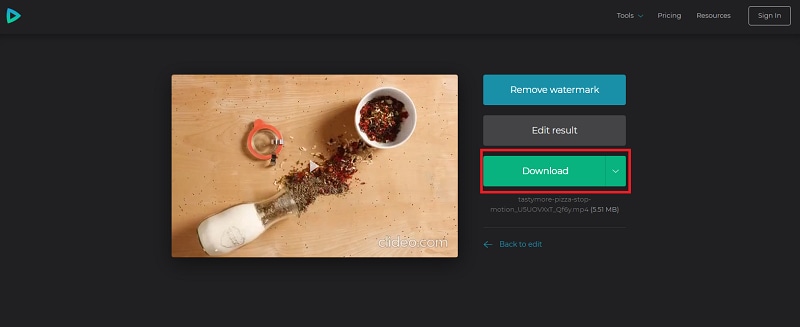
You can quickly reverse a YouTube video with Clideo in just three steps, along with a watermark removal facility.
Reverse YouTube Videos More Creatively
Want to embed more creativity in your YouTube video before reversing them? Get to know some of the YouTube video downloaders from this session.
Keepvid
Keepvid is an online video downloader that converts a video directly to MP4 & MP3. It allows you to download videos from 100+ sites, including YouTube, Facebook, Twitter, Vevo, Reddit, and BBC, irrespective of their video metadata. With Keepvid, you can listen to YouTube videos offline, save YouTube videos directly to MP3, download YouTube playlists everywhere, and anytime with the web-based lite-weight app.
YTD Video downloader
YTD video downloader has been in the market for years as a popular video downloader & converter. It is free to download software, allowing you to download video, audio, and playlist that could play offline. YTD video downloaded has gathered more than 200M users globally, supporting overall popular sites like Bing, Vimeo, TikTok, Yahoo, and Metacafe. With YTD, you can download the unlimited playlist and HD videos of 1080P at ultra-fast speed.
Want to reverse your YouTube video creatively and stunningly?
Wondershare Filmora is all you need, a complete pack of video/editing toolkit developed for the inspired that helps discover storytelling. It is a platform where you can create without limits, give life to your videos, craft fun in every clip, go beyond boundaries with endless possibilities, and make your epic story or adventure outstanding in the crowd. Filmora has a free version that allows you to access all the beautiful features like video reverse, ripple edit, trim, rotate, flip, zoom, edit, and audio ducking.
3.1How to Reverse Videos in Filmora?
Now that you have come to know about Filmora Wondershare, the best video reverser from the list, let’s directly jump over to a manual on how to reverse a YouTube video at ease.
Note: Before starting up, download and install the free version of Filmora on the device from https://filmora.wondershare.com/ .


Step 1: Open Filmora and click the “File” menu. Choose “New Project” from the drop-down.
Step 2: To import the YouTube video to the workplace, choose the “Import Media” option from the file menu.
From the drop-down, you can import files or folders at your convenience.
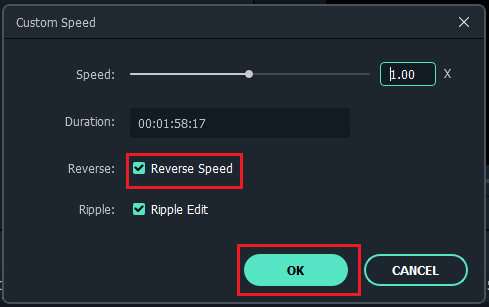
Step 3: Once the video is loaded on the media library, right-click on the track timeline and select the “Speed and Duration” option.
Tick the “Reverse Speed” checkbox and then hit the “OK” button.
Step 4: Doing so will play the YouTube video backward, and you can see the progress on the preview window.
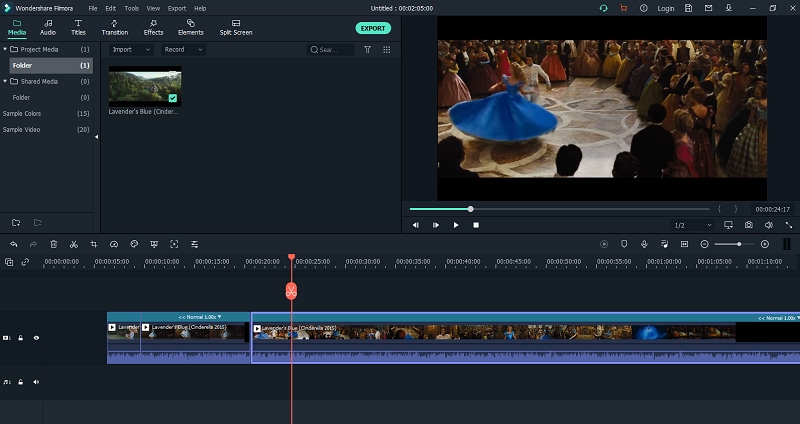
Step 5: You can perfect your creation with filters or effects offered with Filmora.
Once done, click the “Export” option that will allow you to save the file in your destined format and export it.
You can upload the reversed YouTube video directly to your YouTube account or other social media apps with Filmora.
3.2Tips for Customizing the Reversing Videos
1. Add filters & effects: Adding filters and effects like Mosaic and Amaro can uplift your reversed video and make them attractive. Filmora has 200+ filters, utilities, overlays, and LUT.
2. Render/Perfect the audio: Audio is the backbone of the video that provokes and makes the creation sound perfect and outstanding. 76 in-built audio tracks included in Filmora consisting of tender, sentimental, folk, rock, and young categories.
3. Transform your video with transitions: While various ordinary videos crowd the Internet, make yours unique by transforming them with 3D effects and a slideshow. Filmora comes with 233 transitions like 3D, warp, dissolve & ripple slideshow, lifestyle, and still a lot more.
4. Perform video editing tricks: While trim, cut & merge, crop & flip, resize, delete, and watermark are pre-defined and traditional editing tools, why don’t you try something new like creating freeze frames, accessing sample colors, and zoom in/out timeline where Filmora has a toolkit more than what you expect.
Conclusion
Thanks to the technology behind video reversers like Clideo and Kapwing that does a great job of reversing the YouTube video online quickly. The alternatives YTD downloader and Keepvid also facilitates downloading your favorite videos from 100+ video streaming sites. However, if you aspire to become a creative & professional video creator expert in the field, Filmora from Wondershare stands as the best choice for all. Lastly, also note the tips discussed, and use Filmora today for a brighter career tomorrow.
Richard Bennett
Richard Bennett is a writer and a lover of all things video.
Follow @Richard Bennett
Richard Bennett
Mar 27, 2024• Proven solutions
It could be a film or a reversed meme, a boomerang video on Instagram, or a rewind effect in a playback action. The reversing results make the clip compelling and creative. At present, many video creators find YouTube as a suitable platform for such rewind effects as it has millions of diverse genre video clips. Although the mechanism behind such an act can be quite confusing, it is no more if you get to know how to reverse YouTube videos at ease. Yes, video reversers are created and developed for such a purpose, and you can read below to understand how to play YouTube videos backward.
- Part 1: How to Reverse YouTube Video in the Quickest Way?
- Part 2: Reverse YouTube Videos More Creatively
How to Reverse YouTube Video in the Quickest Way?
Let’s take a look at some online tools that can play YouTube videos backward.
2. Kapwing
Kapwing is an online video reverser shared stage where you can create images, videos, and GIFs to share on social media. It suits to be perfect for any content that performs varied tasks with video editor tools like trimmer, resizes, studio, subtitles, and audio addition. Kapwing is an all-in-one workspace asset that is a single secure place to place over your backup safely facilitated with cross-device capability. To whatever field of interest you might belong to from a school student, professional, media, or a design team, Kapwing is the right platform ease-to-use.
3. Clideo
Like Kapwing, Clideo is an online video reverser tool that does multiple tasking like video converter, file converter, audio joiner, video maker, and a slideshow maker. We have taken up Clideo in our list as it follows a simple interface and comes up with useful tools of the loop, stops motion, and meme required in the present video creation industry. Supporting all video formats like MPG, MOV, and VOB, Clideo is a fast editor with a high-level of data protection. Developed by Softo Ltd., Clideo has got more than 4.1M users and had made up 25M videos.
Now, let’s take a simple guide to reverse a YouTube video quickly with Clideo.
Step 1: Enter the link, https://clideo.com/reverse-video on your desired web browser like Chrome or Firefox.
Now add the files from your desktop or your smartphone from the “Choose File” option or the drop-down choose your convenient option like Dropbox, Google Drive, or YouTube URL to reverse the video.
Source: clideo.com
Step 2: Paste the YouTube link on the search box, and the video will process.
Step 3: The YouTube video will now start to play from backward where you can reverse the speed by changing the levels from 0.5X to 2X.
You can make a preview by playing or pausing the timeline of the YouTube video.
Once satisfied, hit the “Reverse” button on the right corner of the screen.
Step 4: Before downloading the revered Youtube video, you can play it once, and upon satisfaction, tap the “Download” button else you can go on with the “Back to edit” option.
You can quickly reverse a YouTube video with Clideo in just three steps, along with a watermark removal facility.
Reverse YouTube Videos More Creatively
Want to embed more creativity in your YouTube video before reversing them? Get to know some of the YouTube video downloaders from this session.
Keepvid
Keepvid is an online video downloader that converts a video directly to MP4 & MP3. It allows you to download videos from 100+ sites, including YouTube, Facebook, Twitter, Vevo, Reddit, and BBC, irrespective of their video metadata. With Keepvid, you can listen to YouTube videos offline, save YouTube videos directly to MP3, download YouTube playlists everywhere, and anytime with the web-based lite-weight app.
YTD Video downloader
YTD video downloader has been in the market for years as a popular video downloader & converter. It is free to download software, allowing you to download video, audio, and playlist that could play offline. YTD video downloaded has gathered more than 200M users globally, supporting overall popular sites like Bing, Vimeo, TikTok, Yahoo, and Metacafe. With YTD, you can download the unlimited playlist and HD videos of 1080P at ultra-fast speed.
Want to reverse your YouTube video creatively and stunningly?
Wondershare Filmora is all you need, a complete pack of video/editing toolkit developed for the inspired that helps discover storytelling. It is a platform where you can create without limits, give life to your videos, craft fun in every clip, go beyond boundaries with endless possibilities, and make your epic story or adventure outstanding in the crowd. Filmora has a free version that allows you to access all the beautiful features like video reverse, ripple edit, trim, rotate, flip, zoom, edit, and audio ducking.
3.1How to Reverse Videos in Filmora?
Now that you have come to know about Filmora Wondershare, the best video reverser from the list, let’s directly jump over to a manual on how to reverse a YouTube video at ease.
Note: Before starting up, download and install the free version of Filmora on the device from https://filmora.wondershare.com/ .
Step 1: Open Filmora and click the “File” menu. Choose “New Project” from the drop-down.
Step 2: To import the YouTube video to the workplace, choose the “Import Media” option from the file menu.
From the drop-down, you can import files or folders at your convenience.
Step 3: Once the video is loaded on the media library, right-click on the track timeline and select the “Speed and Duration” option.
Tick the “Reverse Speed” checkbox and then hit the “OK” button.
Step 4: Doing so will play the YouTube video backward, and you can see the progress on the preview window.
Step 5: You can perfect your creation with filters or effects offered with Filmora.
Once done, click the “Export” option that will allow you to save the file in your destined format and export it.
You can upload the reversed YouTube video directly to your YouTube account or other social media apps with Filmora.
3.2Tips for Customizing the Reversing Videos
1. Add filters & effects: Adding filters and effects like Mosaic and Amaro can uplift your reversed video and make them attractive. Filmora has 200+ filters, utilities, overlays, and LUT.
2. Render/Perfect the audio: Audio is the backbone of the video that provokes and makes the creation sound perfect and outstanding. 76 in-built audio tracks included in Filmora consisting of tender, sentimental, folk, rock, and young categories.
3. Transform your video with transitions: While various ordinary videos crowd the Internet, make yours unique by transforming them with 3D effects and a slideshow. Filmora comes with 233 transitions like 3D, warp, dissolve & ripple slideshow, lifestyle, and still a lot more.
4. Perform video editing tricks: While trim, cut & merge, crop & flip, resize, delete, and watermark are pre-defined and traditional editing tools, why don’t you try something new like creating freeze frames, accessing sample colors, and zoom in/out timeline where Filmora has a toolkit more than what you expect.
Conclusion
Thanks to the technology behind video reversers like Clideo and Kapwing that does a great job of reversing the YouTube video online quickly. The alternatives YTD downloader and Keepvid also facilitates downloading your favorite videos from 100+ video streaming sites. However, if you aspire to become a creative & professional video creator expert in the field, Filmora from Wondershare stands as the best choice for all. Lastly, also note the tips discussed, and use Filmora today for a brighter career tomorrow.
Richard Bennett
Richard Bennett is a writer and a lover of all things video.
Follow @Richard Bennett
Behind the Scenes: Insider Knowledge for YouTube Video Production
10 Tips For Shooting Profesional YouTube Videos
Richard Bennett
Mar 27, 2024• Proven solutions
We have mentioned before about the equipment you should have to start your YouTube video shooting , however, being methodical in your approach to the video making process and knowing exactly what and where you are going to stage and record will increase the quality of the content. Focus on the technical aspects of your YouTube video before you actually start shooting and strive to be well prepared for all the challenges a day on the set may bring.
These and other useful tips may help you make better videos for your YouTube channel, so let’s explore different ways of improving your video making skills.
10 Tips for Shooting Better YouTube Videos
All videographers agree that you shouldn’t come to the set unprepared. Everything has to be in its place, no matter how insignificant it may seem, because a tiny detail can completely ruin the shot or even an entire day of work. These tips are going to help you avoid common mistakes, inexperienced video producers often make.
1. Write the Script
Everything starts with a script, at least in the cinematography world. You don’t have to write long, detailed descriptions of all scenes, just make a short note of every scene, what is being said in the shot, on-screen actions, camera positions, and so on. By doing this, you’ll save yourself a lot of valuable time, you can then dedicate to other burning issues on the set. Besides, knowing what you are going to say throughout the video so you don’t have to improvise all the time is going to help you feel more relaxed in front of a camera.
2. Build the Set (Lighting included)
Don’t leave anything to chance. You should control everything that is going to be in the shot, so avoid working at locations you can’t at least partially control. Shooting in studio-like conditions will enable you to carefully select the scenography and to design light so it matches the scene perfectly. The actors must always be clearly visible to the audience, which is why you need to pay attention to where they are located in the shot and how much light you have in that part of the shot.
3. Keep Your Batteries Charged
There is nothing more frustrating than arriving at the set anxious to start shooting just to find out that the batteries are empty. Charge the batteries at the end of each day on the set, because the chances are that you are going to need them early in the morning. Always have several spare batteries with you, so even if one battery is empty you have the replacement ready. You can also prolong the battery life by switching the camera off when you are not recording.
4. Do a Microphone Check
Capturing audio with an external microphone drastically increases the quality of the sound in your videos. That’s why making absolutely sure that all cables are connected and that the microphone is perfectly placed is paramount if you want to get the sound right. The host or the hosts of the video must be at the right distance from the microphone, usually, the length of their fist with the thumb and pinky finger extended, but this can vary a few inches to either side.
Check out the best microphone for YouTuber in 2018
5. Pay Attention to The Shot Composition
The rule of thirds is a common composition principle used by videographers to create balanced and unified images. The rule suggests that the subjects in a shot should be placed at the intersections of the lines that divide the screen. Most digital cameras have a grid that makes using the rule of thirds quite simple because you can easily see when the subjects in the shot are not positioned correctly.
This is just one of many shot composition techniques you have at your disposal, and as you gain more experience you’ll learn how to combine them and get aesthetically pleasing results.
6. Always Record Videos in Landscape Mode
Posting vertically oriented videos to your YouTube channel will make you look unprofessional because portrait mode is never used for capturing videos. YouTubers who record their videos with Smartphones are more likely to fall into this trap, but all you need to do to avoid this is remember to hold the device horizontally.
By switching to portrait mode, you’ll be cropping the frame in a way, so you might unknowingly end up removing parts of the shot you wanted to record.
In case that you want to convert your portrait video to landscape, do not miss this article about How to Convert A Portrait Video to Landscape.
7. Eliminate The Background Noises
Professional microphones can pick up even the softest sounds, that might prove difficult to remove in the post-production. You can reduce the noise levels in your videos by using shotgun microphones that only capture sounds that come directly into the microphone, or by using the omnidirectional mic to eliminate the wind if you’re shooting on an outdoor location.
Background noises can be particularly unpleasant when recording narration, because the viewers of the video may not want to watch it until the end if they can’t hear what the person in the video is saying.
If it is hard for you to record your YouTube video in quite environment, you can remove the background noise by using some video editing software. For YouTubers, we recommend you to try Wondershare Filmora to de-noise. Check the video below about how to remove background noise with one click.
8. Keep The Shot in Focus
You can always keep the shot in focus by simply enabling the autofocus feature, but if you do so you won’t be able to control where the focus is going to be. Pulling focus manually is an art that takes years to master, and you have to keep practicing it as much as you can in order to become good at it.
The best way to deal with out of focus shots is to avoid shooting scenes that include a lot of action because you won’t have to pull focus that often.
9. Put The Camera on a Tripod

The footage you produce should be smooth and free of camera shakes. All video cameras pick up vibrations easily, so even the slightest movement or impact can ruin a shot. Putting the camera on a tripod is one of the best ways to stabilize the shot and avoid camera shaking.
In addition, a tripod enables you to maintain image stability even when shooting form lower or upper angles, something that cannot be achieved by simply holding the camera.
We have chosen some of the best tripods that you can use for starting a YouTube vlogging Video shooting . If you are using a 4K camera, here are some tripods that you can use for your 4K Cameras .
10. Find The Best Angle
Every scene has its perfect angle, you just have to find it. This job is much easier if you have already built the set and adjusted the lighting before approaching the shot selection process because it will allow you to know exactly where the camera should be.
The camera position depends on a number of factors, including the video’s aesthetics or the action that takes place in the shot, and you have to go through this process for each shot in your video.
Read More to Get : How to Download YouTube Videos without Any Software Easily >>
Conclusion
Hopefully, the tips we provided in this article are going to help you create better YouTube videos. There are hundreds of tricks you’ll have to learn as your skills become more polished, but sometimes just paying attention to the basic rules of videography is more than enough to create a stunning video.
Leave a comment and let us know which tips helped you the most or tell us which useful tips we failed to mention in this article.
Richard Bennett
Richard Bennett is a writer and a lover of all things video.
Follow @Richard Bennett
Richard Bennett
Mar 27, 2024• Proven solutions
We have mentioned before about the equipment you should have to start your YouTube video shooting , however, being methodical in your approach to the video making process and knowing exactly what and where you are going to stage and record will increase the quality of the content. Focus on the technical aspects of your YouTube video before you actually start shooting and strive to be well prepared for all the challenges a day on the set may bring.
These and other useful tips may help you make better videos for your YouTube channel, so let’s explore different ways of improving your video making skills.
10 Tips for Shooting Better YouTube Videos
All videographers agree that you shouldn’t come to the set unprepared. Everything has to be in its place, no matter how insignificant it may seem, because a tiny detail can completely ruin the shot or even an entire day of work. These tips are going to help you avoid common mistakes, inexperienced video producers often make.
1. Write the Script
Everything starts with a script, at least in the cinematography world. You don’t have to write long, detailed descriptions of all scenes, just make a short note of every scene, what is being said in the shot, on-screen actions, camera positions, and so on. By doing this, you’ll save yourself a lot of valuable time, you can then dedicate to other burning issues on the set. Besides, knowing what you are going to say throughout the video so you don’t have to improvise all the time is going to help you feel more relaxed in front of a camera.
2. Build the Set (Lighting included)
Don’t leave anything to chance. You should control everything that is going to be in the shot, so avoid working at locations you can’t at least partially control. Shooting in studio-like conditions will enable you to carefully select the scenography and to design light so it matches the scene perfectly. The actors must always be clearly visible to the audience, which is why you need to pay attention to where they are located in the shot and how much light you have in that part of the shot.
3. Keep Your Batteries Charged
There is nothing more frustrating than arriving at the set anxious to start shooting just to find out that the batteries are empty. Charge the batteries at the end of each day on the set, because the chances are that you are going to need them early in the morning. Always have several spare batteries with you, so even if one battery is empty you have the replacement ready. You can also prolong the battery life by switching the camera off when you are not recording.
4. Do a Microphone Check
Capturing audio with an external microphone drastically increases the quality of the sound in your videos. That’s why making absolutely sure that all cables are connected and that the microphone is perfectly placed is paramount if you want to get the sound right. The host or the hosts of the video must be at the right distance from the microphone, usually, the length of their fist with the thumb and pinky finger extended, but this can vary a few inches to either side.
Check out the best microphone for YouTuber in 2018
5. Pay Attention to The Shot Composition
The rule of thirds is a common composition principle used by videographers to create balanced and unified images. The rule suggests that the subjects in a shot should be placed at the intersections of the lines that divide the screen. Most digital cameras have a grid that makes using the rule of thirds quite simple because you can easily see when the subjects in the shot are not positioned correctly.
This is just one of many shot composition techniques you have at your disposal, and as you gain more experience you’ll learn how to combine them and get aesthetically pleasing results.
6. Always Record Videos in Landscape Mode
Posting vertically oriented videos to your YouTube channel will make you look unprofessional because portrait mode is never used for capturing videos. YouTubers who record their videos with Smartphones are more likely to fall into this trap, but all you need to do to avoid this is remember to hold the device horizontally.
By switching to portrait mode, you’ll be cropping the frame in a way, so you might unknowingly end up removing parts of the shot you wanted to record.
In case that you want to convert your portrait video to landscape, do not miss this article about How to Convert A Portrait Video to Landscape.
7. Eliminate The Background Noises
Professional microphones can pick up even the softest sounds, that might prove difficult to remove in the post-production. You can reduce the noise levels in your videos by using shotgun microphones that only capture sounds that come directly into the microphone, or by using the omnidirectional mic to eliminate the wind if you’re shooting on an outdoor location.
Background noises can be particularly unpleasant when recording narration, because the viewers of the video may not want to watch it until the end if they can’t hear what the person in the video is saying.
If it is hard for you to record your YouTube video in quite environment, you can remove the background noise by using some video editing software. For YouTubers, we recommend you to try Wondershare Filmora to de-noise. Check the video below about how to remove background noise with one click.
8. Keep The Shot in Focus
You can always keep the shot in focus by simply enabling the autofocus feature, but if you do so you won’t be able to control where the focus is going to be. Pulling focus manually is an art that takes years to master, and you have to keep practicing it as much as you can in order to become good at it.
The best way to deal with out of focus shots is to avoid shooting scenes that include a lot of action because you won’t have to pull focus that often.
9. Put The Camera on a Tripod
The footage you produce should be smooth and free of camera shakes. All video cameras pick up vibrations easily, so even the slightest movement or impact can ruin a shot. Putting the camera on a tripod is one of the best ways to stabilize the shot and avoid camera shaking.
In addition, a tripod enables you to maintain image stability even when shooting form lower or upper angles, something that cannot be achieved by simply holding the camera.
We have chosen some of the best tripods that you can use for starting a YouTube vlogging Video shooting . If you are using a 4K camera, here are some tripods that you can use for your 4K Cameras .
10. Find The Best Angle
Every scene has its perfect angle, you just have to find it. This job is much easier if you have already built the set and adjusted the lighting before approaching the shot selection process because it will allow you to know exactly where the camera should be.
The camera position depends on a number of factors, including the video’s aesthetics or the action that takes place in the shot, and you have to go through this process for each shot in your video.
Read More to Get : How to Download YouTube Videos without Any Software Easily >>
Conclusion
Hopefully, the tips we provided in this article are going to help you create better YouTube videos. There are hundreds of tricks you’ll have to learn as your skills become more polished, but sometimes just paying attention to the basic rules of videography is more than enough to create a stunning video.
Leave a comment and let us know which tips helped you the most or tell us which useful tips we failed to mention in this article.
Richard Bennett
Richard Bennett is a writer and a lover of all things video.
Follow @Richard Bennett
Also read:
- Monetizing Success A Guide to Purchasing YouTube Content
- Unlocking YouTube Live Potential A Step-by-Step Guide
- [New] Enhancing User Engagement How to Use YouTube Tags Effectively
- [Updated] Counteract Vibration for Clear Captures
- Streamline Your Online Experience Blocking Youtube Channels Effectively
- Epic Playlist Over a Hundred Top-Tier Titles
- Maximizing Your YouTube Earnings Potential
- [New] Discover Efficient Methods for Compiling Songs on YouTube
- In 2024, A Comprehensive Review Camera Lenses for YouTube
- [Updated] Deciphering Revenue Sharing in YouTube Shorts
- The Complete Angle Manipulation Handbook for YouTube Videos
- Seek Out Stimulating YouTube Snippets
- Pro Gamer's Equipment Showcase Series
- Top 8 YouTube Ranks Elevating Your Content with Premier Applications
- [Updated] Decoding Your YouTube's View-Zero Dilemma 10 Insights
- Elevating Your YouTube Presence with Longer Video Formats
- [Updated] Easy Steps to Directly Share Videos From iPhone/iPad
- In 2024, A Comprehensive Look at Decelerating YouTube Video Speed (50 Chars)
- [New] Enhancing Comments with Emojis on YouTube
- Your Essential Gift A Compact Bundle of 50 Banners
- A Step-by-Step Strategy for Merging Your YouTube & TikTok Presence for 2024
- In 2024, A Deep Dive Into the Top 9 YouTube Downloader Apps for Android
- Apex Chart Seeker Monitor Most Viewed Videos
- Secrets of Filmo
- Channel Dominance Plan Studio Protocol Vs. Beta Update
- Essential List 6 Free Online Platforms for YouTube Short Downloads for 2024
- Elevate Your YT Presence and Skyrocket To 1000+ Fans
- Redefine Small Screen Experience Explore These Top 6 Freely Available YouTube Shorts Downloader Tools
- Investing Right Choosing the Best Camera and Gear
- [Updated] Discover How to Craft Videos Flawlessly in 8 Tools
- 2024 Approved Essential Techniques for Forming YouTube Collab Videos
- In 2024, Achieve Wider Exposure by Transferring Twitch Broadcasts to YouTube
- [New] Essentials YouTube's Premier Music Bands
- Download YouTube Videos Directly
- 10 Top YouTube Music Collectives Unveiled for 2024
- [New] A Comprehensive Tutorial for YouTube Customization Tools
- In 2024, FREE Best YouTube Video Editor Apps for Android
- Perfect Your Presence with Solo Video Setups and Techniques
- Taking Charge of Your Visual Brand Identity
- Richest Revenue Generators in the YouTube Universe
- 2024 Approved Crafting a Customizable YT Channel Subscribe Link
- Unique Themes Redesign Your YouTube Presence
- Boost Traffic to Your Videos Top SEO Practices for YouTube Success
- 2024 Approved Behind the Scenes with YouTube's Payment Policies for Creators
- 2024 Approved What Is the Best Video Format for YouTube?
- [New] Charting Updates YouTube Money Standards
- [New] Choosing the Right Tool for Your YouTube-to-AVI Desire
- [New] 2024 Approved How to Utilize OBS Studio Android Solutions
- How to Remove iPhone 14 Pro Max SIM Lock?
- 2024 Approved Unraveling the Magic of TikTok's Anime Flair Dance, Music & Visual Mastery
- How to Use Phone Clone to Migrate Your Honor Play 7T Data? | Dr.fone
- [Updated] Screen Capture Showdown Bandicam Vs Camtasia Battle for 2024
- In 2024, How to Remove Activation Lock From the iPhone 12 Pro Without Previous Owner?
- 2024 Approved Closing an Outdated LinkedIn Profile A Step-by-Step Guide
- In 2024, How to Intercept Text Messages on Oppo Reno 11 5G | Dr.fone
- [Updated] Comparing Metaverse to MultipleMetasa Highlighting Their Variance
- New 2024 Approved The Complete Guide to Installing Linux on a Chromebook
- [New] Catching Every Frame Leading Windows 10 Capture Tools
- Bypass iCloud Activation Lock with IMEI Code On iPhone 11
- [Updated] In 2024, Boosting Your IGTV Influence Techniques to Amplify Audience Size
- Fix the Error of Unfortunately the Process.com.android.phone Has Stopped on Honor Magic V2 | Dr.fone
- [Updated] 2024 Approved Discreetly See FB Snapshots
- [Updated] Mastering the Art of Watermarking on Facebook
- The One-Stop Shop for Facebook Video Aspect Ratios A Beginners Guide
- Title: "A Step Into Anti-Time Original Techniques to Rewind YT Videos"
- Author: Kevin
- Created at : 2024-06-18 20:20:45
- Updated at : 2024-06-19 20:20:45
- Link: https://youtube-videos.techidaily.com/a-step-into-anti-time-original-techniques-to-rewind-yt-videos/
- License: This work is licensed under CC BY-NC-SA 4.0.
