

"2024 Approved Disseminating Data-Driven Insights You Vs. Others on Video Markets"
Disseminating Data-Driven Insights: You Vs. Others on Video Markets
YouTube Analytics – How to analyze your and Competitor’s YouTube Video

Richard Bennett
Mar 27, 2024• Proven solutions
Tracking your brand’s YouTube metrics is not enough to ensure success in YouTube. Unless you garner deep insights of your competitors. You must be thinking how can you gauge their company insights using YouTube and track the data movement as well. There is nothing to worry about, we have got you covered. We will show you how to analyze your own channel as well as that of your competitors’ YouTube analytics. Let’s now explore about it!
How to analyze your own YouTube channel/video?
It is important to have reliable YouTube analytics tools for your brand, as videos on YouTube are searchable through Google. They contribute to generate organic traffic for you using both Google and YouTube as a medium. YouTube has a default dedicated analytics mechanism to measure how the video fares in YouTube to gain the most out of it.
Here we have collated the broadly used YouTube insights to ensure that your highly equipped, SEO compatible video engages more audience and performs well. The matrix sums up the most essential parts of YouTube analytics. Let’s go through them.
1. Views
Though, views determine the number of people clicked on a certain video on YouTube, it’s impossible to figure out whether the video has been watched till the end or not. Moreover, they can be altered through clickbait tricks and hence YouTube doesn’t solely put much value on them.
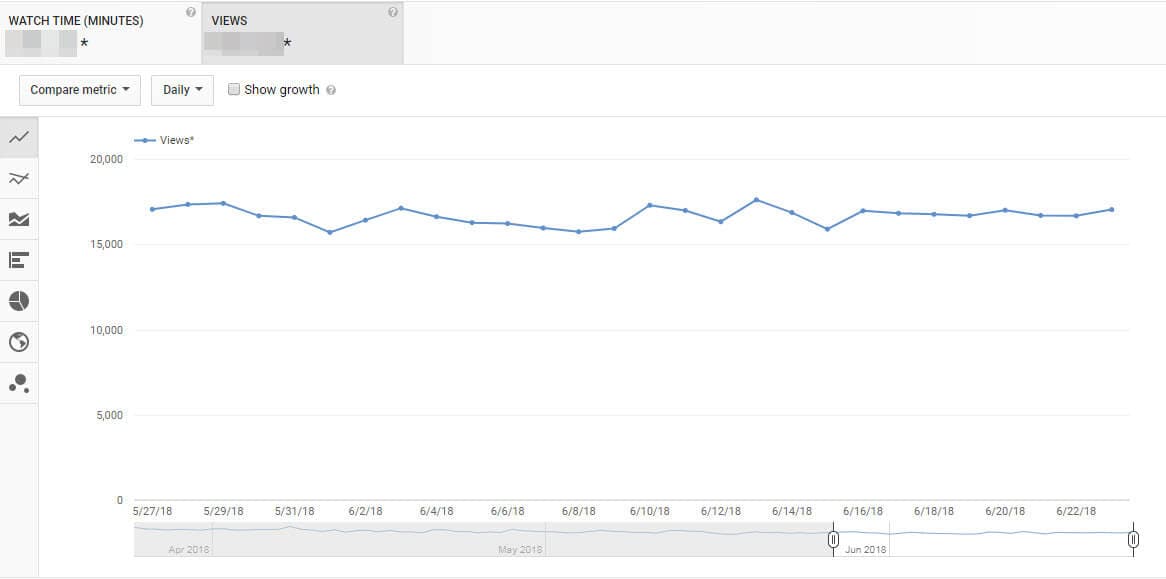
Views along with watch time turn out to be the best bet. Watch time sums up the total amount of time spent (in terms of minutes) on your brand’ videos. With the updated dashboard it becomes easy to get the YouTube analytics and gauge the video’s performance. Using the average view duration, you can know whether your video is being watched till the end or not.
2. Playback Location
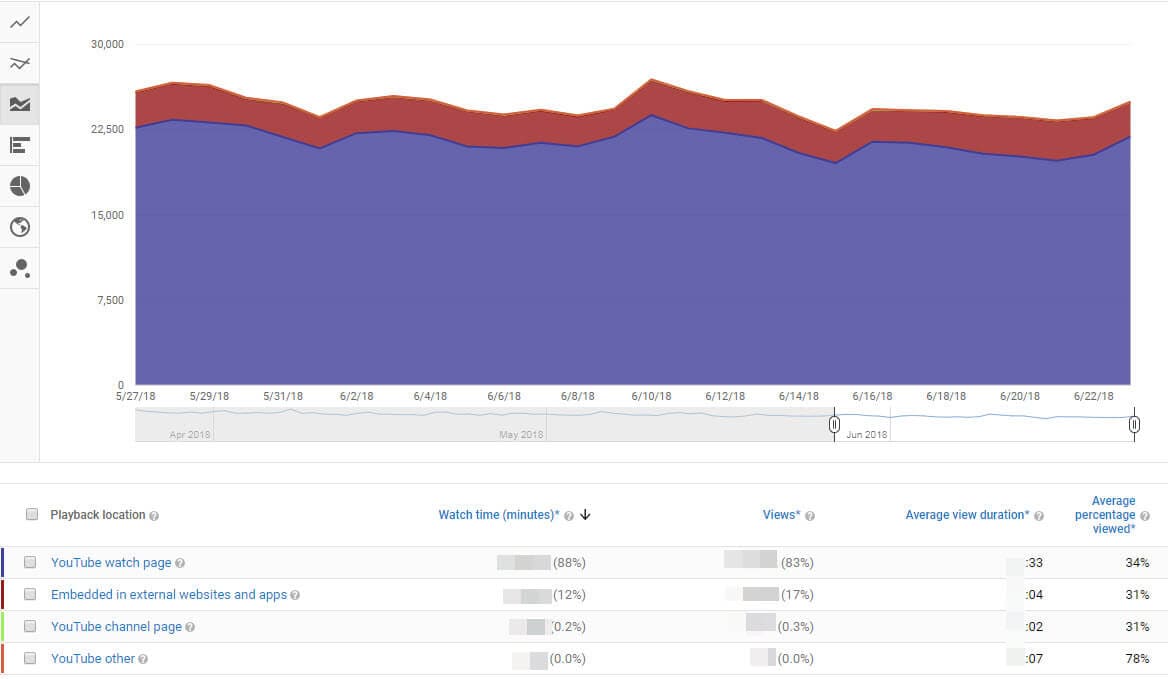
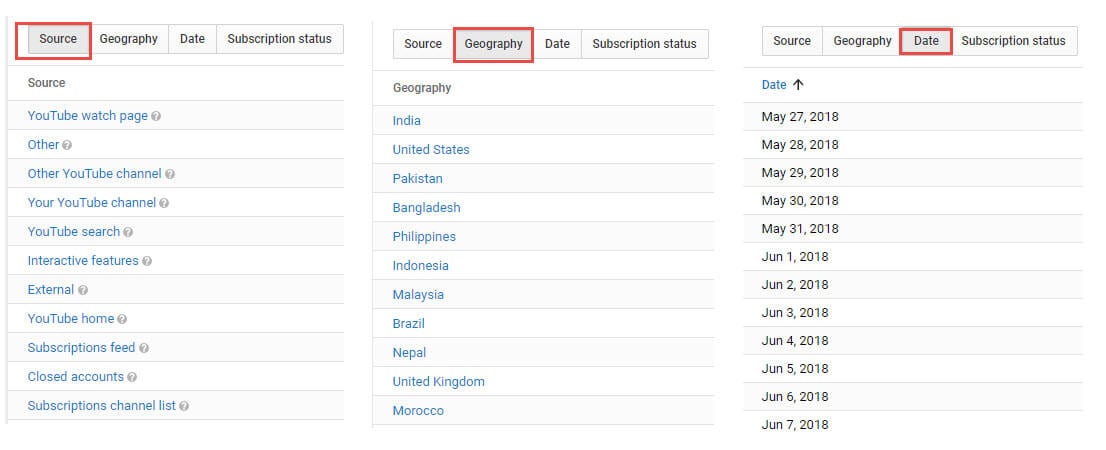
As ‘Playback locations’ of YouTube videos can reveal where does all the traffic come from, it would help your channel figure out for which location the video has fared well. It will guide you to reach the backlinks locations/sites. Knowing the popular locations for your YouTube video being played, you can know whether YouTube is the search engine or they have been diverted from somewhere else. Depending on the video playing locations, the views will be segregated in to embedded video, YouTube watch page, mobile devices, and YouTube channel page. Understanding location specific views would help you decide where should you focus to enhance the performance of your video.
3. Demographics
The demographics page helps you get YouTube insights, using them you can know the audience in a gender and location specific manner. For local businesses targeting a certain region, YouTube analytics would prove to be a boon. You can also know the geography and device used by the viewers with this feature. Understanding the gender and location of people will help you create dedicated product videos that would be helpful to them.

4. Traffic sources
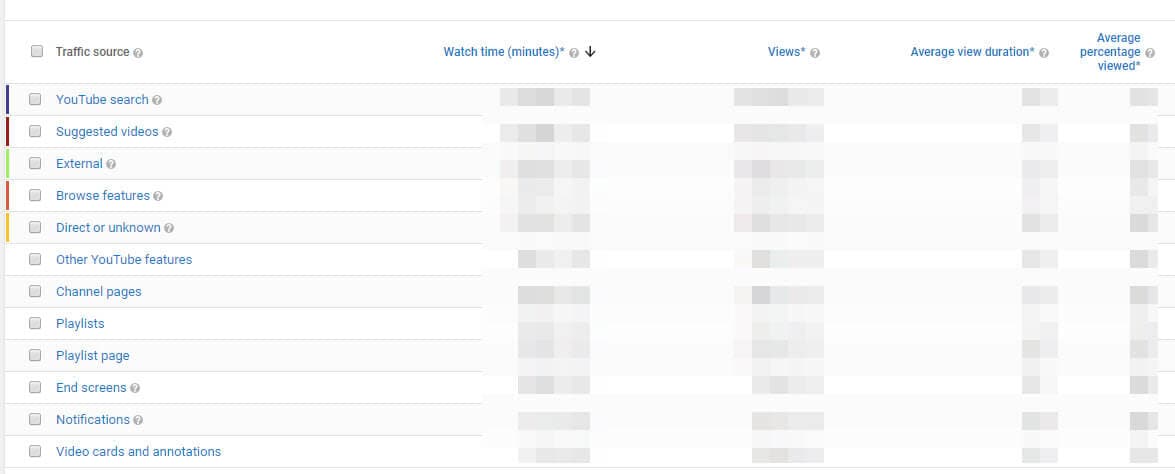
Understanding the source of your YouTube video’s traffic would help you track the prominent keywords that viewers use for landing at your YouTube video. You can figure out their choice and their search patterns this way. The YouTube insights will show you whether the viewers found your video by searching YouTube, a channel on YouTube, through suggested videos, or an external link. The YouTube Analytics tool’s panel would assist you in finalizing the most beneficial traffic source for your brand. You can optimize your video and keyword strategy with this.
5. Audience Retention
This data explains how far your video has engaged your audience. Along with views, the duration that a viewer is on your video weighs too. From the audience retention page, you can find out the specific time that a viewer has exited your video and see what made them do so. There are 2 types of audience retention features – absolute audience retention and relative audience retention.
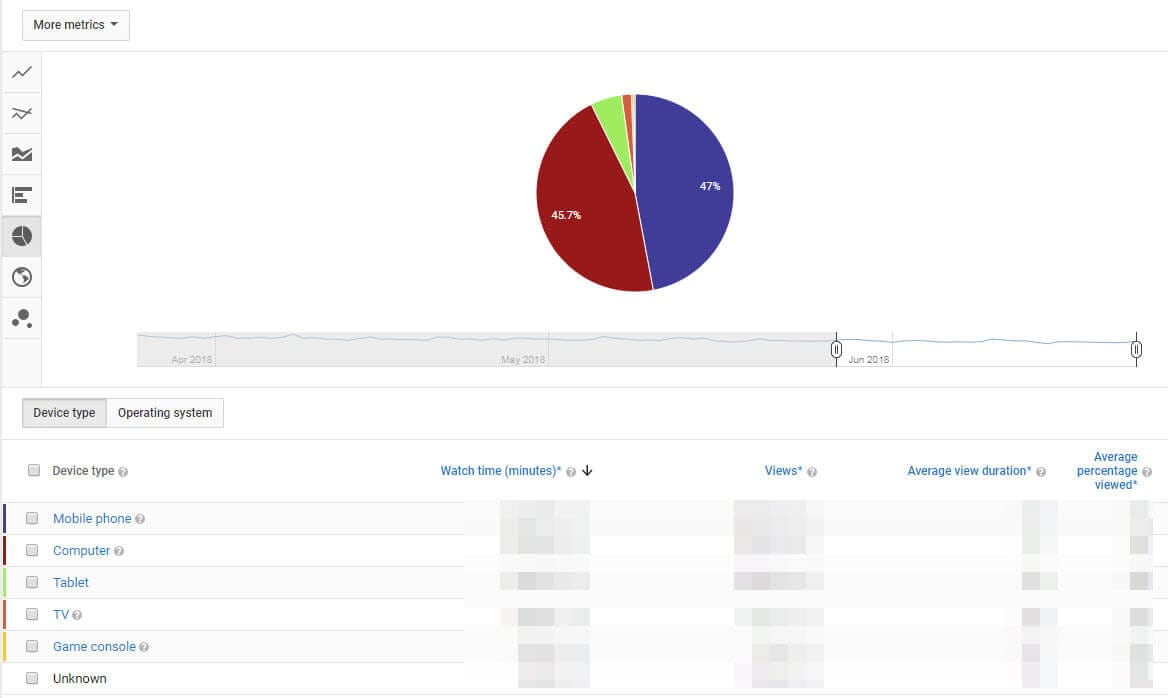
6. Devices
It is important to know which device is being used to watch the video. The metrics is distributed among mobile phones, computer, TV, tablet etc. you will be able to understand whether your video needs to be optimized for a certain video or not.
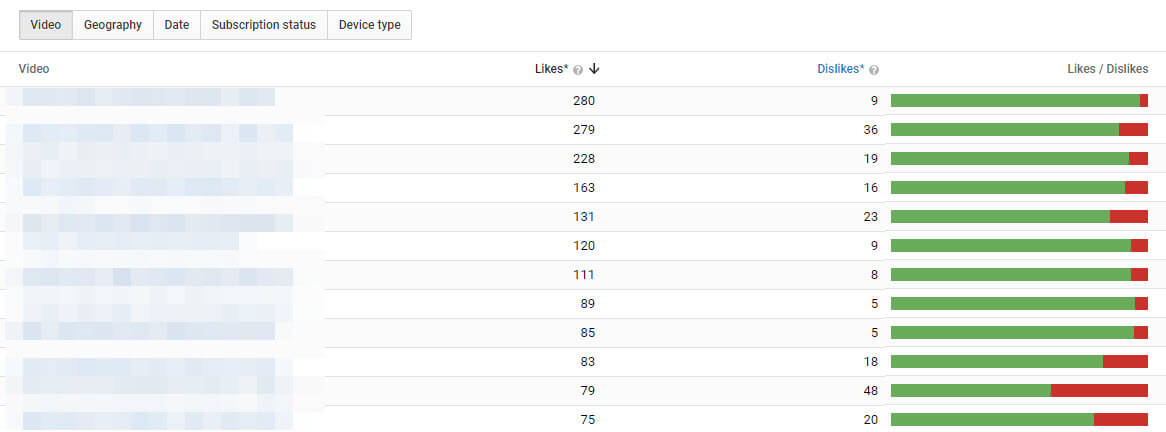
7. Likes and dislikes
YouTube insights gauge the audience acceptance for your video by the number of likes and dislikes. Videos with a huge number of like implies that it is loved by people, though, the quality of video can’t exactly be defined by the number of likes or dislikes. Even the best quality video created for asking opinions about a certain situation/issue might be good enough but still get dislikes.
8. Subscribers
YouTube analytics help you determine the engagement metrics to explain the origin of your subscribers. It includes both their geo-location, the date of subscription, and the source/medium they used to land with your video on YouTube. You can observe the number of people subscribing and unsubscribing from your YouTube channel.
The subscription stream enables your audience to get suggestions for new videos from your channel and offer better exposure to the service and products you offer.
You May Also Like : How to Get More Subscribers
9. Annotations
While considering YouTube Analytics, it is essential to understand that there are annotations to guide viewers to your business site for more content. It is not necessary that the content is video only, it might include a blog post as well. This will let you understand the click through rate and ‘close’ rates for every annotation. This in turn will assist you in optimizing how to reach your audience and where to place the annotations.

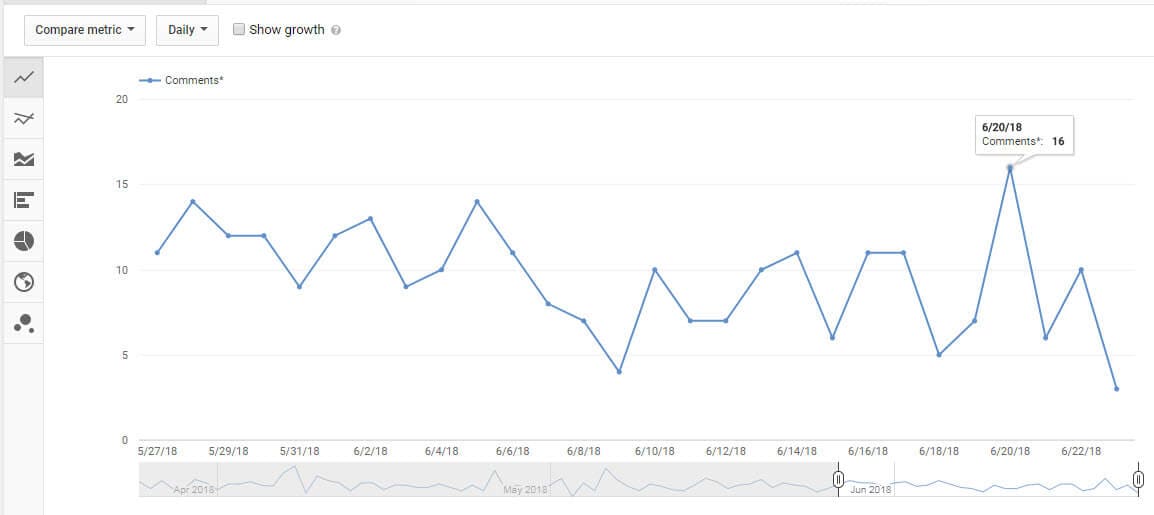
10. Comments
Audience engagement on any YouTube video can easily be gauged by using the vital aspect known as comments. Either it touched a chord in their heart, inspired or motivated them, or simply made them smile, the comments will say it all. Sometimes the audience simply taps ‘Like’ in place of commenting at their convenient.
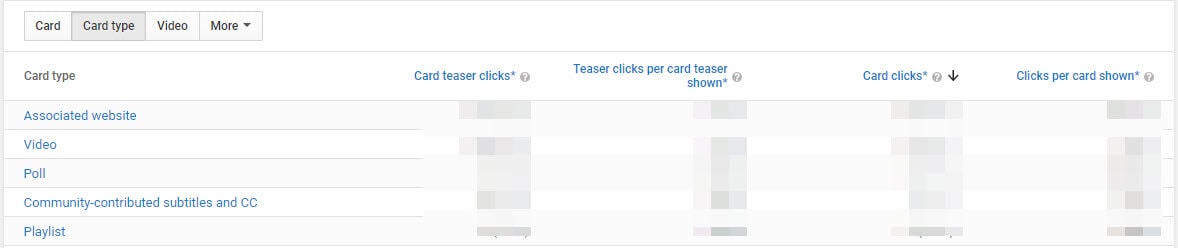
11. Cards
Cards is a new feature in YouTube analytics and aimed at replacing annotations. This will improve user interactivity of any video and accelerate the engagement. They will act as call to action for informing visitors regarding playlists, videos, merchandising, fan funding, and associated website etc.
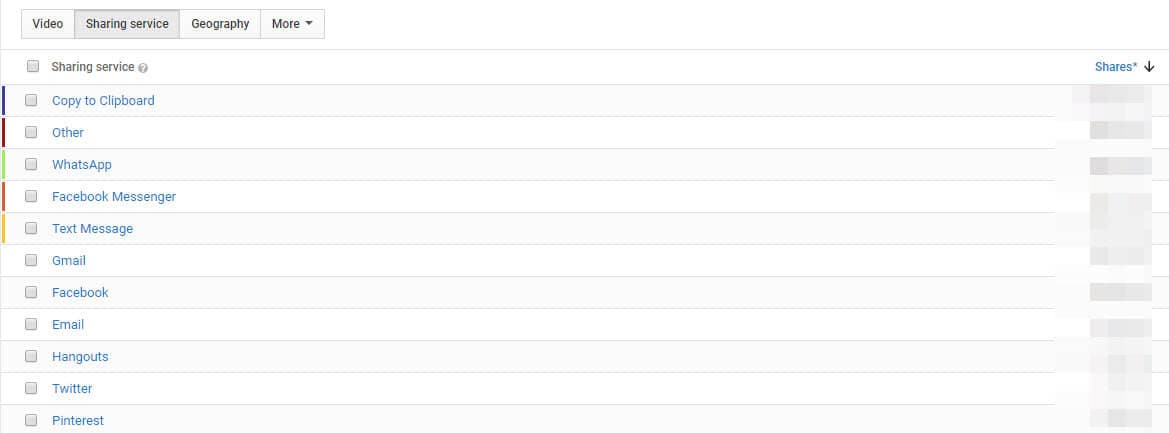
12. Sharing
This aspect sums up the amount of shares of the YouTube video across different social networks along with the share date. Google ranking is influenced with the share numbers, as higher the number more the chances of unique backlinks for your videos.
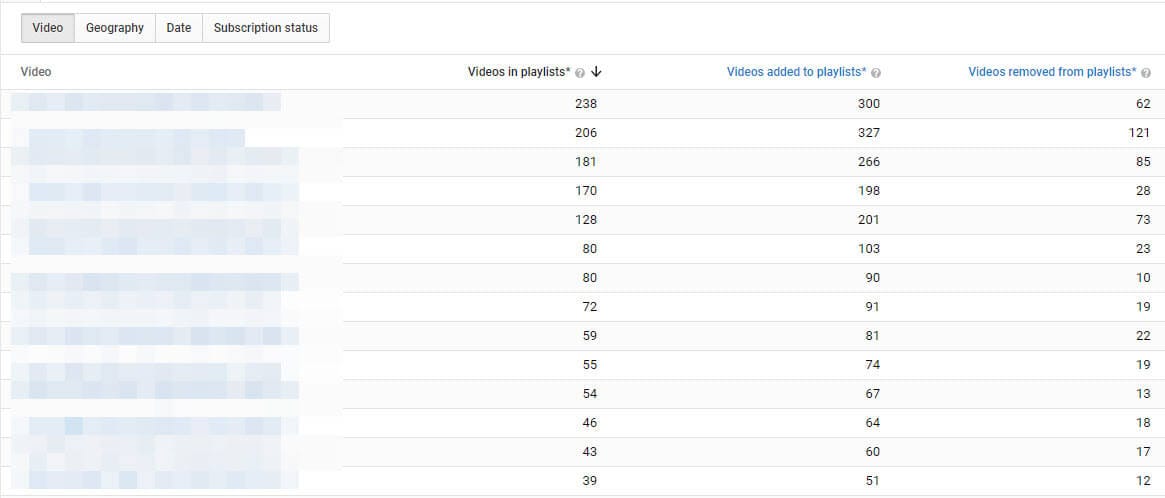
13. Videos in playlists
Favorites has been renamed to ‘Videos in playlists’. Your reach broadens as people keep marking your videos as favorites on their playlist. This is visible to the public on the YouTube channel itself.
How to analyze your competitors
Although, you can’t see the dashboard data of your competitor, there are still some ways to observe and study your competitors’ successful videos and from their views, favorites, ratings, and comments find out the driving force behind it.
For example, reading the comments and see what they are saying. Notice both the positive and negative ones so that you can incorporate the ideas in your videos. You can also make a better video by understanding what a specific demographic region is fond of watching in the said niche.
Or you can use those analyzing tools below to discover the more stats of your competitors.
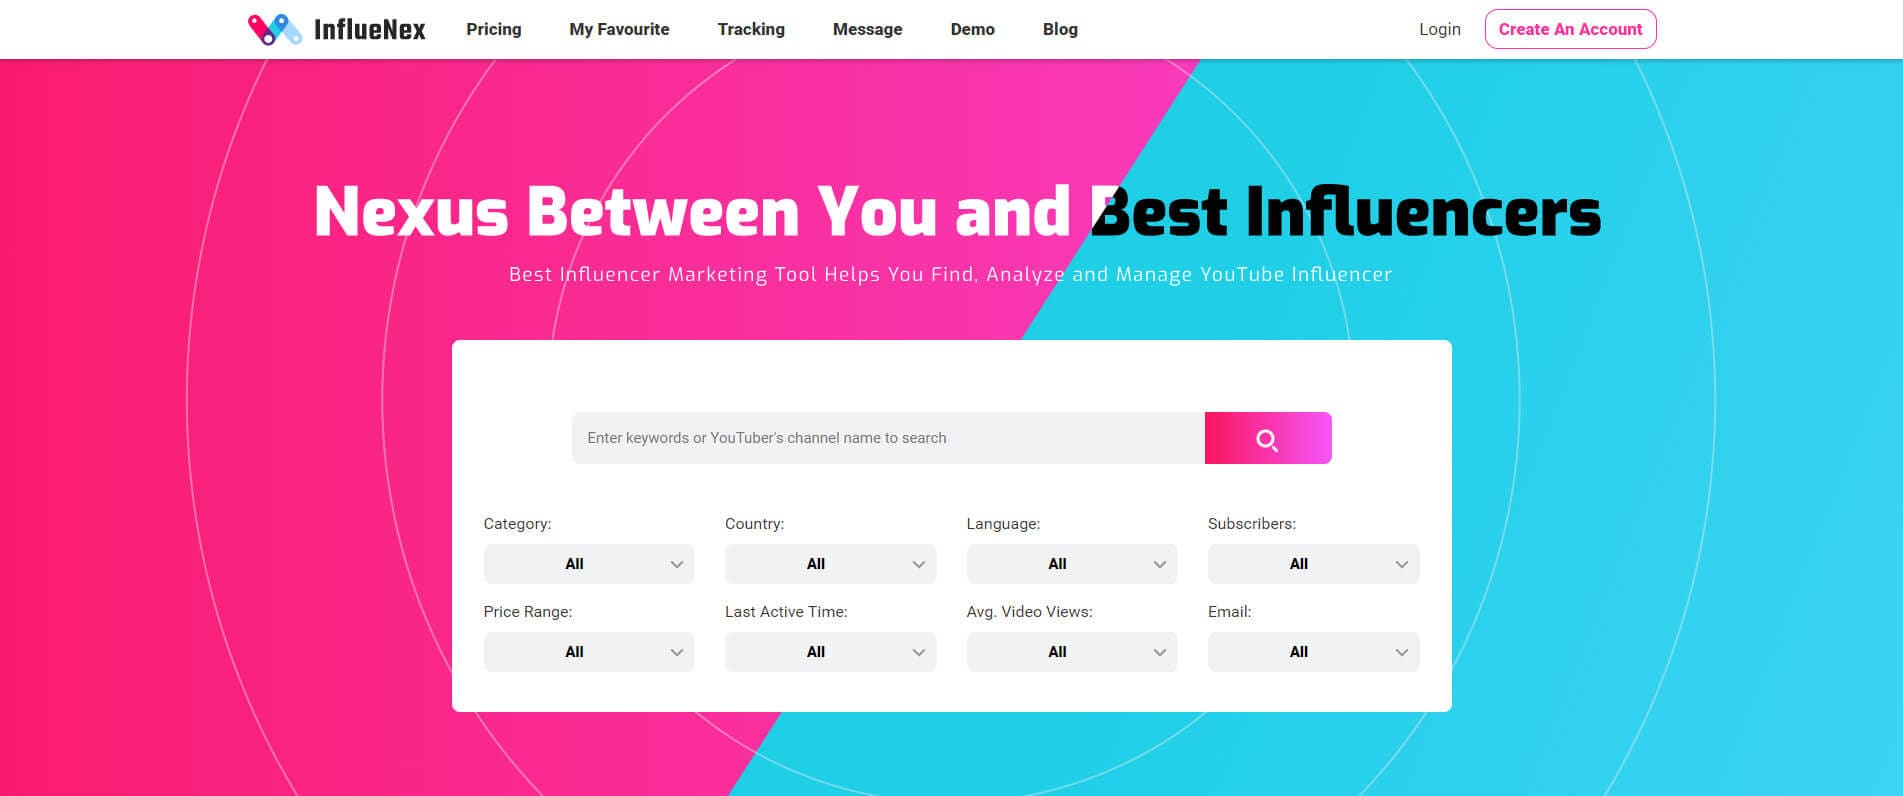
1. InflueNex
InflueNex is a helpful influencer marketing tool for Analyzing, searching, and managing YouTubers. With the help of this YouTube analytics tool, you’re able to learn your competitors’ channels and videos with detailed information.
2. Rival IQ
This YouTube analytics tool helps you increase social media engagement, conduct competitive analysis to track competition, discovers new content ideas for your target audience. You can use it to leverage your foothold in YouTube.
3. SocialBlade
SocialBlade helps you gain YouTube insights and enables you to understand how your rival brands fare. You can learn from them and enhance your own strategy to beat them.
Read More to Get: 5 Methods to Go Frame by Frame on YouTube Video >>
Richard Bennett
Richard Bennett is a writer and a lover of all things video.
Follow @Richard Bennett
Richard Bennett
Mar 27, 2024• Proven solutions
Tracking your brand’s YouTube metrics is not enough to ensure success in YouTube. Unless you garner deep insights of your competitors. You must be thinking how can you gauge their company insights using YouTube and track the data movement as well. There is nothing to worry about, we have got you covered. We will show you how to analyze your own channel as well as that of your competitors’ YouTube analytics. Let’s now explore about it!
How to analyze your own YouTube channel/video?
It is important to have reliable YouTube analytics tools for your brand, as videos on YouTube are searchable through Google. They contribute to generate organic traffic for you using both Google and YouTube as a medium. YouTube has a default dedicated analytics mechanism to measure how the video fares in YouTube to gain the most out of it.
Here we have collated the broadly used YouTube insights to ensure that your highly equipped, SEO compatible video engages more audience and performs well. The matrix sums up the most essential parts of YouTube analytics. Let’s go through them.
1. Views
Though, views determine the number of people clicked on a certain video on YouTube, it’s impossible to figure out whether the video has been watched till the end or not. Moreover, they can be altered through clickbait tricks and hence YouTube doesn’t solely put much value on them.
Views along with watch time turn out to be the best bet. Watch time sums up the total amount of time spent (in terms of minutes) on your brand’ videos. With the updated dashboard it becomes easy to get the YouTube analytics and gauge the video’s performance. Using the average view duration, you can know whether your video is being watched till the end or not.
2. Playback Location
As ‘Playback locations’ of YouTube videos can reveal where does all the traffic come from, it would help your channel figure out for which location the video has fared well. It will guide you to reach the backlinks locations/sites. Knowing the popular locations for your YouTube video being played, you can know whether YouTube is the search engine or they have been diverted from somewhere else. Depending on the video playing locations, the views will be segregated in to embedded video, YouTube watch page, mobile devices, and YouTube channel page. Understanding location specific views would help you decide where should you focus to enhance the performance of your video.
3. Demographics
The demographics page helps you get YouTube insights, using them you can know the audience in a gender and location specific manner. For local businesses targeting a certain region, YouTube analytics would prove to be a boon. You can also know the geography and device used by the viewers with this feature. Understanding the gender and location of people will help you create dedicated product videos that would be helpful to them.
4. Traffic sources
Understanding the source of your YouTube video’s traffic would help you track the prominent keywords that viewers use for landing at your YouTube video. You can figure out their choice and their search patterns this way. The YouTube insights will show you whether the viewers found your video by searching YouTube, a channel on YouTube, through suggested videos, or an external link. The YouTube Analytics tool’s panel would assist you in finalizing the most beneficial traffic source for your brand. You can optimize your video and keyword strategy with this.
5. Audience Retention
This data explains how far your video has engaged your audience. Along with views, the duration that a viewer is on your video weighs too. From the audience retention page, you can find out the specific time that a viewer has exited your video and see what made them do so. There are 2 types of audience retention features – absolute audience retention and relative audience retention.
6. Devices
It is important to know which device is being used to watch the video. The metrics is distributed among mobile phones, computer, TV, tablet etc. you will be able to understand whether your video needs to be optimized for a certain video or not.
7. Likes and dislikes
YouTube insights gauge the audience acceptance for your video by the number of likes and dislikes. Videos with a huge number of like implies that it is loved by people, though, the quality of video can’t exactly be defined by the number of likes or dislikes. Even the best quality video created for asking opinions about a certain situation/issue might be good enough but still get dislikes.
8. Subscribers
YouTube analytics help you determine the engagement metrics to explain the origin of your subscribers. It includes both their geo-location, the date of subscription, and the source/medium they used to land with your video on YouTube. You can observe the number of people subscribing and unsubscribing from your YouTube channel.
The subscription stream enables your audience to get suggestions for new videos from your channel and offer better exposure to the service and products you offer.
You May Also Like : How to Get More Subscribers
9. Annotations
While considering YouTube Analytics, it is essential to understand that there are annotations to guide viewers to your business site for more content. It is not necessary that the content is video only, it might include a blog post as well. This will let you understand the click through rate and ‘close’ rates for every annotation. This in turn will assist you in optimizing how to reach your audience and where to place the annotations.
10. Comments
Audience engagement on any YouTube video can easily be gauged by using the vital aspect known as comments. Either it touched a chord in their heart, inspired or motivated them, or simply made them smile, the comments will say it all. Sometimes the audience simply taps ‘Like’ in place of commenting at their convenient.
11. Cards
Cards is a new feature in YouTube analytics and aimed at replacing annotations. This will improve user interactivity of any video and accelerate the engagement. They will act as call to action for informing visitors regarding playlists, videos, merchandising, fan funding, and associated website etc.
12. Sharing
This aspect sums up the amount of shares of the YouTube video across different social networks along with the share date. Google ranking is influenced with the share numbers, as higher the number more the chances of unique backlinks for your videos.
13. Videos in playlists
Favorites has been renamed to ‘Videos in playlists’. Your reach broadens as people keep marking your videos as favorites on their playlist. This is visible to the public on the YouTube channel itself.
How to analyze your competitors
Although, you can’t see the dashboard data of your competitor, there are still some ways to observe and study your competitors’ successful videos and from their views, favorites, ratings, and comments find out the driving force behind it.
For example, reading the comments and see what they are saying. Notice both the positive and negative ones so that you can incorporate the ideas in your videos. You can also make a better video by understanding what a specific demographic region is fond of watching in the said niche.
Or you can use those analyzing tools below to discover the more stats of your competitors.
1. InflueNex
InflueNex is a helpful influencer marketing tool for Analyzing, searching, and managing YouTubers. With the help of this YouTube analytics tool, you’re able to learn your competitors’ channels and videos with detailed information.
2. Rival IQ
This YouTube analytics tool helps you increase social media engagement, conduct competitive analysis to track competition, discovers new content ideas for your target audience. You can use it to leverage your foothold in YouTube.
3. SocialBlade
SocialBlade helps you gain YouTube insights and enables you to understand how your rival brands fare. You can learn from them and enhance your own strategy to beat them.
Read More to Get: 5 Methods to Go Frame by Frame on YouTube Video >>
Richard Bennett
Richard Bennett is a writer and a lover of all things video.
Follow @Richard Bennett
From Concept to Completion: Crafting Your YouTube Masterpiece
How to Make YouTube Video
Richard Bennett
Mar 27, 2024• Proven solutions
Finding the audience for short videos you create, sharing your knowledge of publicizing the music you create has become a much simpler and cheaper process in the last fourteen years. ‘Everyone deserves a voice’ is one of the core values that motivates the founders of YouTube to continue developing the world’s largest video sharing platform. So if you are looking for your own voice, but you’re not really sure where to start, you’ve come to the right place, because in this article we are going to show you how to make attention-grabbing YouTube videos that are going to attract a huge audience.
- Preparation Stage for Making YouTube Video [4 Aspects You Should Consider]
- Production Stage: Recording a YouTube Video [5 Tips and Tricks]
- YouTube Video Postproduction Stage: Editing the Footage You Recorded
- Uploading Videos to Your YouTube Channel
- How to Make YouTube Videos from a Mac or PC Computer? [Step Guide]
Preparation Stage: Getting Ready to Make a YouTube Video
Achieving success on YouTube may only seem easy before you realize how much time and effort it takes to run a successful YouTube channel. Making a YouTube video isn’t much different than making any other type of short or feature film as you have to go through the same stages of the video production process. Everything, including creating YouTube videos starts with an idea, so let’s take a look at the steps you’ll need to take before you actually start recording your first YouTube video.
1. Start a YouTube Channel
The journey towards success begins with seemingly small and insignificant steps. Creating a YouTube channel is exactly that, a step, without which you won’t be able to become a YouTuber. All you have to do in order to create a channel on YouTube is sign in to the platform using your Google account and then head over to the Settings menu. Click on the Create a new channel option and then pick a name for your Brand channel . Dedicate some extra time to the process of selecting a name for the channel, because that is the first thing your potential followers are going to notice. The platform lets you start as many as fifty channels with one Gmail ID, and as your channels grow, you can add multiple managers to each channel you’ve started. Click on the Create button when you’re done and that’s it you’re now a proud owner of a YouTube channel.
We have summarized some tips and tricks for creating a YouTube channel account , hope that will help you to create a channel more easily.
2. Choose a Niche and Craft a Video Content Strategy
Devising a plan before you start producing content you are going to share on YouTube is going to give you a sense of direction, since there are so many different types of videos that can attract a large audience. Try to imagine your ideal YouTube follower, and then think about what they are interested in or how you can generate value for them through the content you post on your channel. Attempting to cover a broad spectrum of topics usually doesn’t produce the best results, so instead, you should focus on a specific subject and do your best to offer a unique perspective to your viewers on that subject. More importantly, you need to choose the themes for your videos that are relevant to the audience you would like to reach. Gaming, tutorials, beauty or comedy videos are just a few of the most popular genres of videos on YouTube, although which niche you’re going to pick ultimately depends on your personal interests and reasons why you chose to become a YouTuber in the first place.
Additionally, you should follow the hottest trends on the Internet so that you can find out which topics are drawing the most attention at the moment. Don’t let all these questions trouble you, simply choose a niche in which you feel the most comfortable in and start shooting. Keep a watchful eye on how your followers respond to the videos you share on your channel as time goes on and remain open to new ideas or collaborations.
3. Secure a Fresh Supply of YouTube Video Ideas
Defining your niche is just a beginning because you have to keep producing your videos at a steady pace. Most YouTube experts say that sharing new content at least once a week is necessary if you want to gather a large group of followers on your channel. Consequently, you’ll need a constant supply of ideas for new videos that cover topics your audience is interested in. A simple search on YouTube can help you discover the videos on the platform that have the most views. This should give you a pretty good idea which types of videos are the most popular at the moment and what viewers want to see the most.
Reading the comments section below a YouTube video can be a great way to discover new ideas since viewers often ask questions or search for advice on very specific aspects of the topic that particular video is covering. Moreover, YouTube isn’t the only destination on the Internet where you can find inspiration for your next video since there are countless groups and communities where you can come across interesting topics for your next video.
4. Get the Right Video and Audio Recording Equipment
The list of audio and video recording gear you’re going to need to create a YouTube video depends on the type of video you’re trying to make. Gamers who want to record gameplay and post it on their YouTube channel only need a screen capturing software or a capture card and a microphone. The list of equipment is a bit longer for YouTubers interested in the production of vlogs, comedy or review videos since they are going to need a camera or a Smartphone capable of recording videos at high resolutions, lighting equipment, tripods, steady cams, microphones. If you would like to learn more about the pieces of equipment you are going to need while recording a YouTube video, check our picks of the YouTube Video Shooting Equipment List .
Production Stage: Recording a YouTube Video
After you’ve successfully completed the preparation stage it is time to start getting ready for the next step of the process of making a YouTube video. However, you can’t just pick up a camera and start randomly shooting unrelated scenes, instead, you should follow the steps below that make the production of a video much less complicated.
1. Write a Script and Make a Shooting Schedule
Write down all of your ideas for your next video prior to shooting the first shot of that video. A script can be particularly useful if the video you’re planning on making involves a lot of narration since you’ll always know what to say next. Furthermore, you don’t have to record the entire video on the same day, and you have the freedom to plan when and where you are going to record each scene you want to include in the video.
2. Set a Scene
You control what the viewers of your YouTube video are going to see. That’s why you have to choose your shooting locations carefully and to hand-pick each prop that is going to be visible in the shot. Avoid shooting in messy rooms, because the items in the background are going to distract the viewer and reduce the quality of your videos.
3. Pick the Best Camera Positions
Once you know where and when you are going to shoot your video, you should start planning your shots. Most YouTube videos are recorded from a single camera position, but you can also experiment with different shot angles if it helps you to tell the story of the video. Don’t put the actors near direct sources of light like windows or lamps because if you do so you can easily end up ruining the shot.
4. Make Sure that You Have Enough Light in The Shot
Natural sources of light are often not enough to light a scene properly, because the amount of available light you’ll have at your disposal can change in a few minutes. That’s why nearly all YouTubers use lighting kits that enable them to control the amount of light in the shot at any moment.
5. Bonus: Making YouTube Videos Without a Camera
In case using video and audio recording equipment is a bit too technical for you, there is a simple alternative solution since you can capture all activities on your computer’s screen with software products such as Filmora or OBS Studio. This is an excellent option for gamers who want to record gameplay of their favorite video games or skilled educators that would like to share their knowledge and show others how to use a piece of software or perform any other computer-based task.
Besides screencasting, you can also assemble existing footage from old TV shows, movies or cartoons to make a YouTube video. You don’t have to worry about copyright infringements, as long as the footage you’re using is within the public domain. However, if you accidentally end up using footage without permission it is highly unlikely that anyone is going to file a lawsuit, but your video may be removed from your YouTube channel if someone reports that you’ve used footage without the permission from its owners.
Postproduction Stage: Editing the Footage You Recorded
Before you can share the video clips you recorded with a camera, Smartphone or a screencasting software, you should edit them first. Choosing video editing software isn’t always easy since there are so many different options that enable you to perform both basic and advanced video editing tasks. You can check our recommendations about some of the best video editing software for YouTube videos, in case you are still looking for a video editor that is best suited for the price range you’ve had in mind or your skill level. You should choose a video editing app that you feel the most comfortable using since you are going to spend a lot of time editing videos with it.
The video editing techniques you will utilize during the process of piecing together a YouTube video depend on a number of factors that range from the genre of the video to its visual style. However, trimming or cutting the footage, creating opening titles and end credits are among the most common video editing actions you will have to perform on each new project. Mastering these basic video editing techniques is essential for the success of your videos on YouTube since it will enable you to quickly trim a video clip by dragging one of its ends in an inward or outward direction or remove a portion of a clip you don’t want to feature in the final cut of the video from the timeline.
Hard cuts can at times disrupt the flow of a video, but you can easily fix this by adding a transition between two clips. What’s more, nearly all video editing software products on the market come bundled with rich visual and audio effects libraries that make the color grading or audio editing process much faster. Adding opening titles, lower thirds or any other image overlay can help you introduce the characters in the video to the audience, inform the audience about important aspects of the topic you’re covering or summarize the key points of the video.
Creating a soundtrack is also a vital step of the video editing process that largely influences the quality of the final video. That’s why the narration or the dialogues must be recorded professionally since even the slightest background noise can distract the viewer. Whether or not you are going to add music to a video, depends on the type of project you’re working on. Video editing software products like Filmora have their own royalty free music libraries that offer songs from Rock or Electronic and numerous other genres.
When you complete the video editing process, you should export the video to a folder on your hard drive or directly to your YouTube channel if the video editing app you’ve chosen provides that option. How long the rendering of a video is going to take depends on your computer’s processing power, video’s length, and the output resolution.
Adding/Uploading Videos to Your YouTube Channel
As we already noted you can either upload a video to YouTube directly from a video editing software or from a hard drive after the rendering process is completed. You can upload videos with 16:9 or 4:3 aspect ratios to your channel, and the platform support videos in resolutions up to 8K. The minimum length of a YouTube video is 33 seconds while a video’s maximum length cannot exceed the twelve-hour limit. The file’s size can’t be larger than 128GB while the frame rates can go as high as 60fps. If you need to edit the uploaded and published YouTube videos, you can check our tips about editing existing YouTube videos , and you can check out our guide about how to make money on YouTube if you would like to learn more about account monetization.
Read More to Get : How to Loop a YouTube Video >>
1. Optimize Your Content for YouTube Searches
Every bit of information you add to the video increases its visibility on the platform. Even the name of the file you’re uploading to your channel should contain a keyword, and once the upload is completed you should add a title, description, and metadata if you would like to increase the video’s visibility on the platform. It is vital to select your YouTube SEO strategy before you actually start adding new videos to your strategy. In case you’re not familiar with the concept of search engine optimization for YouTube, you can find everything you need to know aboutYouTube SEO in our guide.
2. Create Visually Captivating Thumbnails and End Screen Elements
A thumbnail is usually a snapshot of a frame from a video, you’ve created during the video editing process or any other still image that suggests what the video is about. A small thing like adding a thumbnail to a YouTube video can increase both the number of views and the number of likes that video is getting. In addition, YouTube’s video editor enables you to add end screens that last anywhere between five and twenty seconds to your videos, but keep in mind that the video must be at least 25 seconds long to have an end screen. There are a number of fully customizable templates available that can be uses to promote your upcoming videos or to invite viewers to subscribe to your channel.
Wanna making YouTube thumbnail yourself? Check some of the best YouTube thumbnail makers list.
3. Publish, Interact and Share
YouTube lets you keep your videos private until you are ready to make them public. Once you decide to make a video available to all YouTube users, you should share it on social media like Twitter, Facebook or Tumblr. Furthermore, embedding a YouTube video on your blog or website can drastically increase the number of views it’s getting. The YouTube Analytics tool is designed to help you track the metrics that indicate how well your video is performing. Don’t know which analytics tools should use? Check our picks of some useful YouTube Analytics Tools to learn how to analyze your video.
How to Make YouTube Videos from a Mac or PC Computer?
Even though you can use almost any video editing software to edit a YouTube video, we recommend trying a versatile video editing app like Filmora to edit videos on Windows PC and Mac which offers both basic and advanced video editing features. Creating a video in Filmora doesn’t require a developed set of video editing skills, since all of the tools and options the editor offers are remarkably easy to use.
When you are ready to start a new project you should simply launch the software, and once the new project loads, you should head over to the File menu and select the Project Settings option that lets you set the resolution, aspect ratio and the frame rate of the video. Proceed to import the footage into the project by selecting one of the available options in the Import drop-down menu or by simply dragging the media assets from a folder on your hard drive and dropping them to the Filmora’s Media Panel. In case you don’t have your own audio and video footage you can download videos, music, visual and audio effects from a stock footage website like Filmstock effects store . Filmora also offers screen casting features, so you can easily record gameplay, show viewers how to use a software or capture any other type of activity on your computer’s screen.
Add each media asset you want to include in the final cut of the video to the timeline and then proceed to remove all unwanted parts of the video and audio clips from the timeline using the Cut or Trim options. Filmora offers rich transitions and visual effects libraries you can use to make the cuts between shot smoother or enhance the colors in the video clips you’re editing. Furthermore, the editor lets you take snapshots of any frame in video clips you’ve placed on the timeline in a single click which can be quite useful if you want to create a thumbnail for your YouTube video. Creating the opening titles, end credits or adding different image overlays to a video is a straight forward process since you just have to select the option that fits the style of the video you’re creating and add it to the timeline. Once you’ve completed the video editing process, you can click on the Export button and decide if you want to export a video directly to your YouTube channel or to a destination on your hard drive.
New to Filmora? Check our beginner guide about How to Edit Videos in Filmora in details or check the quick video tutorial below to find out more details.


Conclusion
Becoming a successful YouTuber requires a lot of dedication and hard work, so if at first, you don’t succeed, you should be patient and persistent. In time, as your channel grows, you will be able to monetize your videos, but only if you keep producing new content at a steady pace. Each step of the YouTube creation process is equally important, and you should dedicate an equal amount of attention to recording high-quality footage, editing, and promotion of the content you share on your YouTube channel. Was this article helpful? Leave a comment below and share your thoughts and experiences with us.
Richard Bennett
Richard Bennett is a writer and a lover of all things video.
Follow @Richard Bennett
Richard Bennett
Mar 27, 2024• Proven solutions
Finding the audience for short videos you create, sharing your knowledge of publicizing the music you create has become a much simpler and cheaper process in the last fourteen years. ‘Everyone deserves a voice’ is one of the core values that motivates the founders of YouTube to continue developing the world’s largest video sharing platform. So if you are looking for your own voice, but you’re not really sure where to start, you’ve come to the right place, because in this article we are going to show you how to make attention-grabbing YouTube videos that are going to attract a huge audience.
- Preparation Stage for Making YouTube Video [4 Aspects You Should Consider]
- Production Stage: Recording a YouTube Video [5 Tips and Tricks]
- YouTube Video Postproduction Stage: Editing the Footage You Recorded
- Uploading Videos to Your YouTube Channel
- How to Make YouTube Videos from a Mac or PC Computer? [Step Guide]
Preparation Stage: Getting Ready to Make a YouTube Video
Achieving success on YouTube may only seem easy before you realize how much time and effort it takes to run a successful YouTube channel. Making a YouTube video isn’t much different than making any other type of short or feature film as you have to go through the same stages of the video production process. Everything, including creating YouTube videos starts with an idea, so let’s take a look at the steps you’ll need to take before you actually start recording your first YouTube video.
1. Start a YouTube Channel
The journey towards success begins with seemingly small and insignificant steps. Creating a YouTube channel is exactly that, a step, without which you won’t be able to become a YouTuber. All you have to do in order to create a channel on YouTube is sign in to the platform using your Google account and then head over to the Settings menu. Click on the Create a new channel option and then pick a name for your Brand channel . Dedicate some extra time to the process of selecting a name for the channel, because that is the first thing your potential followers are going to notice. The platform lets you start as many as fifty channels with one Gmail ID, and as your channels grow, you can add multiple managers to each channel you’ve started. Click on the Create button when you’re done and that’s it you’re now a proud owner of a YouTube channel.
We have summarized some tips and tricks for creating a YouTube channel account , hope that will help you to create a channel more easily.
2. Choose a Niche and Craft a Video Content Strategy
Devising a plan before you start producing content you are going to share on YouTube is going to give you a sense of direction, since there are so many different types of videos that can attract a large audience. Try to imagine your ideal YouTube follower, and then think about what they are interested in or how you can generate value for them through the content you post on your channel. Attempting to cover a broad spectrum of topics usually doesn’t produce the best results, so instead, you should focus on a specific subject and do your best to offer a unique perspective to your viewers on that subject. More importantly, you need to choose the themes for your videos that are relevant to the audience you would like to reach. Gaming, tutorials, beauty or comedy videos are just a few of the most popular genres of videos on YouTube, although which niche you’re going to pick ultimately depends on your personal interests and reasons why you chose to become a YouTuber in the first place.
Additionally, you should follow the hottest trends on the Internet so that you can find out which topics are drawing the most attention at the moment. Don’t let all these questions trouble you, simply choose a niche in which you feel the most comfortable in and start shooting. Keep a watchful eye on how your followers respond to the videos you share on your channel as time goes on and remain open to new ideas or collaborations.
3. Secure a Fresh Supply of YouTube Video Ideas
Defining your niche is just a beginning because you have to keep producing your videos at a steady pace. Most YouTube experts say that sharing new content at least once a week is necessary if you want to gather a large group of followers on your channel. Consequently, you’ll need a constant supply of ideas for new videos that cover topics your audience is interested in. A simple search on YouTube can help you discover the videos on the platform that have the most views. This should give you a pretty good idea which types of videos are the most popular at the moment and what viewers want to see the most.
Reading the comments section below a YouTube video can be a great way to discover new ideas since viewers often ask questions or search for advice on very specific aspects of the topic that particular video is covering. Moreover, YouTube isn’t the only destination on the Internet where you can find inspiration for your next video since there are countless groups and communities where you can come across interesting topics for your next video.
4. Get the Right Video and Audio Recording Equipment
The list of audio and video recording gear you’re going to need to create a YouTube video depends on the type of video you’re trying to make. Gamers who want to record gameplay and post it on their YouTube channel only need a screen capturing software or a capture card and a microphone. The list of equipment is a bit longer for YouTubers interested in the production of vlogs, comedy or review videos since they are going to need a camera or a Smartphone capable of recording videos at high resolutions, lighting equipment, tripods, steady cams, microphones. If you would like to learn more about the pieces of equipment you are going to need while recording a YouTube video, check our picks of the YouTube Video Shooting Equipment List .
Production Stage: Recording a YouTube Video
After you’ve successfully completed the preparation stage it is time to start getting ready for the next step of the process of making a YouTube video. However, you can’t just pick up a camera and start randomly shooting unrelated scenes, instead, you should follow the steps below that make the production of a video much less complicated.
1. Write a Script and Make a Shooting Schedule
Write down all of your ideas for your next video prior to shooting the first shot of that video. A script can be particularly useful if the video you’re planning on making involves a lot of narration since you’ll always know what to say next. Furthermore, you don’t have to record the entire video on the same day, and you have the freedom to plan when and where you are going to record each scene you want to include in the video.
2. Set a Scene
You control what the viewers of your YouTube video are going to see. That’s why you have to choose your shooting locations carefully and to hand-pick each prop that is going to be visible in the shot. Avoid shooting in messy rooms, because the items in the background are going to distract the viewer and reduce the quality of your videos.
3. Pick the Best Camera Positions
Once you know where and when you are going to shoot your video, you should start planning your shots. Most YouTube videos are recorded from a single camera position, but you can also experiment with different shot angles if it helps you to tell the story of the video. Don’t put the actors near direct sources of light like windows or lamps because if you do so you can easily end up ruining the shot.
4. Make Sure that You Have Enough Light in The Shot
Natural sources of light are often not enough to light a scene properly, because the amount of available light you’ll have at your disposal can change in a few minutes. That’s why nearly all YouTubers use lighting kits that enable them to control the amount of light in the shot at any moment.
5. Bonus: Making YouTube Videos Without a Camera
In case using video and audio recording equipment is a bit too technical for you, there is a simple alternative solution since you can capture all activities on your computer’s screen with software products such as Filmora or OBS Studio. This is an excellent option for gamers who want to record gameplay of their favorite video games or skilled educators that would like to share their knowledge and show others how to use a piece of software or perform any other computer-based task.
Besides screencasting, you can also assemble existing footage from old TV shows, movies or cartoons to make a YouTube video. You don’t have to worry about copyright infringements, as long as the footage you’re using is within the public domain. However, if you accidentally end up using footage without permission it is highly unlikely that anyone is going to file a lawsuit, but your video may be removed from your YouTube channel if someone reports that you’ve used footage without the permission from its owners.
Postproduction Stage: Editing the Footage You Recorded
Before you can share the video clips you recorded with a camera, Smartphone or a screencasting software, you should edit them first. Choosing video editing software isn’t always easy since there are so many different options that enable you to perform both basic and advanced video editing tasks. You can check our recommendations about some of the best video editing software for YouTube videos, in case you are still looking for a video editor that is best suited for the price range you’ve had in mind or your skill level. You should choose a video editing app that you feel the most comfortable using since you are going to spend a lot of time editing videos with it.
The video editing techniques you will utilize during the process of piecing together a YouTube video depend on a number of factors that range from the genre of the video to its visual style. However, trimming or cutting the footage, creating opening titles and end credits are among the most common video editing actions you will have to perform on each new project. Mastering these basic video editing techniques is essential for the success of your videos on YouTube since it will enable you to quickly trim a video clip by dragging one of its ends in an inward or outward direction or remove a portion of a clip you don’t want to feature in the final cut of the video from the timeline.
Hard cuts can at times disrupt the flow of a video, but you can easily fix this by adding a transition between two clips. What’s more, nearly all video editing software products on the market come bundled with rich visual and audio effects libraries that make the color grading or audio editing process much faster. Adding opening titles, lower thirds or any other image overlay can help you introduce the characters in the video to the audience, inform the audience about important aspects of the topic you’re covering or summarize the key points of the video.
Creating a soundtrack is also a vital step of the video editing process that largely influences the quality of the final video. That’s why the narration or the dialogues must be recorded professionally since even the slightest background noise can distract the viewer. Whether or not you are going to add music to a video, depends on the type of project you’re working on. Video editing software products like Filmora have their own royalty free music libraries that offer songs from Rock or Electronic and numerous other genres.
When you complete the video editing process, you should export the video to a folder on your hard drive or directly to your YouTube channel if the video editing app you’ve chosen provides that option. How long the rendering of a video is going to take depends on your computer’s processing power, video’s length, and the output resolution.
Adding/Uploading Videos to Your YouTube Channel
As we already noted you can either upload a video to YouTube directly from a video editing software or from a hard drive after the rendering process is completed. You can upload videos with 16:9 or 4:3 aspect ratios to your channel, and the platform support videos in resolutions up to 8K. The minimum length of a YouTube video is 33 seconds while a video’s maximum length cannot exceed the twelve-hour limit. The file’s size can’t be larger than 128GB while the frame rates can go as high as 60fps. If you need to edit the uploaded and published YouTube videos, you can check our tips about editing existing YouTube videos , and you can check out our guide about how to make money on YouTube if you would like to learn more about account monetization.
Read More to Get : How to Loop a YouTube Video >>
1. Optimize Your Content for YouTube Searches
Every bit of information you add to the video increases its visibility on the platform. Even the name of the file you’re uploading to your channel should contain a keyword, and once the upload is completed you should add a title, description, and metadata if you would like to increase the video’s visibility on the platform. It is vital to select your YouTube SEO strategy before you actually start adding new videos to your strategy. In case you’re not familiar with the concept of search engine optimization for YouTube, you can find everything you need to know aboutYouTube SEO in our guide.
2. Create Visually Captivating Thumbnails and End Screen Elements
A thumbnail is usually a snapshot of a frame from a video, you’ve created during the video editing process or any other still image that suggests what the video is about. A small thing like adding a thumbnail to a YouTube video can increase both the number of views and the number of likes that video is getting. In addition, YouTube’s video editor enables you to add end screens that last anywhere between five and twenty seconds to your videos, but keep in mind that the video must be at least 25 seconds long to have an end screen. There are a number of fully customizable templates available that can be uses to promote your upcoming videos or to invite viewers to subscribe to your channel.
Wanna making YouTube thumbnail yourself? Check some of the best YouTube thumbnail makers list.
3. Publish, Interact and Share
YouTube lets you keep your videos private until you are ready to make them public. Once you decide to make a video available to all YouTube users, you should share it on social media like Twitter, Facebook or Tumblr. Furthermore, embedding a YouTube video on your blog or website can drastically increase the number of views it’s getting. The YouTube Analytics tool is designed to help you track the metrics that indicate how well your video is performing. Don’t know which analytics tools should use? Check our picks of some useful YouTube Analytics Tools to learn how to analyze your video.
How to Make YouTube Videos from a Mac or PC Computer?
Even though you can use almost any video editing software to edit a YouTube video, we recommend trying a versatile video editing app like Filmora to edit videos on Windows PC and Mac which offers both basic and advanced video editing features. Creating a video in Filmora doesn’t require a developed set of video editing skills, since all of the tools and options the editor offers are remarkably easy to use.
When you are ready to start a new project you should simply launch the software, and once the new project loads, you should head over to the File menu and select the Project Settings option that lets you set the resolution, aspect ratio and the frame rate of the video. Proceed to import the footage into the project by selecting one of the available options in the Import drop-down menu or by simply dragging the media assets from a folder on your hard drive and dropping them to the Filmora’s Media Panel. In case you don’t have your own audio and video footage you can download videos, music, visual and audio effects from a stock footage website like Filmstock effects store . Filmora also offers screen casting features, so you can easily record gameplay, show viewers how to use a software or capture any other type of activity on your computer’s screen.
Add each media asset you want to include in the final cut of the video to the timeline and then proceed to remove all unwanted parts of the video and audio clips from the timeline using the Cut or Trim options. Filmora offers rich transitions and visual effects libraries you can use to make the cuts between shot smoother or enhance the colors in the video clips you’re editing. Furthermore, the editor lets you take snapshots of any frame in video clips you’ve placed on the timeline in a single click which can be quite useful if you want to create a thumbnail for your YouTube video. Creating the opening titles, end credits or adding different image overlays to a video is a straight forward process since you just have to select the option that fits the style of the video you’re creating and add it to the timeline. Once you’ve completed the video editing process, you can click on the Export button and decide if you want to export a video directly to your YouTube channel or to a destination on your hard drive.
New to Filmora? Check our beginner guide about How to Edit Videos in Filmora in details or check the quick video tutorial below to find out more details.
Conclusion
Becoming a successful YouTuber requires a lot of dedication and hard work, so if at first, you don’t succeed, you should be patient and persistent. In time, as your channel grows, you will be able to monetize your videos, but only if you keep producing new content at a steady pace. Each step of the YouTube creation process is equally important, and you should dedicate an equal amount of attention to recording high-quality footage, editing, and promotion of the content you share on your YouTube channel. Was this article helpful? Leave a comment below and share your thoughts and experiences with us.
Richard Bennett
Richard Bennett is a writer and a lover of all things video.
Follow @Richard Bennett
Also read:
- Buy Subscribers Wisely, Watch Your Numbers Soar for 2024
- Building Direct URLs for YouTube Channel Subscribers
- [New] Creating Engaging Stream Content Shorts
- In 2024, Can You Respect Intellectual Property While ScreenRecording YouTube?
- In 2024, Digital Deck of Cards YouTube's Milestone Challenges
- [Updated] Effortless Repetition Replay Your YouTube Videos via TV Connection
- Delve Into YouTube Metrics Using the Power of Social Blade for 2024
- Crafting the Perfect Harmony Fusing Lyrics & Images with Lyric Video Maker for 2024
- How to Proficiently Upload Impressive, Elongated YouTube Content
- Affordable & Accessible The Definitive Guide to 9 Budget-Friendly Editors for 2024
- [Updated] Essential Guide to Aspect Ratios for Effective YouTube Engagement
- Building Your Way to Greatness A Complete Guide to Valorant Video Thumbnails for 2024
- The Instructor's Roadmap to YouTube Success – 10 Crucial Steps
- Elevate Your Channel Vision Selecting Ideal Content Strategies
- Engage Viewers Beyond Individual Watches
- [Updated] Discover the Top 9 Free Online Tools to Craft Your Logo
- What Everyone Should Learn About Subscribing to YouTube TV
- Premier Online Entrepreneurs
- Decoding Best Practices Navigating Through Top 9 Free Logo Creators
- 2024 Approved Amplify Your Content Two Approaches to Skyrocket Traffic
- [Updated] Elite Visionaries Video Realm
- 2024 Approved Crafting the Perfect YouTube Channel Url A Quick Guide
- 2024 Approved Dynamic Topic Suggestions for Streamers
- Noise Reduction Mastery Tips and Tricks for Final Cut Pro X Users for 2024
- Updated Reviewing Efectum App For Smartphone Users Create Slow Motion Videos for 2024
- [New] FB Vids Effortless MP4 Extraction at Your Fingertips for 2024
- [Updated] Offline Masterpieces Top 10 iOS Game Selections Without Internet
- Manage Microphone Background Noises To Perfection With The Best Tools
- [Updated] The Platform Face-Off Going Live with OBS/Twitch
- [Updated] 2024 Approved Transforming Social Media Nostalgia How to Edit Lookback
- Camera Cutting-Edge An In-Depth Look at ION Air Pro 3
- 3 Solutions to Hard Reset Nokia C110 Phone Using PC | Dr.fone
- [New] Navigating the Best Ways to Record Screens on HP Systems
- [Updated] In 2024, Exclusive List Top Sandbox Experiences
- Title: "2024 Approved Disseminating Data-Driven Insights You Vs. Others on Video Markets"
- Author: Kevin
- Created at : 2024-06-10 00:24:42
- Updated at : 2024-06-11 00:24:42
- Link: https://youtube-videos.techidaily.com/2024-approved-disseminating-data-driven-insights-you-vs-others-on-video-markets/
- License: This work is licensed under CC BY-NC-SA 4.0.
