
:max_bytes(150000):strip_icc()/kids-and-ipads-177219460-resized-56a532c45f9b58b7d0db7169.jpg)
"2024 Approved Crafting Competitive Edge Assessing Personal and Marketplace Videos"
Crafting Competitive Edge: Assessing Personal and Marketplace Videos
YouTube Analytics – How to analyze your and Competitor’s YouTube Video

Richard Bennett
Mar 27, 2024• Proven solutions
Tracking your brand’s YouTube metrics is not enough to ensure success in YouTube. Unless you garner deep insights of your competitors. You must be thinking how can you gauge their company insights using YouTube and track the data movement as well. There is nothing to worry about, we have got you covered. We will show you how to analyze your own channel as well as that of your competitors’ YouTube analytics. Let’s now explore about it!
How to analyze your own YouTube channel/video?
It is important to have reliable YouTube analytics tools for your brand, as videos on YouTube are searchable through Google. They contribute to generate organic traffic for you using both Google and YouTube as a medium. YouTube has a default dedicated analytics mechanism to measure how the video fares in YouTube to gain the most out of it.
Here we have collated the broadly used YouTube insights to ensure that your highly equipped, SEO compatible video engages more audience and performs well. The matrix sums up the most essential parts of YouTube analytics. Let’s go through them.
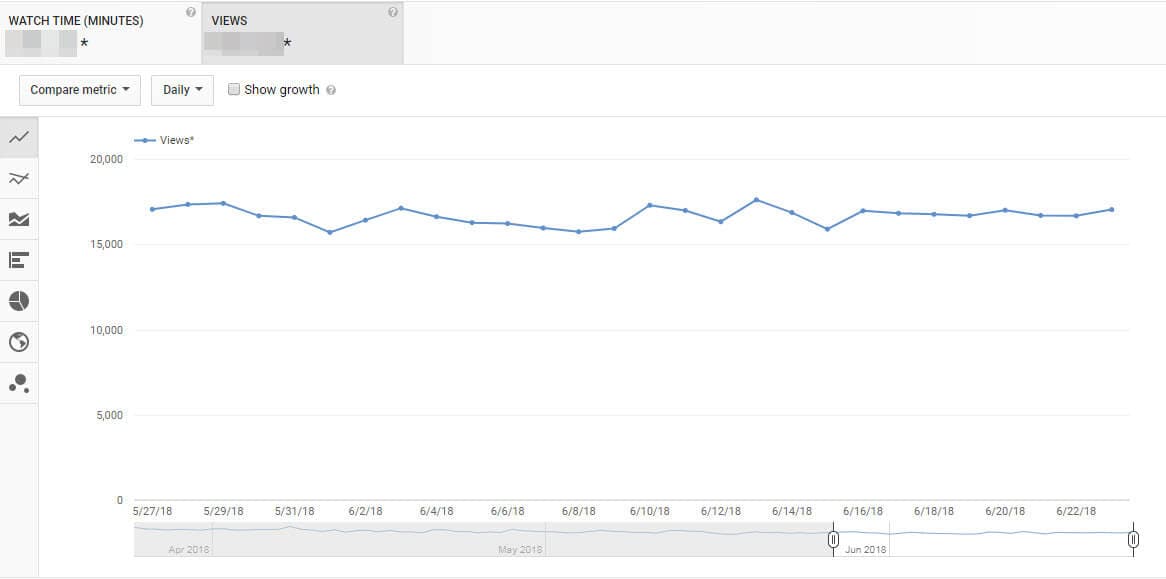
1. Views
Though, views determine the number of people clicked on a certain video on YouTube, it’s impossible to figure out whether the video has been watched till the end or not. Moreover, they can be altered through clickbait tricks and hence YouTube doesn’t solely put much value on them.
Views along with watch time turn out to be the best bet. Watch time sums up the total amount of time spent (in terms of minutes) on your brand’ videos. With the updated dashboard it becomes easy to get the YouTube analytics and gauge the video’s performance. Using the average view duration, you can know whether your video is being watched till the end or not.
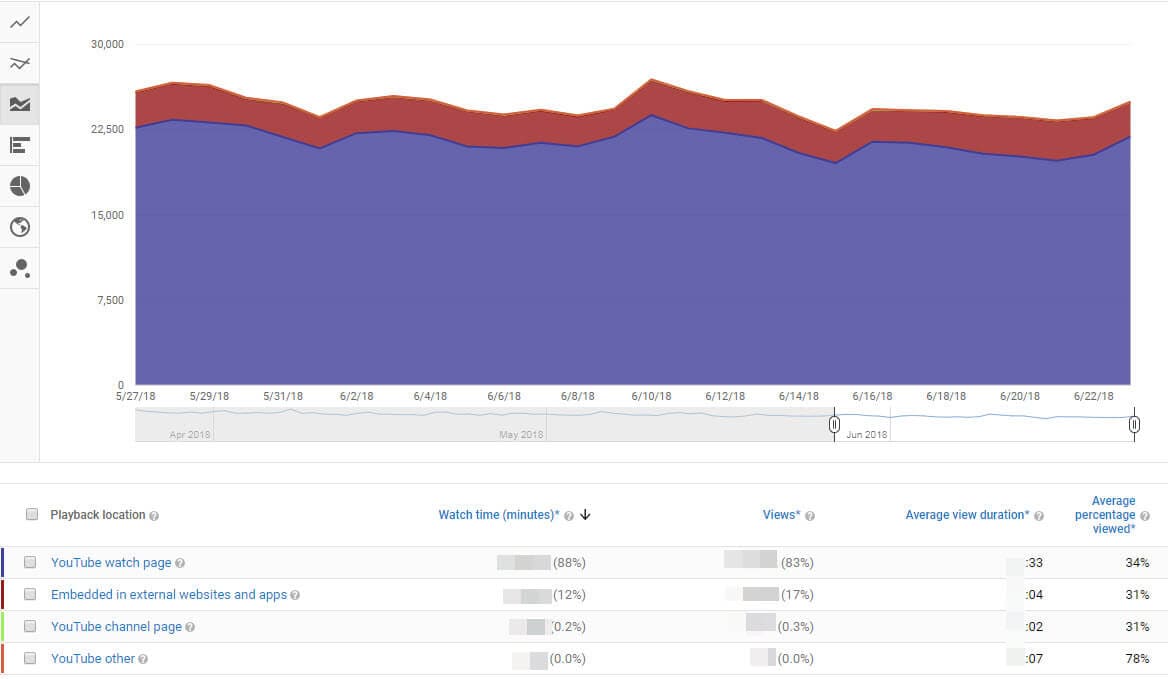
2. Playback Location
As ‘Playback locations’ of YouTube videos can reveal where does all the traffic come from, it would help your channel figure out for which location the video has fared well. It will guide you to reach the backlinks locations/sites. Knowing the popular locations for your YouTube video being played, you can know whether YouTube is the search engine or they have been diverted from somewhere else. Depending on the video playing locations, the views will be segregated in to embedded video, YouTube watch page, mobile devices, and YouTube channel page. Understanding location specific views would help you decide where should you focus to enhance the performance of your video.
3. Demographics
The demographics page helps you get YouTube insights, using them you can know the audience in a gender and location specific manner. For local businesses targeting a certain region, YouTube analytics would prove to be a boon. You can also know the geography and device used by the viewers with this feature. Understanding the gender and location of people will help you create dedicated product videos that would be helpful to them.

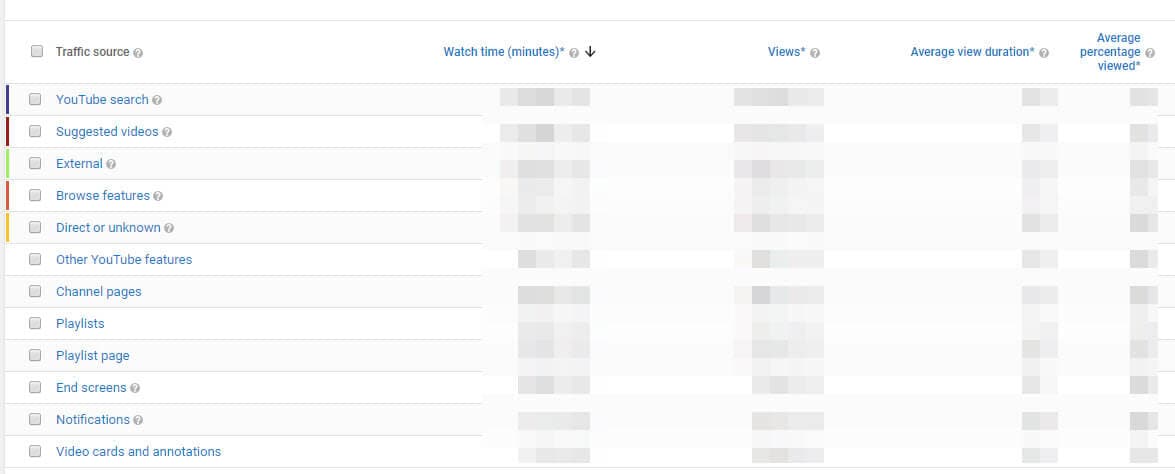
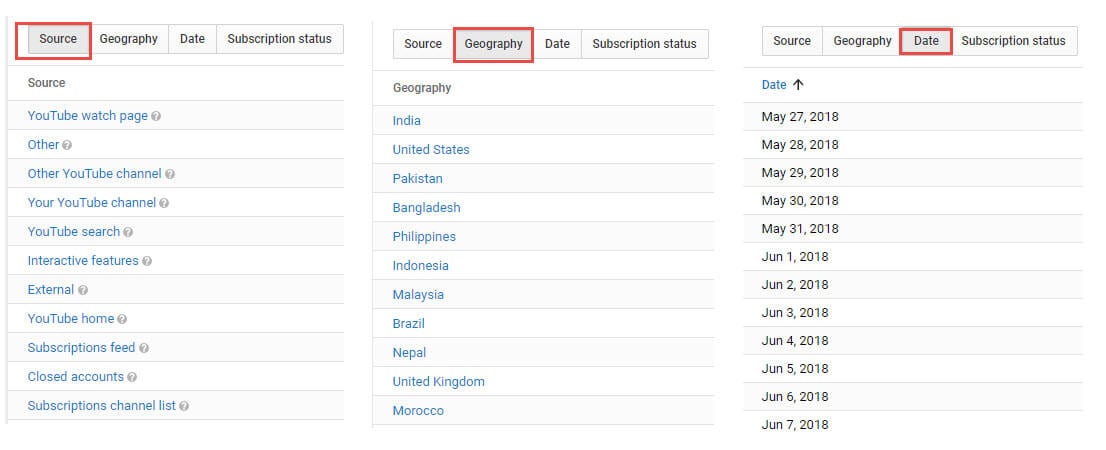
4. Traffic sources
Understanding the source of your YouTube video’s traffic would help you track the prominent keywords that viewers use for landing at your YouTube video. You can figure out their choice and their search patterns this way. The YouTube insights will show you whether the viewers found your video by searching YouTube, a channel on YouTube, through suggested videos, or an external link. The YouTube Analytics tool’s panel would assist you in finalizing the most beneficial traffic source for your brand. You can optimize your video and keyword strategy with this.
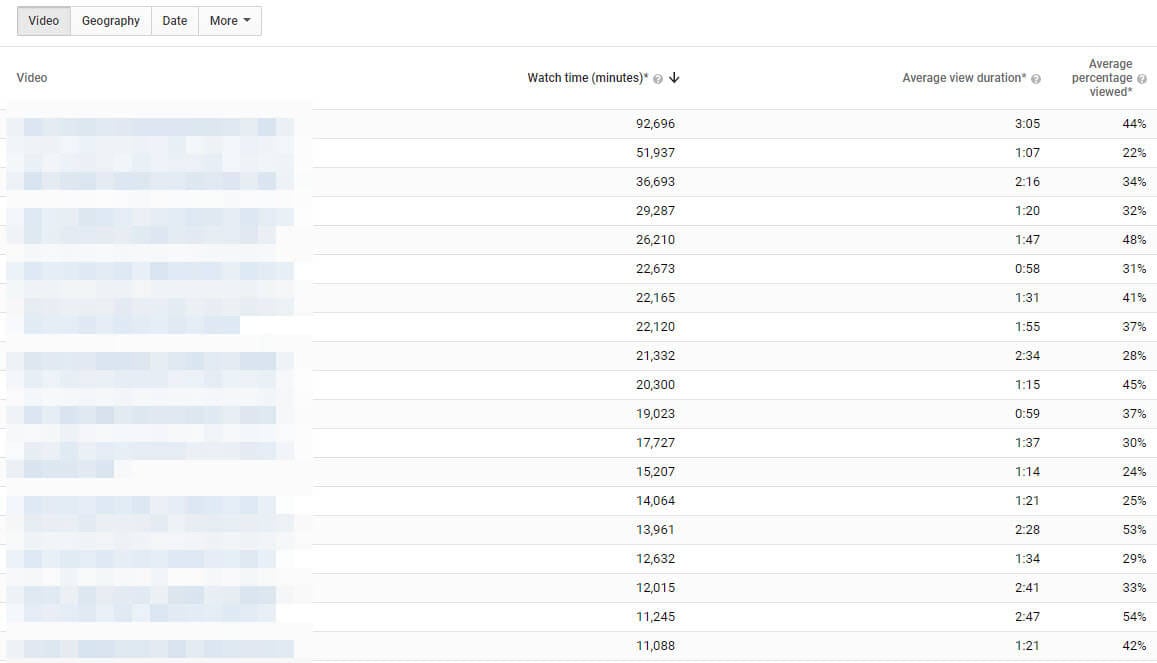
5. Audience Retention
This data explains how far your video has engaged your audience. Along with views, the duration that a viewer is on your video weighs too. From the audience retention page, you can find out the specific time that a viewer has exited your video and see what made them do so. There are 2 types of audience retention features – absolute audience retention and relative audience retention.
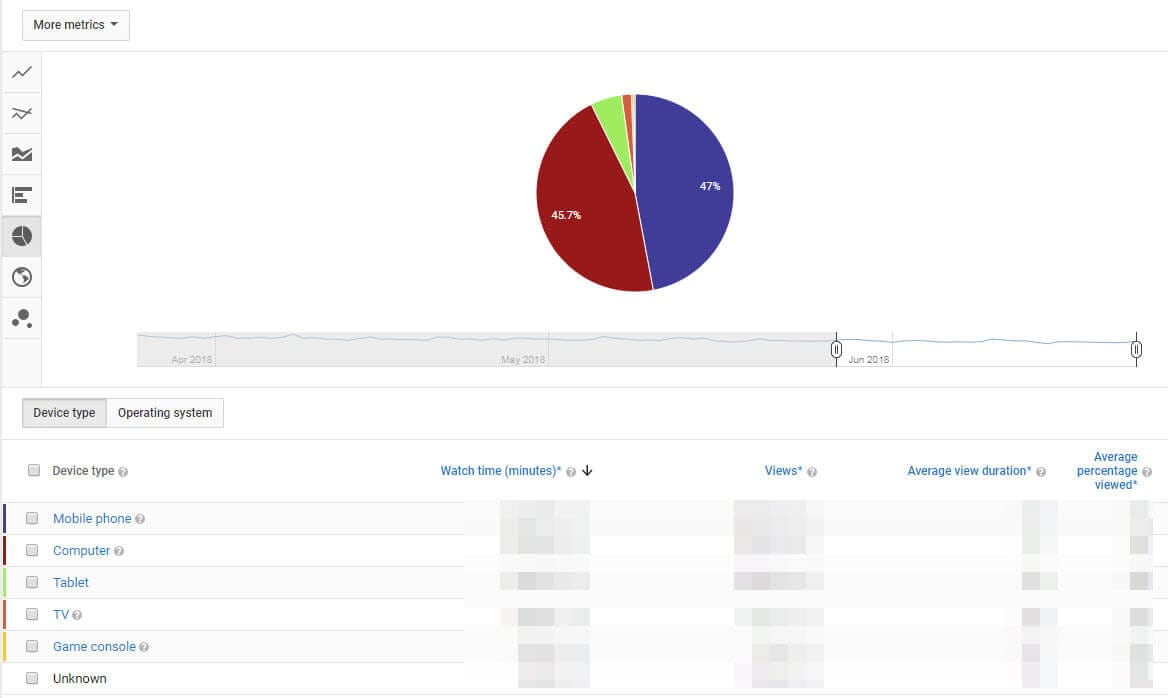
6. Devices
It is important to know which device is being used to watch the video. The metrics is distributed among mobile phones, computer, TV, tablet etc. you will be able to understand whether your video needs to be optimized for a certain video or not.
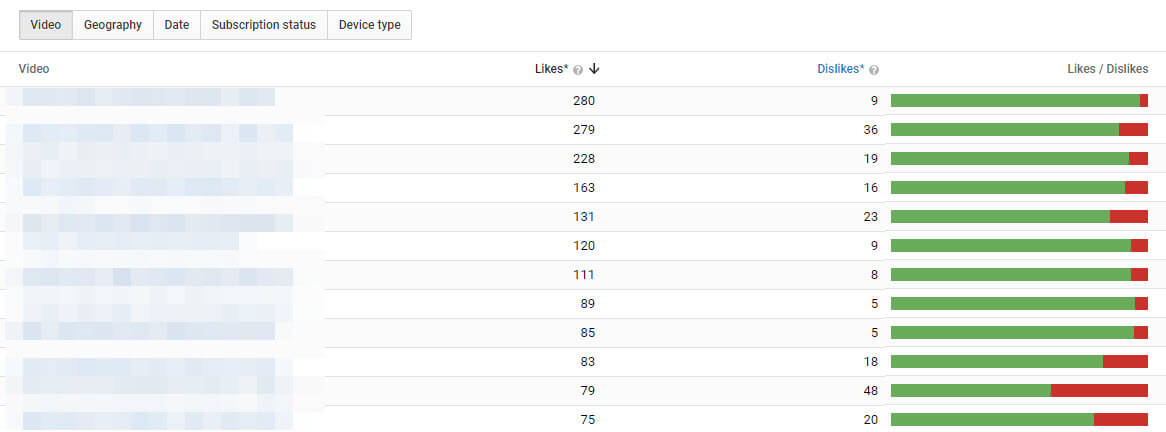
7. Likes and dislikes
YouTube insights gauge the audience acceptance for your video by the number of likes and dislikes. Videos with a huge number of like implies that it is loved by people, though, the quality of video can’t exactly be defined by the number of likes or dislikes. Even the best quality video created for asking opinions about a certain situation/issue might be good enough but still get dislikes.
8. Subscribers
YouTube analytics help you determine the engagement metrics to explain the origin of your subscribers. It includes both their geo-location, the date of subscription, and the source/medium they used to land with your video on YouTube. You can observe the number of people subscribing and unsubscribing from your YouTube channel.
The subscription stream enables your audience to get suggestions for new videos from your channel and offer better exposure to the service and products you offer.
You May Also Like : How to Get More Subscribers
9. Annotations
While considering YouTube Analytics, it is essential to understand that there are annotations to guide viewers to your business site for more content. It is not necessary that the content is video only, it might include a blog post as well. This will let you understand the click through rate and ‘close’ rates for every annotation. This in turn will assist you in optimizing how to reach your audience and where to place the annotations.

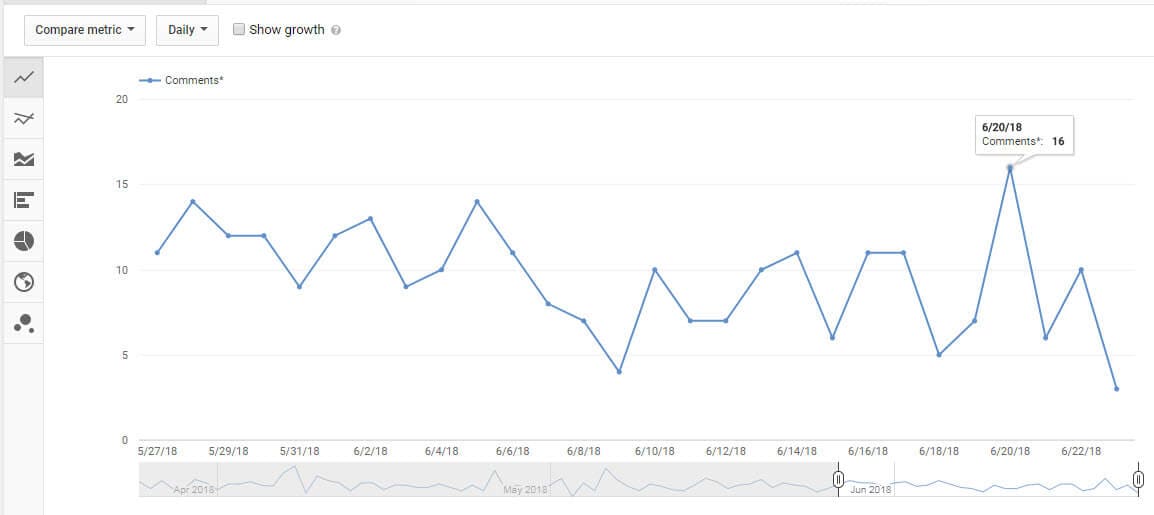
10. Comments
Audience engagement on any YouTube video can easily be gauged by using the vital aspect known as comments. Either it touched a chord in their heart, inspired or motivated them, or simply made them smile, the comments will say it all. Sometimes the audience simply taps ‘Like’ in place of commenting at their convenient.
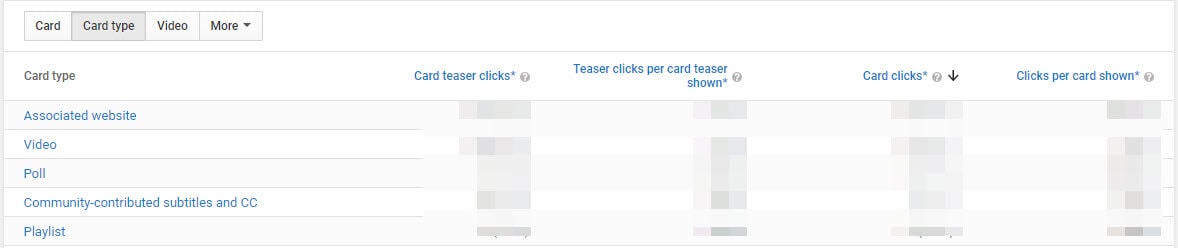
11. Cards
Cards is a new feature in YouTube analytics and aimed at replacing annotations. This will improve user interactivity of any video and accelerate the engagement. They will act as call to action for informing visitors regarding playlists, videos, merchandising, fan funding, and associated website etc.
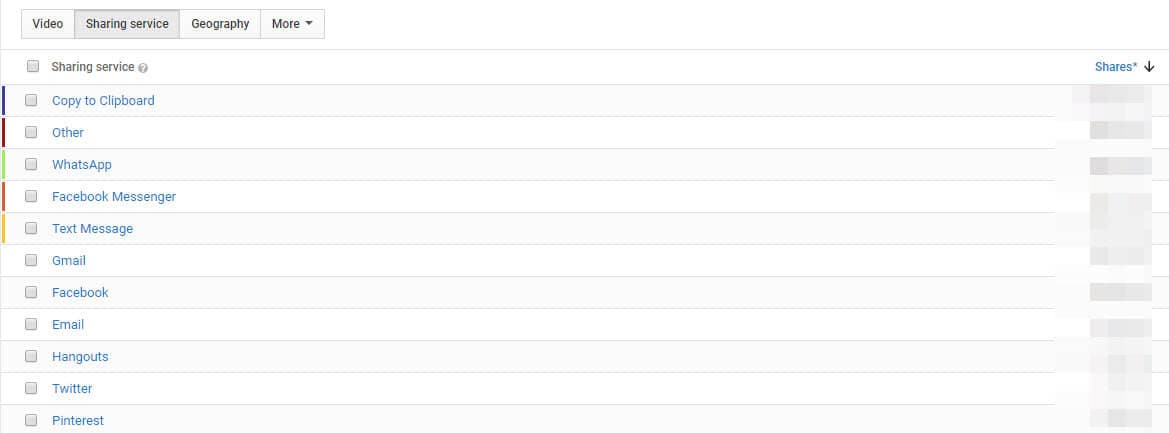
12. Sharing
This aspect sums up the amount of shares of the YouTube video across different social networks along with the share date. Google ranking is influenced with the share numbers, as higher the number more the chances of unique backlinks for your videos.
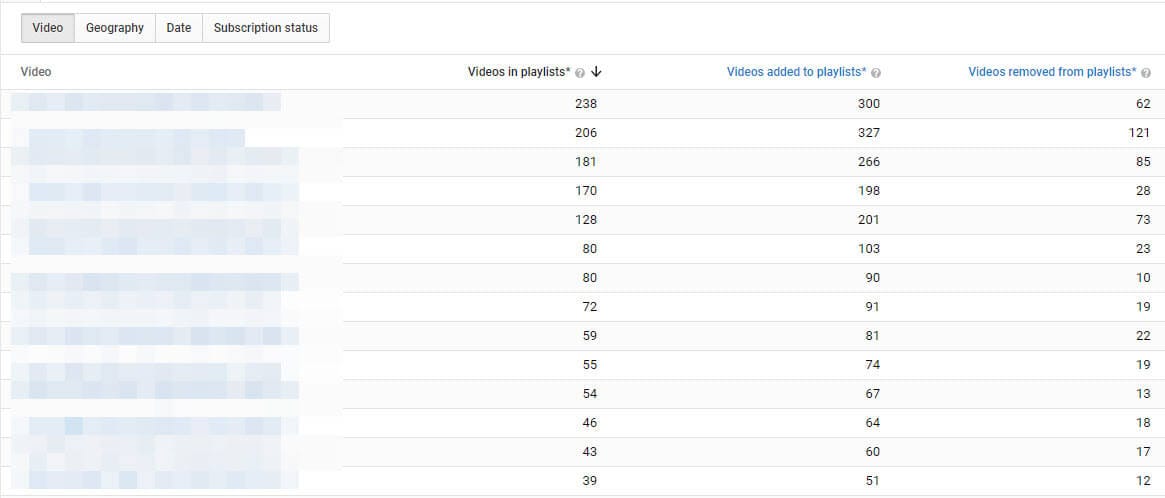
13. Videos in playlists
Favorites has been renamed to ‘Videos in playlists’. Your reach broadens as people keep marking your videos as favorites on their playlist. This is visible to the public on the YouTube channel itself.
How to analyze your competitors
Although, you can’t see the dashboard data of your competitor, there are still some ways to observe and study your competitors’ successful videos and from their views, favorites, ratings, and comments find out the driving force behind it.
For example, reading the comments and see what they are saying. Notice both the positive and negative ones so that you can incorporate the ideas in your videos. You can also make a better video by understanding what a specific demographic region is fond of watching in the said niche.
Or you can use those analyzing tools below to discover the more stats of your competitors.
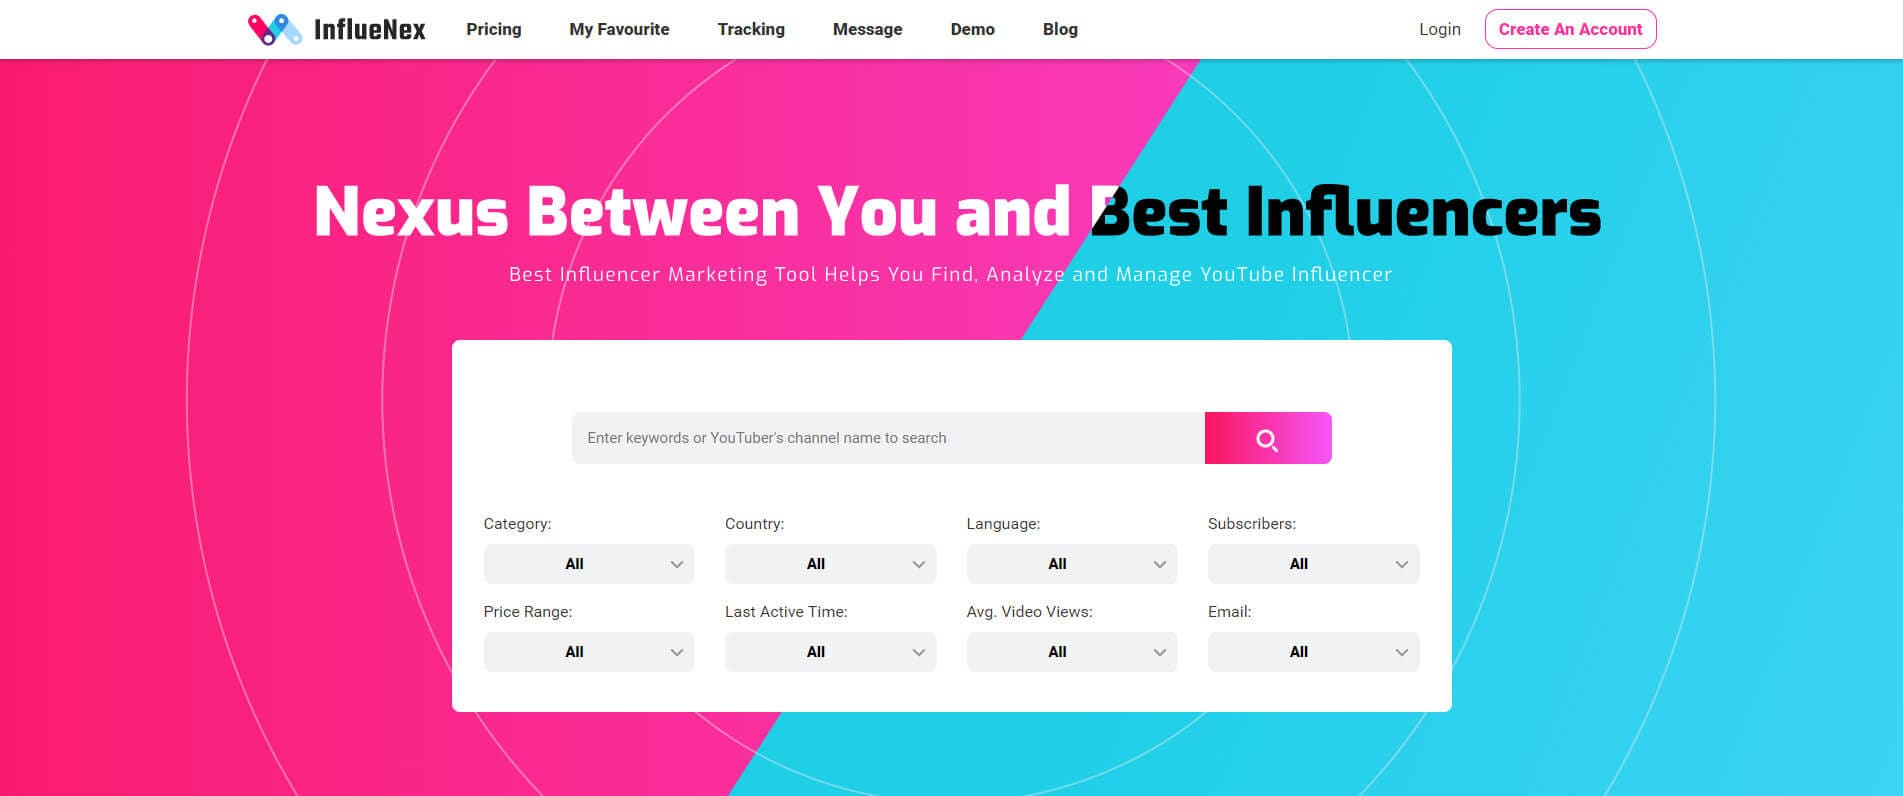
1. InflueNex
InflueNex is a helpful influencer marketing tool for Analyzing, searching, and managing YouTubers. With the help of this YouTube analytics tool, you’re able to learn your competitors’ channels and videos with detailed information.
2. Rival IQ
This YouTube analytics tool helps you increase social media engagement, conduct competitive analysis to track competition, discovers new content ideas for your target audience. You can use it to leverage your foothold in YouTube.
3. SocialBlade
SocialBlade helps you gain YouTube insights and enables you to understand how your rival brands fare. You can learn from them and enhance your own strategy to beat them.
Read More to Get: 5 Methods to Go Frame by Frame on YouTube Video >>
Richard Bennett
Richard Bennett is a writer and a lover of all things video.
Follow @Richard Bennett
Richard Bennett
Mar 27, 2024• Proven solutions
Tracking your brand’s YouTube metrics is not enough to ensure success in YouTube. Unless you garner deep insights of your competitors. You must be thinking how can you gauge their company insights using YouTube and track the data movement as well. There is nothing to worry about, we have got you covered. We will show you how to analyze your own channel as well as that of your competitors’ YouTube analytics. Let’s now explore about it!
How to analyze your own YouTube channel/video?
It is important to have reliable YouTube analytics tools for your brand, as videos on YouTube are searchable through Google. They contribute to generate organic traffic for you using both Google and YouTube as a medium. YouTube has a default dedicated analytics mechanism to measure how the video fares in YouTube to gain the most out of it.
Here we have collated the broadly used YouTube insights to ensure that your highly equipped, SEO compatible video engages more audience and performs well. The matrix sums up the most essential parts of YouTube analytics. Let’s go through them.
1. Views
Though, views determine the number of people clicked on a certain video on YouTube, it’s impossible to figure out whether the video has been watched till the end or not. Moreover, they can be altered through clickbait tricks and hence YouTube doesn’t solely put much value on them.
Views along with watch time turn out to be the best bet. Watch time sums up the total amount of time spent (in terms of minutes) on your brand’ videos. With the updated dashboard it becomes easy to get the YouTube analytics and gauge the video’s performance. Using the average view duration, you can know whether your video is being watched till the end or not.
2. Playback Location
As ‘Playback locations’ of YouTube videos can reveal where does all the traffic come from, it would help your channel figure out for which location the video has fared well. It will guide you to reach the backlinks locations/sites. Knowing the popular locations for your YouTube video being played, you can know whether YouTube is the search engine or they have been diverted from somewhere else. Depending on the video playing locations, the views will be segregated in to embedded video, YouTube watch page, mobile devices, and YouTube channel page. Understanding location specific views would help you decide where should you focus to enhance the performance of your video.
3. Demographics
The demographics page helps you get YouTube insights, using them you can know the audience in a gender and location specific manner. For local businesses targeting a certain region, YouTube analytics would prove to be a boon. You can also know the geography and device used by the viewers with this feature. Understanding the gender and location of people will help you create dedicated product videos that would be helpful to them.
4. Traffic sources
Understanding the source of your YouTube video’s traffic would help you track the prominent keywords that viewers use for landing at your YouTube video. You can figure out their choice and their search patterns this way. The YouTube insights will show you whether the viewers found your video by searching YouTube, a channel on YouTube, through suggested videos, or an external link. The YouTube Analytics tool’s panel would assist you in finalizing the most beneficial traffic source for your brand. You can optimize your video and keyword strategy with this.
5. Audience Retention
This data explains how far your video has engaged your audience. Along with views, the duration that a viewer is on your video weighs too. From the audience retention page, you can find out the specific time that a viewer has exited your video and see what made them do so. There are 2 types of audience retention features – absolute audience retention and relative audience retention.
6. Devices
It is important to know which device is being used to watch the video. The metrics is distributed among mobile phones, computer, TV, tablet etc. you will be able to understand whether your video needs to be optimized for a certain video or not.
7. Likes and dislikes
YouTube insights gauge the audience acceptance for your video by the number of likes and dislikes. Videos with a huge number of like implies that it is loved by people, though, the quality of video can’t exactly be defined by the number of likes or dislikes. Even the best quality video created for asking opinions about a certain situation/issue might be good enough but still get dislikes.
8. Subscribers
YouTube analytics help you determine the engagement metrics to explain the origin of your subscribers. It includes both their geo-location, the date of subscription, and the source/medium they used to land with your video on YouTube. You can observe the number of people subscribing and unsubscribing from your YouTube channel.
The subscription stream enables your audience to get suggestions for new videos from your channel and offer better exposure to the service and products you offer.
You May Also Like : How to Get More Subscribers
9. Annotations
While considering YouTube Analytics, it is essential to understand that there are annotations to guide viewers to your business site for more content. It is not necessary that the content is video only, it might include a blog post as well. This will let you understand the click through rate and ‘close’ rates for every annotation. This in turn will assist you in optimizing how to reach your audience and where to place the annotations.
10. Comments
Audience engagement on any YouTube video can easily be gauged by using the vital aspect known as comments. Either it touched a chord in their heart, inspired or motivated them, or simply made them smile, the comments will say it all. Sometimes the audience simply taps ‘Like’ in place of commenting at their convenient.
11. Cards
Cards is a new feature in YouTube analytics and aimed at replacing annotations. This will improve user interactivity of any video and accelerate the engagement. They will act as call to action for informing visitors regarding playlists, videos, merchandising, fan funding, and associated website etc.
12. Sharing
This aspect sums up the amount of shares of the YouTube video across different social networks along with the share date. Google ranking is influenced with the share numbers, as higher the number more the chances of unique backlinks for your videos.
13. Videos in playlists
Favorites has been renamed to ‘Videos in playlists’. Your reach broadens as people keep marking your videos as favorites on their playlist. This is visible to the public on the YouTube channel itself.
How to analyze your competitors
Although, you can’t see the dashboard data of your competitor, there are still some ways to observe and study your competitors’ successful videos and from their views, favorites, ratings, and comments find out the driving force behind it.
For example, reading the comments and see what they are saying. Notice both the positive and negative ones so that you can incorporate the ideas in your videos. You can also make a better video by understanding what a specific demographic region is fond of watching in the said niche.
Or you can use those analyzing tools below to discover the more stats of your competitors.
1. InflueNex
InflueNex is a helpful influencer marketing tool for Analyzing, searching, and managing YouTubers. With the help of this YouTube analytics tool, you’re able to learn your competitors’ channels and videos with detailed information.
2. Rival IQ
This YouTube analytics tool helps you increase social media engagement, conduct competitive analysis to track competition, discovers new content ideas for your target audience. You can use it to leverage your foothold in YouTube.
3. SocialBlade
SocialBlade helps you gain YouTube insights and enables you to understand how your rival brands fare. You can learn from them and enhance your own strategy to beat them.
Read More to Get: 5 Methods to Go Frame by Frame on YouTube Video >>
Richard Bennett
Richard Bennett is a writer and a lover of all things video.
Follow @Richard Bennett
Crystal Clear Capture: Amping Up Your Home Studio Recordings
10 Recording Tips for Recording Audio with High Quality
Richard Bennett
Oct 26, 2023• Proven solutions
Getting the best sound for your recording is not as simplistic as buying an expensive microphone. There are many different things you can do to record your audio more clearly. Here are 10 recording tips to record high-quality audio.
1. Silence everything you don’t want your microphone to record
2. Put your mobile phone in airplane mode
3. Minimize echo
4. Block wind from reaching your microphone
5. Upgrade your microphone
6. Adjust your levels
7. Start with a sound cue if you’re planning to do some syncing in post
8. Get close to the sound
9. ADR
10. Record Ambient Sound
Bonus Tip-Record Your Audio with Wondershare Filmora
Wondershare Filmora has great recording features that enable you to record screen , voiceover, and webcam. Just connect the recording device to your computer, and start the recording in Wondershare Filmora and you will get high-quality audio. And you can also easily pick a song from the royalty-free music library on Wondershare Filmora. These audio features on Filmora are rare and very simple to use, you only need to click a few times and your video will have a new sound and background song.


1. Silence everything you don’t want your microphone to record
When you’re recording audio, you have to be more aware of the subtle sounds that drone on in your background. These sounds may include humming from machines with fans, buzzing from lights, and jingling from your pet’s collar. Observe your recording space and find ways to silence everything that you don’t want in your audio recording.
2. Put your mobile phone in airplane mode
Although it may be quite obvious to turn your phone’s ring tone off when you’re recording, it may not be as obvious to put your phone in airplane mode. When phones receive calls or perform searches as part of their background processes, they emit signals that can get picked up by your recording system. Avoid ruining good takes with unwanted sounds of phone signals by putting your phones in airplane mode.
3. Minimize echo
If you are recording yourself talk or sing, make sure to set up your recording space in a way where the sound projected from your voice bounces minimally off the walls and back to your microphone. Bare walls and hardwood floors will cause a lot of bouncing. Make use of materials that will absorb your sound rather than bounce it, like a thick rug or a comforter. If you want your voice to echo, that’s something you should do in post-production.
4. Block wind from reaching your microphone
Although it might not sound so loud and distracting to the naked ear, wind sounds terribly loud through a microphone recording and can cause your audio to clip (distortion of waveform due to output of sound exceeding maximum capacity or 0 dB point). This includes the “wind” that comes out of your mouth when you pronounce words starting with the letter “p.” Use pop filters, windscreens, and deadcats to block wind from reaching your microphone.
5. Upgrade your microphone
As much as you try to control all the noise in your surroundings, your greatest recording limitation will come from the hardware that you use. Improve your recordings by plugging in an external microphone into your camera’s microphone jack or record audio completely separately with a professional microphone.
Need help with deciding on a microphone to buy? Check out our recommended list of microphones.
6. Adjust your levels
Before pressing the record button, see how loudly your microphone picks up the sound you wish to record. Adjust your levels (sensitivity of your microphone) until the sound sits in between -6 dBs and -12dBs. This range gives the source of your sound some room to get louder without the recorded audio getting clipped. When you first listen to audio recorded within this range, it may sound very quiet. No need to worry though because you can increase the volume later in editing.
7. Start with a sound cue if you’re planning to do some syncing in post
If you’re recording separate audio that you plan to sync to your video later in editing, start your recording with a short and loud sound cue like a clap or a high pitched “beep” tone. Later, when you’re editing, it’ll be much easier for you to find the section where your video and additional audio match.
8. Get close to the sound
Unless you’re aiming to record ambient sound, bring your microphone close to the source of sound you are wanting to record. The closer your microphone is to the source of sound, the lower your sensitivity setting can be on your microphone. As a result of lowering your levels, sounds you are not meaning to record will also sound fainter.
9. ADR
When you need to record a scene in a loud setting where you have very little control over the noise, record additional vocals later and replace the original vocals through a process called automated dialogue replacement.
10. Record Ambient Sound
Remember to record ambient sound or “room tone.” You can use these recordings to fill in the blanks if you run out of audio and also smooth out parts of your audio where you hear pops, clicks, and other unwanted noise.
Richard Bennett
Richard Bennett is a writer and a lover of all things video.
Follow @Richard Bennett
Richard Bennett
Oct 26, 2023• Proven solutions
Getting the best sound for your recording is not as simplistic as buying an expensive microphone. There are many different things you can do to record your audio more clearly. Here are 10 recording tips to record high-quality audio.
1. Silence everything you don’t want your microphone to record
2. Put your mobile phone in airplane mode
3. Minimize echo
4. Block wind from reaching your microphone
5. Upgrade your microphone
6. Adjust your levels
7. Start with a sound cue if you’re planning to do some syncing in post
8. Get close to the sound
9. ADR
10. Record Ambient Sound
Bonus Tip-Record Your Audio with Wondershare Filmora
Wondershare Filmora has great recording features that enable you to record screen , voiceover, and webcam. Just connect the recording device to your computer, and start the recording in Wondershare Filmora and you will get high-quality audio. And you can also easily pick a song from the royalty-free music library on Wondershare Filmora. These audio features on Filmora are rare and very simple to use, you only need to click a few times and your video will have a new sound and background song.
1. Silence everything you don’t want your microphone to record
When you’re recording audio, you have to be more aware of the subtle sounds that drone on in your background. These sounds may include humming from machines with fans, buzzing from lights, and jingling from your pet’s collar. Observe your recording space and find ways to silence everything that you don’t want in your audio recording.
2. Put your mobile phone in airplane mode
Although it may be quite obvious to turn your phone’s ring tone off when you’re recording, it may not be as obvious to put your phone in airplane mode. When phones receive calls or perform searches as part of their background processes, they emit signals that can get picked up by your recording system. Avoid ruining good takes with unwanted sounds of phone signals by putting your phones in airplane mode.
3. Minimize echo
If you are recording yourself talk or sing, make sure to set up your recording space in a way where the sound projected from your voice bounces minimally off the walls and back to your microphone. Bare walls and hardwood floors will cause a lot of bouncing. Make use of materials that will absorb your sound rather than bounce it, like a thick rug or a comforter. If you want your voice to echo, that’s something you should do in post-production.
4. Block wind from reaching your microphone
Although it might not sound so loud and distracting to the naked ear, wind sounds terribly loud through a microphone recording and can cause your audio to clip (distortion of waveform due to output of sound exceeding maximum capacity or 0 dB point). This includes the “wind” that comes out of your mouth when you pronounce words starting with the letter “p.” Use pop filters, windscreens, and deadcats to block wind from reaching your microphone.
5. Upgrade your microphone
As much as you try to control all the noise in your surroundings, your greatest recording limitation will come from the hardware that you use. Improve your recordings by plugging in an external microphone into your camera’s microphone jack or record audio completely separately with a professional microphone.
Need help with deciding on a microphone to buy? Check out our recommended list of microphones.
6. Adjust your levels
Before pressing the record button, see how loudly your microphone picks up the sound you wish to record. Adjust your levels (sensitivity of your microphone) until the sound sits in between -6 dBs and -12dBs. This range gives the source of your sound some room to get louder without the recorded audio getting clipped. When you first listen to audio recorded within this range, it may sound very quiet. No need to worry though because you can increase the volume later in editing.
7. Start with a sound cue if you’re planning to do some syncing in post
If you’re recording separate audio that you plan to sync to your video later in editing, start your recording with a short and loud sound cue like a clap or a high pitched “beep” tone. Later, when you’re editing, it’ll be much easier for you to find the section where your video and additional audio match.
8. Get close to the sound
Unless you’re aiming to record ambient sound, bring your microphone close to the source of sound you are wanting to record. The closer your microphone is to the source of sound, the lower your sensitivity setting can be on your microphone. As a result of lowering your levels, sounds you are not meaning to record will also sound fainter.
9. ADR
When you need to record a scene in a loud setting where you have very little control over the noise, record additional vocals later and replace the original vocals through a process called automated dialogue replacement.
10. Record Ambient Sound
Remember to record ambient sound or “room tone.” You can use these recordings to fill in the blanks if you run out of audio and also smooth out parts of your audio where you hear pops, clicks, and other unwanted noise.
Richard Bennett
Richard Bennett is a writer and a lover of all things video.
Follow @Richard Bennett
Also read:
- GraphicGenius Suite
- [Updated] Echoes of Entertainment Discovering 6 Free Android Apps for Your YouTube Playlists
- [New] Capturing the Best Visuals in Vlogs
- Secrets to Crafting Enthralling Edu-Videos for the Digital Age
- In 2024, Creative Commons Legalities Explained Simply
- [New] Dominating Search Results Essential YouTube SEO Tricks
- [Updated] Enhancing Engagement with Solutions to Common Shorts Challenges
- 2024 Approved How to Buy 1 Million YouTube Views Safely From Trusted Providers
- 10 Best Yoga YouTube Channels to Follow - Keep Fit
- Convert & Edit Wonders 10 Best YouTube Tools Feat. Audio for 2024
- In 2024, Downloading YouTube Playlists Made Simple & Easy
- [Updated] Essential Tips for Smooth YouTube Content Trimming
- In 2024, Best Live Stream Screen Recorders for YouTube
- 2024 Approved Dominate YouTube with These Strategic FreeFire Video Hashtags
- 2024 Approved Comprehensive YouTube Etiquette Guide
- [Updated] Creating on the Side Balancing Employment with YouTube
- Digital Phenoms Who Has the Most Followers for 2024
- In 2024, Broadcast Perfection Recommended Tech and Apps for YouTubers
- A Compre Written By Dr. John Smith, PhD in Environmental Science
- 10 Best Desktop & Online GIF Tools Ranked for 2024
- In 2024, Delving Into the World of ASMR Soundscapes
- [Updated] Erase Unwanted Boards From Old YouTube Videos for Clearer Viewing
- Enhance Visibility With Any Channel Title Through Free Makers for 2024
- [Updated] Enhancing Engagement Through YouTube Advertising
- Ascending with Expertise Mastering The Art & Science of ASMR Production
- Unlocking the Power of Targeted Keywords on YouTube
- 2024 Approved Beginner's Steps to Broadcast on Youtube via OBS
- Leading Free Platforms for YouTube Openings
- Harnessing Powerful Tools for Effective YouTubers' SEO
- 2024 Approved Earnings Expansion The Significance of 500 Subs Club
- In 2024, Best YouTube Video Ideas to Spark Inspiration [For YouTube Channels]
- 2024 Approved Curated List of Top 10 YouTube Video Cutting Apps
- [Updated] Audience Connection – Mastering the Art of Viewpoint-Based YouTube Reaction Vids (2 POV Method)
- Accessing Global Hitters The #1-#6 Short Video Downloaders
- [Updated] Earnings Enlightenment Joshi and YouTube Success Stories
- Crafting Dynamic Collab Videos with Content Partners on YouTube for 2024
- The Definitive Playbook Enhancing Your Video's First Impression
- Easy YouTube File Transfer Techniques
- Money Matters Choosing Best Stocks YTs Guide
- [New] Best Practices for Snapchat Posts The Essentials List
- New Voice Archiving with Vocaroo Protocols, Tips, and Comparable Services for 2024
- [New] The Ultimate Guide to Professional Screen Recording Methods
- Three Solutions to Hard Reset Oppo Find N3 Flip? | Dr.fone
- Updated In 2024, Best Live Streaming Platforms To Engage Audiences and Increase Viewership
- About Tecno Pop 7 Pro FRP Bypass
- [New] Integrating FB Live on Roku Step-by-Step Guide for 2024
- [Updated] In 2024, Investing in the Future Learning to Proficiently Record Skype Calls
- In 2024, 3 Ways for Android Pokemon Go Spoofing On Tecno Spark 20 | Dr.fone
- In 2024, Here Are Some Reliable Ways to Get Pokemon Go Friend Codes For Honor Magic 5 Lite | Dr.fone
- [New] Optimal List of 10 Excellent Spotify Audio Recorders
- [Updated] In 2024, Exploring the Purpose of Instagram Story Sections
- Free, Individualized Music for Engaging Video Conclusions
- Title: "2024 Approved Crafting Competitive Edge Assessing Personal and Marketplace Videos"
- Author: Kevin
- Created at : 2024-05-25 14:24:29
- Updated at : 2024-05-26 14:24:29
- Link: https://youtube-videos.techidaily.com/2024-approved-crafting-competitive-edge-assessing-personal-and-marketplace-videos/
- License: This work is licensed under CC BY-NC-SA 4.0.
