
"2024 Approved Content Delivery Comparison Vimeo vs YouTube vs Dailymotion"
Content Delivery Comparison: Vimeo vs YouTube vs Dailymotion
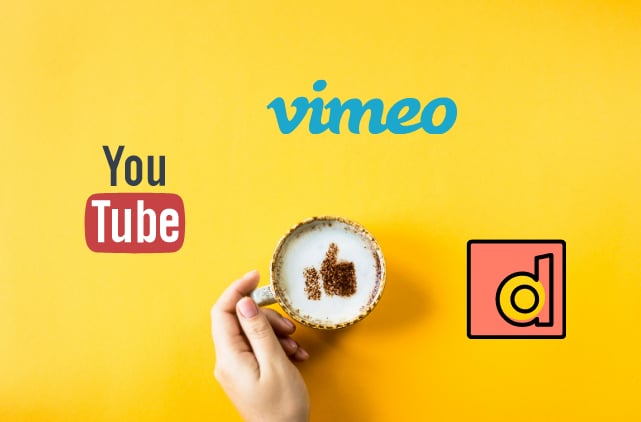
Vimeo vs YouTube vs Dailymotion: Which Video Platform is Right for You?

Ollie Mattison
Mar 27, 2024• Proven solutions
If you are an upcoming entrepreneur who is looking forward to an effective video marketing strategy then you have to come to a decision regarding the portal you want to use for your marketing. As you should know by now YouTube , Dailymotion and Vimeo are the 3 major players in the field of video marketing. In this article, we are going to give you a comparative analysis of all these video sharing platforms so that you can select the one most suited to your needs.

- Part 1: Detailed Comparison of Vimeo, YouTube, and DailyMotion
- Part 2: Tips for Editing Videos on YouTube, DailyMotion, and Vimeo
Compare Vimeo, YouTube, and DailyMotion in 4 Aspects
1. Content

Before deciding which video platform to choose, you need to find out about the content in which each of them specializes.
Youtube: If your content is more related to entertainment then YouTube is the platform to go for.
Vimeo: Vimeo is a closed community specializing in videos by artists from various genres and is considered to be a more creative platform than YouTube.
Dailymotion: Dailymotion has a fair share of both but it resembles the YouTube trend.
2. Audience Size and Membership

Youtube: YouTube’s audience is large, with over 1 billion users that watch hundreds of millions of hours of content – each day! Vimeo has a much smaller for their audience, its 170 million viewers, about 42 million are in the United States.
Vimeo: Vimeo comes with 4 membership options – the Basic which is available for free and the paid Plus, ($59.95/ year) Pro ($199.00 a year), and Business membership ($599.00 a year). The storage level and support for each membership option vary. The free membership is limited to just 500 MB/week. YouTube and Dailymotion on the other hand are totally free, and Youtube gives unlimited hosting. However YouTube Red is a $9.99 subscription service that will allow you to watch ad-free videos and download them for watching offline.
Read this Vimeo introduction >>>
Dailymotion: DailyMotion is the world’s second-largest video-sharing website behind YouTube, statistics claimed by both companies show that YouTube has a significant advantage over DailyMotion in terms of unique site visits, totaling one billion visits per month compared with DailyMotion’s 112 million visits per month.
Know more about Dailymotion >>>
3. Limitation of Videos

Youtube: One of the best parts about this platform is that it doesn’t come with any upload limit.
Dailymotion: Regular users can upload 60 minutes videos of 2 GB limit and the quality of upload is limited to 1280 720p.
Vimeo: With a Basic plan, you can upload 500MB/week, with a Plus plan you can upload 5GB/week and with Pro plan you will be able to upload unlimited videos with a per-file limit of 25 GB.
4. User Experience
To begin with, both Vimeo and YouTube had a very similar kind of user interface. This has gradually evolved over the years and these days the user interface of Vimeo is more attractive than YouTube. Vimeo would give the user fewer adverts, offer easy navigation and of course, allow them to watch the videos on a large video player. Though these days YouTube is also offering a ‘theatre mode’ for the full-screen view along with a skip adoption, yet the quality of its user experience is still isn’t at par with Vimeo. YouTube is still trying its best to satisfy its one billion/month users but still, Vimeo is the winner when it comes to unparalleled user experience.
Tips for Editing Videos on YouTube, DailyMotion, and Vimeo
Before uploading your video on any one of these above-mentioned platforms the first thing you have to do is get your videos edited. The Wondershare Filmora is a comprehensive video editor that is ideal for use by beginners. With this software, you will be able to nicely edit a video even if you have no prior knowledge about video editing. This easy to use video editing software is loaded with lots of useful features which can be effectively used by the casual and novice editors. This software is packed with all you need to create good quality videos for your audience on YouTube, Vimeo, or DailyMotion. All you need to do is import the video clips and choose a piece of pre-programmed music and theme for your video. The software would then analyze your video clips and automatically create a video for you.
 CollageIt Pro

Ollie Mattison
Ollie Mattison is a writer and a lover of all things video.
Follow @Ollie Mattison
Ollie Mattison
Mar 27, 2024• Proven solutions
If you are an upcoming entrepreneur who is looking forward to an effective video marketing strategy then you have to come to a decision regarding the portal you want to use for your marketing. As you should know by now YouTube , Dailymotion and Vimeo are the 3 major players in the field of video marketing. In this article, we are going to give you a comparative analysis of all these video sharing platforms so that you can select the one most suited to your needs.
- Part 1: Detailed Comparison of Vimeo, YouTube, and DailyMotion
- Part 2: Tips for Editing Videos on YouTube, DailyMotion, and Vimeo
Compare Vimeo, YouTube, and DailyMotion in 4 Aspects
1. Content

WPS Office Premium ( File Recovery, Photo Scanning, Convert PDF)–Yearly
Before deciding which video platform to choose, you need to find out about the content in which each of them specializes.
Youtube: If your content is more related to entertainment then YouTube is the platform to go for.
Vimeo: Vimeo is a closed community specializing in videos by artists from various genres and is considered to be a more creative platform than YouTube.
Dailymotion: Dailymotion has a fair share of both but it resembles the YouTube trend.
2. Audience Size and Membership
Youtube: YouTube’s audience is large, with over 1 billion users that watch hundreds of millions of hours of content – each day! Vimeo has a much smaller for their audience, its 170 million viewers, about 42 million are in the United States.
Vimeo: Vimeo comes with 4 membership options – the Basic which is available for free and the paid Plus, ($59.95/ year) Pro ($199.00 a year), and Business membership ($599.00 a year). The storage level and support for each membership option vary. The free membership is limited to just 500 MB/week. YouTube and Dailymotion on the other hand are totally free, and Youtube gives unlimited hosting. However YouTube Red is a $9.99 subscription service that will allow you to watch ad-free videos and download them for watching offline.
Read this Vimeo introduction >>>
Dailymotion: DailyMotion is the world’s second-largest video-sharing website behind YouTube, statistics claimed by both companies show that YouTube has a significant advantage over DailyMotion in terms of unique site visits, totaling one billion visits per month compared with DailyMotion’s 112 million visits per month.
Know more about Dailymotion >>>
3. Limitation of Videos

Youtube: One of the best parts about this platform is that it doesn’t come with any upload limit.
Dailymotion: Regular users can upload 60 minutes videos of 2 GB limit and the quality of upload is limited to 1280 720p.
Vimeo: With a Basic plan, you can upload 500MB/week, with a Plus plan you can upload 5GB/week and with Pro plan you will be able to upload unlimited videos with a per-file limit of 25 GB.
4. User Experience
To begin with, both Vimeo and YouTube had a very similar kind of user interface. This has gradually evolved over the years and these days the user interface of Vimeo is more attractive than YouTube. Vimeo would give the user fewer adverts, offer easy navigation and of course, allow them to watch the videos on a large video player. Though these days YouTube is also offering a ‘theatre mode’ for the full-screen view along with a skip adoption, yet the quality of its user experience is still isn’t at par with Vimeo. YouTube is still trying its best to satisfy its one billion/month users but still, Vimeo is the winner when it comes to unparalleled user experience.
 SwifDoo PDF Perpetual (2-PC) Free upgrade. No monthly fees ever.
Tips for Editing Videos on YouTube, DailyMotion, and Vimeo
Before uploading your video on any one of these above-mentioned platforms the first thing you have to do is get your videos edited. The Wondershare Filmora is a comprehensive video editor that is ideal for use by beginners. With this software, you will be able to nicely edit a video even if you have no prior knowledge about video editing. This easy to use video editing software is loaded with lots of useful features which can be effectively used by the casual and novice editors. This software is packed with all you need to create good quality videos for your audience on YouTube, Vimeo, or DailyMotion. All you need to do is import the video clips and choose a piece of pre-programmed music and theme for your video. The software would then analyze your video clips and automatically create a video for you.
 PCDJ DEX 3 for Windows & MAC is the total entertainment DJ software solution, offering audio, video, and karaoke mixing ability. Automatic beat-sync, smart looping, 4 decks, DJ MIDI controller support, Karaoke Streaming and much more.
Ollie Mattison
Ollie Mattison is a writer and a lover of all things video.
Follow @Ollie Mattison
Ollie Mattison
Mar 27, 2024• Proven solutions
If you are an upcoming entrepreneur who is looking forward to an effective video marketing strategy then you have to come to a decision regarding the portal you want to use for your marketing. As you should know by now YouTube , Dailymotion and Vimeo are the 3 major players in the field of video marketing. In this article, we are going to give you a comparative analysis of all these video sharing platforms so that you can select the one most suited to your needs.
- Part 1: Detailed Comparison of Vimeo, YouTube, and DailyMotion
- Part 2: Tips for Editing Videos on YouTube, DailyMotion, and Vimeo
Compare Vimeo, YouTube, and DailyMotion in 4 Aspects
1. Content
Before deciding which video platform to choose, you need to find out about the content in which each of them specializes.
Youtube: If your content is more related to entertainment then YouTube is the platform to go for.
Vimeo: Vimeo is a closed community specializing in videos by artists from various genres and is considered to be a more creative platform than YouTube.
Dailymotion: Dailymotion has a fair share of both but it resembles the YouTube trend.
2. Audience Size and Membership

Youtube: YouTube’s audience is large, with over 1 billion users that watch hundreds of millions of hours of content – each day! Vimeo has a much smaller for their audience, its 170 million viewers, about 42 million are in the United States.
Vimeo: Vimeo comes with 4 membership options – the Basic which is available for free and the paid Plus, ($59.95/ year) Pro ($199.00 a year), and Business membership ($599.00 a year). The storage level and support for each membership option vary. The free membership is limited to just 500 MB/week. YouTube and Dailymotion on the other hand are totally free, and Youtube gives unlimited hosting. However YouTube Red is a $9.99 subscription service that will allow you to watch ad-free videos and download them for watching offline.
Read this Vimeo introduction >>>
Dailymotion: DailyMotion is the world’s second-largest video-sharing website behind YouTube, statistics claimed by both companies show that YouTube has a significant advantage over DailyMotion in terms of unique site visits, totaling one billion visits per month compared with DailyMotion’s 112 million visits per month.
Know more about Dailymotion >>>
3. Limitation of Videos
Youtube: One of the best parts about this platform is that it doesn’t come with any upload limit.
Dailymotion: Regular users can upload 60 minutes videos of 2 GB limit and the quality of upload is limited to 1280 720p.
Vimeo: With a Basic plan, you can upload 500MB/week, with a Plus plan you can upload 5GB/week and with Pro plan you will be able to upload unlimited videos with a per-file limit of 25 GB.
4. User Experience
To begin with, both Vimeo and YouTube had a very similar kind of user interface. This has gradually evolved over the years and these days the user interface of Vimeo is more attractive than YouTube. Vimeo would give the user fewer adverts, offer easy navigation and of course, allow them to watch the videos on a large video player. Though these days YouTube is also offering a ‘theatre mode’ for the full-screen view along with a skip adoption, yet the quality of its user experience is still isn’t at par with Vimeo. YouTube is still trying its best to satisfy its one billion/month users but still, Vimeo is the winner when it comes to unparalleled user experience.
Tips for Editing Videos on YouTube, DailyMotion, and Vimeo
Before uploading your video on any one of these above-mentioned platforms the first thing you have to do is get your videos edited. The Wondershare Filmora is a comprehensive video editor that is ideal for use by beginners. With this software, you will be able to nicely edit a video even if you have no prior knowledge about video editing. This easy to use video editing software is loaded with lots of useful features which can be effectively used by the casual and novice editors. This software is packed with all you need to create good quality videos for your audience on YouTube, Vimeo, or DailyMotion. All you need to do is import the video clips and choose a piece of pre-programmed music and theme for your video. The software would then analyze your video clips and automatically create a video for you.
Ollie Mattison
Ollie Mattison is a writer and a lover of all things video.
Follow @Ollie Mattison
Ollie Mattison
Mar 27, 2024• Proven solutions
If you are an upcoming entrepreneur who is looking forward to an effective video marketing strategy then you have to come to a decision regarding the portal you want to use for your marketing. As you should know by now YouTube , Dailymotion and Vimeo are the 3 major players in the field of video marketing. In this article, we are going to give you a comparative analysis of all these video sharing platforms so that you can select the one most suited to your needs.
- Part 1: Detailed Comparison of Vimeo, YouTube, and DailyMotion
- Part 2: Tips for Editing Videos on YouTube, DailyMotion, and Vimeo
Compare Vimeo, YouTube, and DailyMotion in 4 Aspects
1. Content

Before deciding which video platform to choose, you need to find out about the content in which each of them specializes.
Youtube: If your content is more related to entertainment then YouTube is the platform to go for.
Vimeo: Vimeo is a closed community specializing in videos by artists from various genres and is considered to be a more creative platform than YouTube.
Dailymotion: Dailymotion has a fair share of both but it resembles the YouTube trend.
2. Audience Size and Membership
Youtube: YouTube’s audience is large, with over 1 billion users that watch hundreds of millions of hours of content – each day! Vimeo has a much smaller for their audience, its 170 million viewers, about 42 million are in the United States.
Vimeo: Vimeo comes with 4 membership options – the Basic which is available for free and the paid Plus, ($59.95/ year) Pro ($199.00 a year), and Business membership ($599.00 a year). The storage level and support for each membership option vary. The free membership is limited to just 500 MB/week. YouTube and Dailymotion on the other hand are totally free, and Youtube gives unlimited hosting. However YouTube Red is a $9.99 subscription service that will allow you to watch ad-free videos and download them for watching offline.
Read this Vimeo introduction >>>
Dailymotion: DailyMotion is the world’s second-largest video-sharing website behind YouTube, statistics claimed by both companies show that YouTube has a significant advantage over DailyMotion in terms of unique site visits, totaling one billion visits per month compared with DailyMotion’s 112 million visits per month.
Know more about Dailymotion >>>
3. Limitation of Videos
Youtube: One of the best parts about this platform is that it doesn’t come with any upload limit.
Dailymotion: Regular users can upload 60 minutes videos of 2 GB limit and the quality of upload is limited to 1280 720p.
Vimeo: With a Basic plan, you can upload 500MB/week, with a Plus plan you can upload 5GB/week and with Pro plan you will be able to upload unlimited videos with a per-file limit of 25 GB.
4. User Experience
To begin with, both Vimeo and YouTube had a very similar kind of user interface. This has gradually evolved over the years and these days the user interface of Vimeo is more attractive than YouTube. Vimeo would give the user fewer adverts, offer easy navigation and of course, allow them to watch the videos on a large video player. Though these days YouTube is also offering a ‘theatre mode’ for the full-screen view along with a skip adoption, yet the quality of its user experience is still isn’t at par with Vimeo. YouTube is still trying its best to satisfy its one billion/month users but still, Vimeo is the winner when it comes to unparalleled user experience.
Tips for Editing Videos on YouTube, DailyMotion, and Vimeo
Before uploading your video on any one of these above-mentioned platforms the first thing you have to do is get your videos edited. The Wondershare Filmora is a comprehensive video editor that is ideal for use by beginners. With this software, you will be able to nicely edit a video even if you have no prior knowledge about video editing. This easy to use video editing software is loaded with lots of useful features which can be effectively used by the casual and novice editors. This software is packed with all you need to create good quality videos for your audience on YouTube, Vimeo, or DailyMotion. All you need to do is import the video clips and choose a piece of pre-programmed music and theme for your video. The software would then analyze your video clips and automatically create a video for you.
Ollie Mattison
Ollie Mattison is a writer and a lover of all things video.
Follow @Ollie Mattison
 DLNow Video Downloader
Polishing Your YouTube Projects: The Premiere Pro Way
How to Edit YouTube Videos in Adobe Premiere

Richard Bennett
Mar 27, 2024• Proven solutions
You just made a few videos, and you want to edit them first before uploading to YouTube. The truth is that you may find the editing part a bit more challenging compared to uploading. However, there are now tools like Adobe Premiere that can help make the editing process easier. Read on and learn how to edit YouTube videos with Adobe Premier so that you can create amazing videos.
Related article:Adobe Premiere User Guide
Adobe Premiere is largely targeted towards professional users, and the best alternative you can use today, whether you are a professional user or just a casual YouTube user, is Wondershare Filmora . This is not only a highly effective video editing program, but it is also user-friendly and very easy to use.
 TubeDigger - online video downloader from mostly any site
Download Mac Version ](https://tools.techidaily.com/wondershare/filmora/download/ )
Adobe is well known for having some of the leading video production tools in the industry. In fact, most of their tools ranging from the Premier Pro and Photoshop to Audition and many others have been used in many video and movie productions, including some of the popular theatrical releases of our times. Their latest professional video editor, Adobe Premier can be summarized as one of the best editors with versatility, depth, and power for high-quality video editing.
How to edit YouTube Videos with Adobe Premier
Step 1: Import the Video Clips
The first step in how to edit YouTube videos with Adobe Premier is to basically import the video clips you want to edit. This is achieved using a simple process of clicking “import” from the “file” drop-down menu. Once you have finished importing your photos or video files, you can then drag them from the sidebar and into the editing area.
 EmEditor Professional (Lifetime License, non-store app)

Note
- If the videos you want to import are already published online, you can start the process by first downloading them directly from YouTube first, making sure to save them as MP4 files.
- The best way of importing videos from YouTube is by using an innovative video converter like Wondershare Video Converter Ultimate. This program will help in downloading and converting files to a format that is supported by Adobe Premier.
Step 2: Editing
The next step in how edit YouTube videos with Adobe Premiere is to start modifying the video files or photos the way you want. To achieve this, click on “Effects Control” and apply the desired effects. If you want to insert some text or words into your video, select “title” and then click “new title.” Now choose how you would like the words to behave, for instance, “Default Roll” makes the text roll upwards in the page.
Now drag the text that you have created into the editor area. If you want to edit the text, simply double-click to select it, and it will bring up a separate page where you can make further edits. You can then modify the text, font, and the positioning as well. This page also allows you to set whether the text will crawl or roll.

The final part of the process is to import your chosen audio file. This could be the chosen soundtrack for your presentation. Simply drag the audio file onto your editor. You can then modify how the length of your videos or photos by selecting and dragging the specific photo or video. Finally, press enter and your video will start rendering.
Step 3: Save the Edited File and Upload to YouTube
It is important to note that even as you edit YouTube videos with Adobe Premier, the software does not allow direct uploads to YouTube. This means you will need to save the edited file first on your computer and ensure you use a YouTube supported format. The most effective option is to use the codec, which will then save your file in the MPEG-4 format. This is the preferred format for YouTube and Video uploads.
Richard Bennett
Richard Bennett is a writer and a lover of all things video.
Follow @Richard Bennett
Richard Bennett
Mar 27, 2024• Proven solutions
You just made a few videos, and you want to edit them first before uploading to YouTube. The truth is that you may find the editing part a bit more challenging compared to uploading. However, there are now tools like Adobe Premiere that can help make the editing process easier. Read on and learn how to edit YouTube videos with Adobe Premier so that you can create amazing videos.
Related article:Adobe Premiere User Guide
Adobe Premiere is largely targeted towards professional users, and the best alternative you can use today, whether you are a professional user or just a casual YouTube user, is Wondershare Filmora . This is not only a highly effective video editing program, but it is also user-friendly and very easy to use.
Download Mac Version ](https://tools.techidaily.com/wondershare/filmora/download/ )
Adobe is well known for having some of the leading video production tools in the industry. In fact, most of their tools ranging from the Premier Pro and Photoshop to Audition and many others have been used in many video and movie productions, including some of the popular theatrical releases of our times. Their latest professional video editor, Adobe Premier can be summarized as one of the best editors with versatility, depth, and power for high-quality video editing.
 WinUtilities Pro
How to edit YouTube Videos with Adobe Premier
Step 1: Import the Video Clips
The first step in how to edit YouTube videos with Adobe Premier is to basically import the video clips you want to edit. This is achieved using a simple process of clicking “import” from the “file” drop-down menu. Once you have finished importing your photos or video files, you can then drag them from the sidebar and into the editing area.
Note
- If the videos you want to import are already published online, you can start the process by first downloading them directly from YouTube first, making sure to save them as MP4 files.
- The best way of importing videos from YouTube is by using an innovative video converter like Wondershare Video Converter Ultimate. This program will help in downloading and converting files to a format that is supported by Adobe Premier.
Step 2: Editing
The next step in how edit YouTube videos with Adobe Premiere is to start modifying the video files or photos the way you want. To achieve this, click on “Effects Control” and apply the desired effects. If you want to insert some text or words into your video, select “title” and then click “new title.” Now choose how you would like the words to behave, for instance, “Default Roll” makes the text roll upwards in the page.
Now drag the text that you have created into the editor area. If you want to edit the text, simply double-click to select it, and it will bring up a separate page where you can make further edits. You can then modify the text, font, and the positioning as well. This page also allows you to set whether the text will crawl or roll.
The final part of the process is to import your chosen audio file. This could be the chosen soundtrack for your presentation. Simply drag the audio file onto your editor. You can then modify how the length of your videos or photos by selecting and dragging the specific photo or video. Finally, press enter and your video will start rendering.
Step 3: Save the Edited File and Upload to YouTube
It is important to note that even as you edit YouTube videos with Adobe Premier, the software does not allow direct uploads to YouTube. This means you will need to save the edited file first on your computer and ensure you use a YouTube supported format. The most effective option is to use the codec, which will then save your file in the MPEG-4 format. This is the preferred format for YouTube and Video uploads.
Richard Bennett
Richard Bennett is a writer and a lover of all things video.
Follow @Richard Bennett
Richard Bennett
Mar 27, 2024• Proven solutions
You just made a few videos, and you want to edit them first before uploading to YouTube. The truth is that you may find the editing part a bit more challenging compared to uploading. However, there are now tools like Adobe Premiere that can help make the editing process easier. Read on and learn how to edit YouTube videos with Adobe Premier so that you can create amazing videos.
Related article:Adobe Premiere User Guide
Adobe Premiere is largely targeted towards professional users, and the best alternative you can use today, whether you are a professional user or just a casual YouTube user, is Wondershare Filmora . This is not only a highly effective video editing program, but it is also user-friendly and very easy to use.
Download Mac Version ](https://tools.techidaily.com/wondershare/filmora/download/ )
Adobe is well known for having some of the leading video production tools in the industry. In fact, most of their tools ranging from the Premier Pro and Photoshop to Audition and many others have been used in many video and movie productions, including some of the popular theatrical releases of our times. Their latest professional video editor, Adobe Premier can be summarized as one of the best editors with versatility, depth, and power for high-quality video editing.
 DEX 3 RE is Easy-To-Use DJ Mixing Software for MAC and Windows Designed for Today’s Versatile DJ.
Mix from your own library of music, iTunes or use the Pulselocker subsciprtion service for in-app access to over 44 million songs. Use with over 85 supported DJ controllers or mix with a keyboard and mouse.
DEX 3 RE is everything you need without the clutter - the perfect 2-deck mixing software solution for mobile DJs or hard-core hobbiests.
PCDJ DEX 3 RE (DJ Software for Win & MAC - Product Activation For 3 Machines)
How to edit YouTube Videos with Adobe Premier
Step 1: Import the Video Clips
The first step in how to edit YouTube videos with Adobe Premier is to basically import the video clips you want to edit. This is achieved using a simple process of clicking “import” from the “file” drop-down menu. Once you have finished importing your photos or video files, you can then drag them from the sidebar and into the editing area.
 Easy and Safe Partition Software & Hard Disk Manager
Note
- If the videos you want to import are already published online, you can start the process by first downloading them directly from YouTube first, making sure to save them as MP4 files.
- The best way of importing videos from YouTube is by using an innovative video converter like Wondershare Video Converter Ultimate. This program will help in downloading and converting files to a format that is supported by Adobe Premier.
Step 2: Editing
The next step in how edit YouTube videos with Adobe Premiere is to start modifying the video files or photos the way you want. To achieve this, click on “Effects Control” and apply the desired effects. If you want to insert some text or words into your video, select “title” and then click “new title.” Now choose how you would like the words to behave, for instance, “Default Roll” makes the text roll upwards in the page.
Now drag the text that you have created into the editor area. If you want to edit the text, simply double-click to select it, and it will bring up a separate page where you can make further edits. You can then modify the text, font, and the positioning as well. This page also allows you to set whether the text will crawl or roll.

The final part of the process is to import your chosen audio file. This could be the chosen soundtrack for your presentation. Simply drag the audio file onto your editor. You can then modify how the length of your videos or photos by selecting and dragging the specific photo or video. Finally, press enter and your video will start rendering.
Step 3: Save the Edited File and Upload to YouTube
It is important to note that even as you edit YouTube videos with Adobe Premier, the software does not allow direct uploads to YouTube. This means you will need to save the edited file first on your computer and ensure you use a YouTube supported format. The most effective option is to use the codec, which will then save your file in the MPEG-4 format. This is the preferred format for YouTube and Video uploads.
Richard Bennett
Richard Bennett is a writer and a lover of all things video.
Follow @Richard Bennett
Richard Bennett
Mar 27, 2024• Proven solutions
You just made a few videos, and you want to edit them first before uploading to YouTube. The truth is that you may find the editing part a bit more challenging compared to uploading. However, there are now tools like Adobe Premiere that can help make the editing process easier. Read on and learn how to edit YouTube videos with Adobe Premier so that you can create amazing videos.
Related article:Adobe Premiere User Guide
Adobe Premiere is largely targeted towards professional users, and the best alternative you can use today, whether you are a professional user or just a casual YouTube user, is Wondershare Filmora . This is not only a highly effective video editing program, but it is also user-friendly and very easy to use.
Download Mac Version ](https://tools.techidaily.com/wondershare/filmora/download/ )
Adobe is well known for having some of the leading video production tools in the industry. In fact, most of their tools ranging from the Premier Pro and Photoshop to Audition and many others have been used in many video and movie productions, including some of the popular theatrical releases of our times. Their latest professional video editor, Adobe Premier can be summarized as one of the best editors with versatility, depth, and power for high-quality video editing.
How to edit YouTube Videos with Adobe Premier
Step 1: Import the Video Clips
The first step in how to edit YouTube videos with Adobe Premier is to basically import the video clips you want to edit. This is achieved using a simple process of clicking “import” from the “file” drop-down menu. Once you have finished importing your photos or video files, you can then drag them from the sidebar and into the editing area.
Note
- If the videos you want to import are already published online, you can start the process by first downloading them directly from YouTube first, making sure to save them as MP4 files.
- The best way of importing videos from YouTube is by using an innovative video converter like Wondershare Video Converter Ultimate. This program will help in downloading and converting files to a format that is supported by Adobe Premier.
Step 2: Editing
The next step in how edit YouTube videos with Adobe Premiere is to start modifying the video files or photos the way you want. To achieve this, click on “Effects Control” and apply the desired effects. If you want to insert some text or words into your video, select “title” and then click “new title.” Now choose how you would like the words to behave, for instance, “Default Roll” makes the text roll upwards in the page.
Now drag the text that you have created into the editor area. If you want to edit the text, simply double-click to select it, and it will bring up a separate page where you can make further edits. You can then modify the text, font, and the positioning as well. This page also allows you to set whether the text will crawl or roll.
The final part of the process is to import your chosen audio file. This could be the chosen soundtrack for your presentation. Simply drag the audio file onto your editor. You can then modify how the length of your videos or photos by selecting and dragging the specific photo or video. Finally, press enter and your video will start rendering.
Step 3: Save the Edited File and Upload to YouTube
It is important to note that even as you edit YouTube videos with Adobe Premier, the software does not allow direct uploads to YouTube. This means you will need to save the edited file first on your computer and ensure you use a YouTube supported format. The most effective option is to use the codec, which will then save your file in the MPEG-4 format. This is the preferred format for YouTube and Video uploads.
Richard Bennett
Richard Bennett is a writer and a lover of all things video.
Follow @Richard Bennett
- Title: 2024 Approved Content Delivery Comparison Vimeo vs YouTube vs Dailymotion
- Author: Kevin
- Created at : 2024-08-03 03:41:18
- Updated at : 2024-08-04 03:41:18
- Link: https://youtube-videos.techidaily.com/2024-approved-content-delivery-comparison-vimeo-vs-youtube-vs-dailymotion/
- License: This work is licensed under CC BY-NC-SA 4.0.