
"2024 Approved 11-Year-Old Video Sensation Unprecedented Wealth Accumulation"
11-Year-Old Video Sensation: Unprecedented Wealth Accumulation
If you are curious about Ryan Kaji’s net worth and what led to it, you are at the right place. YouTube as a platform is accessible to a vast global audience, and anyone, regardless of age or lifestyle, can earn high amounts with the right type of content. Ryan Kaji is one such individual who has achieved a lot in his short life with his YouTube channel, Ryan’s World.
Read ahead to get deep knowledge of how much does ryan’s world make, career graph, and how you can emulate a similar path on YouTube.

Part 1: The Biography Box on Ryan Kaji
Before going into this in detail, here is an overall summary of Ryan Kaji and his income structure for a quick look.
| Name | Ryan Kaji |
|---|---|
| Real Name | Ryan Naruto Nguyen |
| Net Worth (as of 2022) | USD 35 million |
| Monthly Income/Salary (approx.) | USD 1.11 million |
| Yearly Income (approx.) | USD 16.66 million |
| Age | 11 years |
| Gender | Male |
| Height | 1.28 m or 128 cm or 4 ft 2 inches |
| Nationality | Asian-American |
| Profession | YouTuber, Influencer |
| YouTube Channel | Ryan’s World |
| Awards and Recognition | · Ranked No. 23 on Top Creators List, Forbes 2022.· Ryan’s World ranks as one of the top 100 YouTube channels. |
Now that we know the primary data about Ryan, read on to learn about how he became famous on YouTube and his overall income, in more detail.
Part 2: Ryan Kaji YouTube Earning and Stats
After seeing the notes about Ryan’s World’s yearly income and other points, you must wonder how it has increased over the years. To simplify, most of his income comes from YouTube in terms of views and ad revenue, like most YouTubers.
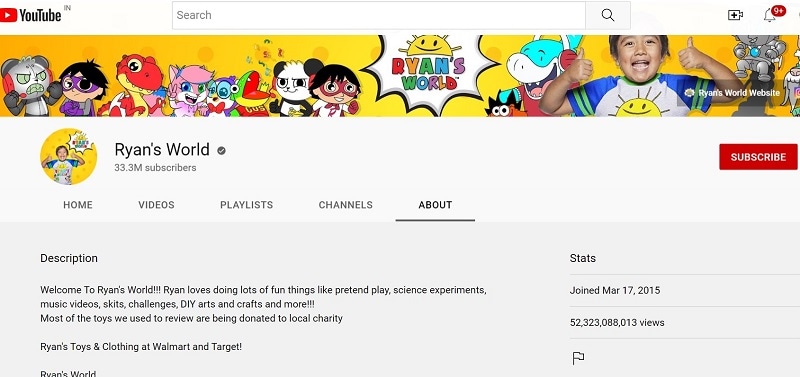
Other than that, his subscriber count also accounts for a portion of what the YouTube algorithm calculates for the income evaluation. Currently, the subscriber counts for the Ryan’s World channel sits at 33.3 million, spread across different age demographics.
To calculate Ryan World net worth in 2020, the jump from 2022, and how it grew since 2015 overall, the ads play a major role. Typically, YouTubers earn around USD 3-7 for every 1000 views. His videos get around 277.59 million views per month. So, the overall count can extend to USD 1.11 million per month.
If he earns higher, like USD 7 for every 1000 views, his annual average can increase reach around USD 29.98 million instead of the estimated USD 16.66 million.
Moreover, YouTubers earn from other sources besides the ads on their videos, so the overall Ryan YouTube income is likely even higher monthly and yearly. These additional sources include affiliate commissions, sponsorships, interviews at other platforms, and product sales/merchandise.

Here is a quantified average of the earning statistics for Ryan’s World income in tabular format.
| Ryan Kaji Ryan’s World Income | |
|---|---|
| Estimated Earnings per Month | USD 1.11 million |
| Estimated Earnings per Year | USD 16.66 million |
| Total Video Uploads (Approx) | 52.323 billion |
| Subscribers | 33.3 million |
| Video Views (on average) | 800,000+ |
| Views for the last 30 days (on average) | 277.59 million |
Ryan Kaji’s Annual Income between 2016-2022
For a better understanding of how much does Ryan ToysReview make, which is the most popular segment in his channel, let’s look at his earning graph over the years.
Here is a bar chart showing the growth in Raji Kaji’s net worth from 2016 to the present.
Since Ryan Kaji started his channel in 2015, he has focused mainly on posting reviews and critiques on toys in videos. His personable characteristics and demeanor, plus the type of content he presented, helped him increase his earnings, raking in USD 11 million in 2016 and 2017.
As he grew in age, his content shifted to fit his interests at 6 years of age, which revolved around DIY science, adding animated co-stars, and doodles. He also started his custom merchandise for the subscribers, had his AdSense revenue, and a proprietary toy line. Therefore, regarding how much money did Ryan ToysReview make in 2018, the channel saw growth to USD 22 million, which further increased to USD 26 million in 2019.
In 2020, he earned around USD 29.5 million and USD 27 million in 2021. The Ryan ToysReview income further grew to USD 35 million in 2022, and it is expected to increase in the upcoming time, especially with his videos raking in millions of views in recent times.
Popularity across social media
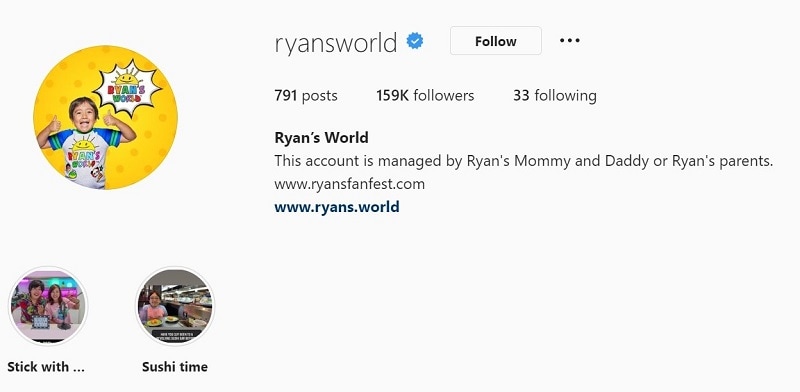
The leading social media platform where Ryan Kaji grew his strength is YouTube, and he currently enjoys a massive fan following. His channel, Ryan’s World, has an overall subscriber base of around 33.3 million YouTube users. These include primarily children as well as other adults, either who enjoy his content or those who watch along with their kids. He also has an Instagram account for his channel with around 159k followers.
Besides that, the total Ryan’s World earnings also come from his other YouTube channels, managed under the company his parents established afterward. These include Ryan ToysReview, The Studio Space, Ryan’s Family Review, EK Doodles, and three more.
All of these channels combined get a substantial overall following base, though there are overlaps between all or some of them. Ryan Kaji also has a television series and video game under the brand, increasing his overall popularity. The series name is “Ryan’s Mystery Playdate” on Nick Jr.
Part 3: Why is Ryan Kaji Trending on YouTube?
The overall view of how much money does Ryan have throughout the years and his social media popularity will surely give you an idea of how he amassed his impressive net worth. However, why exactly is he so popular on the platform when he focuses mainly on kid’s toys instead of other things that appeal to the primarily adult userbase on YouTube?
Charming personality
Ryan has a fun and enthusiastic approach to his videos, showing a bright and adorable personality. This shines through all of his videos, and his excitement translates across the screen to the viewers to captivate their attention well.
Interactive and engaging videos
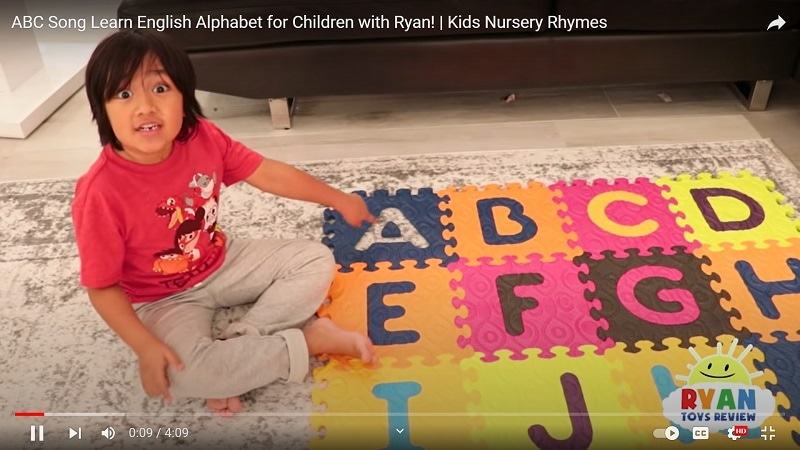
The way the content is presented is engaging, with Ryan speaking to the viewers like friends. That creates a light-hearted environment for his subscribers, who are mostly kids. His videos also include information they learn, like the “ABC Song Learn English Alphabet for Children with Ryan!” video.
High-quality visuals and effects
The videos on the channel are well edited, with bright color scape and high-resolution imagery. The editor also adds fun effects in video, image, and audio format to engage all senses of viewers.
Consistent delivery/updates
The team behind Ryan’s World has the timing of their releases well-planned and relatively consistent with the posting schedule. Subscribers stay engaged since they get the videos they want regularly.
Engaging and eye-catching titles-
The titles of the videos on this channel are framed with the main keywords of what content one can expect. The title card design with effects and other areas where text pop up is properly set.
Top videos on Ryan’s World
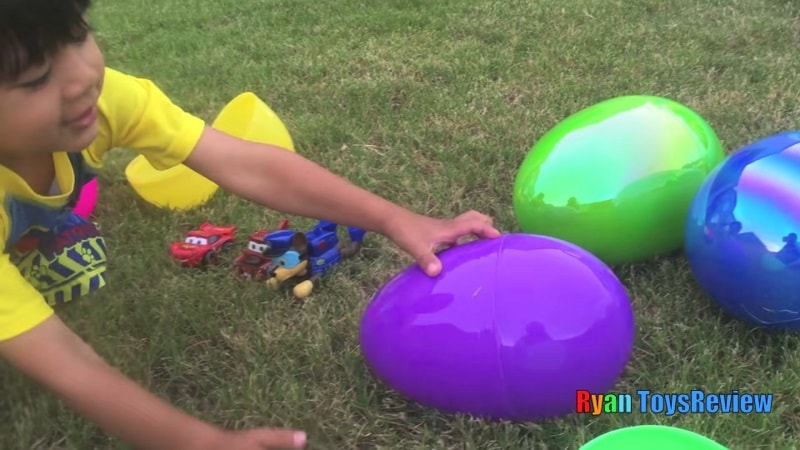
To understand these points, you should take a look at his top videos on YouTube. The best videos on Ryan’s World channel include “HUGE EGGS Surprise Toys Challenge with Inflatable Water Slide” with 2 billion views, “Giant Lightning McQueen Egg Surprise with 100+ Disney Cars Toys” with 1.1 billion views, and “ABC Song Learn English Alphabet for Children with Ryan!” with 384 million views.
Video Link: https://www.youtube.com/watch?v=GcmDiyk3NJs
Each video has an engaging title that speaks on the central theme while keeping consistent with his content type, i.e., toys review. Plus, he has visually appealing thumbnails with edited imagery, and his vibrant personality is appealing as well. All in all, he covers all the main points necessary to create engaging content, and that naturally adds to Ryan World salary.
Bonus Tip: How to be a YouTuber and Make Videos like Ryan Kaji
Yes, the quality and presentation of the videos on the channel are one of critical pieces that caused the high Ryan Kaji net worth. If you plan to start your YouTube channel, you should focus on video editing to optimize its quality. In this context, the Filmora software is an excellent tool to use.
Filmora- Why should you use it?
Wondershare Filmora is a high-grade video editing software that allows users to create dynamic, eye-grabbing, and intuitive videos efficiently. You can use the features available in this Mac and Windows-based software to merge, cut, split, and more your video clips into one cohesive project. It is simple to add filters with pre-set FX plugins like Boris FX, among other available options, for a unique video look.
Additionally, you can adjust the coloring of your videos with Color Matching and Color Correction features and add titles/transitions, among others. You can add voiceover and audio effects and adjust the video’s volume, tone, and soundtrack. AI-based features are also available here for quick automated edits (Instant Mode), removing background by focusing on only the subject (AI Portrait), and more.
How to use Filmora to create engaging videos for YouTube?
Free Download For Win 7 or later(64-bit)
Free Download For macOS 10.14 or later
Step1 Download and launch the Filmora software on Mac or Windows PC.
Step2 Tap on New Project > Click here to import media.
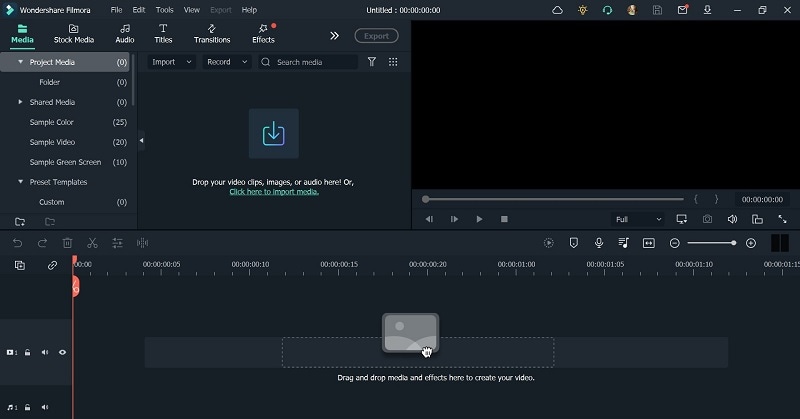
Step3 After choosing the video file or files from your device, drag them to the editor timeline below.
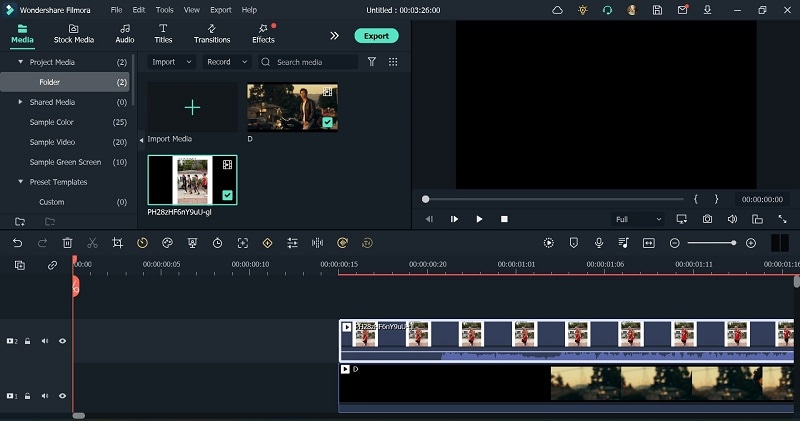
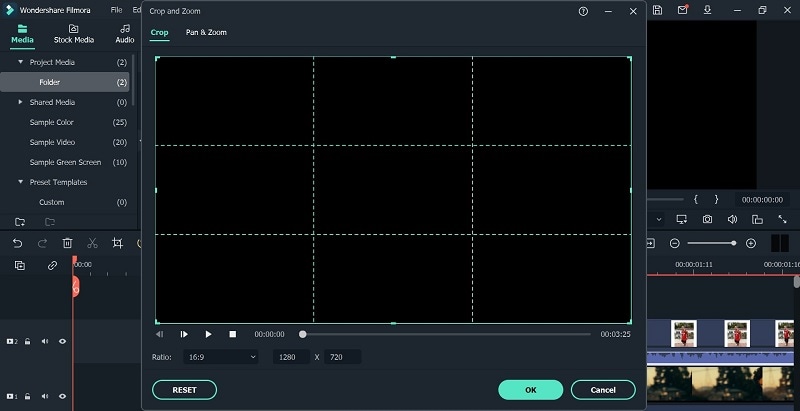
Step4 From the toolbar just above the timeline, click on the standard functions you want to use for editing the video. For example, click on the file and press the Crop icon.
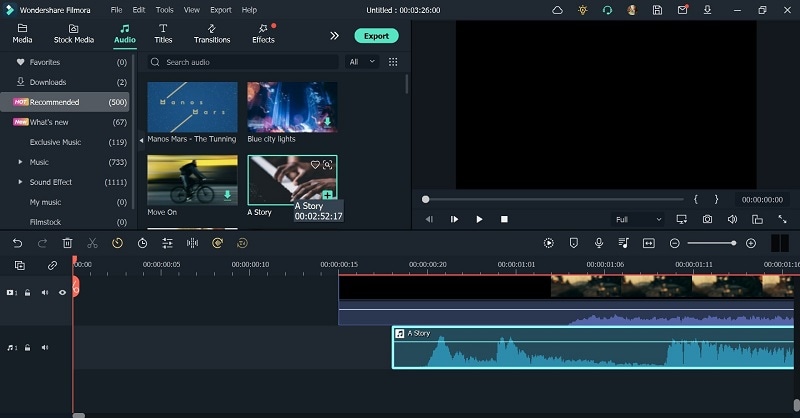
Step5 At the top-most toolbar, you can see many tabs for editing, like Effects, Audio, Titles, etc. Click on them to get the drop-down menu of available effects, audio clips, and more. Add the ones you choose by dragging them to the video on the timeline.
Continue with further editing work using other tools available, like speed adjustment, background removal (chroma key), and more.
Step6 After completing the edits, click the Export button. Choose to download it offline by selecting Local and choosing your preferred format. Make further changes in the settings.
Or, you can directly post the video to your linked YouTube account.
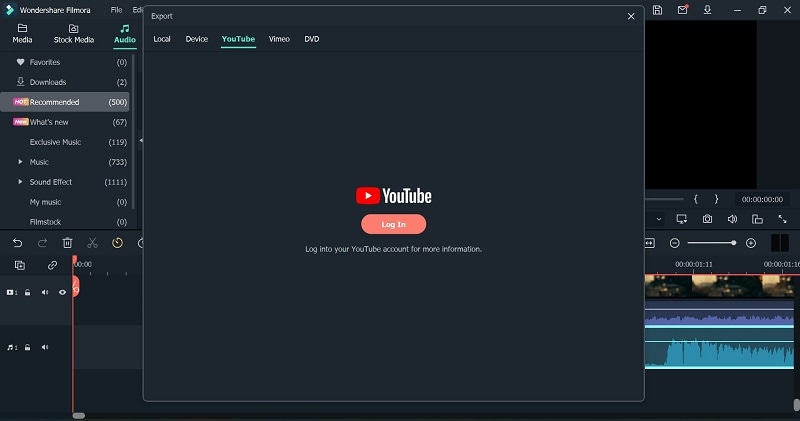
Step7 Tap the Export button.
Final Words
Overall, Ryan Kaji saw great success with his stunning and engaging videos on his YouTube channel over the years. Also, he focused on other ventures, with the support of the team behind his channel, for income and editing work.
But, while starting, your funding will be less. It would help if you handled the video editing work on your own first, with reliable software like Filmora . Also, use other analytics tools and strategies to improve your channel further.
Free Download For Win 7 or later(64-bit)
Free Download For macOS 10.14 or later
Part 1: The Biography Box on Ryan Kaji
Before going into this in detail, here is an overall summary of Ryan Kaji and his income structure for a quick look.
| Name | Ryan Kaji |
|---|---|
| Real Name | Ryan Naruto Nguyen |
| Net Worth (as of 2022) | USD 35 million |
| Monthly Income/Salary (approx.) | USD 1.11 million |
| Yearly Income (approx.) | USD 16.66 million |
| Age | 11 years |
| Gender | Male |
| Height | 1.28 m or 128 cm or 4 ft 2 inches |
| Nationality | Asian-American |
| Profession | YouTuber, Influencer |
| YouTube Channel | Ryan’s World |
| Awards and Recognition | · Ranked No. 23 on Top Creators List, Forbes 2022.· Ryan’s World ranks as one of the top 100 YouTube channels. |
Now that we know the primary data about Ryan, read on to learn about how he became famous on YouTube and his overall income, in more detail.
Part 2: Ryan Kaji YouTube Earning and Stats
After seeing the notes about Ryan’s World’s yearly income and other points, you must wonder how it has increased over the years. To simplify, most of his income comes from YouTube in terms of views and ad revenue, like most YouTubers.
Other than that, his subscriber count also accounts for a portion of what the YouTube algorithm calculates for the income evaluation. Currently, the subscriber counts for the Ryan’s World channel sits at 33.3 million, spread across different age demographics.
To calculate Ryan World net worth in 2020, the jump from 2022, and how it grew since 2015 overall, the ads play a major role. Typically, YouTubers earn around USD 3-7 for every 1000 views. His videos get around 277.59 million views per month. So, the overall count can extend to USD 1.11 million per month.
If he earns higher, like USD 7 for every 1000 views, his annual average can increase reach around USD 29.98 million instead of the estimated USD 16.66 million.
Moreover, YouTubers earn from other sources besides the ads on their videos, so the overall Ryan YouTube income is likely even higher monthly and yearly. These additional sources include affiliate commissions, sponsorships, interviews at other platforms, and product sales/merchandise.
Here is a quantified average of the earning statistics for Ryan’s World income in tabular format.
| Ryan Kaji Ryan’s World Income | |
|---|---|
| Estimated Earnings per Month | USD 1.11 million |
| Estimated Earnings per Year | USD 16.66 million |
| Total Video Uploads (Approx) | 52.323 billion |
| Subscribers | 33.3 million |
| Video Views (on average) | 800,000+ |
| Views for the last 30 days (on average) | 277.59 million |
Ryan Kaji’s Annual Income between 2016-2022
For a better understanding of how much does Ryan ToysReview make, which is the most popular segment in his channel, let’s look at his earning graph over the years.
Here is a bar chart showing the growth in Raji Kaji’s net worth from 2016 to the present.
Since Ryan Kaji started his channel in 2015, he has focused mainly on posting reviews and critiques on toys in videos. His personable characteristics and demeanor, plus the type of content he presented, helped him increase his earnings, raking in USD 11 million in 2016 and 2017.
As he grew in age, his content shifted to fit his interests at 6 years of age, which revolved around DIY science, adding animated co-stars, and doodles. He also started his custom merchandise for the subscribers, had his AdSense revenue, and a proprietary toy line. Therefore, regarding how much money did Ryan ToysReview make in 2018, the channel saw growth to USD 22 million, which further increased to USD 26 million in 2019.
In 2020, he earned around USD 29.5 million and USD 27 million in 2021. The Ryan ToysReview income further grew to USD 35 million in 2022, and it is expected to increase in the upcoming time, especially with his videos raking in millions of views in recent times.
Popularity across social media
The leading social media platform where Ryan Kaji grew his strength is YouTube, and he currently enjoys a massive fan following. His channel, Ryan’s World, has an overall subscriber base of around 33.3 million YouTube users. These include primarily children as well as other adults, either who enjoy his content or those who watch along with their kids. He also has an Instagram account for his channel with around 159k followers.
Besides that, the total Ryan’s World earnings also come from his other YouTube channels, managed under the company his parents established afterward. These include Ryan ToysReview, The Studio Space, Ryan’s Family Review, EK Doodles, and three more.
All of these channels combined get a substantial overall following base, though there are overlaps between all or some of them. Ryan Kaji also has a television series and video game under the brand, increasing his overall popularity. The series name is “Ryan’s Mystery Playdate” on Nick Jr.
Part 3: Why is Ryan Kaji Trending on YouTube?
The overall view of how much money does Ryan have throughout the years and his social media popularity will surely give you an idea of how he amassed his impressive net worth. However, why exactly is he so popular on the platform when he focuses mainly on kid’s toys instead of other things that appeal to the primarily adult userbase on YouTube?
Charming personality
Ryan has a fun and enthusiastic approach to his videos, showing a bright and adorable personality. This shines through all of his videos, and his excitement translates across the screen to the viewers to captivate their attention well.
Interactive and engaging videos
The way the content is presented is engaging, with Ryan speaking to the viewers like friends. That creates a light-hearted environment for his subscribers, who are mostly kids. His videos also include information they learn, like the “ABC Song Learn English Alphabet for Children with Ryan!” video.
High-quality visuals and effects
The videos on the channel are well edited, with bright color scape and high-resolution imagery. The editor also adds fun effects in video, image, and audio format to engage all senses of viewers.
Consistent delivery/updates
The team behind Ryan’s World has the timing of their releases well-planned and relatively consistent with the posting schedule. Subscribers stay engaged since they get the videos they want regularly.
Engaging and eye-catching titles-
The titles of the videos on this channel are framed with the main keywords of what content one can expect. The title card design with effects and other areas where text pop up is properly set.
Top videos on Ryan’s World
To understand these points, you should take a look at his top videos on YouTube. The best videos on Ryan’s World channel include “HUGE EGGS Surprise Toys Challenge with Inflatable Water Slide” with 2 billion views, “Giant Lightning McQueen Egg Surprise with 100+ Disney Cars Toys” with 1.1 billion views, and “ABC Song Learn English Alphabet for Children with Ryan!” with 384 million views.
Video Link: https://www.youtube.com/watch?v=GcmDiyk3NJs
Each video has an engaging title that speaks on the central theme while keeping consistent with his content type, i.e., toys review. Plus, he has visually appealing thumbnails with edited imagery, and his vibrant personality is appealing as well. All in all, he covers all the main points necessary to create engaging content, and that naturally adds to Ryan World salary.
Bonus Tip: How to be a YouTuber and Make Videos like Ryan Kaji
Yes, the quality and presentation of the videos on the channel are one of critical pieces that caused the high Ryan Kaji net worth. If you plan to start your YouTube channel, you should focus on video editing to optimize its quality. In this context, the Filmora software is an excellent tool to use.
Filmora- Why should you use it?
Wondershare Filmora is a high-grade video editing software that allows users to create dynamic, eye-grabbing, and intuitive videos efficiently. You can use the features available in this Mac and Windows-based software to merge, cut, split, and more your video clips into one cohesive project. It is simple to add filters with pre-set FX plugins like Boris FX, among other available options, for a unique video look.
Additionally, you can adjust the coloring of your videos with Color Matching and Color Correction features and add titles/transitions, among others. You can add voiceover and audio effects and adjust the video’s volume, tone, and soundtrack. AI-based features are also available here for quick automated edits (Instant Mode), removing background by focusing on only the subject (AI Portrait), and more.
How to use Filmora to create engaging videos for YouTube?
Free Download For Win 7 or later(64-bit)
Free Download For macOS 10.14 or later
Step1 Download and launch the Filmora software on Mac or Windows PC.
Step2 Tap on New Project > Click here to import media.
Step3 After choosing the video file or files from your device, drag them to the editor timeline below.
Step4 From the toolbar just above the timeline, click on the standard functions you want to use for editing the video. For example, click on the file and press the Crop icon.
Step5 At the top-most toolbar, you can see many tabs for editing, like Effects, Audio, Titles, etc. Click on them to get the drop-down menu of available effects, audio clips, and more. Add the ones you choose by dragging them to the video on the timeline.
Continue with further editing work using other tools available, like speed adjustment, background removal (chroma key), and more.
Step6 After completing the edits, click the Export button. Choose to download it offline by selecting Local and choosing your preferred format. Make further changes in the settings.
Or, you can directly post the video to your linked YouTube account.
Step7 Tap the Export button.
Final Words
Overall, Ryan Kaji saw great success with his stunning and engaging videos on his YouTube channel over the years. Also, he focused on other ventures, with the support of the team behind his channel, for income and editing work.
But, while starting, your funding will be less. It would help if you handled the video editing work on your own first, with reliable software like Filmora . Also, use other analytics tools and strategies to improve your channel further.
Free Download For Win 7 or later(64-bit)
Free Download For macOS 10.14 or later
The Art of Initiating Your YouTube Content Compellingly
2024 | How to Make a YouTube Intro Video?

Richard Bennett
Mar 27, 2024• Proven solutions
Be it YouTube or any other streaming channel, or even for selling your videos on any e-commerce website, intros play a vital role in your brand promotion, and creating them is not as complicated as it sounds either.
The following sections describe in detail how to make a YouTube intro with Wondershare Filmora video editor, and keep it safe so it can be re-used easily in all your creations to maintain consistency and to give your brand a unique identity.
Part 1: How to Make a YouTube Intro Video with Filmora
With Wondershare Filmora, you can create your custom intros from scratch, i.e., even if you don’t have an existing image or footage to start with. You can follow the method given below to learn how to make YouTube intro with Filmora:
Step 1: Add Intro Background to Filmora
Launch Wondershare Filmora, go to Media tab at the top, select the Sample Colors category from the left pane.
Notice all the existing solid and gradient colors in the Media library in the right, hover the mouse over the tile of the color you want to use as a background, and click the + icon that appears in the center to add it to the timeline.

Note: The default duration of such solids is 5 seconds. You can increase or decrease this time by dragging the right handle of track in the timeline.
Alternatively, you can also use your own background image or video clip by selecting the Project Media category from the left pane, clicking anywhere inside the Media window, and then importing your favorite media file to Filmora. After importing, you can follow the procedure given above to add it to the timeline.
Step 2: Select and Add Audio/Sound Effect to YouTube Intro
With audio in the YouTube intro, your video will be more recognizable. If you have watched PewDiePie ‘s video, you’ll find that even though he changed the images on the intro often, he keeps the music and sound the same in the intro.

In Filmora, you can use the music and sound effect in the inbuilt audio library, double click the audio thumbnail from the library to listen to the soundtrack.
Repeat the process until you find the background music or sound effect that you can use in the intro. Once found, drag and drop it to the audio track below the video.

Note: You should keep the background and the audio at the same duration. For more details about audio editing in Filmora, please check this guide about how to edit audio .
Step 3: Add Text/Logo to Intro Video
In the intro video, you can add your channel name, company name, or other branding elements for brand awareness consideration.
Click Titles tab, hover the mouse over the tile with the text you want to use, and then drag and drop it to the track above the video.


To customize, double-click the title track in the timeline, use the new window that appears in the upper-left area of the interface to change, format, and animate the text as needed, and click OK from the bottom-right corner of the library.
Also, you need to adjust the position and duration of the title to get a better view.
In the intro video, it is recommended to add your logo or slogan as well. To add your logo, drag and drop it to the track above the video, and adjust its position and size. For more details, you can check the guide about How to Add Photo or Video to Watermark .
Step 4: Add Effects to YouTube Intro
Go to Effects tab, choose a category from the top-left pane, and click and drag your preferred effect from the Effects library to the timeline.
Adjust the playback duration by dragging the right handle of the track in the timeline as explained above. Optionally, double-click the Effects track to customize the appearance as needed.
Step 5: Export the Intro and Add to Shared Media
Once you are done creating your YouTube intro with all the required ingredients, click EXPORT from the top-center area of the interface, go to the Local tab on the Export box, choose your preferred output format from the left pane (the most common and widely used is MP4), adjust other preferences like destination location, resolution, framerate, etc. from the right pane of the box, and click EXPORT to export the YouTube intro.
Once exported, back on the main interface, select Media again from the standard toolbar, select the Shared Media container from the left pane, click anywhere inside the Media library, and import the YouTube intro video you just created to Shared Media so it can be reused every time you create a new video for the series.

Also, you can save the project, and then revise the element, effects or text to make a YouTube intro vibration.
You can find there are many video tutorials about how to use Filmora to make a YouTube intro, and below is one for you to have a quick glance.
Part 2: How to Make YouTube Intros with Templates
If the turnaround time of your project is about to end, and you need to hustle up, you can always use pre-built templates that not only expedite your creation process, they also look more professional because they are designed by the experts who already have decades of experience in the industry.
Besides the pre-programmed templates and effects in Filmora, you can find more visual effect packs in the effect store Filmstock .
You can learn how to make YouTube intro video in Filmora with a template downloaded from Filmstock.
Step 1: Visit Filmora Effects Page on Filmstock
Visit https://filmstock.wondershare.com/ and log in with the same WSID that you used on Filmora, and then click EFFECTS from the top of the webpage. Since Filmstock also provides templates for After Effects, you should select Filmora Effects to access the entire Filmora Effects library.

You can search the effects that you want in the Search bar, here, since I’m looking for effects for YouTube intro, I just enter “intro”. The effects related to intro will be displayed like below.
Step 2: Download Video Effect Packs for Filmora
Click your preferred intro effect template, click Download Now and follow the on-screen instructions to obtain and download the template.
After downloading, you will see these them in red circles under titles, transitions, or filters, based on the elements included in this effect pack. You can then add this downloaded titles or transitions to the intro video.

Looking for an online solution? Check the list of Top 10 Free Online YouTube Intro Makers .
Part 3: Creative Intro Makers Made with Filmora (Video Tutorial Included)
Both the above processes on how to make YouTube intro video are helpful as long as you use effective titles, decent effects, and extremely appealing color combinations. While the first method gives you full control over the creation as you can use all your imaginations to prepare one, the second method saves your time and yet lets you come up with a professionally-looking intro clip.
Below is a video tutorial from YouTuber Nash. He demonstrated how to create a YouTube Intro with the Sample Colors, Titles, filters and sound effects.
FAQs About YouTube Intro Video Making
- 1. What is a YouTube Intro Video?
A YouTube intro video is 5 seconds to 7 seconds short motion clip that comprises your company name and logo. Such intros help in your brand promotion and give any film or episode that follows them a unique identity. This allows audiences to recognize your organization, and with regular appearances, you can establish strong goodwill among your customers.
- 2. What Should I Put in a YouTube Intro Video?
A YouTube intro video should have your YouTube channel name, an effective and well-formatted text, brand logo, background music, effects, and a slight and simple animation.
Conclusion
To learn how to make a YouTube intro is easy, and things can get even simpler if you are using an efficient and robust post-production software like Wondershare Filmora, which not only allows you to create such clips from the scratch, it also enables you to access Filmstock’ online library to download more fantastic templates in order to expedite your workflow.
Richard Bennett
Richard Bennett is a writer and a lover of all things video.
Follow @Richard Bennett
Richard Bennett
Mar 27, 2024• Proven solutions
Be it YouTube or any other streaming channel, or even for selling your videos on any e-commerce website, intros play a vital role in your brand promotion, and creating them is not as complicated as it sounds either.
The following sections describe in detail how to make a YouTube intro with Wondershare Filmora video editor, and keep it safe so it can be re-used easily in all your creations to maintain consistency and to give your brand a unique identity.
Part 1: How to Make a YouTube Intro Video with Filmora
With Wondershare Filmora, you can create your custom intros from scratch, i.e., even if you don’t have an existing image or footage to start with. You can follow the method given below to learn how to make YouTube intro with Filmora:
Step 1: Add Intro Background to Filmora
Launch Wondershare Filmora, go to Media tab at the top, select the Sample Colors category from the left pane.
Notice all the existing solid and gradient colors in the Media library in the right, hover the mouse over the tile of the color you want to use as a background, and click the + icon that appears in the center to add it to the timeline.
Note: The default duration of such solids is 5 seconds. You can increase or decrease this time by dragging the right handle of track in the timeline.
Alternatively, you can also use your own background image or video clip by selecting the Project Media category from the left pane, clicking anywhere inside the Media window, and then importing your favorite media file to Filmora. After importing, you can follow the procedure given above to add it to the timeline.
Step 2: Select and Add Audio/Sound Effect to YouTube Intro
With audio in the YouTube intro, your video will be more recognizable. If you have watched PewDiePie ‘s video, you’ll find that even though he changed the images on the intro often, he keeps the music and sound the same in the intro.
In Filmora, you can use the music and sound effect in the inbuilt audio library, double click the audio thumbnail from the library to listen to the soundtrack.
Repeat the process until you find the background music or sound effect that you can use in the intro. Once found, drag and drop it to the audio track below the video.
Note: You should keep the background and the audio at the same duration. For more details about audio editing in Filmora, please check this guide about how to edit audio .
Step 3: Add Text/Logo to Intro Video
In the intro video, you can add your channel name, company name, or other branding elements for brand awareness consideration.
Click Titles tab, hover the mouse over the tile with the text you want to use, and then drag and drop it to the track above the video.
To customize, double-click the title track in the timeline, use the new window that appears in the upper-left area of the interface to change, format, and animate the text as needed, and click OK from the bottom-right corner of the library.
Also, you need to adjust the position and duration of the title to get a better view.
In the intro video, it is recommended to add your logo or slogan as well. To add your logo, drag and drop it to the track above the video, and adjust its position and size. For more details, you can check the guide about How to Add Photo or Video to Watermark .
Step 4: Add Effects to YouTube Intro
Go to Effects tab, choose a category from the top-left pane, and click and drag your preferred effect from the Effects library to the timeline.
Adjust the playback duration by dragging the right handle of the track in the timeline as explained above. Optionally, double-click the Effects track to customize the appearance as needed.
Step 5: Export the Intro and Add to Shared Media
Once you are done creating your YouTube intro with all the required ingredients, click EXPORT from the top-center area of the interface, go to the Local tab on the Export box, choose your preferred output format from the left pane (the most common and widely used is MP4), adjust other preferences like destination location, resolution, framerate, etc. from the right pane of the box, and click EXPORT to export the YouTube intro.
Once exported, back on the main interface, select Media again from the standard toolbar, select the Shared Media container from the left pane, click anywhere inside the Media library, and import the YouTube intro video you just created to Shared Media so it can be reused every time you create a new video for the series.
Also, you can save the project, and then revise the element, effects or text to make a YouTube intro vibration.
You can find there are many video tutorials about how to use Filmora to make a YouTube intro, and below is one for you to have a quick glance.
Part 2: How to Make YouTube Intros with Templates
If the turnaround time of your project is about to end, and you need to hustle up, you can always use pre-built templates that not only expedite your creation process, they also look more professional because they are designed by the experts who already have decades of experience in the industry.
Besides the pre-programmed templates and effects in Filmora, you can find more visual effect packs in the effect store Filmstock .
You can learn how to make YouTube intro video in Filmora with a template downloaded from Filmstock.
Step 1: Visit Filmora Effects Page on Filmstock
Visit https://filmstock.wondershare.com/ and log in with the same WSID that you used on Filmora, and then click EFFECTS from the top of the webpage. Since Filmstock also provides templates for After Effects, you should select Filmora Effects to access the entire Filmora Effects library.
You can search the effects that you want in the Search bar, here, since I’m looking for effects for YouTube intro, I just enter “intro”. The effects related to intro will be displayed like below.
Step 2: Download Video Effect Packs for Filmora
Click your preferred intro effect template, click Download Now and follow the on-screen instructions to obtain and download the template.
After downloading, you will see these them in red circles under titles, transitions, or filters, based on the elements included in this effect pack. You can then add this downloaded titles or transitions to the intro video.
Looking for an online solution? Check the list of Top 10 Free Online YouTube Intro Makers .
Part 3: Creative Intro Makers Made with Filmora (Video Tutorial Included)
Both the above processes on how to make YouTube intro video are helpful as long as you use effective titles, decent effects, and extremely appealing color combinations. While the first method gives you full control over the creation as you can use all your imaginations to prepare one, the second method saves your time and yet lets you come up with a professionally-looking intro clip.
Below is a video tutorial from YouTuber Nash. He demonstrated how to create a YouTube Intro with the Sample Colors, Titles, filters and sound effects.
FAQs About YouTube Intro Video Making
- 1. What is a YouTube Intro Video?
A YouTube intro video is 5 seconds to 7 seconds short motion clip that comprises your company name and logo. Such intros help in your brand promotion and give any film or episode that follows them a unique identity. This allows audiences to recognize your organization, and with regular appearances, you can establish strong goodwill among your customers.
- 2. What Should I Put in a YouTube Intro Video?
A YouTube intro video should have your YouTube channel name, an effective and well-formatted text, brand logo, background music, effects, and a slight and simple animation.
Conclusion
To learn how to make a YouTube intro is easy, and things can get even simpler if you are using an efficient and robust post-production software like Wondershare Filmora, which not only allows you to create such clips from the scratch, it also enables you to access Filmstock’ online library to download more fantastic templates in order to expedite your workflow.
Richard Bennett
Richard Bennett is a writer and a lover of all things video.
Follow @Richard Bennett
Also read:
- [New] Are Authentic Engagement Strategies More Valuable?
- Channel Alchemy Turning Viewers Into Believers for 2024
- Mastering YT Techniques for Fading Out Unwanted Backgrounds
- In 2024, Engage & Learn Students' Choice of Best Historical YouTubes
- [Updated] Achieving Affiliate Success with Online Videos
- Elevate Your YT Presence and Skyrocket To 1000+ Fans
- Directly Infuse YouTube Music Into Any iMovie Project for 2024
- Elevate Your Channel's Aesthetics - Free Banners Available
- Conquer YouTube's Copy-Paste Loop Mastery Essentials
- Building a Sustainable Income via YouTube and AdSense
- 2024 Approved Are There Natural Methods for Boosting Channels?
- Jest and Jibe Constructing Parody Videos
- In 2024, Confirming Correct YouTube Ad Revenue Allocation
- In 2024, Data Deluge Infographics on YouTube's Intriguing Insights
- Eye on the Screen YouTube Journey Comparison From Creator to Competitor
- [Updated] Disruptive Beats Curated List of Music Mutators
- In 2024, A Comprehensible Breakdown for YouTube Annotation and Card Implementation
- [New] Affluent Streaming Stars
- Dominate Views Smarter Youtube Timing Strategies for 2024
- Breaking Free From the Static of ZERO Views on YouTube Videos for 2024
- 2024 Approved Discovering the Best YouTube MP3 Transformers
- [Updated] Complete Code of Conduct for YouTube Creators
- YouTube Ad Creators, Tips and How-Tos
- In 2024, Digital Deck of Cards YouTube's Milestone Challenges
- [New] Beating the Blues of Overly Green A Mac Video Editor's Handbook
- [Updated] Driving Traffic to Long-Form Videos via Shorts
- 2024 Approved Elevating Video Experience Non-Youtube Hubs Explained
- In 2024, Direct Access to Streams How to Download YouTube Videos to Your iOS Device
- Affordable Methods to Craft Your Own YouTube Intros
- Quick Creation of Fortnite Visuals
- Crafting Content Gold YouTube Studio's Path to Perfection
- In 2024, Discover 12 Cutting-Edge Flip-Screen Cams for Video Content
- Boost Visibility Selecting the Right YouTube Thumbnail Dimensions for 2024
- 2024 Approved Charting Your Course Building Plays on YouTube
- Digital Dominance Top YouTube Watch Count Chronicles for 2024
- 2024 Approved Charting the Financial Pathway of TSeries Within YouTube Market Space
- Incorporating Visual Media Into Free Writings
- Striking Visuals A Deep Dive Into Optimal YouTube Thumbnail Sizes
- Direct to Mp3 Ease Select 10 Video-to-Audio Devices for 2024
- Cost-Effective Audio Equipment for Newcomers
- Updated The Best of the Best Top 10 Pro Audio Editing Software
- [New] How to Record Multiple Monitors for 2024
- New In 2024, MP3 Optimization 101 Top Editing Practices for Sound Quality
- [New] A Step-by-Step Approach How To Record & Archive Online Radio
- 2024 Approved Amplifying TV Screens Through FB Live Integration
- The 6 Best SIM Unlock Services That Actually Work On Your Asus ROG Phone 7 Device
- Best App for Gamers Fraps Vs. OBS Studio Review
- In 2024, 9 Best Phone Monitoring Apps for Vivo Y56 5G | Dr.fone
- [Updated] 2024 Approved Foundations of Video Editing in the Gaming World
- In 2024, Top 4 SIM Location Trackers To Easily Find Your Lost Samsung Galaxy A05s Device
- [Updated] 2024 Approved Premier Logo Removal Software for Creators on Tablets
- Android Safe Mode - How to Turn off Safe Mode on Vivo V30? | Dr.fone
- [New] In 2024, Top 8 Cost-Free Android Video Recording Software
- Mastering the Art of Profile Video Attraction
- Prank Your Friends! Easy Ways to Fake and Share Google Maps Location On OnePlus Nord CE 3 Lite 5G | Dr.fone
- Best Ways to Bypass iCloud Activation Lock on Apple iPhone 6 Plus/iPad/iPod
- The Art of Patience Mastering the Craft of Producing Captivating Slow Motion Videos and Photos for Instagram for 2024
- Highlighting the Finest Video Grabbers in Windows 10 for 2024
- Updated Essential Websites Offering Lofi Audio Sets & Wallpapers for 2024
- In 2024, Getting the Pokemon Go GPS Signal Not Found 11 Error in Infinix Hot 40i | Dr.fone
- New The Definite Guide to Craig Bot Discord for 2024
- Updated How to Brighten a Video in Windows 10 Easily
- [New] 2024 Approved Transforming Your FB Audience with Effective Cover Videos
- In 2024, Exciting iOS Applications for Playing PSP Titles #1-5
- The Straightforward Guide for Instagram Chat Beginners for 2024
- Title: "2024 Approved 11-Year-Old Video Sensation Unprecedented Wealth Accumulation"
- Author: Kevin
- Created at : 2024-05-25 14:15:16
- Updated at : 2024-05-26 14:15:16
- Link: https://youtube-videos.techidaily.com/2024-approved-11-year-old-video-sensation-unprecedented-wealth-accumulation/
- License: This work is licensed under CC BY-NC-SA 4.0.
